目录
一、主要思路
-
页面管理:
- 在
Widget类中,使用currentIndex来表示当前显示的页面索引。通过addPage函数添加页面。 - 使用
addButton函数在指定页面上添加按钮,使得每个页面可以包含若干个按钮。 - 在初始化函数
init中,创建页面和按钮,并实现了基本的页面跳转逻辑。
- 在
-
按钮点击事件处理:
- 在按钮的构造函数中,通过 lambda 表达式将点击按钮时要执行的操作与按钮对象绑定。
- 按钮类中的
checkClick函数负责检查鼠标点击位置是否在按钮范围内,并执行绑定的操作。 - 当点击按钮时,触发按钮对象的
onClick函数,其中包含页面切换的逻辑。例如,点击按钮跳转到另一个页面时,会调用setCurrentIndex函数更新当前页面索引。
-
页面切换的实现:
- 在按钮的点击事件中,通过调用
setCurrentIndex函数来更新当前页面索引。这样就可以在下一次绘制页面时,显示指定的页面内容。 - 在
draw函数中,根据当前页面索引获取对应的页面内容并绘制出来。
- 在按钮的点击事件中,通过调用
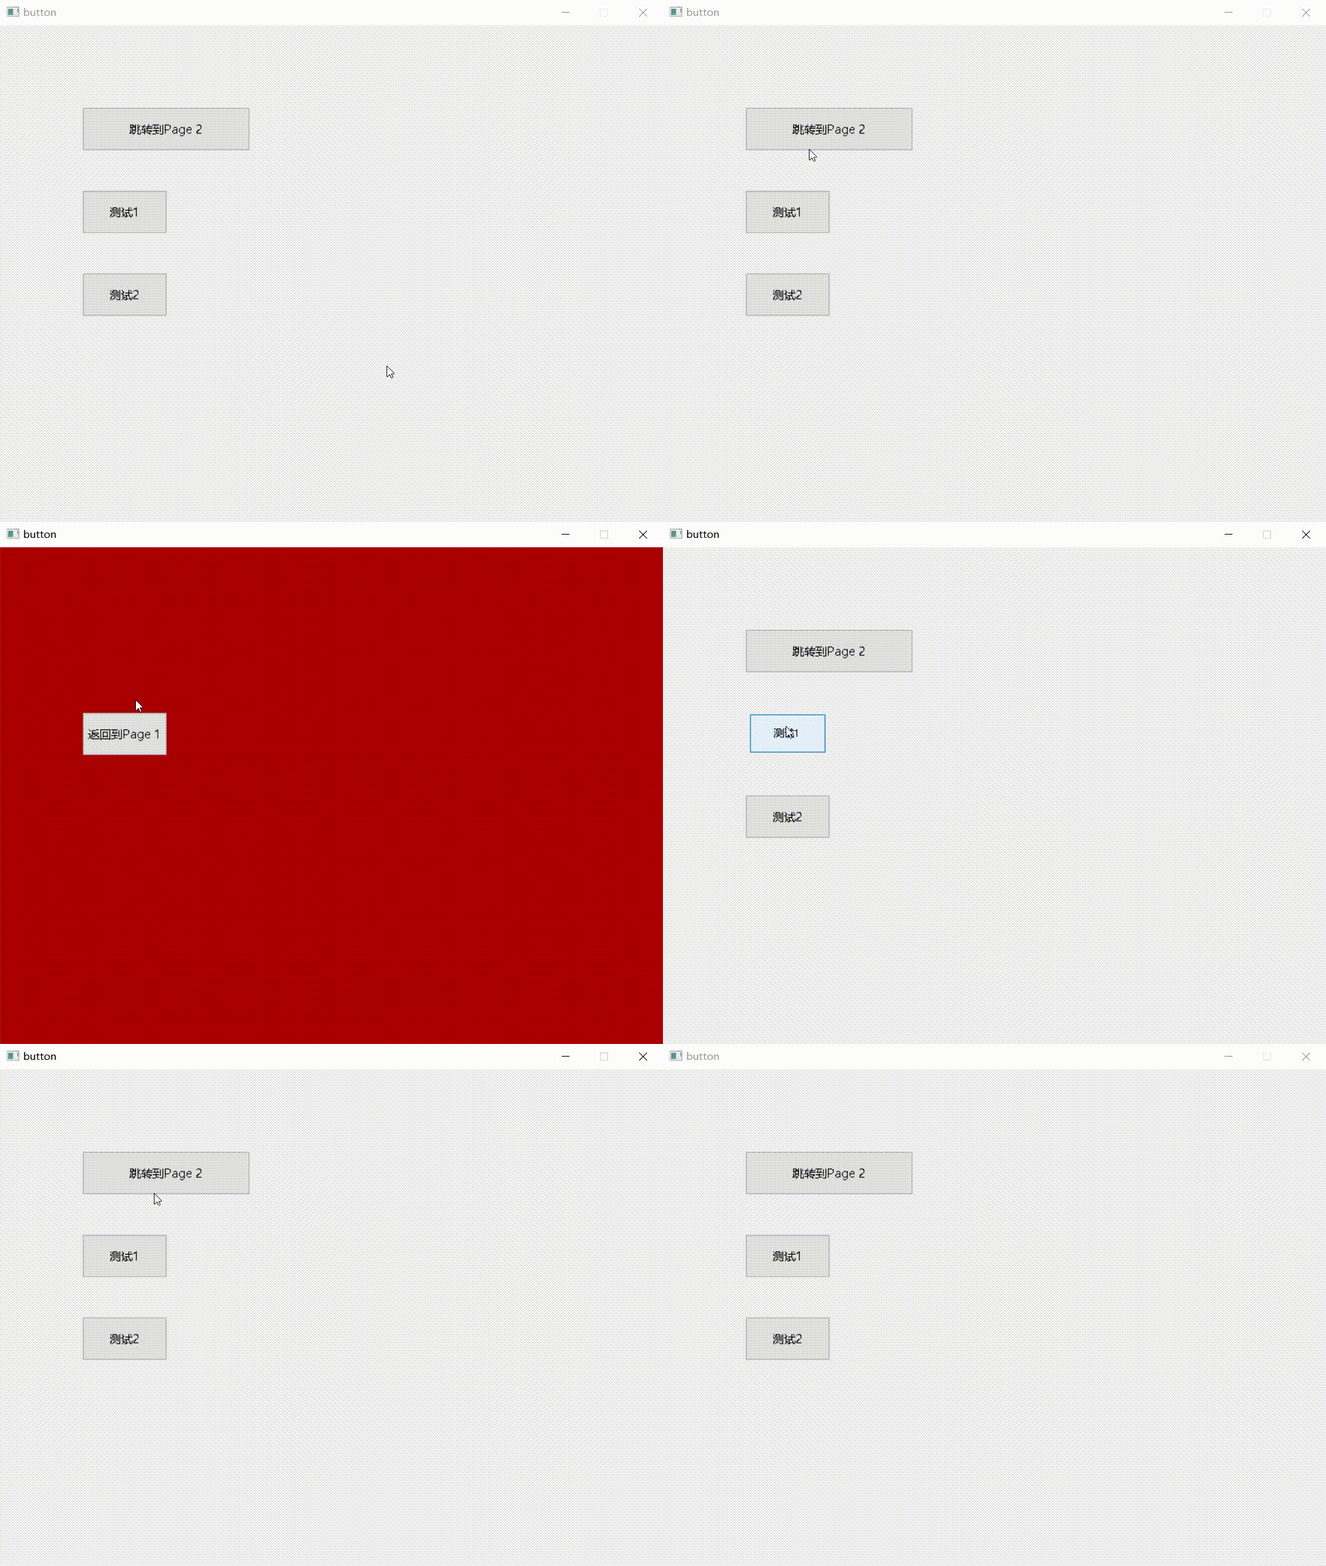
二、效果展示

三、代码
#include <graphics.h>
#include <functional>
#include <string>
#include <vector>
#include <iostream>

using namespace std;

// 定义Button类,表示一个按钮
class Button
{
private:
    int x; // 按钮左上角x坐标
    int y; // 按钮左上角y坐标
    int width; // 按钮宽度
    int height; // 按钮高度
    float scale; // 缩放比例,用于实现鼠标悬停效果
    bool isMouseOver; // 表示鼠标是否在按钮上方
    wstring text; // 按钮文本
    function<void()> onClick; // 点击按钮触发的函数

public:

    Button(int x, int y, int width, int height, const wstring& text, const function<void()>& onClick)
        : x(x), y(y), width(width), height(height), text(text), onClick(onClick), scale(1.0f), isMouseOver(false)
    {
    }

    // 检查鼠标是否在按钮上方
    void checkMouseOver(int mouseX, int mouseY)
    {
        isMouseOver = (mouseX >= x && mouseX <= x + width && mouseY >= y && mouseY <= y + height);

        if (isMouseOver) {
            scale = 0.9f; // 鼠标悬停时缩放按钮
        }
        else {
            scale = 1.0f; // 恢复按钮原始大小
        }
    }

    // 检查鼠标点击是否在按钮内,并执行函数
    bool checkClick(int mouseX, int mouseY)
    {
        if (mouseX >= x && mouseX <= x + width && mouseY >= y && mouseY <= y + height)
        {
            onClick(); // 执行按钮点击时的函数
            isMouseOver = false;
            scale = 1.0f;
            return true;
        }
        return false;
    }

    // 绘制按钮
    void draw()
    {
        int scaledWidth = width * scale; // 缩放后的按钮宽度
        int scaledHeight = height * scale; // 缩放后的按钮高度
        int scaledX = x + (width - scaledWidth) / 2; // 缩放后的按钮x坐标
        int scaledY = y + (height - scaledHeight) / 2; // 缩放后的按钮y坐标

        if (isMouseOver)
        {
            setlinecolor(RGB(0, 120, 215)); // 鼠标悬停时按钮边框颜色
            setfillcolor(RGB(229, 241, 251)); // 鼠标悬停时按钮填充颜色

        }
        else
        {
            setlinecolor(RGB(173, 173, 173)); // 按钮边框颜色
            setfillcolor(RGB(225, 225, 225)); // 按钮填充颜色
        }

        fillrectangle(scaledX, scaledY, scaledX + scaledWidth, scaledY + scaledHeight); // 绘制按钮
        settextcolor(BLACK); // 设置文本颜色为黑色
        setbkmode(TRANSPARENT); // 设置文本背景透明
        settextstyle(20 * scale, 0, _T("微软雅黑")); // 设置文本大小和字体
        //居中显示按钮文本
        int textX = scaledX + (scaledWidth - textwidth(text.c_str())) / 2; // 计算文本在按钮中央的x坐标
        int textY = scaledY + (scaledHeight - textheight(_T("微软雅黑"))) / 2; // 计算文本在按钮中央的y坐标
        outtextxy(textX, textY, text.c_str()); // 在按钮上绘制文本
    }
};

// 定义Widget类,表示一个简单的图形用户界面
class Widget
{
private:
    int width; // 宽度
    int height; // 高度
    int currentIndex; // 当前页面索引
    vector<IMAGE*> pages; // 存储所有页面的图片指针
    vector<vector<Button*>> buttons; // 存储每个页面上的按钮

    // 添加一个页面
    void addPage(IMAGE* page)
    {
        pages.push_back(page);
        buttons.push_back({});
    }

    // 在指定页面上添加一个按钮
    void addButton(int index, Button* button)
    {
        if (index >= 0 && index < buttons.size())
        {
            buttons[index].push_back(button);
        }
    }

    // 设置当前显示的页面索引
    void setCurrentIndex(int index)
    {
        if (index >= 0 && index < pages.size())
        {
            currentIndex = index;
        }
    }

    // 处理鼠标点击事件
    void mouseClick(int mouseX, int mouseY)
    {
        if (currentIndex >= 0 && currentIndex < buttons.size())
        {
            for (Button* button : buttons[currentIndex])
            {
                if (button->checkClick(mouseX, mouseY))
                {
                    break;
                }
            }
        }
    }

    // 处理鼠标移动事件
    void mouseMove(int mouseX, int mouseY)
    {
        if (currentIndex >= 0 && currentIndex < buttons.size())
        {
            for (Button* button : buttons[currentIndex])
            {
                button->checkMouseOver(mouseX, mouseY);
            }
        }
    }

    // 绘制当前页面的内容
    void draw()
    {
        if (currentIndex >= 0 && currentIndex < pages.size())
        {
            putimage(0, 0, pages[currentIndex]); // 在窗口中绘制当前页面的图片

            if (currentIndex >= 0 && currentIndex < buttons.size())
            {
                for (Button* button : buttons[currentIndex])
                {
                    button->draw(); // 绘制当前页面上的所有按钮
                }
            }
        }
    }

public:
    Widget(int width, int height)
        :width(width), height(height), currentIndex(-1)
    {
    }
    ~Widget() {}

    // 初始化控件,创建图形环境,设置页面和按钮
    void init()
    {
        initgraph(width, height);

        // 创建页面1
        IMAGE* page1 = new IMAGE(width, height);//可以直接用loadimage()函数加载图片
        setfillcolor(RGB(240, 240, 240)); // 设置页面1的背景颜色为浅灰色
        solidrectangle(0, 0, width, height); // 绘制页面1的背景矩形
        getimage(page1, 0, 0, width, height); // 将页面1的内容保存到图片中

        addPage(page1); // 添加页面1

        // 在页面1创建按钮1
        Button* button1_1 = new Button(100, 100, 200, 50, L"跳转到Page 2", [&]() {
            setCurrentIndex(1); // 点击按钮1时,切换到页面2
            });
        addButton(0, button1_1); // 将按钮1添加到页面1

        // 在页面1创建按钮2
        Button* button1_2 = new Button(100, 200, 100, 50, L"测试1", [&]() {
            // 点击按钮2时,执行相关的逻辑
            });
        addButton(0, button1_2); // 将按钮2添加到页面1

        // 在页面1创建按钮3
        Button* button1_3 = new Button(100, 300, 100, 50, L"测试2", [&]() {
            // 点击按钮3时,执行相关的逻辑
            });
        addButton(0, button1_3); // 将按钮3添加到页面1

        // 创建页面2
        IMAGE* page2 = new IMAGE(width, height);
        setfillcolor(RED); // 设置页面2的背景颜色为红色
        solidrectangle(0, 0, width, height); // 绘制页面2的背景矩形
        getimage(page2, 0, 0, width, height); // 将页面2的内容保存到图片中

        addPage(page2); // 添加页面2

        // 在页面2创建按钮1
        Button* button2_1 = new Button(100, 200, 100, 50, L"返回到Page 1", [&]() {
            setCurrentIndex(0); // 点击按钮1时,切换回页面1
            });
        addButton(1, button2_1); // 将按钮1添加到页面2

        setCurrentIndex(0); // 设置初始显示页面为页面1
    }

    // 运行,进入消息循环
    void run()
    {
        ExMessage msg;

        BeginBatchDraw(); // 开始批量绘制

        while (true)
        {
            if (peekmessage(&msg)) // 检查是否有消息
            {
                int mouseX = msg.x; // 获取鼠标x坐标
                int mouseY = msg.y; // 获取鼠标y坐标

                switch (msg.message)
                {
                case WM_LBUTTONDOWN: // 鼠标左键按下事件
                    mouseClick(mouseX, mouseY); // 处理鼠标点击事件
                    break;
                case WM_MOUSEMOVE: // 鼠标移动事件
                    mouseMove(mouseX, mouseY); // 处理鼠标移动事件
                    break;
                }
            }

            draw(); // 绘制当前页面内容
            FlushBatchDraw(); // 将缓冲区内容显示在屏幕上
            Sleep(10);
        }

        EndBatchDraw(); // 结束批量绘制
    }

    // 关闭
    void close()
    {
        closegraph(); // 关闭图形环境
    }
};

int main()
{
    Widget widget(800, 600);
    widget.init();
    widget.run();
    widget.close();
    return 0;
}
总结
本文提供了关于如何实现按钮类和界面的思路以及简单的实现,更复杂的操作读者可自行尝试。


 1410
1410

 被折叠的 条评论
为什么被折叠?


