


目录:
1. 前言
要想c++学的好,好工具也很重要,vscode就是其中之一,可是由于其繁琐的配置步骤,很多网友下了又卸了,本文将手把手教你配置vscode(c++)。
2. 扩展
第一步,我们需要安装扩展:
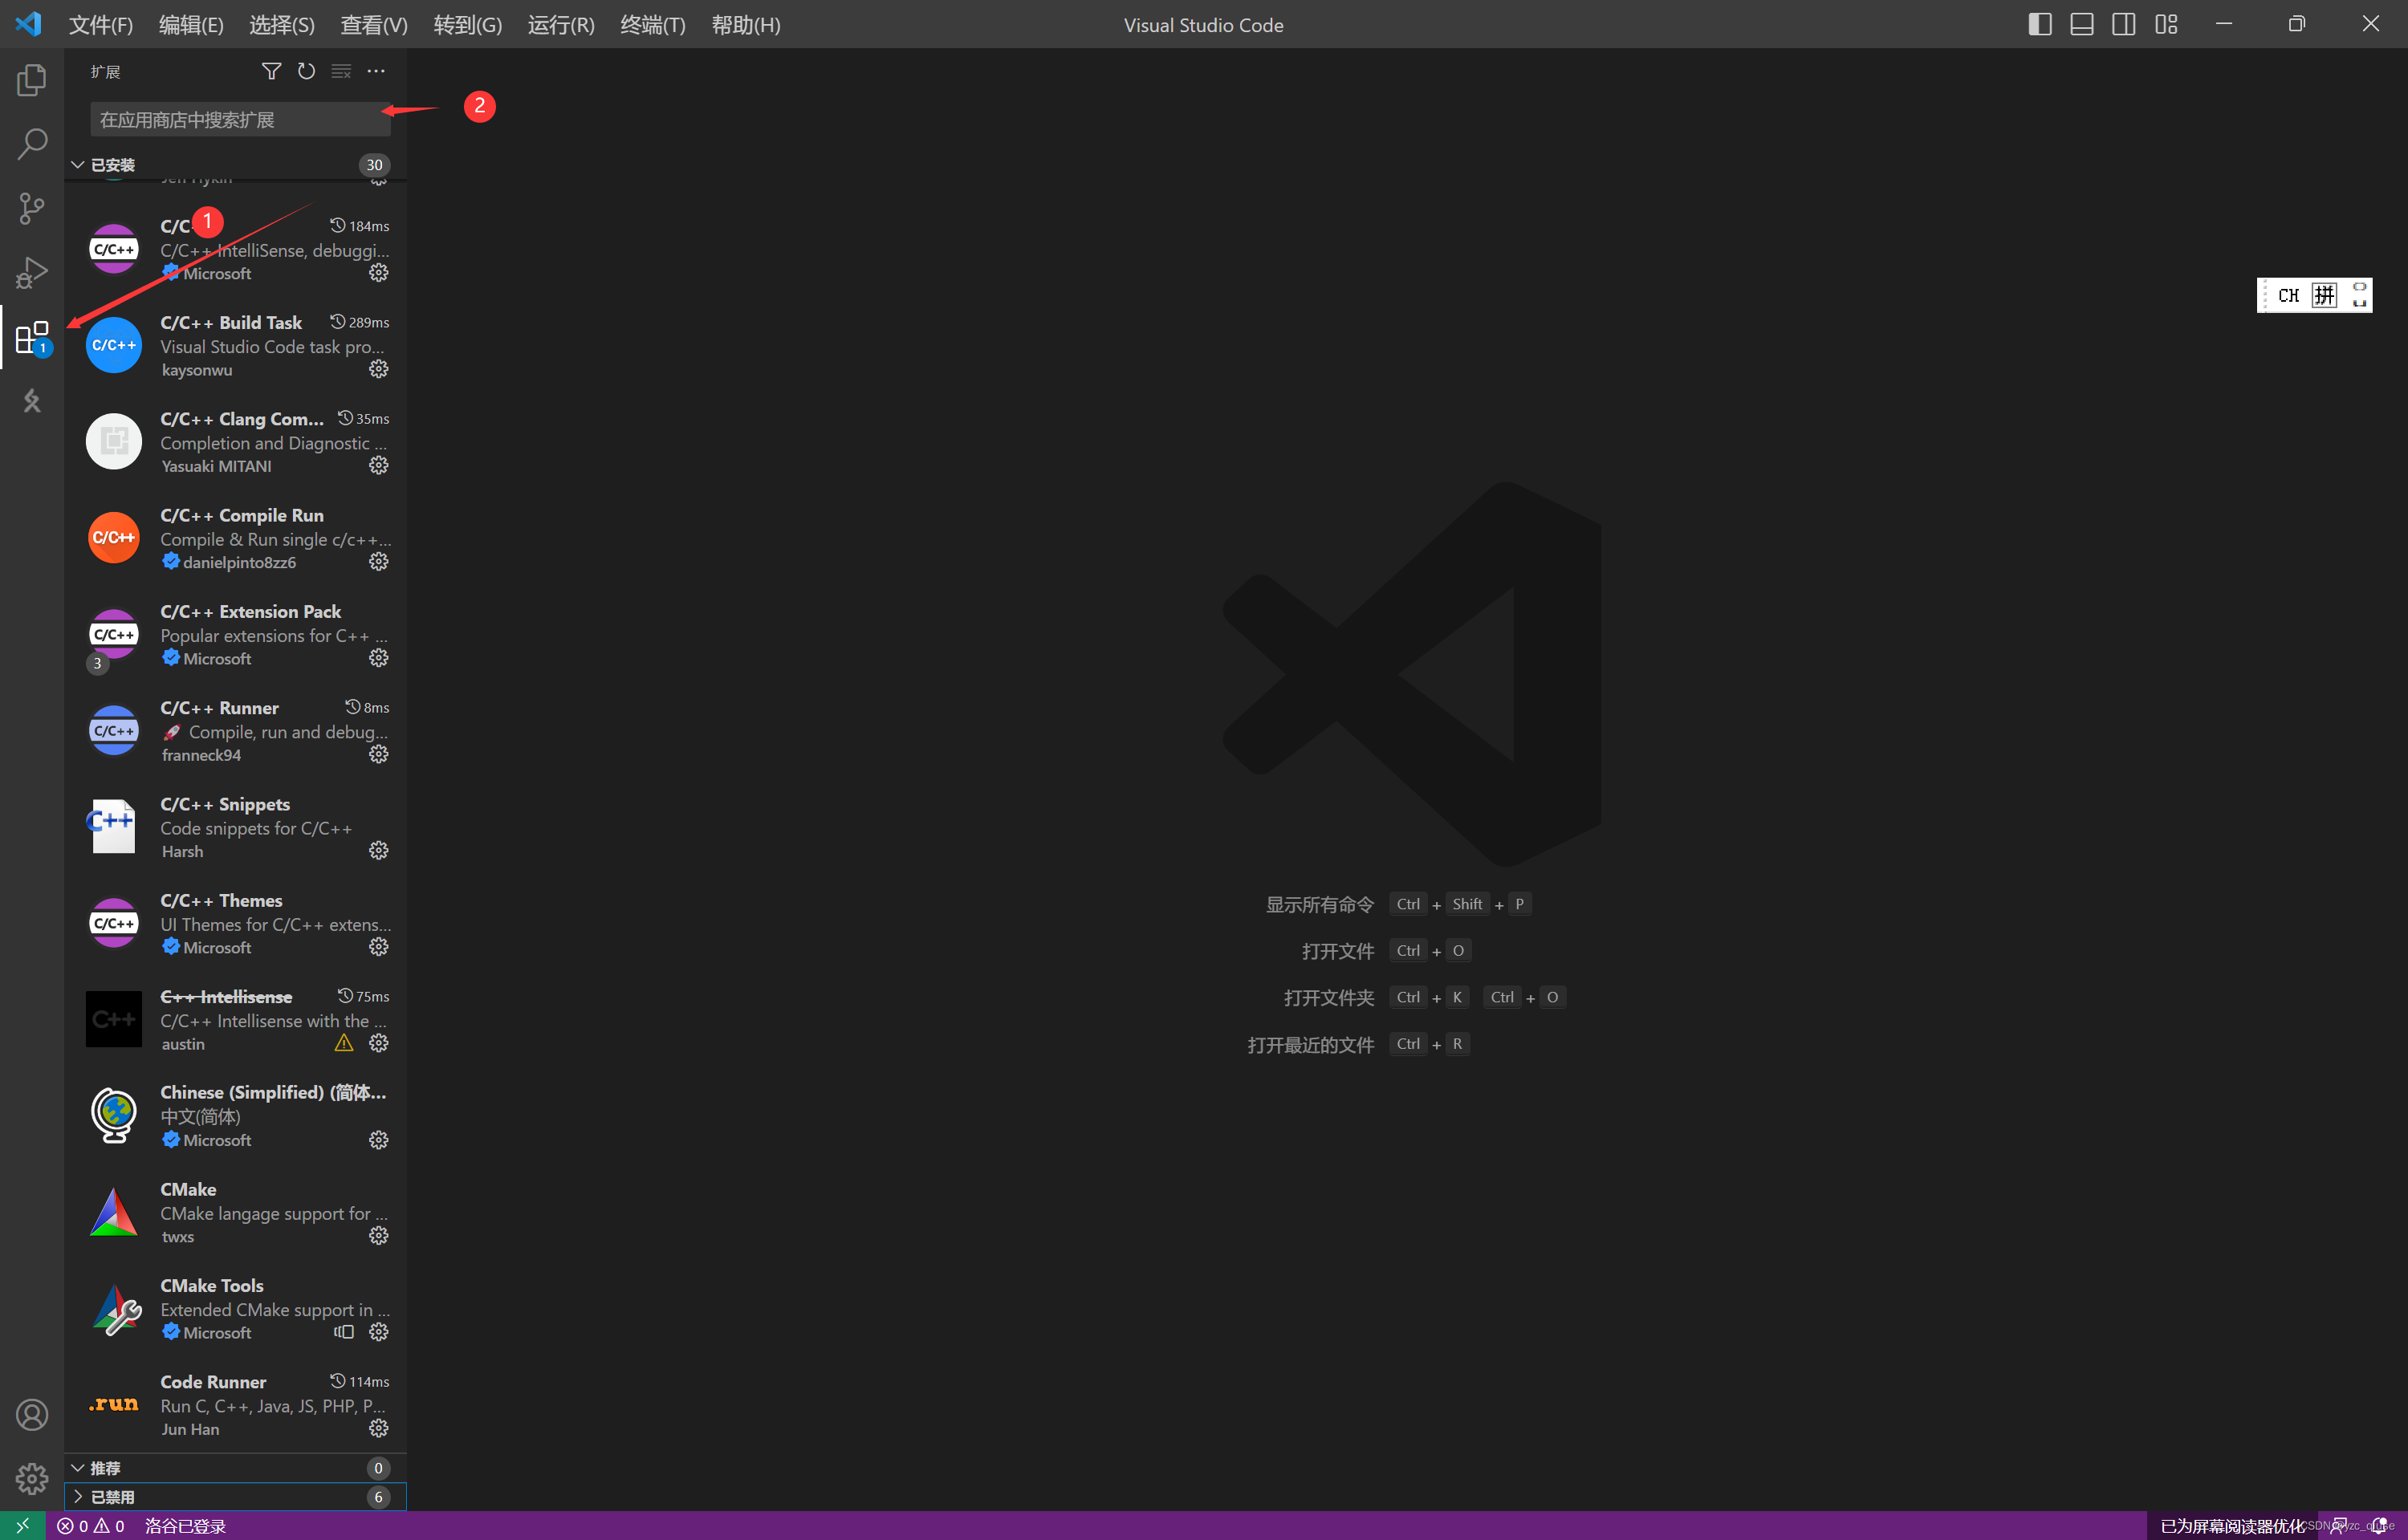
我这里安装的大家都可以安装上,安装的时候先安装中文插件,后面就按照字(安装)一步一步来就行了,如果没有反应,那就重启下试试。
3. 编译器、环境变量
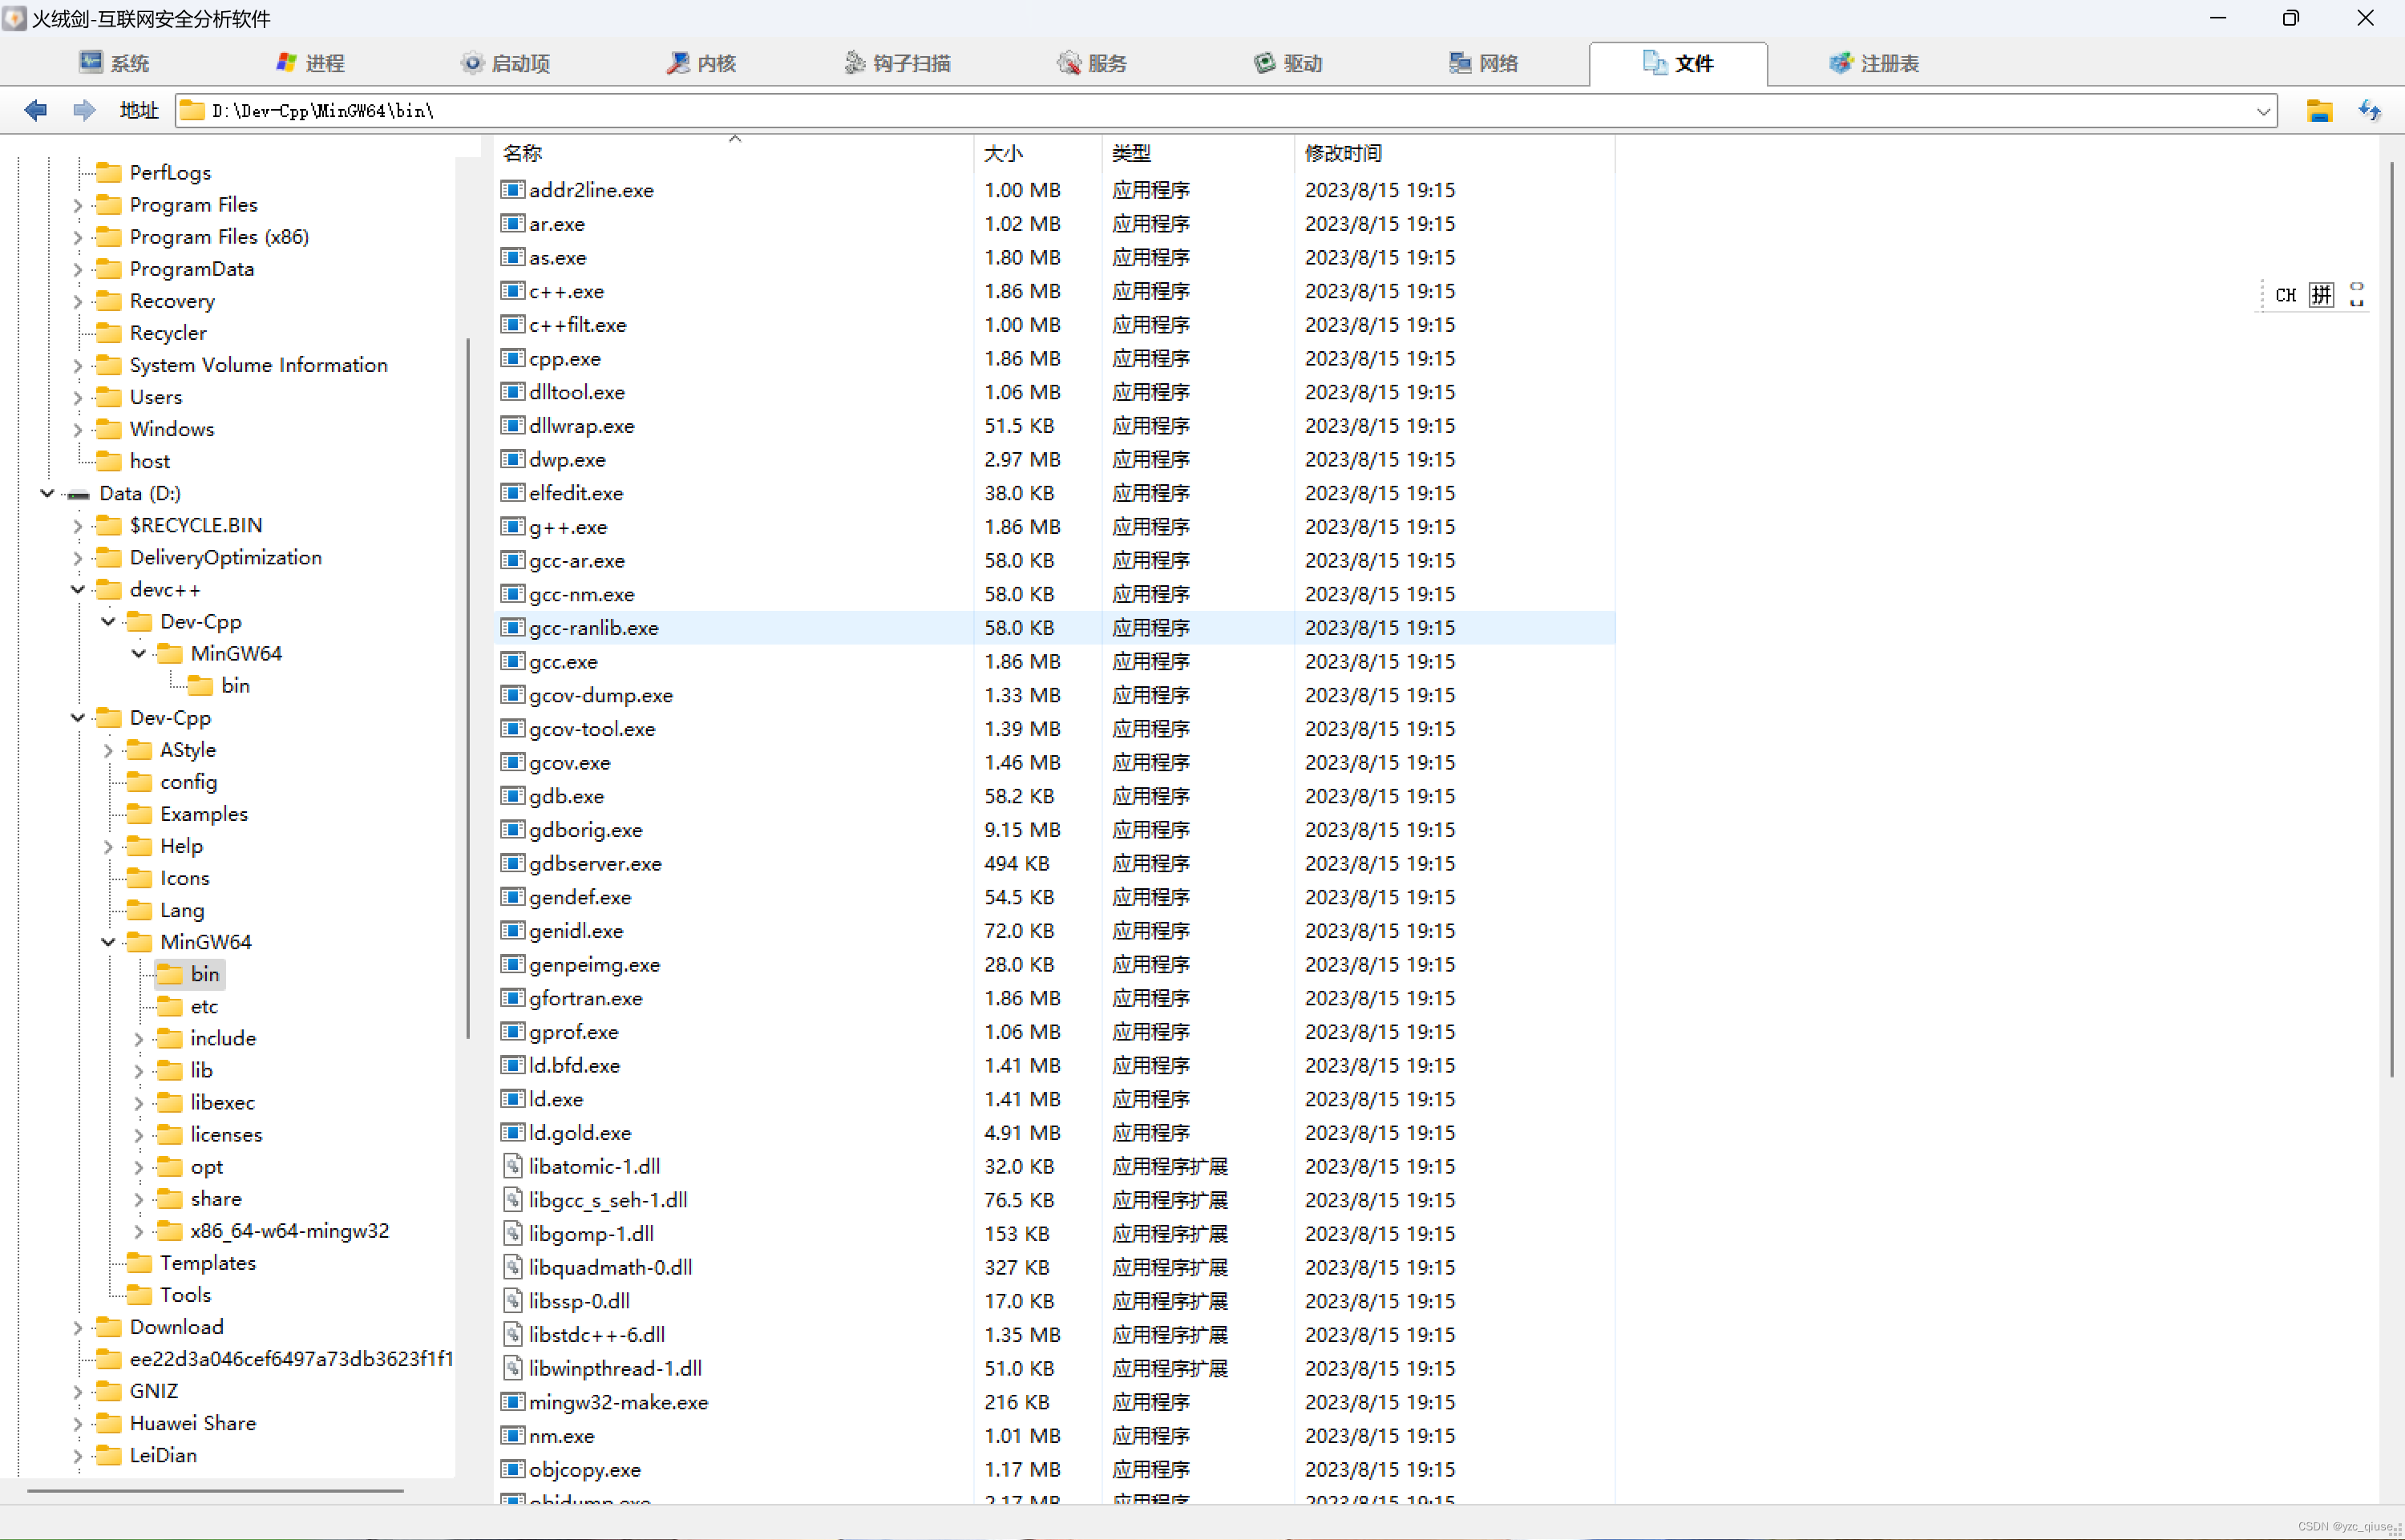
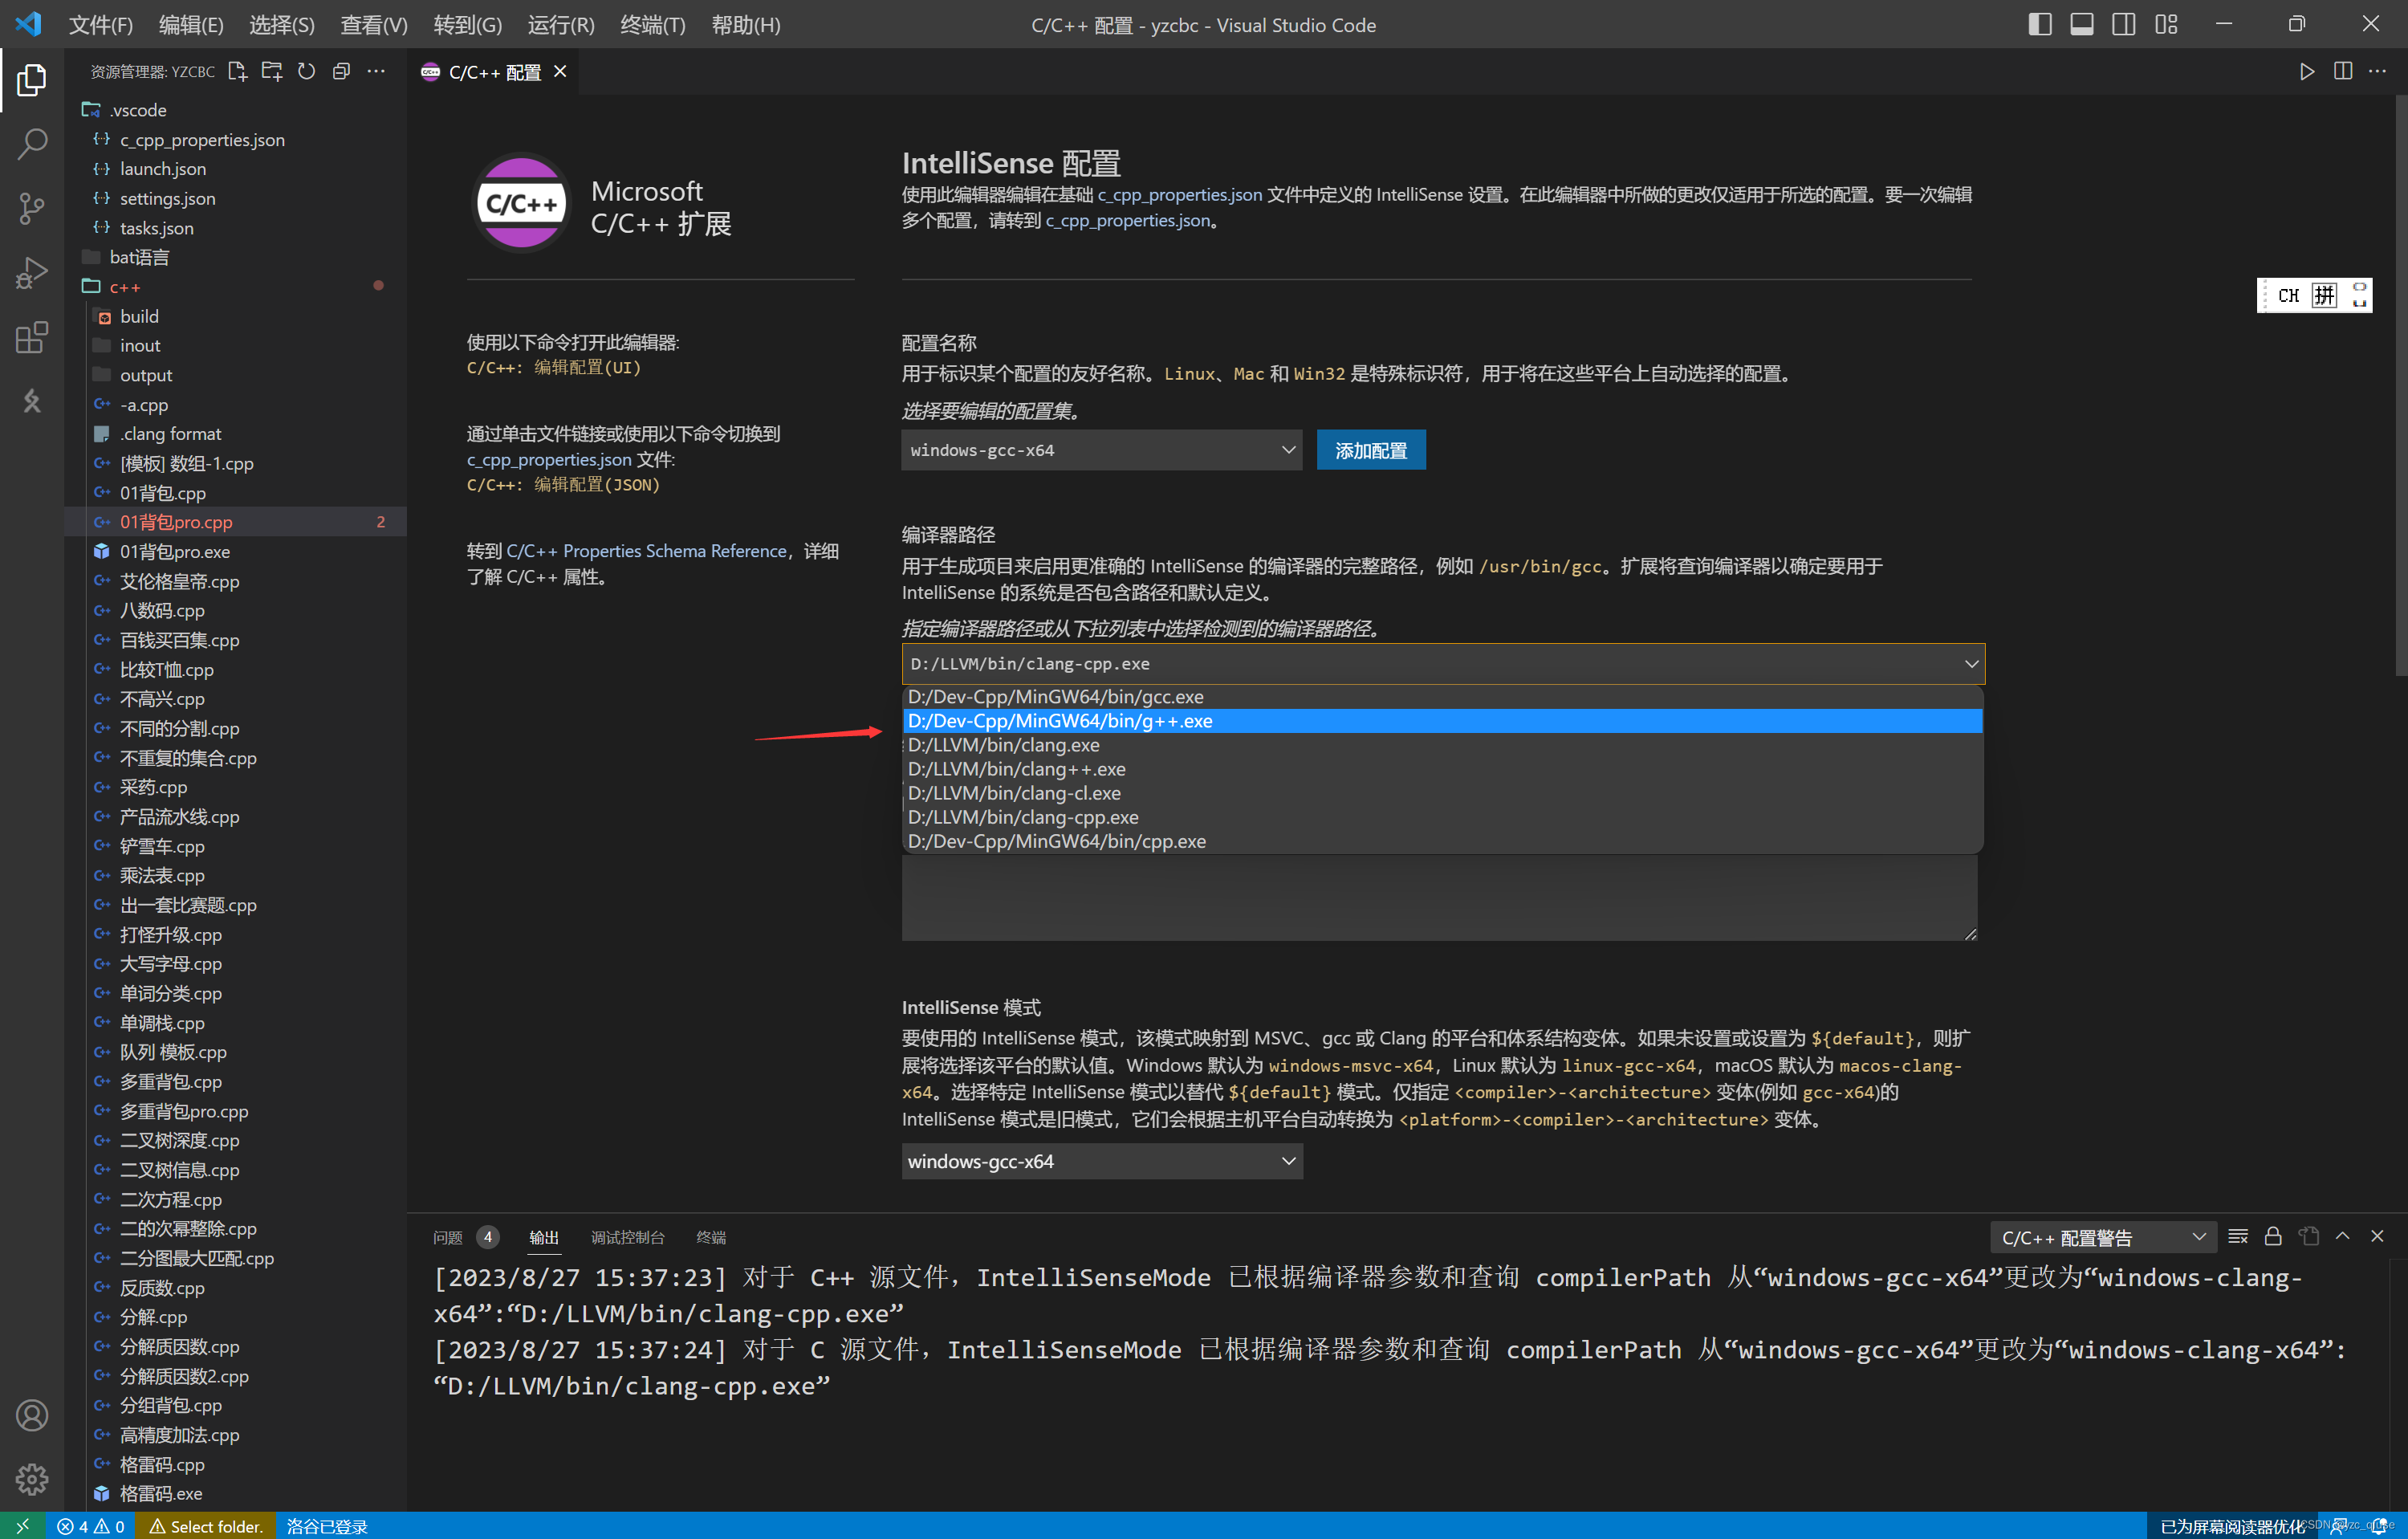
大家可以下一个Devc++或者是MinGW,本人用的是小龙Dev,因为它自带MinGW。
3.1 环境变量
先像我一样找到Dev的bin路径
然后右键此电脑,属性,高级系统设置
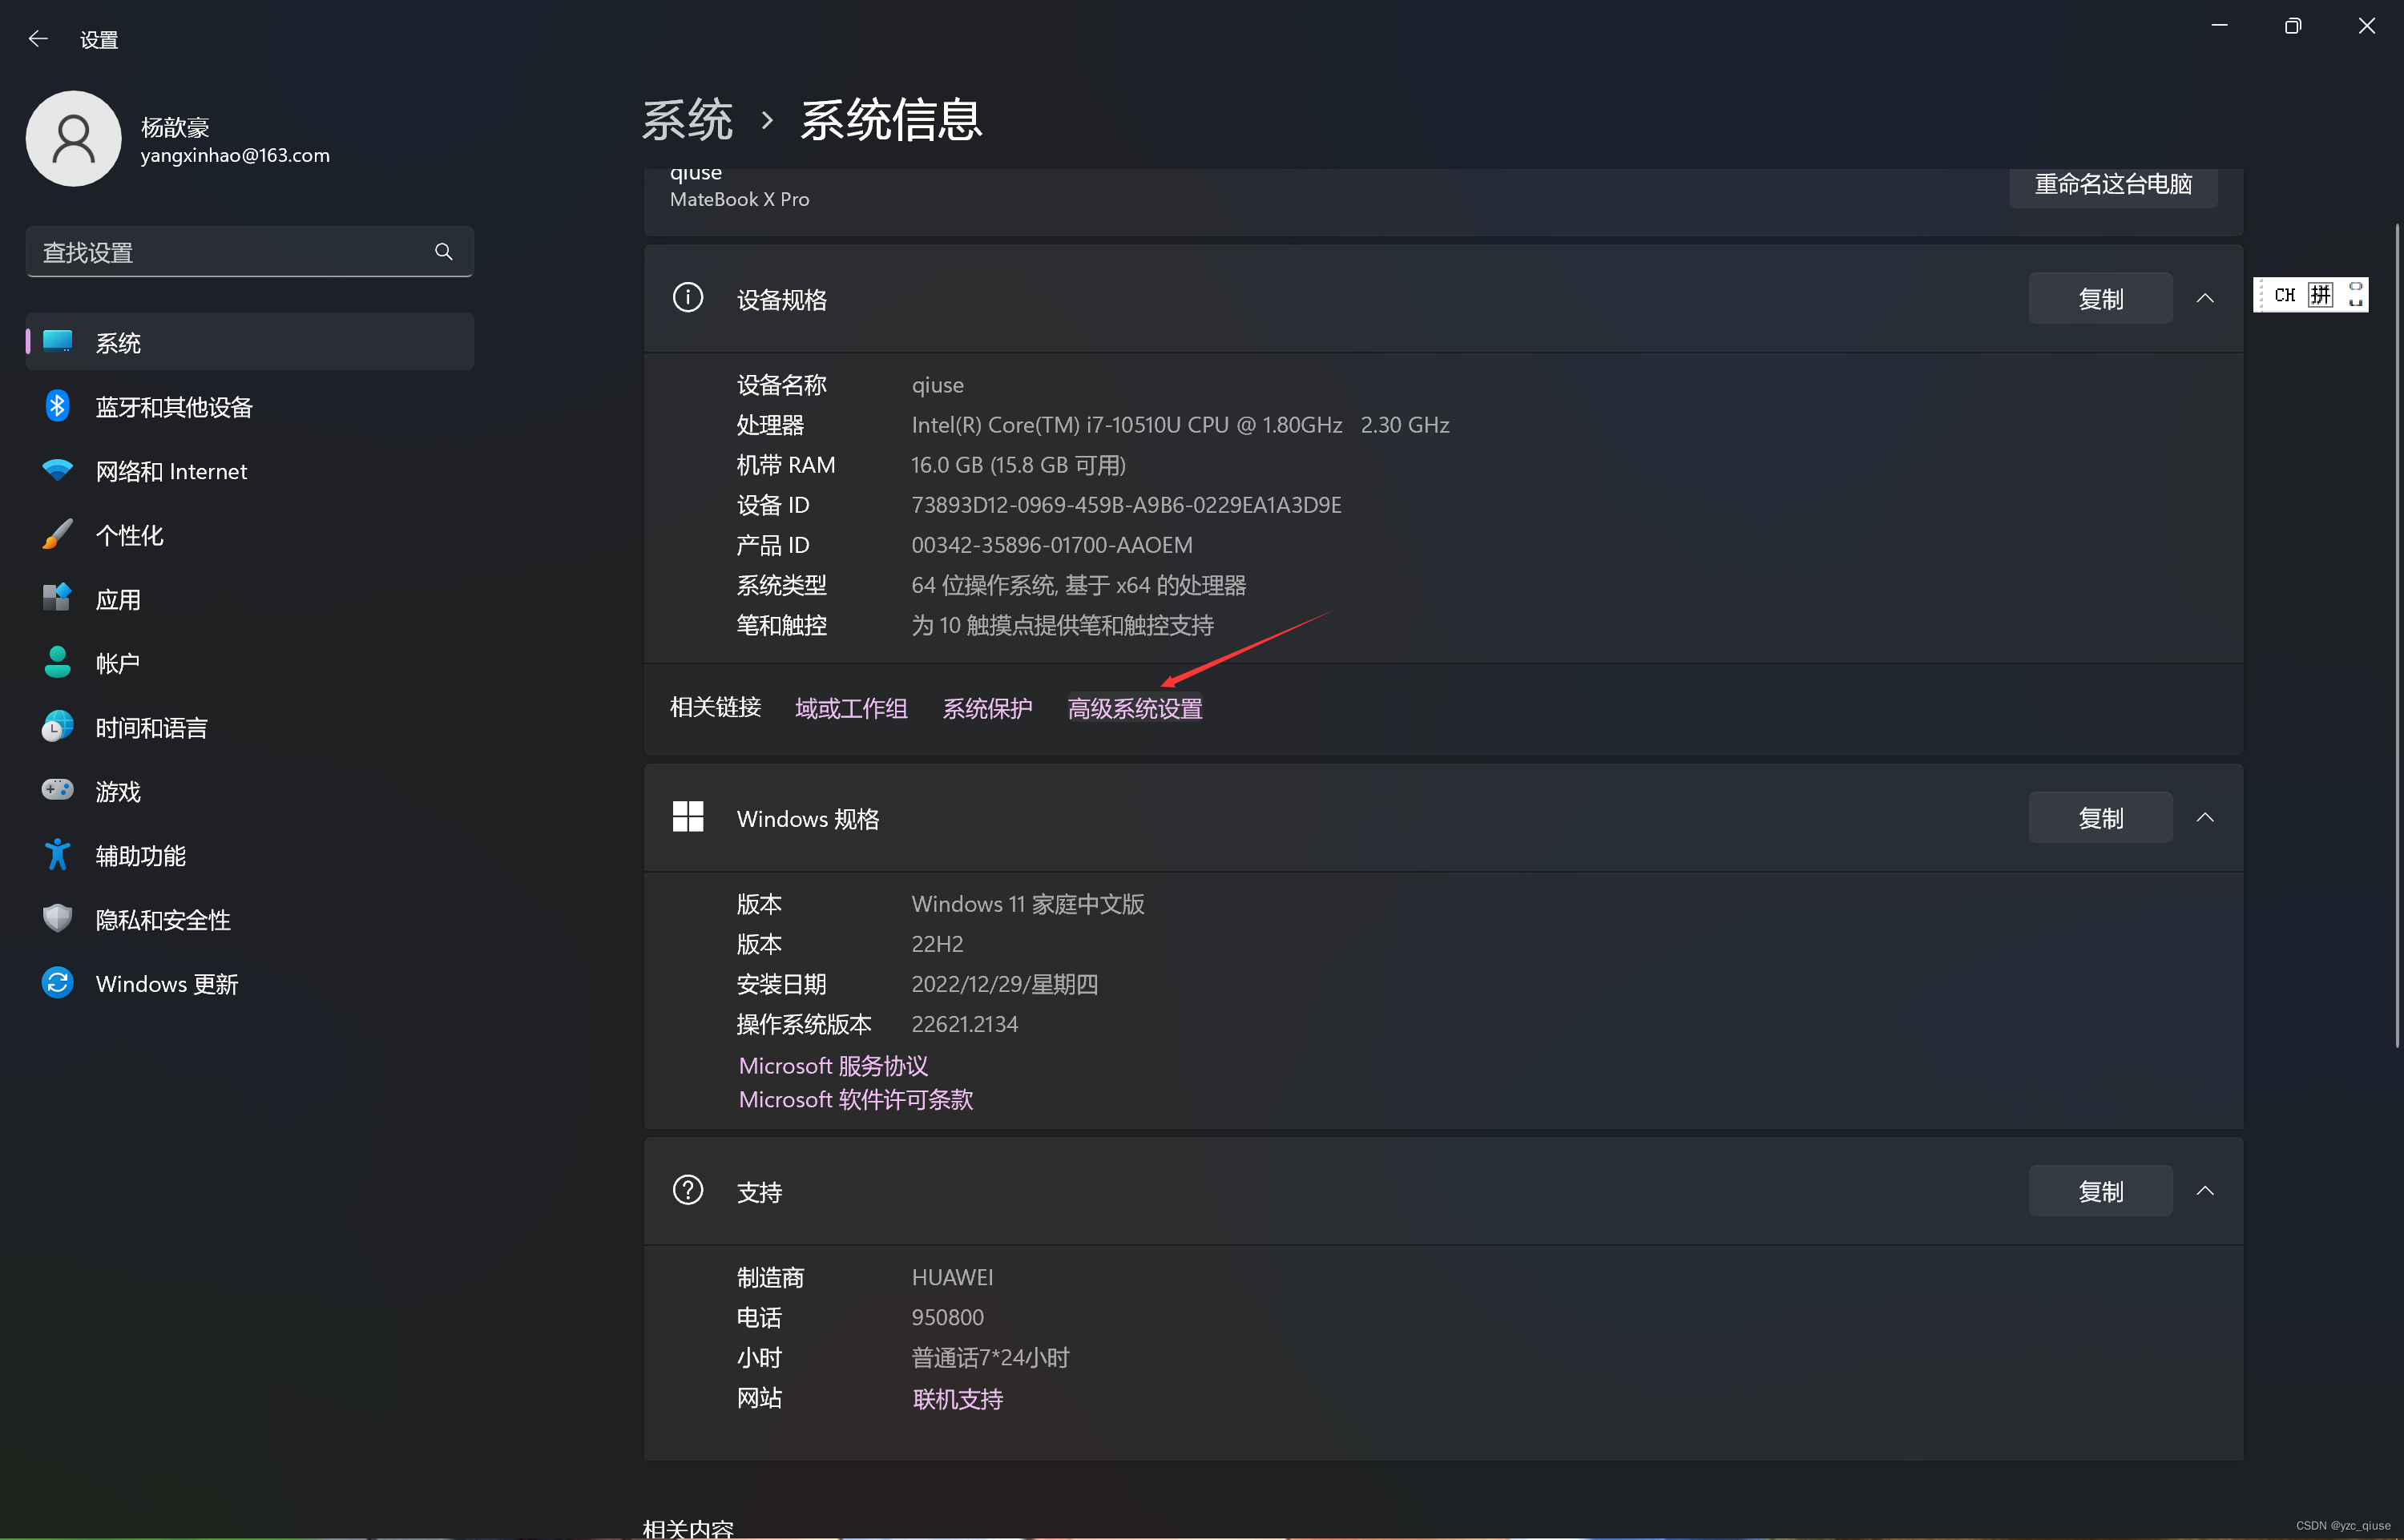
按照下图操作
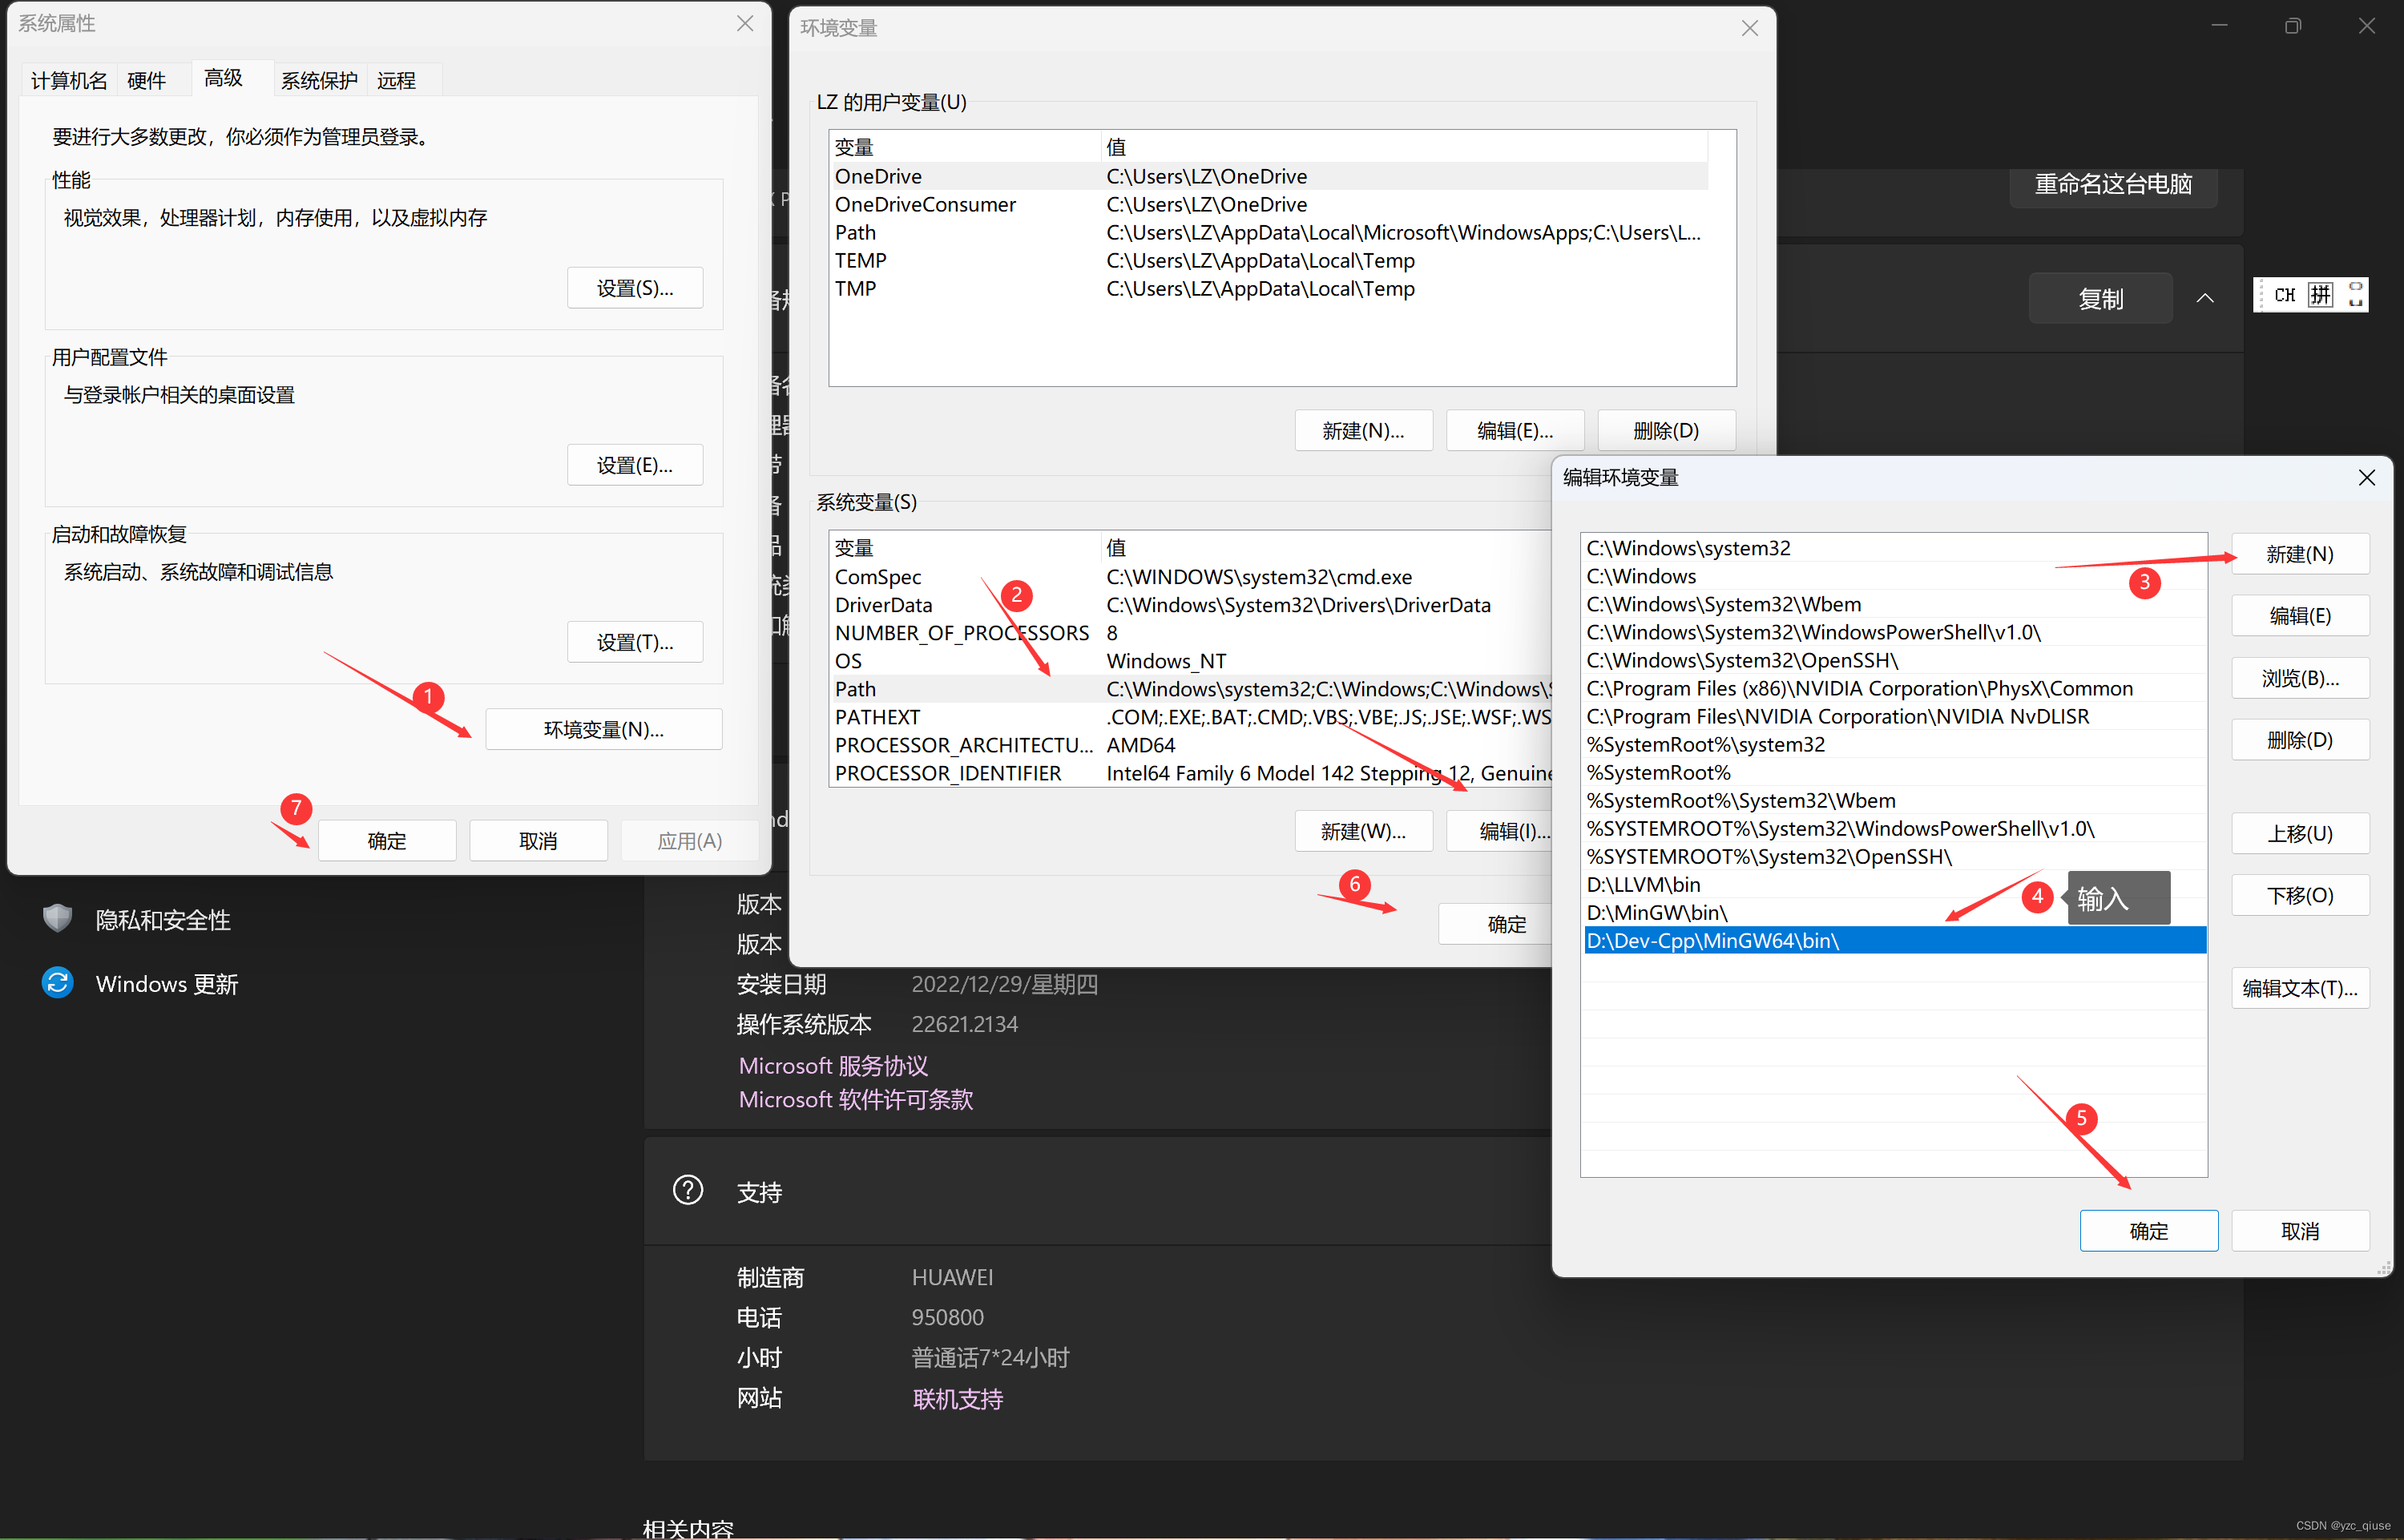
做完这么多步序,环境变量就设置完成啦!
3.2 编译器
按下,输入
,选择第一个选项,在编译器的选项里选:
编译器也好啦!
4. 安装LLVM
LLVM到处都是,大家随便找一个就行了
5. 缺省源
按下,输入
,选择
,把中间注释掉的代码换成你自己的,实例:
{
    "#include":{
        "prefix": "#include",
        "body": [
            "#include<bits/stdc++.h>",
            "using namespace std;",
            "#define int long long",
            "typedef pair<int, int> PII;",
            "#define endl '\\n'",
            "const int N = 1e8;",
            "#define For(i, a, b) for(int i = a;i <= b;i++)",
            "int gcd(int a, int b){",
            "    if (b == 0)",
            "        return a;",
            "    else",
            "        return gcd(b, a % b);",
            "}",
            "int lcm(int a, int b){return a * b / gcd(a, b);}",
            "int read(){",
            "    int x = 0;",
            "    int f = 1;",
            "    char ch = getchar();",
            "    while (ch < '0' || ch > '9'){",
            "        if (ch == '-'){",
            "            f = -1;",
            "        }",
            "        ch = getchar();",
            "    }",
            "    while ('0' <= ch && ch <= '9'){",
            "        x = (x << 1) + (x << 3) + (ch ^ 48);",
            "        ch = getchar();",
            "    }",
            "    return x * f;",
            "}",
            "void write(int res){",
            "    if(res > 9){",
            "        write(res / 10);",
            "    }",
            "    putchar(res % 10 + '0');",
            "}",
            "long long kuaimi(long long a, long long b, long long q){",
            "    long long ans = 1;",
            "    while (b)",
            "    {",
            "        if(b % 2 == 0)",
            "        {",
            "            b /= 2;",
            "            a *= a;",
            "            a %= q;",
            "        }",
            "        else",
            "        {",
            "            ans *= a;",
            "            b--;",
            "            ans %= q;",
            "        }",
            "    }",
            "    return ans;",
            "}",
            "$0",
            "signed main(){",
            "    ios::sync_with_stdio(false), cin.tie(0), cout.tie(0);",
            "    ",
            "    return 0;",
            "}",
        ],
    },
    "forcin":{
        "prefix": "forcin",
        "body":[
            "for(int i = 1;i <= n;i++){",
            "    cin >> a[i];$0",
            "}"
        ],
    },
    "forcout":{
        "prefix": "forcout",
        "body": [
            "for(int i = 1;i <= n;i++){",
            "    cout << a[i];$0",
            "}"
        ]
    },
    "fangxiang[]":{
        "prefix": "fangxiang[]",
        "body": [
            "int dx[] = {1, -1, 0, 0};",
            "int dy[] = {0, 0, 1, -1};",
        ],
    },
    "max":{
        "prefix": "max",
        "body": [
            "max($0)",
        ],
    },
    "min":{
        "prefix": "min",
        "body":[
            "min($0)",

        ],
    },
    "cin":{
        "prefix": "cin ",
        "body": [
            "cin >> ",
        ],
    },
    "cout":{
        "prefix": "cout ",
        "body": [
            "cout << ",
        ],
    },
    "size":{
        "prefix": "size",
        "body": [
            "size()",
        ],
    },
    "push":{
        "prefix": "push_back",
        "body": [
            "push_back($0)",
        ],
    },
    "priority_queue":{
        "prefix": "priority_queue",
        "body": [
            "priority_queue<PII$0>"
        ],
    },
    "string":{
        "prefix": "string",
        "body": [
            "string ",
        ],
    },
    "long long":{
        "prefix": "long long",
        "body" :[
            "long long",
        ],
    },
    "__int128_t":{
        "prefix": "__int128_t",
        "body": [
            "__int128_t",
        ],
    },
    "begin":{
        "prefix": "begin()",
        "body": [
            "begin()",
        ],
    },
    "end":{
        "prefix": "end()",
        "body": [
            "end()",
        ],
    },
    "pop()":{
        "prefix": "pop",
        "body": [
            "pop()",
        ],
    },
    "_push":{
        "prefix": "push()",
        "body": [
            "push($0)",
        ],
    },
    "read":{
        "prefix": "cin",
        "body": [
            "= read",
        ],
    },
    "write":{
        "prefix": "write",
        "body": [
            "write($0)",
        ],
    },
}
其中prefix表示你输入的东西,body表示你按下enter或tab会跳出的东西,$0表示按下enter或tab后光标的位置。
6. 运行
因为我刚才让你们安装了Code Runner,所以不需要vscode自己运行那么繁琐的步骤,只需按下,就可以运行啦!
7. 结语
好啦,本期内容就到这里,我们下期再见,三连必回qwq!


 4574
4574


 被折叠的 条评论
为什么被折叠?
被折叠的 条评论
为什么被折叠?
 到【灌水乐园】发言


