


Spark RDD详解(血统关系)
RDD的概念
Spark计算中一个重要的概念就是可以跨越多个节点的可伸缩分布式数据集 RDD(resilient distributeddataset) Spark的内存计算的核心就是RDD的并行计算。RDD可以理解是一个弹性的,分布式、不可变的、带有分区的数据集合,所谓的Spark的批处理,实际上就是正对RDD的集合操作。
弹性:一个数据集如果很大你可以设置它的并行度,小的数据集你也可以一台机器处理一个。分布式:指的是spark可以将一个计算拆分为多个阶段,每个阶段都有自己的并行度(这叫做集群)不可变:计算的RDD的都是只读的,计算完生成新的RDD带有分区:分区的目的就是为了并行计算,每个机器节点计算的都是局部的数据
RDD有以下特点
- 任意一个RDD都包含分区数(决定程序某个阶段计算并行度)
- RDD所谓的分布式计算是在分区内部计算的
- 因为RDD是只读的,RDD之间的变换存着依赖关系(宽依赖、窄依赖)
- 针对于k-v类型的RDD,一般可以指定分区策略(一般系统提供)
- 针对于存储在HDFS上的文件,系统可以计算最优位置,计算每个切片。

通过上诉的代码中不难发现,Spark的整个任务的计算无外乎围绕RDD的三种类型操作RDD创建、RDD转换、RDD Action.通常习惯性的将flatMap/map/reduceByKey称为RDD的转换算子,collect触发任务执行,因此被人们称为动作算子。在Spark中所有的Transform算子都是lazy执行的,只有在Action算子的时候,Spark才会真正的运行任务,也就是说只有遇到Action算子的时候,SparkContext才会对任务做DAG状态拆分,系统才会计算每个状态下任务的TaskSet,继而TaskSchedule才会将任务提交给Executors执行。现将以上字符统计计算流程描述如下:

textFile(“路径”,分区数) -> flatMap -> map -> reduceByKey -> sortBy在这些转换中其中flatMap/map、reduceByKey、sotBy都是转换算子,所有的转换算子都是Lazy执行的。程序在遇到collect(Action 算子)系统会触发job执行。Spark底层会按照RDD的依赖关系将整个计算拆分成若干个阶段,我们通常将RDD的依赖关系称为RDD的血统-lineage。血统的依赖通常包含:宽依赖、窄依赖
RDD容错
在理解DAGSchedule如何做状态划分的前提是需要大家了解一个专业术语lineage通常被人们称为RDD的血统
Spark的计算本质就是对RDD做各种转换,因为RDD是一个不可变只读的集合,因此每次的转换都需要上一次的RDD作为本次转换的输入,因此RDD的lineage描述的是RDD间的相互依赖关系。为了保证RDD中数据的健壮性,RDD数据集通过所谓的血统关系(Lineage)记住了它是如何从其它RDD中演变过来的。Spark将RDD之间的关系归类为宽依赖和窄依赖。Spark会根据Lineage存储的RDD的依赖关系对RDD计算做故障容错,目前Saprk的容错策略更具RDD依赖关系重新计算、对RDD做Cache、对RDD做Checkpoint手段完成RDD计算的故障容错。
宽窄依赖
RDD在Lineage依赖方面分为两种Narrow Dependencies与Wide Dependencies用来解决数据容错的高效性。
窄依赖:是指RDD的每一个分区最多被一个子RDD的分区所用。(独生子女)
宽依赖:是指父RDD的一个分区对应一个子RDD的多个分区。

- 对于Wide Dependencies这种计算的输入和输出在不同的节点上,一般需要夸节点做Shuffle,因此如果是RDD在做宽依赖恢复的时候需要多个节点重新计算成本较高。
- 相对于Narrow Dependencies RDD间的计算是在同一个Task当中实现的是线程内部的的计算,因此在RDD分区数据丢失的的时候,也非常容易恢复。
Stage划分(手撕源码)
在分析SparkStage的状态划分之前我们要先了解Spark的计算流程,具体的流程大概如下图

具体的Spark和MapReduce的区别我们会在下一篇博客中提及。
Spark任务阶段的划分是按照RDD的lineage关系逆向生成的这么一个过程,Spark任务提交的流程大致如下图所示:

1.首先动作算子才会触发runJob 例如collect
  def collect(): Array[T] = withScope {
    val results = sc.runJob(this, (iter: Iterator[T]) => iter.toArray)
    Array.concat(results: _*)
  }
2.dagScheduler.runJob
  def runJob[T, U: ClassTag](
      rdd: RDD[T],
      func: (TaskContext, Iterator[T]) => U,
      partitions: Seq[Int],
      resultHandler: (Int, U) => Unit): Unit = {
    if (stopped.get()) {
      throw new IllegalStateException("SparkContext has been shutdown")
    }
    val callSite = getCallSite
    val cleanedFunc = clean(func)
    logInfo("Starting job: " + callSite.shortForm)
    if (conf.getBoolean("spark.logLineage", false)) {
      logInfo("RDD's recursive dependencies:\n" + rdd.toDebugString)
    }
    dagScheduler.runJob(rdd, cleanedFunc, partitions, callSite, resultHandler, localProperties.get)
    progressBar.foreach(_.finishAll())
    rdd.doCheckpoint()
  }
3.runJob方法里面里面有一个submit Job
def runJob[T, U](
      rdd: RDD[T],
      func: (TaskContext, Iterator[T]) => U,
      partitions: Seq[Int],
      callSite: CallSite,
      resultHandler: (Int, U) => Unit,
      properties: Properties): Unit = {
    val start = System.nanoTime
    //submitJob方法
    val waiter = submitJob(rdd, func, partitions, callSite, resultHandler, properties)
    ThreadUtils.awaitReady(waiter.completionFuture, Duration.Inf)
    waiter.completionFuture.value.get match {
      case scala.util.Success(_) =>
        logInfo("Job %d finished: %s, took %f s".format
          (waiter.jobId, callSite.shortForm, (System.nanoTime - start) / 1e9))
      case scala.util.Failure(exception) =>
        logInfo("Job %d failed: %s, took %f s".format
          (waiter.jobId, callSite.shortForm, (System.nanoTime - start) / 1e9))
        // SPARK-8644: Include user stack trace in exceptions coming from DAGScheduler.
        val callerStackTrace = Thread.currentThread().getStackTrace.tail
        exception.setStackTrace(exception.getStackTrace ++ callerStackTrace)
        throw exception
    }
  }
4.submitJob方法会将任务封装成jobsubmitter 提交到eventProcessLoop队列中
def runApproximateJob[T, U, R](
      rdd: RDD[T],
      func: (TaskContext, Iterator[T]) => U,
      evaluator: ApproximateEvaluator[U, R],
      callSite: CallSite,
      timeout: Long,
      properties: Properties): PartialResult[R] = {
    val listener = new ApproximateActionListener(rdd, func, evaluator, timeout)
    val func2 = func.asInstanceOf[(TaskContext, Iterator[_]) => _]
    val partitions = (0 until rdd.partitions.length).toArray
    val jobId = nextJobId.getAndIncrement()
    eventProcessLoop.post(JobSubmitted(
      jobId, rdd, func2, partitions, callSite, listener, SerializationUtils.clone(properties)))
    listener.awaitResult()    // Will throw an exception if the job fails
  }
这里还有很早重要的一点 为什么我eventProcessLoop.post()调用的是handleJobSubmitted
(1)
//首先你的eventProcessLoop 这个对象是由 DAGSchedulerEventProcessLoop生成的
 private[spark] val eventProcessLoop = new DAGSchedulerEventProcessLoop(this)
  taskScheduler.setDAGScheduler(this)
(2)进入DAGSchedulerEventProcessLoop类中看一眼
//然后你发现这个DAGSchedulerEventProcessLoop 对象 又继承了EventLoop 这个对像
private[scheduler] class DAGSchedulerEventProcessLoop(dagScheduler: DAGScheduler)
  extends EventLoop[DAGSchedulerEvent]("dag-scheduler-event-loop") with Logging {

  private[this] val timer = dagScheduler.metricsSource.messageProcessingTimer

  /**
   * The main event loop of the DAG scheduler.
   */
  override def onReceive(event: DAGSchedulerEvent): Unit = {
    val timerContext = timer.time()
    try {
    //看到这里我们好像已经明白怎么回事了 一旦我们调用onReceive方法就会调用下面的doOnReceive
      doOnReceive(event)
    } finally {
      timerContext.stop()
    }
  }
	//然后这里就会做模式匹配 如果你传进来的是一个JobSubmitted 就会调用handleJobSubmitted
  private def doOnReceive(event: DAGSchedulerEvent): Unit = event match {
    case JobSubmitted(jobId, rdd, func, partitions, callSite, listener, properties) =>
      dagScheduler.handleJobSubmitted(jobId, rdd, func, partitions, callSite, listener, properties)

    case MapStageSubmitted(jobId, dependency, callSite, listener, properties) =>
      dagScheduler.handleMapStageSubmitted(jobId, dependency, callSite, listener, properties)

    case StageCancelled(stageId, reason) =>
      dagScheduler.handleStageCancellation(stageId, reason)

    case JobCancelled(jobId, reason) =>
      dagScheduler.handleJobCancellation(jobId, reason)

    case JobGroupCancelled(groupId) =>
      dagScheduler.handleJobGroupCancelled(groupId)

    case AllJobsCancelled =>
      dagScheduler.doCancelAllJobs()

    case ExecutorAdded(execId, host) =>
      dagScheduler.handleExecutorAdded(execId, host)

    case ExecutorLost(execId, reason) =>
      val workerLost = reason match {
        case SlaveLost(_, true) => true
        case _ => false
      }
      dagScheduler.handleExecutorLost(execId, workerLost)

    case WorkerRemoved(workerId, host, message) =>
      dagScheduler.handleWorkerRemoved(workerId, host, message)

    case BeginEvent(task, taskInfo) =>
      dagScheduler.handleBeginEvent(task, taskInfo)

    case SpeculativeTaskSubmitted(task) =>
      dagScheduler.handleSpeculativeTaskSubmitted(task)

    case GettingResultEvent(taskInfo) =>
      dagScheduler.handleGetTaskResult(taskInfo)

    case completion: CompletionEvent =>
      dagScheduler.handleTaskCompletion(completion)

    case TaskSetFailed(taskSet, reason, exception) =>
      dagScheduler.handleTaskSetFailed(taskSet, reason, exception)

    case ResubmitFailedStages =>
      dagScheduler.resubmitFailedStages()
  }
(3) 我们这个时候回头去看EventLoop这个对象 这个对象里我们主要看俩方面
private[spark] abstract class EventLoop[E](name: String) extends Logging {
	//这里是个阻塞队列
  private val eventQueue: BlockingQueue[E] = new LinkedBlockingDeque[E]()

  private val stopped = new AtomicBoolean(false)

  // Exposed for testing.
  //这路在不停的post我们线程在take
  private[spark] val eventThread = new Thread(name) {
    setDaemon(true)

    override def run(): Unit = {
      try {
        while (!stopped.get) {
        //第一方面对于eventQueue这个队列的操作 一致在take 同时在调onReceiver方法
          val event = eventQueue.take()
          try {
            onReceive(event)
          } catch {
            case NonFatal(e) =>
              try {
                onError(e)
              } catch {
                case NonFatal(e) => logError("Unexpected error in " + name, e)
              }
          }
        }
      } catch {
        case ie: InterruptedException => // exit even if eventQueue is not empty
        case NonFatal(e) => logError("Unexpected error in " + name, e)
      }
    }

 /**
   * Put the event into the event queue. The event thread will process it later.
   */
   //第二个方法就是这个 也就是一开始的 eventProcessLoop.post(BeginEvent(task, taskInfo))
  def post(event: E): Unit = {
    eventQueue.put(event)
  }

  }
(4)这个时候我们的问题好像明朗了 再回头看eventProcessLoop.post(BeginEvent(task, taskInfo)) 明白了吧
eventProcessLoop.post()
5.DAGSchedule收到队列的事件之后,调用handleJobSubmiited开始处理job
private[scheduler] def handleJobSubmitted(jobId: Int,
      finalRDD: RDD[_],
      func: (TaskContext, Iterator[_]) => _,
      partitions: Array[Int],
      callSite: CallSite,
      listener: JobListener,
      properties: Properties) {
    var finalStage: ResultStage = null
    try {
      // New stage creation may throw an exception if, for example, jobs are run on a
      // HadoopRDD whose underlying HDFS files have been deleted.
      finalStage = createResultStage(finalRDD, func, partitions, jobId, callSite)
    } catch {
      case e: BarrierJobSlotsNumberCheckFailed =>
        logWarning(s"The job $jobId requires to run a barrier stage that requires more slots " +
          "than the total number of slots in the cluster currently.")
        // If jobId doesn't exist in the map, Scala coverts its value null to 0: Int automatically.
        val numCheckFailures = barrierJobIdToNumTasksCheckFailures.compute(jobId,
          new BiFunction[Int, Int, Int] {
            override def apply(key: Int, value: Int): Int = value + 1
          })
        if (numCheckFailures <= maxFailureNumTasksCheck) {
          messageScheduler.schedule(
            new Runnable {
              override def run(): Unit = eventProcessLoop.post(JobSubmitted(jobId, finalRDD, func,
                partitions, callSite, listener, properties))
            },
            timeIntervalNumTasksCheck,
            TimeUnit.SECONDS
          )
          return
        } else {
          // Job failed, clear internal data.
          barrierJobIdToNumTasksCheckFailures.remove(jobId)
          listener.jobFailed(e)
          return
        }

      case e: Exception =>
        logWarning("Creating new stage failed due to exception - job: " + jobId, e)
        listener.jobFailed(e)
        return
    }
    // Job submitted, clear internal data.
    barrierJobIdToNumTasksCheckFailures.remove(jobId)

    val job = new ActiveJob(jobId, finalStage, callSite, listener, properties)
    clearCacheLocs()
    logInfo("Got job %s (%s) with %d output partitions".format(
      job.jobId, callSite.shortForm, partitions.length))
    logInfo("Final stage: " + finalStage + " (" + finalStage.name + ")")
    logInfo("Parents of final stage: " + finalStage.parents)
    logInfo("Missing parents: " + getMissingParentStages(finalStage))

    val jobSubmissionTime = clock.getTimeMillis()
    jobIdToActiveJob(jobId) = job
    activeJobs += job
    finalStage.setActiveJob(job)
    val stageIds = jobIdToStageIds(jobId).toArray
    val stageInfos = stageIds.flatMap(id => stageIdToStage.get(id).map(_.latestInfo))
    listenerBus.post(
      SparkListenerJobStart(job.jobId, jobSubmissionTime, stageInfos, properties))
      //优先处理最后一个stage
    submitStage(finalStage)
  }
6.这里是最重要的一个方法【submitStage】
private def submitStage(stage: Stage) {
    val jobId = activeJobForStage(stage)
    if (jobId.isDefined) {
      logDebug("submitStage(" + stage + ")")
      if (!waitingStages(stage) && !runningStages(stage) && !failedStages(stage)) {
      //这里是先去查找所有我父类的stage 方法就是下面的getMissingParentStages方法 就是找宽依赖
        val missing = getMissingParentStages(stage).sortBy(_.id)
        logDebug("missing: " + missing)
        //如果不存在父stage 就执行当前stage下的task
        if (missing.isEmpty) {
          logInfo("Submitting " + stage + " (" + stage.rdd + "), which has no missing parents")
          //调用TaskSchedule#submit(TaskSet)任务调度
          submitMissingTasks(stage, jobId.get)
        } else {
          for (parent <- missing) {
          //如果存在父stage 就递归调用这个方法继续寻找父stage
            submitStage(parent)
          }
          waitingStages += stage
        }
      }
    } else {
      abortStage(stage, "No active job for stage " + stage.id, None)
    }
  }
 private def getMissingParentStages(stage: Stage): List[Stage] = {
 	//定义俩个栈
    val missing = new HashSet[Stage]
    val visited = new HashSet[RDD[_]]
    // We are manually maintaining a stack here to prevent StackOverflowError
    // caused by recursively visiting
    val waitingForVisit = new ArrayStack[RDD[_]]
    def visit(rdd: RDD[_]) {
      if (!visited(rdd)) {
        visited += rdd
        val rddHasUncachedPartitions = getCacheLocs(rdd).contains(Nil)
        if (rddHasUncachedPartitions) {
          for (dep <- rdd.dependencies) {
            dep match {
              case shufDep: ShuffleDependency[_, _, _] =>
              //注意处理最后一个resultstage之外 其余的都叫做shuffleMapStage
              //宽依赖就添加一个stage
                val mapStage = getOrCreateShuffleMapStage(shufDep, stage.firstJobId)
                if (!mapStage.isAvailable) {
                  missing += mapStage
                }
                //窄依赖放在visit父RDD栈中
              case narrowDep: NarrowDependency[_] =>
                waitingForVisit.push(narrowDep.rdd)
            }
          }
        }
      }
    }
    waitingForVisit.push(stage.rdd)
    while (waitingForVisit.nonEmpty) {
      visit(waitingForVisit.pop())
    }
    missing.toList
  }
注
7.这个时候我们跳到上一步的 submitMissingTasks(stage, jobId.get)任务调度这一行代码中
//找到submitMissingTask之后发现这里有个try块 明显将要提交的task分为了俩块
//一个是ShuffleMapTask 一个是ResultTask
val tasks: Seq[Task[_]] = try {
      val serializedTaskMetrics = closureSerializer.serialize(stage.latestInfo.taskMetrics).array()
      stage match {
        case stage: ShuffleMapStage =>
          stage.pendingPartitions.clear()
          partitionsToCompute.map { id =>
            val locs = taskIdToLocations(id)
            val part = partitions(id)
            stage.pendingPartitions += id
            new ShuffleMapTask(stage.id, stage.latestInfo.attemptNumber,
              taskBinary, part, locs, properties, serializedTaskMetrics, Option(jobId),
              Option(sc.applicationId), sc.applicationAttemptId, stage.rdd.isBarrier())
          }

        case stage: ResultStage =>
          partitionsToCompute.map { id =>
            val p: Int = stage.partitions(id)
            val part = partitions(p)
            val locs = taskIdToLocations(id)
            new ResultTask(stage.id, stage.latestInfo.attemptNumber,
              taskBinary, part, locs, id, properties, serializedTaskMetrics,
              Option(jobId), Option(sc.applicationId), sc.applicationAttemptId,
              stage.rdd.isBarrier())
          }
      }
    } catch {
      case NonFatal(e) =>
        abortStage(stage, s"Task creation failed: $e\n${Utils.exceptionString(e)}", Some(e))
        runningStages -= stage
        return
    }
       if (tasks.size > 0) {
         logInfo(s"Submitting ${tasks.size} missing tasks from $stage (${stage.rdd}) (first 15 " +
         s"tasks are for partitions ${tasks.take(15).map(_.partitionId)})")
         //这不就回到一开始的计算流程图中taskScheduler调用submitTask方法将TaskSet提交
          taskScheduler.submitTasks(new TaskSet(
        tasks.toArray, stage.id, stage.latestInfo.attemptNumber, jobId, properties))
    }
总结
通过以上源码分析,可以得出Spark所谓宽窄依赖事实上指的是
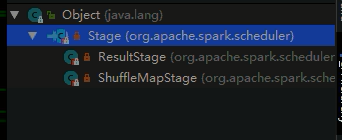
ShuffleDependency或者是NarrowDependency如果是ShuffleDependency系统会生成一个ShuffeMapStage,如果是NarrowDependency则忽略,归为当前Stage。当系统回推到起始RDD的时候因为发现当前RDD或者ShuffleMapStage没有父Stage的时候,当前系统会将当前State下的Task封装成ShuffleMapTask(如果是ResultStage就是ResultTask),当前Task的数目等于当前state分区的分区数。然后将Task封装成TaskSet通过调用taskScheduler.submitTasks将任务提交给集群。
RDD缓存
缓存是一种RDD计算容错的一种手段,程序在RDD数据丢失的时候,可以通过缓存快速计算当前RDD的值,而不需要反推出所有的RDD重新计算,因此Spark在需要对某个RDD多次使用的时候,为了提高程序的执行效率用户可以考虑使用RDD的cache。如下测试:
	val conf = new SparkConf()
		.setAppName("word-count")
		.setMaster("local[2]")
	val sc = new SparkContext(conf)
	val value: RDD[String] = sc.textFile("file:///D:/demo/words/")
	   .cache()
	value.count()

	var begin=System.currentTimeMillis()
	value.count()
	var end=System.currentTimeMillis()
	println("耗时:"+ (end-begin))//耗时:253

	//失效缓存
	value.unpersist()
	begin=System.currentTimeMillis()
	value.count()
	end=System.currentTimeMillis()
	println("不使用缓存耗时:"+ (end-begin))//2029
	sc.stop()
除了调用cache之外,Spark提供了更细粒度的RDD缓存方案,用户可以根据集群的内存状态选择合适的缓存策略。用户可以使用persist方法指定缓存级别。缓存级别有很多:
xxRDD.persist(StorageLevel.MEMORY_AND_DISK_SER_2)/ /推荐使用这个
MEMORY_ONLY:表示数据完全不经过序列化存储在内存中,效率高,但是有可能导致内存溢出.
MEMORY_ONLY_SER和MEMORY_ONLY一样,只不过需要对RDD的数据做序列化,牺牲CPU节省内存,同样会导致内存溢出可能。
其中_2表示缓存结果有备份
Check Point 机制
除了使用缓存机制可以有效的保证RDD的故障恢复,但是如果缓存失效还是会在导致系统重新计算RDD的结果,所以对于一些RDD的lineage较长的场景,计算比较耗时,用户可以尝试使用checkpoint机制存储RDD的计算结果,该种机制和缓存最大的不同在于,使用checkpoint之后被checkpoint的RDD数据直接持久化在文件系统中,一般推荐将结果写在hdfs中,这种checpoint并不会自动清空。注意checkpoint在计算的过程中先是对RDD做mark,在任务执行结束后,再对mark的RDD实行checkpoint,也就是要重新计算被Mark之后的rdd的依赖和结果,因此为了避免Mark RDD重复计算,推荐使用策略
	val conf = new SparkConf().setMaster("yarn").setAppName("wordcount")
	val sc = new SparkContext(conf)
	sc.setCheckpointDir("hdfs:///checkpoints")

	val lineRDD: RDD[String] = sc.textFile("hdfs:///words/t_word.txt")

	val cacheRdd = lineRDD.flatMap(line => line.split(" "))
	.map(word => (word, 1))
	.groupByKey()
	.map(tuple => (tuple._1, tuple._2.sum))
	.sortBy(tuple => tuple._2, false, 1)
	.cache()
	cacheRdd.checkpoint()

	cacheRdd.collect().foreach(tuple=>println(tuple._1+"->"+tuple._2))
	cacheRdd.unpersist()
	//3.关闭sc
	sc.stop()
spark Streaming中 是这样写程序一旦运行要改就要先删除checkpoint
    val conf = new SparkConf().setAppName("userlocation").setMaster("local[5]")
    var checkpointDir="file:///D:/checkpoints"
    var ssc=StreamingContext.getOrCreate(checkpointDir,()=>{


 3884
3884


 被折叠的 条评论
为什么被折叠?
被折叠的 条评论
为什么被折叠?
 到【灌水乐园】发言


