


1、需求分析
实现基于Shiro的SaaS平台的统一权限管理。我们的SaaS-HRM系统是基于微服务构建,所以在使用Shiro鉴权的时候,就需要将认证信息保存到统一的redis服务器中完成。这样,每个微服务都可以通过指定cookie中的sessionid获取公共的认证信息。
2、搭建环境
2.1 加入pom依赖
在父工程的pom文件中添加shiro和redis相关的坐标:
        <!--shiro和spring整合-->
        <dependency>
            <groupId>org.apache.shiro</groupId>
            <artifactId>shiro-spring</artifactId>
            <version>1.3.2</version>
        </dependency>
        <!--shiro核心包-->
        <dependency>
            <groupId>org.apache.shiro</groupId>
            <artifactId>shiro-core</artifactId>
            <version>1.3.2</version>
        </dependency>
        <!--shiro与redis整合-->
        <dependency>
            <groupId>org.crazycake</groupId>
            <artifactId>shiro-redis</artifactId>
            <version>3.0.0</version>
        </dependency>
2.2 修改ProfileResult
ProfileResult作为我们的安全数据存放到Redis中,所以ProfileResult需要实现Serializable,AuthCachePrincipal两个接口,并实现AuthCachePrincipal中的一个接口:package com.zdw.ihrm.domain.system.response;
import com.zdw.ihrm.domain.system.Permission;
import com.zdw.ihrm.domain.system.Role;
import com.zdw.ihrm.domain.system.User;
import lombok.Getter;
import lombok.Setter;
import org.crazycake.shiro.AuthCachePrincipal;
import java.io.Serializable;
import java.util.*;
//服务器返回给客户端的用户权限信息实体
@Setter
@Getter
public class ProfileResult implements Serializable,AuthCachePrincipal {
private String mobile;
private String username;
private String company;
private Map<String,Object> roles = new HashMap<>();
//根据用户User和权限的集合封装一个返回结果
public ProfileResult(User user,List<Permission> perms){
this.mobile = user.getMobile();
this.username = user.getUsername();
this.company = user.getCompanyName();
this.companyId = user.getCompanyId();
Set<String> menus = new HashSet<>();
Set<String> points = new HashSet<>();
Set<String> apis = new HashSet<>();
for (Permission perm : perms) {
String code = perm.getCode();//得到权限编码
if(perm.getType()==1){
menus.add(code);
}else if(perm.getType()==2){
points.add(code);
}else{
apis.add(code);
}
}
this.roles.put("menus",menus);
this.roles.put("points",points);
this.roles.put("apis",apis);
}
public ProfileResult(User user) {
this.mobile = user.getMobile();
this.username = user.getUsername();
this.company = user.getCompanyName();
this.companyId = user.getCompanyId();
Set<Role> roles = user.getRoles();
Set<String> menus = new HashSet<>();
Set<String> points = new HashSet<>();
Set<String> apis = new HashSet<>();
for (Role role : roles) {
Set<Permission> perms = role.getPermissions();
for (Permission perm : perms) {
String code = perm.getCode();//权限编码
if(perm.getType() == 1) {
menus.add(code);
}else if(perm.getType() == 2) {
points.add(code);
}else {
apis.add(code);
}
}
}
this.roles.put("menus",menus);
this.roles.put("points",points);
this.roles.put("apis",apis);
}
@Override
public String getAuthCacheKey() {
return null;
}
}2.3 添加公共的ErrorController
为了在多个微服务中使用,配置公共的未认证未授权的Controller,所以在ihrm_common工程中添加:
package com.zdw.ihrm.common.controller;

import com.zdw.ihrm.common.entity.Result;
import com.zdw.ihrm.common.entity.ResultCode;
import org.springframework.web.bind.annotation.CrossOrigin;
import org.springframework.web.bind.annotation.RequestMapping;
import org.springframework.web.bind.annotation.RestController;

/**
 * 公共的认证或授权失败的controller
 */
@RestController
@CrossOrigin//解决跨域问题
public class ErrorController {
    @RequestMapping(value = "autherror")
    public Result autherror(int code){
        //code==1就是认证失败,其他的值就是权限不足
        return code==1?new Result(ResultCode.UNAUTHENTICATED):new Result(ResultCode.UNAUTHORISE);
    }
}
2.4 自定义Realm
我们所有的系统中,都需要用到Realm来进行授权,因此可以在ihrm_common中定义一个公共的IhrmRealm,在这里面不用管用户的认证,只需要实现用户的授权即可。然而我们的ihrm_system系统中,需要进行用户的认证,所以需要定义一个认证用的UserRealm,它可以去继承IhrmRealm,那么它也拥有了授权功能,然后单独再去实现认证方法即可:
2.4.1 公共的IhrmRealm
在ihrm_common工程下,创建公共的IhrmRealm,实现授权操作:
package com.zdw.ihrm.common.shiro.realm;

import com.zdw.ihrm.domain.system.response.ProfileResult;
import org.apache.shiro.authc.AuthenticationException;
import org.apache.shiro.authc.AuthenticationInfo;
import org.apache.shiro.authc.AuthenticationToken;
import org.apache.shiro.authz.AuthorizationInfo;
import org.apache.shiro.authz.SimpleAuthorizationInfo;
import org.apache.shiro.realm.AuthorizingRealm;
import org.apache.shiro.subject.PrincipalCollection;

import java.util.Set;

/**
 * 公共的Realm,主要是做授权
 */
public class IhrmRealm extends AuthorizingRealm {

    public void setName(String name){
        super.setName("ihrmRealm");
    }

    //授权方法
    protected AuthorizationInfo doGetAuthorizationInfo(PrincipalCollection principalCollection) {
        //1 获取安全数据,我们的安全数据存放的对象是ProfileResult
        ProfileResult profileResult = (ProfileResult)principalCollection.getPrimaryPrincipal();
        //2 获取权限信息,主要是api的权限
        Set<String> apis = (Set<String>) profileResult.getRoles().get("apis");
        //3 构造返回数据
        SimpleAuthorizationInfo info = new SimpleAuthorizationInfo();
        info.setStringPermissions(apis);
        return info;
    }

    @Override
    protected AuthenticationInfo doGetAuthenticationInfo(AuthenticationToken authenticationToken) throws AuthenticationException {
        return null;
    }
}
在ihrm_common工程中需要添加ihrm_common_model的坐标:
        <!--添加对ihrm_common_model的依赖-->
        <dependency>
            <groupId>com.zdw.ihrm</groupId>
            <artifactId>ihrm_common_model</artifactId>
            <version>1.0-SNAPSHOT</version>
        </dependency>
注意,我们之前不注意,也在 ihrm_common_mode中引入了ihrm_common的依赖,这样会导致两个模块互相依赖,运行的时候会报错如下:
Error:java: Annotation processing is not supported for module cycles. Please ensure that all modules from cycle [web_dao,web_service] are excluded from annotation processing其实我们的 ihrm_common_mode模块不需要引入ihrm_common,所以也应该删除掉相关的坐标的。
2.4.2 认证的UserRealm
在ihrm_system系统中,配置用户登录认证的realm域,只需要继承公共的IhrmRealm补充其中的认证方法即可
package com.zdw.ihrm.system.shiro.realm;

import com.zdw.ihrm.common.shiro.realm.IhrmRealm;
import com.zdw.ihrm.domain.system.Permission;
import com.zdw.ihrm.domain.system.User;
import com.zdw.ihrm.domain.system.response.ProfileResult;
import com.zdw.ihrm.system.service.PermissionService;
import com.zdw.ihrm.system.service.UserService;
import org.apache.shiro.authc.*;
import org.springframework.beans.factory.annotation.Autowired;

import java.util.HashMap;
import java.util.List;
import java.util.Map;

/**
 * 用户认证的Realm
 */
public class UserRealm extends IhrmRealm {

    @Autowired
    private UserService userService;
    @Autowired
    private PermissionService permissionService;

    @Override
    protected AuthenticationInfo doGetAuthenticationInfo(AuthenticationToken authenticationToken) throws AuthenticationException {
        //1 获取用户的手机号和密码
        UsernamePasswordToken usernamePasswordToken = (UsernamePasswordToken)authenticationToken;
        String mobile = usernamePasswordToken.getUsername();
        String password = new String(usernamePasswordToken.getPassword());
        //2 根据手机号查询用户信息
        User user = userService.findByMobile(mobile);
        //3 判断用户是否存在,密码是否正确
        if(user!=null && user.getPassword().equals(password)){
            //构造安全数据
            ProfileResult result = null;
            //根据用户级别进行权限查询
            if("user".equals(user.getLevel())){
                result = new ProfileResult(user);
            }else {
                Map<String,Object> map = new HashMap<>();
                if("coAdmin".equals(user.getLevel())){
                    map.put("enVisible","1");
                }
                List<Permission> list = permissionService.findAll(map);
                result = new ProfileResult(user,list);
            }
            //构造返回数据
            SimpleAuthenticationInfo info = new SimpleAuthenticationInfo(result,password,this.getName());
            return info;
        }
        //返回null,会抛出异常,表示用户名和密码不匹配
        return null;
    }
}
2.5 自定义会话管理器
之前的程序使用jwt的方式进行用户认证,前端发送后端的是请求头中的token。为了适配之前的程序,在shiro中需要更改sessionId的获取方式。很好解决,在shiro的会话管理中,可以轻松的使用请求头中的内容作为sessionid:
在ihrm_common中定义会话管理器:
package com.zdw.ihrm.common.shiro.session;

import org.apache.shiro.web.servlet.ShiroHttpServletRequest;
import org.apache.shiro.web.session.mgt.DefaultWebSessionManager;
import org.apache.shiro.web.util.WebUtils;

import javax.servlet.ServletRequest;
import javax.servlet.ServletResponse;
import java.io.Serializable;

/**
 * 自定义的会话管理器
 */
public class CustomSessionManager extends DefaultWebSessionManager {

    //获取sessionId
    @Override
    protected Serializable getSessionId(ServletRequest request, ServletResponse response) {
        //获取请求头信息Authrization
        String sessionId = WebUtils.toHttp(request).getHeader("Authorization");
        if(sessionId==null){
            //如果没有携带sessionId参数则按照父类的方式在cookie进行获取
            return super.getSessionId(request, response);
        }else{
            //我们约定请求头Authorization是以Bearer+ 空格开头的,所以处理
            sessionId = sessionId.replaceAll("Bearer ","");
            request.setAttribute(ShiroHttpServletRequest.REFERENCED_SESSION_ID_SOURCE, "header");//表示从header中去
            request.setAttribute(ShiroHttpServletRequest.REFERENCED_SESSION_ID, sessionId);//表示sessionId的值是什么
            request.setAttribute(ShiroHttpServletRequest.REFERENCED_SESSION_ID_IS_VALID, Boolean.TRUE);//表示是否需要校验
            return sessionId;
        }
    }
}
2.6 添加Shiro配置
在ihrm_system中添加Shiro的相关配置:
package com.zdw.ihrm.system.shiro.conf;

import com.zdw.ihrm.common.shiro.realm.IhrmRealm;
import com.zdw.ihrm.common.shiro.session.CustomSessionManager;
import com.zdw.ihrm.system.shiro.realm.UserRealm;
import org.apache.shiro.mgt.SecurityManager;
import org.apache.shiro.spring.security.interceptor.AuthorizationAttributeSourceAdvisor;
import org.apache.shiro.spring.web.ShiroFilterFactoryBean;
import org.apache.shiro.web.mgt.DefaultWebSecurityManager;
import org.apache.shiro.web.session.mgt.DefaultWebSessionManager;
import org.crazycake.shiro.RedisCacheManager;
import org.crazycake.shiro.RedisManager;
import org.crazycake.shiro.RedisSessionDAO;
import org.springframework.beans.factory.annotation.Value;
import org.springframework.context.annotation.Bean;
import org.springframework.context.annotation.Configuration;

import java.util.LinkedHashMap;
import java.util.Map;

/**
 * Shiro相关的配置
 */
@Configuration
public class ShiroConfiguration {

    //创建Realm
    @Bean
    public IhrmRealm realm(){
        return new UserRealm();
    }

    //创建安全管理器
    @Bean
    public SecurityManager securityManager(IhrmRealm realm){
        DefaultWebSecurityManager securityManager = new DefaultWebSecurityManager();
        securityManager.setRealm(realm);
        //将自定义的会话管理器注册到安全管理器中
        securityManager.setSessionManager(sessionManager());
        //将自定义的redis缓存管理器注册到安全管理器中
        securityManager.setCacheManager(cacheManager());

        return securityManager;
    }

    //创建shiro的过滤器工厂
    @Bean
    public ShiroFilterFactoryBean shiroFilterFactoryBean(SecurityManager securityManager){
        //创建过滤器工厂
        ShiroFilterFactoryBean filterFactoryBean = new ShiroFilterFactoryBean();
        //设置安全管理器
        filterFactoryBean.setSecurityManager(securityManager);
        //3.通用配置(跳转登录页面,未授权跳转的页面)
        filterFactoryBean.setLoginUrl("/autherror?code=1");//登录跳转url地址
        filterFactoryBean.setUnauthorizedUrl("/autherror?code=2");//未授权的url
        //4.设置过滤器集合
        Map<String,String> filterMap = new LinkedHashMap<>();
        //anon -- 匿名访问
        filterMap.put("/sys/login","anon");
        filterMap.put("/autherror","anon");
        //注册
        //authc -- 认证之后访问(登录)
        filterMap.put("/**","authc");
        //perms -- 具有某中权限 (使用注解配置授权)
        filterFactoryBean.setFilterChainDefinitionMap(filterMap);

        return filterFactoryBean;
    }

    //开启对shior注解的支持
    @Bean
    public AuthorizationAttributeSourceAdvisor authorizationAttributeSourceAdvisor(SecurityManager securityManager) {
        AuthorizationAttributeSourceAdvisor advisor = new AuthorizationAttributeSourceAdvisor();
        advisor.setSecurityManager(securityManager);
        return advisor;
    }

    @Value("${spring.redis.host}")
    private String host;
    @Value("${spring.redis.port}")
    private int port;

    /**
     * 1.redis的控制器,操作redis
     */
    public RedisManager redisManager() {
        RedisManager redisManager = new RedisManager();
        redisManager.setHost(host);
        redisManager.setPort(port);
        return redisManager;
    }

    /**
     * 2.sessionDao
     */
    public RedisSessionDAO redisSessionDAO() {
        RedisSessionDAO sessionDAO = new RedisSessionDAO();
        sessionDAO.setRedisManager(redisManager());
        return sessionDAO;
    }

    /**
     * 3.会话管理器
     */
    public DefaultWebSessionManager sessionManager() {
        CustomSessionManager sessionManager = new CustomSessionManager();
        sessionManager.setSessionDAO(redisSessionDAO());
        //禁用cookie
        sessionManager.setSessionIdCookieEnabled(false);
        //禁用url重写   url;jsessionid=id
        sessionManager.setSessionIdUrlRewritingEnabled(false);
        return sessionManager;
    }

    /**
     * 4.缓存管理器
     */
    public RedisCacheManager cacheManager() {
        RedisCacheManager redisCacheManager = new RedisCacheManager();
        redisCacheManager.setRedisManager(redisManager());
        return redisCacheManager;
    }
}
修改application.yml配置文件,添加redis的配置:
spring:
   redis:
      host: 127.0.0.1
      port: 6379
2.7 修改login登录方法
修改UserController中的login方法:
/**
     * 用户登录的方法
     * @param loginMap  登录的手机号和密码是在请求体body中的,所以可以用map来接收
     * @return
     */
    @RequestMapping(value = "/login",method = RequestMethod.POST)
    public Result login(@RequestBody Map<String,String> loginMap) throws Exception {
        String mobile = loginMap.get("mobile");
        String password = loginMap.get("password");
        try {
            //构造登录数据
            // 1.密码加密,密码,盐,加密次数
            password = new Md5Hash(password,mobile,3).toString();
            UsernamePasswordToken usernamePasswordToken = new UsernamePasswordToken(mobile,password);
            // 2 获取Subject
            Subject subject = SecurityUtils.getSubject();
            // 3 登录,进入realm完成认证
            subject.login(usernamePasswordToken);
            // 4.获取sessionId
            String sessionId = (String)subject.getSession().getId();
            // 5 返回
            return new Result(ResultCode.SUCCESS,sessionId);
        }catch (Exception e){
            return new Result(ResultCode.MOBILEORPASSWORDERROR);
        }
}
因为涉及到密码加密,所以我们也要修改UserService中的save保存用户的方法:
public void save(User user){
        String id = idWorker.nextId()+"";
        user.setId(id);
        //user.setPassword("123456");//设置初始密码
        String password = new Md5Hash("123456",user.getMobile(),3).toString();//加密密码
        user.setPassword(password);//设置密码
        user.setLevel("user");//设置级别,默认的都是这个级别,其他的级别是通过数据库去录入的
        user.setEnableState(1);
        user.setCreateTime(new Date());//设置创建时间
        userDao.save(user);//保存操作
    }
数据库已经存在的用户的密码是没有加密的,所以需要手动进行加密,例如:
String password = new Md5Hash("123456",“17773806476”,3).toString();
2.8 修改pfofile获取信息的方法
修改UserController中获取信息的方法profile:
//获取用户信息的方法
    @RequestMapping(value = "/profile",method = RequestMethod.POST)
    public Result profile(HttpServletRequest request) throws Exception {

        //使用shiro 和 redis获取用户信息,只需要从redis中取出我们的安全数据就好了,因为我们在UserRealm的认证方法中存入了安全数据
        Subject subject = SecurityUtils.getSubject();
        PrincipalCollection principals = subject.getPrincipals();
        ProfileResult profileResult = (ProfileResult)principals.getPrimaryPrincipal();
        return new Result(ResultCode.SUCCESS,profileResult);
    }
2.9 修改BaseController
package com.zdw.ihrm.common.controller;

import com.zdw.ihrm.domain.system.response.ProfileResult;
import io.jsonwebtoken.Claims;
import org.apache.shiro.SecurityUtils;
import org.apache.shiro.subject.PrincipalCollection;
import org.apache.shiro.subject.Subject;
import org.springframework.web.bind.annotation.ModelAttribute;

import javax.servlet.http.HttpServletRequest;
import javax.servlet.http.HttpServletResponse;

public class BaseController {
    protected HttpServletRequest request;
    protected HttpServletResponse response;
    //protected Claims claims;//这是使用jwt的方法获取相关数据
    protected ProfileResult profileResult;

    //----使用shiro的方式获取
    @ModelAttribute//这个注解的作用:在实例化子类对象的时候,会先执行该方法
    public void setReqAndResp(HttpServletRequest request, HttpServletResponse response) {
        this.request = request;
        this.response = response;
        Subject subject = SecurityUtils.getSubject();
        PrincipalCollection principals = subject.getPrincipals();
        if(principals!=null){
            profileResult = (ProfileResult)principals.getPrimaryPrincipal();
        }
    }
    //企业id,(暂时使用1,以后会动态获取)
    public String parseCompanyId() {
        if(profileResult!=null){
            return profileResult.getCompanyId();
        }
        return "1";
    }
    public String parseCompanyName() {
        if(profileResult!=null){
            return profileResult.getCompany();
        }
        return "湖南教育股份有限公司";
    }
}
3、测试
3.1 测试登录
在ihrm_system的系统微服务中测试用户登录:
首先要开启redis,因为我们要用到redis存储安全数据。然后我们可以启动两个postman的客户端,其实就相当于两个会话了,一个登录了,另一个登录的时候可以添加头信息,不用登录就可以查询到用户信息:
登录:localhost:9002/sys/login

用另一个postman,先不带请求头,直接访问profile方法:

如果带上请求头:Authrization:

3.2 测试授权
上面已经测试登录通过了,达到了我们想要的结果。接下来通过ihrm_company服务进行授权测试。那么我们需要在ihrm_company的application.yml中,也要添加redis的配置,而且也要添加ShiroConfiguration配置类:
package com.zdw.ihrm.company.shiro.config;

import com.zdw.ihrm.common.shiro.realm.IhrmRealm;
import com.zdw.ihrm.common.shiro.session.CustomSessionManager;
import org.apache.shiro.mgt.SecurityManager;
import org.apache.shiro.spring.security.interceptor.AuthorizationAttributeSourceAdvisor;
import org.apache.shiro.spring.web.ShiroFilterFactoryBean;
import org.apache.shiro.web.mgt.DefaultWebSecurityManager;
import org.apache.shiro.web.session.mgt.DefaultWebSessionManager;
import org.crazycake.shiro.RedisCacheManager;
import org.crazycake.shiro.RedisManager;
import org.crazycake.shiro.RedisSessionDAO;
import org.springframework.beans.factory.annotation.Value;
import org.springframework.context.annotation.Bean;
import org.springframework.context.annotation.Configuration;

import java.util.LinkedHashMap;
import java.util.Map;

/**
 * Shiro相关的配置
 */
@Configuration
public class ShiroConfiguration {

    //创建Realm
    @Bean
    public IhrmRealm realm(){
        return new IhrmRealm();
    }

    //创建安全管理器
    @Bean
    public SecurityManager securityManager(IhrmRealm realm){
        DefaultWebSecurityManager securityManager = new DefaultWebSecurityManager();
        securityManager.setRealm(realm);
        //将自定义的会话管理器注册到安全管理器中
        securityManager.setSessionManager(sessionManager());
        //将自定义的redis缓存管理器注册到安全管理器中
        securityManager.setCacheManager(cacheManager());

        return securityManager;
    }

    //创建shiro的过滤器工厂
    @Bean
    public ShiroFilterFactoryBean shiroFilterFactoryBean(SecurityManager securityManager){
        //创建过滤器工厂
        ShiroFilterFactoryBean filterFactoryBean = new ShiroFilterFactoryBean();
        //设置安全管理器
        filterFactoryBean.setSecurityManager(securityManager);
        //3.通用配置(跳转登录页面,未授权跳转的页面)
        filterFactoryBean.setLoginUrl("/autherror?code=1");//登录跳转url地址
        filterFactoryBean.setUnauthorizedUrl("/autherror?code=2");//未授权的url
        //4.设置过滤器集合
        Map<String,String> filterMap = new LinkedHashMap<>();
        //anon -- 匿名访问
        filterMap.put("/sys/login","anon");
        filterMap.put("/autherror","anon");
        //注册
        //authc -- 认证之后访问(登录)
        filterMap.put("/**","authc");
        //perms -- 具有某中权限 (使用注解配置授权)
        filterFactoryBean.setFilterChainDefinitionMap(filterMap);

        return filterFactoryBean;
    }

    //开启对shior注解的支持
    @Bean
    public AuthorizationAttributeSourceAdvisor authorizationAttributeSourceAdvisor(SecurityManager securityManager) {
        AuthorizationAttributeSourceAdvisor advisor = new AuthorizationAttributeSourceAdvisor();
        advisor.setSecurityManager(securityManager);
        return advisor;
    }

    @Value("${spring.redis.host}")
    private String host;
    @Value("${spring.redis.port}")
    private int port;

    /**
     * 1.redis的控制器,操作redis
     */
    public RedisManager redisManager() {
        RedisManager redisManager = new RedisManager();
        redisManager.setHost(host);
        redisManager.setPort(port);
        return redisManager;
    }

    /**
     * 2.sessionDao
     */
    public RedisSessionDAO redisSessionDAO() {
        RedisSessionDAO sessionDAO = new RedisSessionDAO();
        sessionDAO.setRedisManager(redisManager());
        return sessionDAO;
    }

    /**
     * 3.会话管理器
     */
    public DefaultWebSessionManager sessionManager() {
        CustomSessionManager sessionManager = new CustomSessionManager();
        sessionManager.setSessionDAO(redisSessionDAO());
        //禁用cookie
        sessionManager.setSessionIdCookieEnabled(false);
        //禁用url重写   url;jsessionid=id
        sessionManager.setSessionIdUrlRewritingEnabled(false);
        return sessionManager;
    }

    /**
     * 4.缓存管理器
     */
    public RedisCacheManager cacheManager() {
        RedisCacheManager redisCacheManager = new RedisCacheManager();
        redisCacheManager.setRedisManager(redisManager());
        return redisCacheManager;
    }
}
postman请求需要登录才能访问的路径:

然后登录成功之后,得到请求头,然后再请求并添加请求头,进行访问:

4、前后端联调
还是以删除用户来进行测试。
4.1 添加权限注解
在UserController的deleteById上添加注解:@RequiresPermissions("USER_DELETE")
 //根据id删除用户
    @RequiresPermissions("USER_DELETE")
    @RequestMapping(value = "/user/{id}", method = RequestMethod.DELETE,name = "USER_DELETE")
    public Result deleteById(@PathVariable("id") String id){
        userService.deleteById(id);
        return new Result(ResultCode.SUCCESS);
    }
4.2 修改统一的异常处理
因为我们需要使用shiro的注解授权,那么我们之前讲过,使用注解授权,如果没有相关权限就会报异常的,因此我们需要对该异常进行处理:
package com.zdw.ihrm.common.handler;
import com.zdw.ihrm.common.entity.Result;
import com.zdw.ihrm.common.entity.ResultCode;
import com.zdw.ihrm.common.exception.CommonException;
import org.apache.shiro.authz.AuthorizationException;
import org.springframework.web.bind.annotation.ControllerAdvice;
import org.springframework.web.bind.annotation.ExceptionHandler;
import org.springframework.web.bind.annotation.ResponseBody;
import org.springframework.web.servlet.HandlerExceptionResolver;
import org.springframework.web.servlet.ModelAndView;
import javax.servlet.http.HttpServletRequest;
import javax.servlet.http.HttpServletResponse;
/**
* 自定义的公共异常处理器
* 1.声明异常处理器
* 2.对异常统一处理
*/
@ControllerAdvice
public class BaseExceptionHandler {
@ExceptionHandler(value = Exception.class)
@ResponseBody
public Result error(HttpServletRequest request, HttpServletResponse response, Exception e) {
e.printStackTrace();//打印异常的堆栈信息,方便查找错误
if(e.getClass() == CommonException.class) {
//类型转型
CommonException ce = (CommonException) e;
Result result = new Result(ce.getResultCode());
return result;
}else if(e.getClass() == AuthorizationException.class || e.getClass() == AuthorizationException.class){//shiro的注解授权失败异常
return new Result(ResultCode.UNAUTHORISE);
}else{
Result result = new Result(ResultCode.SERVER_ERROR);
return result;
}
}
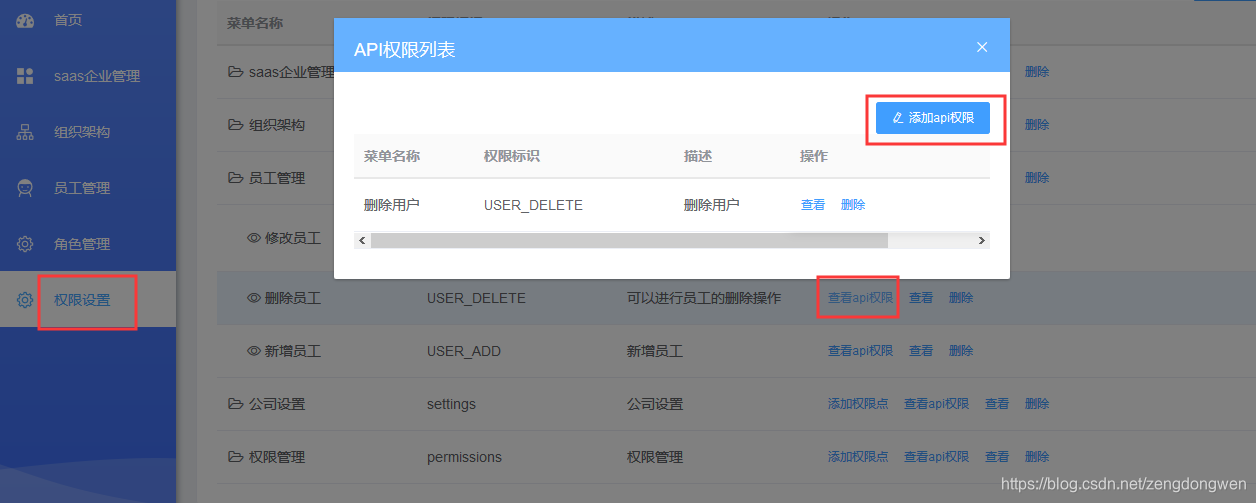
}4.3 启动前端,添加api权限

4.4 删除用户测试权限
然后以没有删除用户权限的用户登录,执行删除操作:


 364
364


 被折叠的 条评论
为什么被折叠?
被折叠的 条评论
为什么被折叠?
 到【灌水乐园】发言


