


写的不是很详细,只写了个大概,后续待补充
启动类只有一句话
@SpringBootApplication()
public class ApiServiceApplication implements CommandLineRunner {

    public static void main(String[] args) {
        SpringApplication.run(ApiServiceApplication.class);
    }

}
- 首先看看它的注解
@SpringBootApplication,@SpringBootApplication中有三个主要的注解SpringBootConfiguration、EnableAutoConfiguration、ComponentScan
@Target(ElementType.TYPE)
@Retention(RetentionPolicy.RUNTIME)
@Documented
@Inherited
// 实际就是Configuration,本身就是Spring容器的配置类
@SpringBootConfiguration
@EnableAutoConfiguration
// 自动扫描并加载符合条件的组件,将这些bean定义加载到容器中
@ComponentScan(excludeFilters = { @Filter(type = FilterType.CUSTOM, classes = TypeExcludeFilter.class),
		@Filter(type = FilterType.CUSTOM, classes = AutoConfigurationExcludeFilter.class) })
点进去看EnableAutoConfiguration
@Target(ElementType.TYPE)
@Retention(RetentionPolicy.RUNTIME)
@Documented
@Inherited
@AutoConfigurationPackage
@Import(AutoConfigurationImportSelector.class)
public @interface EnableAutoConfiguration {
先看AutoConfigurationPackage
@AutoConfigurationPackage注释的作用就是将主配置类所在的包下面所有的组件都扫描到Spring容器中。比如说,你用了Spring Data JPA,可能会在实体类上写@Entity注解。这个@Entity注解由@AutoConfigurationPackage扫描并加载,而我们平时开发用的@Controller/@Service/@Component/@Repository这些注解是由ComponentScan来扫描并加载的。这二者扫描的对象是不一样的。
	static class Registrar implements ImportBeanDefinitionRegistrar, DeterminableImports {

		@Override
		public void registerBeanDefinitions(AnnotationMetadata metadata, BeanDefinitionRegistry registry) {
			register(registry, new PackageImport(metadata).getPackageName());
		}

		@Override
		public Set<Object> determineImports(AnnotationMetadata metadata) {
			return Collections.singleton(new PackageImport(metadata));
		}

	}
再看AutoConfigurationImportSelector
// 他有个	getCandidateConfigurations 方法
protected List<String> getCandidateConfigurations(AnnotationMetadata metadata, AnnotationAttributes attributes) {
		List<String> configurations = SpringFactoriesLoader.loadFactoryNames(getSpringFactoriesLoaderFactoryClass(),
				getBeanClassLoader());
		Assert.notEmpty(configurations, "No auto configuration classes found in META-INF/spring.factories. If you "
				+ "are using a custom packaging, make sure that file is correct.");
		return configurations;
	}
loadFactoryNames进去,再看loadSpringFactories方法。
    private static Map<String, List<String>> loadSpringFactories(@Nullable ClassLoader classLoader) {
        MultiValueMap<String, String> result = (MultiValueMap)cache.get(classLoader);
        if (result != null) {
            return result;
        } else {
            try {
// 从META-INF/spring.factories文件中获取EnableAutoConfiguration所对应的configurations
                Enumeration<URL> urls = classLoader != null ? classLoader.getResources("META-INF/spring.factories") : ClassLoader.getSystemResources("META-INF/spring.factories");
                LinkedMultiValueMap result = new LinkedMultiValueMap();

                while(urls.hasMoreElements()) {
                    URL url = (URL)urls.nextElement();
                    UrlResource resource = new UrlResource(url);
                    Properties properties = PropertiesLoaderUtils.loadProperties(resource);
                    Iterator var6 = properties.entrySet().iterator();

                    while(var6.hasNext()) {
                        Entry<?, ?> entry = (Entry)var6.next();
                        String factoryClassName = ((String)entry.getKey()).trim();
                        String[] var9 = StringUtils.commaDelimitedListToStringArray((String)entry.getValue());
                        int var10 = var9.length;

                        for(int var11 = 0; var11 < var10; ++var11) {
                            String factoryName = var9[var11];
                            result.add(factoryClassName, factoryName.trim());
                        }
                    }
                }

                cache.put(classLoader, result);
                return result;
            } catch (IOException var13) {
                throw new IllegalArgumentException("Unable to load factories from location [META-INF/spring.factories]", var13);
            }
        }
}- 再看 SpringApplication.run(ApiServiceApplication.class);
    public static ConfigurableApplicationContext run(Class<?> primarySource, String... args) {
        return run(new Class<?>[] { primarySource }, args);
    }

//primarySources:加载的主要资源类	args:应用程序参数
	public static ConfigurableApplicationContext run(Class<?>[] primarySources, String[] args) {
		return new SpringApplication(primarySources).run(args);
	}
先看SpringApplication的初始化
	// 首先看看SpringApplication的初始化
	public SpringApplication(ResourceLoader resourceLoader, Class<?>... primarySources) {
		//
		this.resourceLoader = resourceLoader;
		Assert.notNull(primarySources, "PrimarySources must not be null");
		// 初始化资源加载器集合并去重
		this.primarySources = new LinkedHashSet<>(Arrays.asList(primarySources));
		// 推断当前web类型
		this.webApplicationType = WebApplicationType.deduceFromClasspath();
		// 设置应用上线文初始化器
		// ApplicationContextInitializer 用来初始化指定的 Spring 应用上下文,如注册属性资源、激活 Profiles
		setInitializers((Collection) getSpringFactoriesInstances(ApplicationContextInitializer.class));
		// 从类路径下找到META-INF/spring.factories配置的所有ApplicationListener(SpringBoot运行监听的类)
		setListeners((Collection) getSpringFactoriesInstances(ApplicationListener.class));
		this.mainApplicationClass =   ();
	}

	// 点进去getSpringFactoriesInstances
		private <T> Collection<T> getSpringFactoriesInstances(Class<T> type, Class<?>[] parameterTypes, Object... args) {
		ClassLoader classLoader = getClassLoader();
		Set<String> names = new LinkedHashSet<>(SpringFactoriesLoader.loadFactoryNames(type, classLoader));
		// 根据以上类路径创建初始化器实例列表
		List<T> instances = createSpringFactoriesInstances(type, parameterTypes, classLoader, args, names);
		AnnotationAwareOrderComparator.sort(instances);
		return instances;
	}

	// 再看loadFactoryNames 方法,继续跟进loadSpringFactories方法

	    private static Map<String, List<String>> loadSpringFactories(@Nullable ClassLoader classLoader) {
        MultiValueMap<String, String> result = (MultiValueMap)cache.get(classLoader);
        if (result != null) {
            return result;
        } else {
            try {
				// 根据类路径下的 META-INF/spring.factories 文件解析并获取 ApplicationContextInitializer 接口的所有配置的类路径名称。
                Enumeration<URL> urls = classLoader != null ? classLoader.getResources("META-INF/spring.factories") : ClassLoader.getSystemResources("META-INF/spring.factories");
                LinkedMultiValueMap result = new LinkedMultiValueMap();

                while(urls.hasMoreElements()) {
                    URL url = (URL)urls.nextElement();
                    UrlResource resource = new UrlResource(url);
                    Properties properties = PropertiesLoaderUtils.loadProperties(resource);
                    Iterator var6 = properties.entrySet().iterator();

                    while(var6.hasNext()) {
                        Entry<?, ?> entry = (Entry)var6.next();
                        String factoryClassName = ((String)entry.getKey()).trim();
                        String[] var9 = StringUtils.commaDelimitedListToStringArray((String)entry.getValue());
                        int var10 = var9.length;

                        for(int var11 = 0; var11 < var10; ++var11) {
                            String factoryName = var9[var11];
                            result.add(factoryClassName, factoryName.trim());
                        }
                    }
                }

                cache.put(classLoader, result);
                return result;
            } catch (IOException var13) {
                throw new IllegalArgumentException("Unable to load factories from location [META-INF/spring.factories]", var13);
            }
        }
    }
然后看run方法
	/然后看run方法
		public ConfigurableApplicationContext run(String... args) {
		// 创建并启动计时监控类。记录了当前任务的名称,默认为空字符串,然后记录当前 Spring Boot 应用启动的开始时间
		StopWatch stopWatch = new StopWatch();
		stopWatch.start();
		ConfigurableApplicationContext context = null;
		Collection<SpringBootExceptionReporter> exceptionReporters = new ArrayList<>();
		//设置系统属性 `java.awt.headless` 的值,默认值为:true。运行 headless 服务器,用来来进行简单的图像处理
		configureHeadlessProperty();
		// 创建所有 Spring 运行监听器并发布应用启动事件。
		// 这里也会读取META-INF/spring.factories 这个配置文件,获取配置的监听器名称并实例化所有的类
		SpringApplicationRunListeners listeners = getRunListeners(args);
		listeners.starting();
		try {
			// 初始化默认应用参数类
			ApplicationArguments applicationArguments = new DefaultApplicationArguments(args);
			// 根据运行监听器和应用参数来准备 Spring 环境
			// 会处理所有 property sources 配置和 profiles 配置。
			ConfigurableEnvironment environment = prepareEnvironment(listeners, applicationArguments);
			configureIgnoreBeanInfo(environment);
			Banner printedBanner = printBanner(environment);
			// 创建应用上下文
			context = createApplicationContext();
			// 异常报告器
			// 一样调用的是 getSpringFactoriesInstances 方法来获取配置的异常类名称并实例化所有的异常处理类。
			exceptionReporters = getSpringFactoriesInstances(SpringBootExceptionReporter.class,
					new Class[] { ConfigurableApplicationContext.class }, context);
					//准备应用上下文
			prepareContext(context, environment, listeners, applicationArguments, printedBanner);
			// 刷新应用上下文
			refreshContext(context);
			// 应用上下文刷新后置处理
			afterRefresh(context, applicationArguments);
			// 停止计时监控类
			stopWatch.stop();
			//输出日志记录执行主类名、时间信息
			if (this.logStartupInfo) {
				new StartupInfoLogger(this.mainApplicationClass).logStarted(getApplicationLog(), stopWatch);
			}
        // 发布应用上下文启动完成事件
        listeners.started(context);

        // 执行所有 Runner 运行器
        callRunners(context, applicationArguments);
		}
		catch (Throwable ex) {
			handleRunFailure(context, ex, exceptionReporters, listeners);
			throw new IllegalStateException(ex);
		}

		try {
		// 发布应用上下文就绪事件
			listeners.running(context);
		}
		catch (Throwable ex) {
			handleRunFailure(context, ex, exceptionReporters, null);
			throw new IllegalStateException(ex);
		}
		// 返回上下文
		return context;
	}
tomcat加载流程
- 接着上面的refreshContext(context) 方法
	private void refreshContext(ConfigurableApplicationContext context) {
		refresh(context);
		if (this.registerShutdownHook) {
			try {
				context.registerShutdownHook();
			}
			catch (AccessControlException ex) {
				// Not allowed in some environments.
			}
		}
}- 从refresh进入到
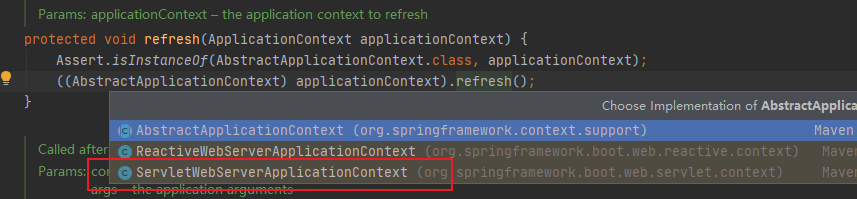
- 继续往下走refresh()方法
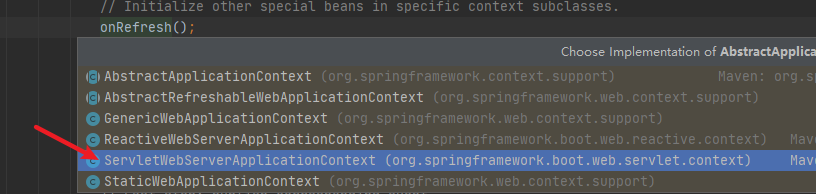
- 发现这时候已经跳到了spring加载bean的这里了
这里详细的说明可以看看 https://blog.csdn.net/zgsxhdzxl/article/details/104511344

- 继续走onRefresh方法,再进入createWebServer()方法
- 可以看到有个一tomcatServlet的Factory

- 在这里里面new了一个tomcat对象,
	@Override
	public WebServer getWebServer(ServletContextInitializer... initializers) {
		Tomcat tomcat = new Tomcat();
		File baseDir = (this.baseDirectory != null ? this.baseDirectory
				: createTempDir("tomcat"));
		tomcat.setBaseDir(baseDir.getAbsolutePath());
		Connector connector = new Connector(this.protocol);
		tomcat.getService().addConnector(connector);
		customizeConnector(connector);
		tomcat.setConnector(connector);
		tomcat.getHost().setAutoDeploy(false);
		configureEngine(tomcat.getEngine());
		for (Connector additionalConnector : this.additionalTomcatConnectors) {
			tomcat.getService().addConnector(additionalConnector);
		}
		prepareContext(tomcat.getHost(), initializers);
		return getTomcatWebServer(tomcat);
}- 继续往下走getTomcatWebServer,会发现new了一个tomcatWebServer对象
	protected TomcatWebServer getTomcatWebServer(Tomcat tomcat) {
		return new TomcatWebServer(tomcat, getPort() >= 0);
}- 在初始化方法里,启动了tomcat
	public TomcatWebServer(Tomcat tomcat, boolean autoStart) {
		Assert.notNull(tomcat, "Tomcat Server must not be null");
		this.tomcat = tomcat;
		this.autoStart = autoStart;
		initialize();
	}

	private void initialize() throws WebServerException {
		TomcatWebServer.logger
				.info("Tomcat initialized with port(s): " + getPortsDescription(false));
		synchronized (this.monitor) {
			try {
				addInstanceIdToEngineName();

				Context context = findContext();
				context.addLifecycleListener((event) -> {
					if (context.equals(event.getSource())
							&& Lifecycle.START_EVENT.equals(event.getType())) {
						// Remove service connectors so that protocol binding doesn't
						// happen when the service is started.
						removeServiceConnectors();
					}
				});
                // 启动了tomcat
				// Start the server to trigger initialization listeners
				this.tomcat.start();

				// We can re-throw failure exception directly in the main thread
				rethrowDeferredStartupExceptions();

				try {
					ContextBindings.bindClassLoader(context, context.getNamingToken(),
							getClass().getClassLoader());
				}
				catch (NamingException ex) {
					// Naming is not enabled. Continue
				}

				// Unlike Jetty, all Tomcat threads are daemon threads. We create a
				// blocking non-daemon to stop immediate shutdown
				startDaemonAwaitThread();
			}
			catch (Exception ex) {
				stopSilently();
				throw new WebServerException("Unable to start embedded Tomcat", ex);
			}
		}
	}


 3015
3015


 被折叠的 条评论
为什么被折叠?
被折叠的 条评论
为什么被折叠?
 到【灌水乐园】发言


