


一、安装
1—基本
通过npm安装相应的包,如果存在vue2.0的包,需要首先npm uninstall进行卸载,再安装。
一个朴素的vue 3的环境包如下图:

通过脚手架建立项目与vue2.0有所不同,如下
| 版本 | 构建命令 | 运行项目 | |
| Vue2.X | vue init webpack <项目名称> | npm run dev | |
| Vue3.X | vue create <项目名称> | npm run serve |
注意:CMD必须以管理员权限运行,否则会显示创建失败。
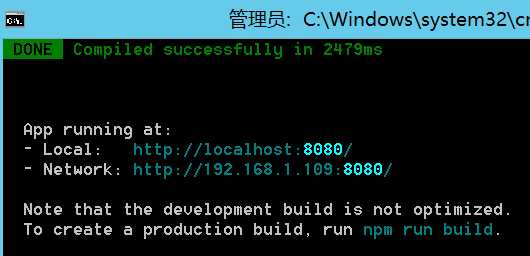
运行后,控制台如下图
2—目录说明
| 目录/文件 | 说明 |
| node_modules | npm加载的项目依赖 |
| src | 要开发的目录,基本覆盖开发的范围 |
| assets | 静态资源 |
| components | 组件文件存放目录,主要的工作目录 |
| App.vue | 项目入口文件,可以直接将组件写入,而不使用components目录 |
| main.js | 项目的核心文件 |
| index.html | 首页入口文件,添加meta信息或统计代码 |
| package.json | 项目配置文件 |
| readme.md | 说明文档 |
3—基本构成代码段
//main.js
import { createApp } from 'vue'
import App from './App.vue'
import router from './router'

createApp(App).use(router).mount('#app')

//app.vue
<template>
  <div id="app" class="app-containt">
      <router-view></router-view>
  </div>
</template>

<script>
export default {
  name: 'App',
}
</script>

//src->router->index.js
import {createRouter,createWebHashHistory} from 'vue-router'
import defaView from '@/components/mySite'
const routes=[
    {
        path:'/',
        redirect: 'default'
    },
    {
        path:'/default',
        name:'defaultPage',
        component:defaView
    }
]

const router=createRouter({
    history:createWebHashHistory(),
    routes,
})

// 查看路径访问
// router.beforeEach((to,from,next)=>{
//     const toPath=to.path;
//     const fromPath=from.path;
//     console.log(fromPath);
//     console.log(toPath);
//     next()
// });


router.onError((err)=>{
    console.log(err)
})
//    向父级暴露router
export default router
4—main.js样例
import { createApp } from 'vue'
import App from './App.vue'
import router from './router'
import ElementPlus from 'element-plus'
import 'element-plus/dist/index.css'
import axios from 'axios'
import VueAxios from 'vue-axios'
import * as ElementPlusIconsVue from '@element-plus/icons-vue'

const app=createApp(App)
//引入了ElementPlus组件
//引入了axios

app.use(router)
    .use(ElementPlus)
    .use(VueAxios,axios)
    .provide('axios',app.config.globalProperties.axios)
    .mount('#app')

for(const [key,component] of Object.entries(ElementPlusIconsVue)){
    app.component(key,component)
}
5—脚本代码函数
<script>
import { ref,defineComponent } from 'vue';

export default defineComponent({
  name:'TestData03',
  setup(){
    let MyName=ref('未知')

    return{
      MyName
    }
  },
  created(){
  },
  mounted(){
    this.fetchData()
  },
  methods:{
    fetchData(){
       console.log(this.MyName)
    }

  }

})

</script>10—常见错误
1.can't resolve 'vue-router'。未加载vue-router依赖,使用npm i --save vue-router进行安装。
二、3.0与2.0的同存
安装如下图,即为共存状态

通过@vue/cli实现分别建构vue2.x和vue3.x脚手架。
Vue2.x和3.X并存的环境,需要安装@vue/cli-init来实现建立Vue2的脚手架。
三、3.0与2.0的异同
1—构造函数
// 相当于 v2中的 Vue.prototype
app.config.globalProperties.$http = ''
// 等价于 v2中的 Vue.use
app.use(router) // 注册路由系统
app.use(store)  // 注册状态管理
四、3.0双向绑定
1—ref 类型
<script>
import {ref} from 'vue'
export default defineComponent{
  name:'app1',
  setup(){
    const age=ref(1)    //声明并初始化语句

    function changeVal(){
      age.value=37          //修改声明的变量值
    }

    return{
      age  ,
      changeVal
    }
  }
}

</script>
与Vue2.X中的双向绑定元素类似,声明时使用ref关键字,但需要在return中暴露出来,否则不能绑定数据更新。
注意:在脚本更改ref声明的变量的值,使用.value来访问,否则拿不到值。
2—reactive类型
<script>
import {reactive} from "vue"
export default defineComponent{
  name:'sect01',
  setup(){
    const myPerson=reactive({
      age:38,
      name:'刘培强'
    })
    function changeVal(){
      myPerson.age=17,
      myPerson.name:'韩朵朵'
    }
    return{
       myPerson,       changeVal
    }
  }

}
</script>
以引用方式进行双向数据绑定的类型,这个在数组、变量等类型数据处理上就非常好用了。
注意:reactive声明的对象展开元素后,每个元素都是普通的元素,不具有响应式;但ref本身就是响应式的。
3—数组的双向绑定
3.1 声明时初始化元素的数组,直接监视数组的value即可
import {defineComponent, reactive, ref,watch} from "vue"
const numArray=ref([1,2,3,4,5])
watch(numArray.value,()=>{
      console.log('数组变化了!!!')

})

function btnChangeArr(){    //改变数组值的事件
      let newVal=numArray.value[1]
      newVal++
      numArray.value[1]=newVal

}
3.2 声明后初始化元素的数组,需要尝试监视数组元素
 const numArray=ref([])
 watch( numArray,()=>{
       console.log('数组/deep变化了!!!')
      },{
        deep:true
      }
 )

 onMounted(()=>{
      numArray.value=[11,12,13,14,15]
 })

 function btnChangeArr(){
      let newVal=numArray.value[1]
      newVal++
      numArray.value[1]=newVal
 }
五、跳转传参
1—query模式
会在地址栏显示参数串
2—params模式
不会显示在地址栏中,类似于post方式。
注意:Vue-Router@4版本会传叁失败。
路由跳转时出现警告:Discarded invalid param(s) "msg" when navigating 且传递的数据丢失


 8903
8903


 被折叠的 条评论
为什么被折叠?
被折叠的 条评论
为什么被折叠?
 到【灌水乐园】发言


