


我本人特别不喜欢那么长篇博客,我尽量缩减。
参考1: https://blog.csdn.net/gsj4719896/article/details/100131840
参考2:https://www.jianshu.com/p/15bde714e198
第一步:安装electron-updater
npm install electron-updater --save
第二步:在vue.config.js里添加public配置,打包将会在dist目录中生成latest.yml文件
- 我看很多文章都将public配置放在package.json的文件里,我是放在vue.config.js文件了,请具体根据项目自行配置。
- url就是你打包上传的地址的前缀,比如你打包后的文件会放在http://www.xxx.com/static/demo.exe,那么这个url就是http://www.xxx.com/static/
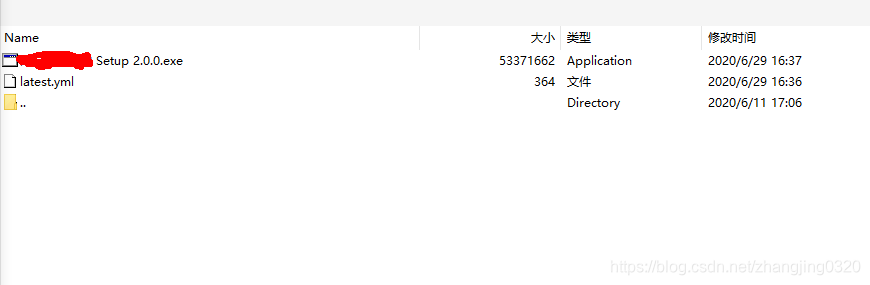
- 关于latest.yml这个文件要放到和上传文件一致的位置,要和2的位置保持一致http://www.xxx.com/static/latest.yml

第三步:请求服务器更新,将这部分的逻辑抽成一个update.js文件
import {
    autoUpdater
} from 'electron-updater'

import {
    ipcMain
} from 'electron'
let mainWindow = null;
export function updateHandle(window, feedUrl) {
    mainWindow = window;
    let message = {
        error: '检查更新出错',
        checking: '正在检查更新……',
        updateAva: '检测到新版本,正在下载……',
        updateNotAva: '现在使用的就是最新版本,不用更新',
    };
    //设置更新包的地址
    autoUpdater.setFeedURL(feedUrl);
    //监听升级失败事件
    autoUpdater.on('error', function (error) {
        sendUpdateMessage({
            cmd: 'error',
            message: error
        })
    });
    //监听开始检测更新事件
    autoUpdater.on('checking-for-update', function (message) {
        sendUpdateMessage({
            cmd: 'checking-for-update',
            message: message
        })
    });
    //监听发现可用更新事件
    autoUpdater.on('update-available', function (message) {
        sendUpdateMessage({
            cmd: 'update-available',
            message: message
        })
    });
    //监听没有可用更新事件
    autoUpdater.on('update-not-available', function (message) {
        sendUpdateMessage({
            cmd: 'update-not-available',
            message: message
        })
    });

    // 更新下载进度事件
    autoUpdater.on('download-progress', function (progressObj) {
        sendUpdateMessage({
            cmd: 'download-progress',
            message: progressObj
        })
    });
    //监听下载完成事件
    autoUpdater.on('update-downloaded', function (event, releaseNotes, releaseName, releaseDate, updateUrl) {
        sendUpdateMessage({
            cmd: 'update-downloaded',
            message: {
                releaseNotes,
                releaseName,
                releaseDate,
                updateUrl
            }
        })
        //退出并安装更新包
        autoUpdater.quitAndInstall();
    });

    //接收渲染进程消息,开始检查更新
    ipcMain.on("checkForUpdate", (e, arg) => {
        //执行自动更新检查
        // sendUpdateMessage({cmd:'checkForUpdate',message:arg})
        autoUpdater.checkForUpdates();
    })
}
//给渲染进程发送消息
function sendUpdateMessage(text) {
    mainWindow.webContents.send('message', text)
}
第四步:background.ts引入update.js
1、我看好多文章都是在main/index.js引入的update.js,根据项目的具体结构来,反正都是要引进来的。
2、主要的代码就两行
import {updateHandle} from '@/utils/updater.js';
// --------放在createWindow方法最后一行就行-------------
updateHandle(win, 'http://static.xuezhong100.cn/client-software/');
import {updateHandle} from '@/utils/updater.js';

function createWindow() {
  // Create the browser window.
  win = new BrowserWindow({
    width: 800,
    height: 600,
    frame: false,
    center: true,
    webPreferences: {
      nodeIntegration: true,
      webSecurity: false
      // preload: path.join(__dirname, './preload')
    }
  })

  var url;
  if (process.env.WEBPACK_DEV_SERVER_URL) {
    url = process.env.WEBPACK_DEV_SERVER_URL as string;
    if (!process.env.IS_TEST) win.webContents.openDevTools()
  } else {
    createProtocol('app')
    url = 'app://./index.html';
  }

  win.webContents.openDevTools()


  win.loadURL(url)
  win.on('closed', () => {
    mainWindow = null
  })
  // 更新,第二个参数就是public里的url,我这里写死了,你直接去找
  updateHandle(win, 'http://static.xuezhong100.cn/client-software/');
}
第五步:App.vue处理逻辑
<template>
  <div id="app">
    <router-view></router-view>
    <el-dialog
      title="正在更新新版本,请稍候..."
      :visible.sync="dialogVisible"
      width="60%"
      :close-on-click-modal="closeOnClickModal"
      :close-on-press-escape="closeOnPressEscape"
      :show-close="showClose"
      center
    >
      <div style="width:100%;height:20vh;line-height:20vh;text-align:center">
        <el-progress
          status="success"
          :text-inside="true"
          :stroke-width="20"
          :percentage="percentage"
          :width="strokeWidth"
          :show-text="true"
        ></el-progress>
      </div>
    </el-dialog>
  </div>
</template>
<script>
let ipcRenderer = require("electron").ipcRenderer;


export default {
  name: "app",
  data() {
    return {
      dialogVisible: false,
      closeOnClickModal: false,
      closeOnPressEscape: false,
      showClose: false,
      percentage: 0,
      strokeWidth:200
    };
  },
  mounted() {
    let _this = this;
	//接收主进程版本更新消息
	ipcRenderer.on("message", (event, arg) => {
	  // for (var i = 0; i < arg.length; i++) {
	  console.log(arg);
	  if ("update-available" == arg.cmd) {
	    //显示升级对话框
	    _this.dialogVisible = true;
	  } else if ("download-progress" == arg.cmd) {
	    //更新升级进度
	    /**
	     *
	     * message{bytesPerSecond: 47673
	      delta: 48960
	      percent: 0.11438799862426002
	      total: 42801693
	      transferred: 48960
	      }
	     */
	    console.log(arg.message.percent);
	    let percent = Math.round(parseFloat(arg.message.percent));
	    _this.percentage = percent;
	  } else if ("error" == arg.cmd) {
	    _this.dialogVisible = false;
	    _this.$message("更新失败");
	  }
	  // }
	});
  	ipcRenderer.send("checkForUpdate");
  }
};
</script>
第六步:结果+错误分析
然后让我们打包一份,打包的版本是比如是1.1.0,将latest.yml(里面对应exe的版本信息、称之类的)和对应的exe放到服务器地址上,将本地的package.json的version改成1.0.0(因为更新是通过版本号的对比控制的)更新操作就会触发,这时候如果你能顺利显示下图,说明你这边已经很顺利的完成了
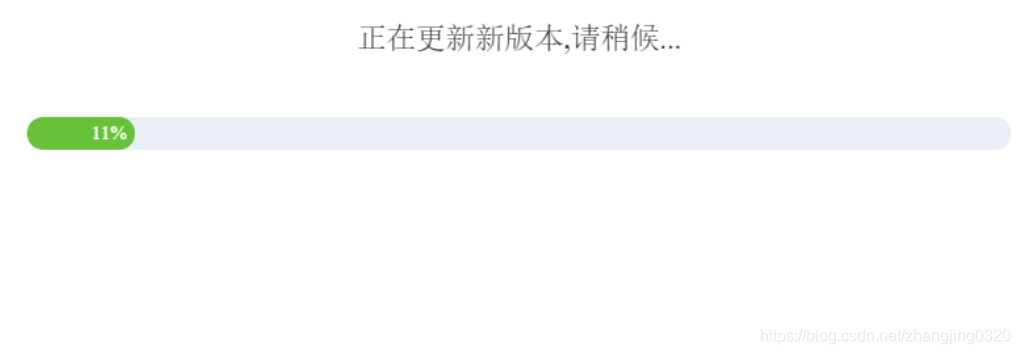
很不幸,如果你报错了
- 问题描述:问题4:控制台会出现:electron-updater code: “ENOENT” errno: -4058 path:
“E:\project1\edu-student\dist_electron\dev-app-update.yml” syscall:
“open” - 问题描述:dev-app-update.yml文件不存在
- 问题分析:dev-app-update.yml文件没有打包到default_app.asar中,dev-app-update.yml的格式是怎样的,查看打包后的文件dist\win-unpacked\resources,发现其中一个app-update.yml文件,查阅资料后发现其实dev-app-update.yml的文件内容格式是一样的
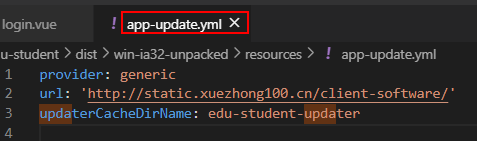
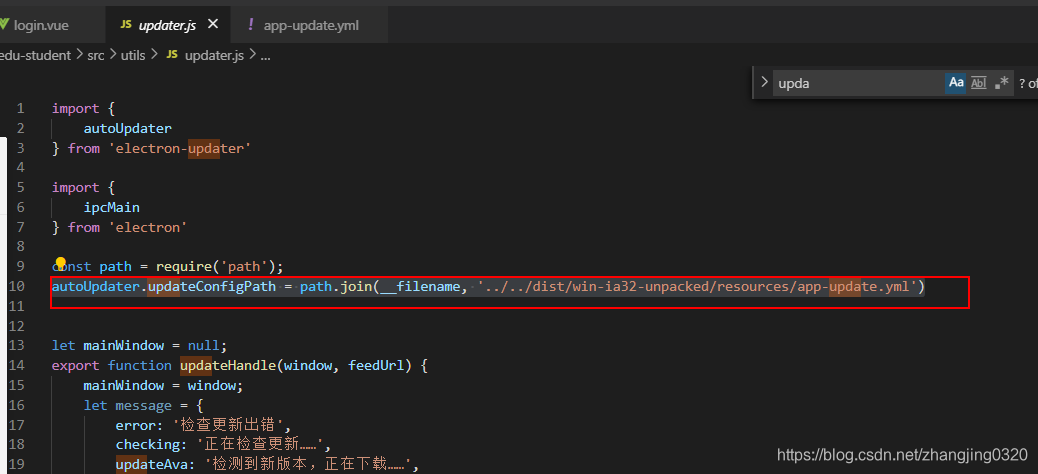
- 问题解决:electron-updater中提供了这个文件的属性配置updateConfigPath,修改updater.js文件,我们将调用的地址修改一下。
autoUpdater.updateConfigPath = path.join(__filename, '../../dist/win-ia32-unpacked/resources/app-update.yml')
改到这一步,你还报错,比如说命令行报错,下载失败balabla的,看下你请求的exe地址是不是有中文,中文会到导致下载失败,请改成英文。对应的yml里的文件名称也改成英文,在试一下。我就是走到这一步才成功才下载成功!!!!走了很多弯路,各种试,到最后下载下来,成就感还是蛮强的。


 417
417


 被折叠的 条评论
为什么被折叠?
被折叠的 条评论
为什么被折叠?
 到【灌水乐园】发言


