


gofpdf 学习笔记
- 一、安装 gofpdf
- 二、极简入门
- 三、跟着官方文档的学习笔记
- 一些值得注意的点,以及遇到的坑
- 参考文献
一、安装 gofpdf
我个人习惯的安装方式如下:
1.1 初始化 go module
1.新建一个文件夹,并进入该文件夹中
2.调出命令行窗口
3.在命令行窗口中键入命令:go mod init url/groupName/projectName
1.2 在 go 文件中键入代码
在该文件夹中,新建一个 .go 文件。键入下列代码:
package main

import (
	"github.com/jung-kurt/gofpdf"
)

func main() {
	pdf := gofpdf.New("P", "mm", "A4", "")
	pdf.AddPage()

	if err := pdf.OutputFileAndClose("1.pdf"); err != nil {
		panic(err.Error())
	}
}
保存该文件。
1.3 编译运行这个 go 文件
在该文件夹中,继续调出命令行窗口,键入命令:go run fileName.go。
既能看到 go 系统会自动去 gofpdf 官方代码仓 拉取代码。
注意:请提前解决代理问题,否则几乎是不可能下载成功的。
1.4 检查结果
该文件夹下出现了 “1.pdf” 这个文件,打开这个 pdf 文件查看下。能够正常打开,说明这个第三方库安装成功,并能正常使用了。
二、极简入门
2.1 写一句英文短句
import (
	"github.com/jung-kurt/gofpdf"
)

func main() {
	//设置页面参数
	pdf := gofpdf.New("P", "mm", "A4", "")

	//添加一页
	pdf.AddPage()

	//写文字内容之前,必须先要设置好字体
	pdf.SetFont("Arial", "B", 16)

	//CellFormat: 表格显示样式设置
	//CellFormat(width, height, text, border, position after, align, fill, link, linkStr)
	pdf.CellFormat(0, 0, "Welcome to golangcode.com", "0", 0, "LM", false, 0, "")

	if err := pdf.OutputFileAndClose("1.pdf"); err != nil {
		panic(err.Error())
	}
}
运行效果:
2.2 添加一张图片
import (
	"github.com/jung-kurt/gofpdf"
)

func main() {
	//设置页面参数
	pdf := gofpdf.New("P", "mm", "A4", "")

	//添加一页
	pdf.AddPage()

	//将图片放入到 pdf 文档中
	//ImageOptions(src, x, y, width, height, flow, options, link, linkStr)
	pdf.ImageOptions(
		"1.jpg",
		0, 0,
		0, 0,
		false,
		gofpdf.ImageOptions{ImageType: "jpg", ReadDpi: false},
		0,
		"",
	)

	if err := pdf.OutputFileAndClose("1.pdf"); err != nil {
		panic(err.Error())
	}
}
运行效果:
2.2.1 官方文档对于 ImageOptions 类型的解释
// ImageOptions provides a place to hang any options we want to use while
// parsing an image.
//
// ImageType's possible values are (case insensitive):
// "JPG", "JPEG", "PNG" and "GIF". If empty, the type is inferred from
// the file extension.
//
// ReadDpi defines whether to attempt to automatically read the image
// dpi information from the image file. Normally, this should be set
// to true (understanding that not all images will have this info
// available). However, for backwards compatibility with previous
// versions of the API, it defaults to false.
//
// AllowNegativePosition can be set to true in order to prevent the default
// coercion of negative x values to the current x position.
type ImageOptions struct {
	ImageType             string
	ReadDpi               bool
	AllowNegativePosition bool
}
大意:
ImageType:只支持:JPG、JPEG、PNG、GIF,这个四个格式。无所谓字符串大小写。如果为空,则根据文件扩展名自行推导。
ReadDpi:是否尝试自动从图像文件读取图像 dpi 信息。 通常,应将其设置为 true(请注意,并非所有图像都会提供此信息)。 但是,为了向后兼容该API的早期版本,它默认为 false。个人笔记注:并非所有图像都提供 dpi,就凭这一项,就应该设置为 false。
2.3 显示中文
func main() {
	pdf := gofpdf.New("P", "mm", "A4", "")
	pdf.AddPage()

	//将字体加载进来
	//AddUTF8Font("给字体起个别名", "", "fontPath")
	pdf.AddUTF8Font("simfang", "", "simfang.ttf")

	//使用这个字体
	//SetFont("字体的别名", "", size)
	pdf.SetFont("simfang", "", 20)
	pdf.Text(5, 10, "阿毛生信系统")

	if err := pdf.OutputFileAndClose("1.pdf"); err != nil {
		panic(err.Error())
	}
}
运行效果:
2.3.1 注意事项
1.AddUTF8Font() 暂不支持 .ttc 格式的字体!
2.经实践:在 AddUTF8Font 和 SetFont() 中,设置 styleStr 属性,好像对中文字体无效。正在寻找其他解决方案。
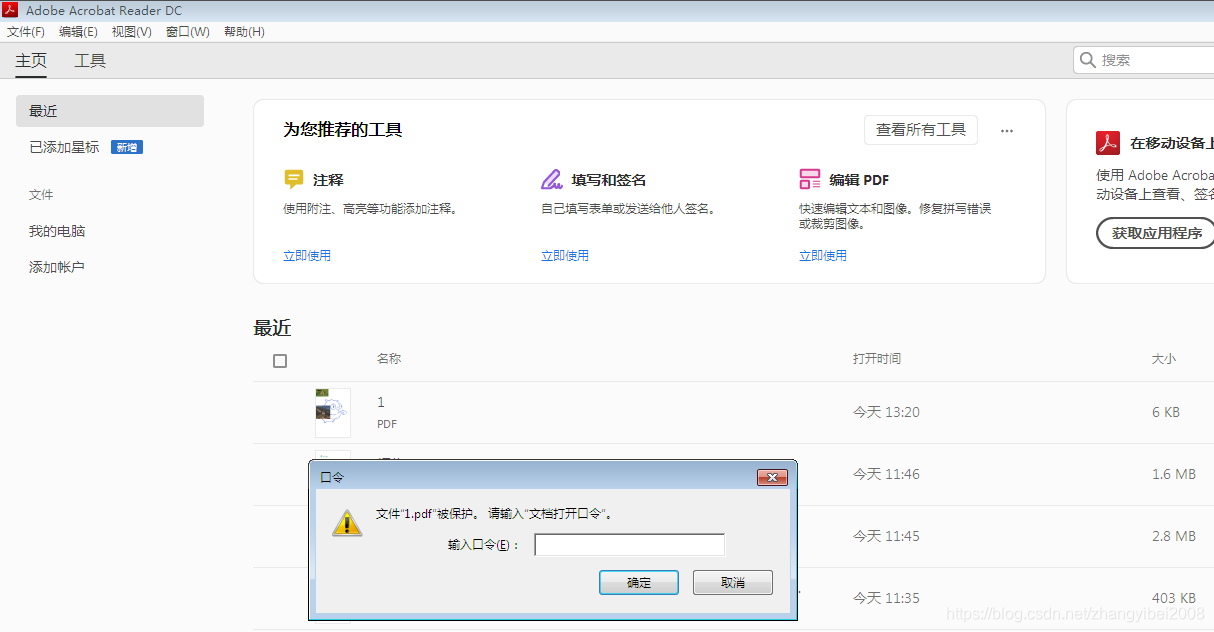
2.4 生成加密的 PDF
打开 PDF 时,会弹出密码框,要求用户输入该文档的密码。
func main() {
	pdf := gofpdf.New("P", "mm", "A4", "")
	pdf.AddPage()

	pdf.AddUTF8Font("simfang", "", "simfang.ttf")
	pdf.SetFont("simfang", "", 20)
	pdf.Text(5, 10, "阿毛生信系统")

	//CnProtectPrint: 表示该文档允许被打印
	pdf.SetProtection(gofpdf.CnProtectPrint, "abc123", "")

	if err := pdf.OutputFileAndClose("1.pdf"); err != nil {
		panic(err.Error())
	}
}
运行效果:
2.5 PDF 中增加链接、HTML
func main() {
pdf := gofpdf.New("P", "mm", "A4", "")
pdf.AddPage()
//先设置字体
pdf.SetFont("Helvetica", "", 20)
_, lineHt := pdf.GetFontSize() //获取 line height
fmt.Println(lineHt) //7.055555555555556
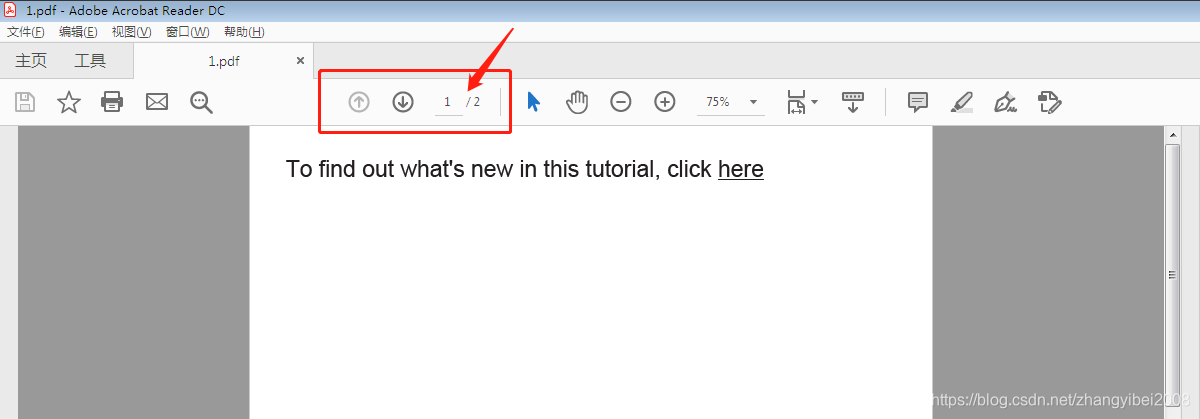
pdf.Write(lineHt, "To find out what's new in this tutorial, click ")
pdf.SetFont("", "U", 0)
link := pdf.AddLink()
pdf.WriteLinkID(lineHt, "here", link)
pdf.SetFont("", "", 0)
//Second page: image link and basic HTML with link
pdf.AddPage()
pdf.SetLink(link, 0, -1)
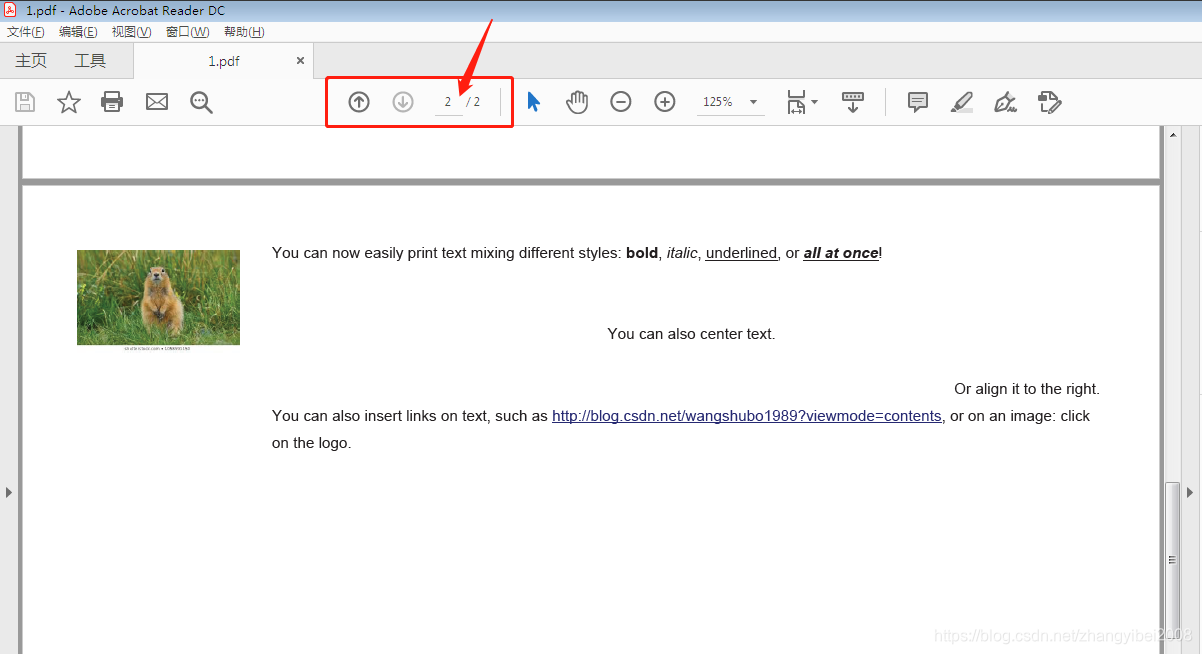
pdf.Image("./images/1.jpg", 10, 12, 30, 0, false, "", 0, "www.google.com/ncr")
pdf.SetLeftMargin(45)
pdf.SetFontSize(8)
htmlStr := `You can now easily print text mixing different styles: <b>bold</b>, ` +
`<i>italic</i>, <u>underlined</u>, or <b><i><u>all at once</u></i></b>!<br><br>` +
`<center>You can also center text.</center>` +
`<right>Or align it to the right.</right>` +
`You can also insert links on text, such as ` +
`<a href="http://www.fpdf.org">http://blog.csdn.net/wangshubo1989?viewmode=contents</a>, or on an image: click on the logo.`
html := pdf.HTMLBasicNew()
html.Write(5.0, htmlStr) //也可以手动指定 line height
if err := pdf.OutputFileAndClose("1.pdf"); err != nil {
panic(err.Error())
}
}
运行效果:
三、跟着官方文档的学习笔记
GitHub 仓中的这个文件:fpdf_test.go,演示了该库的所有功能。
3.1 生成页眉、页脚、分页
代码来源:fpdf_test.go#L310
func main() {
pdf := gofpdf.New("P", "mm", "A4", "")
pdf.SetTopMargin(30)
pdf.AddUTF8Font("simfang", "", "simfang.ttf")
pdf.SetFont("simfang", "", 12)
//设置页眉
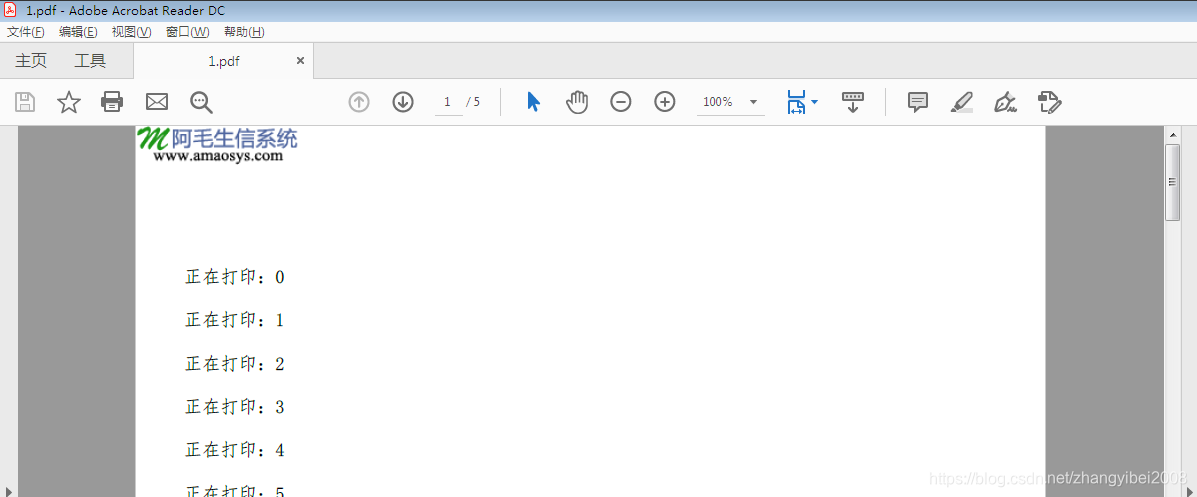
pdf.SetHeaderFuncMode(func() {
pdf.Image("./images/amaosys-logo.png", 0, 0, 0, 0, false, "", 0, "")
pdf.SetY(5)
pdf.Ln(10)
}, true)
//设置页脚
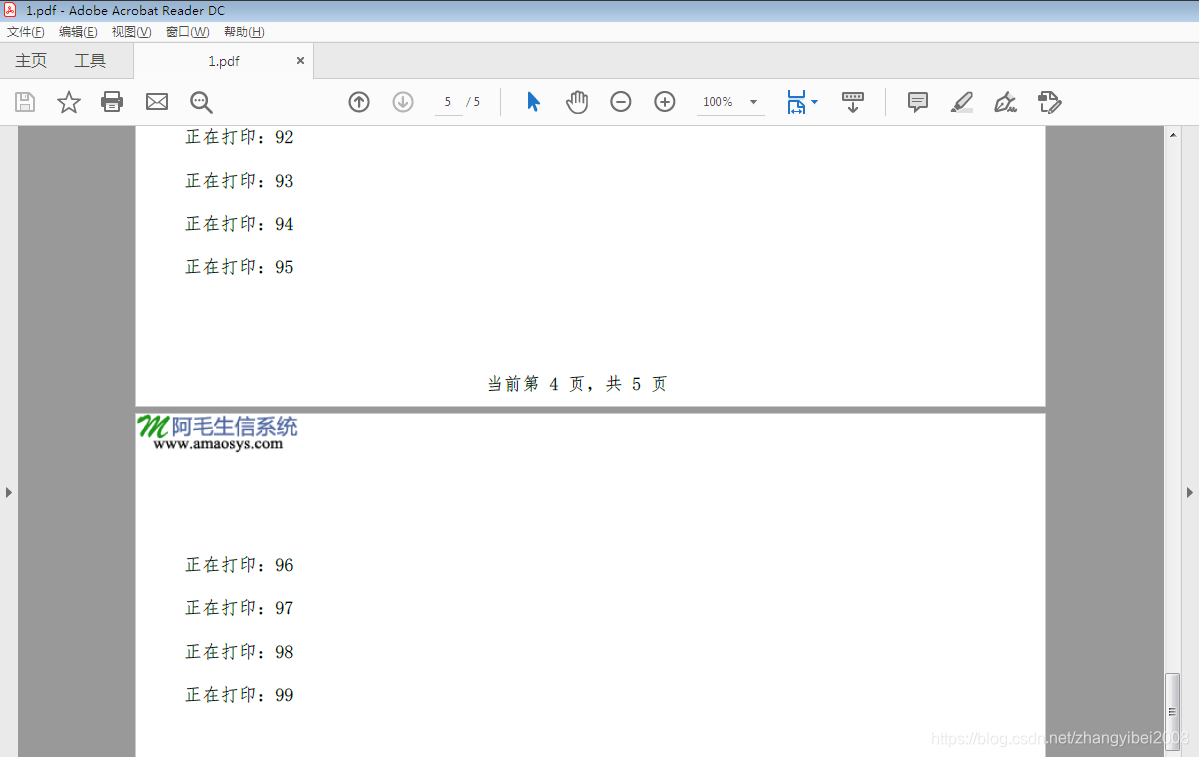
pdf.SetFooterFunc(func() {
pdf.SetY(-10)
pdf.CellFormat(
0, 10,
fmt.Sprintf("当前第 %d 页,共 {nb} 页", pdf.PageNo()), //字符串中的 {nb}。大括号是可以省的,但不建议这么做
"", 0, "C", false, 0, "",
)
})
//给个空字符串就会去替换默认的 "{nb}"。
//如果这里指定了特别的字符串,那么SetFooterFunc() 中的 "nb" 也必须换成这个特别的字符串
pdf.AliasNbPages("")
pdf.AddPage()
for j := 0; j < 100; j++ {
pdf.CellFormat(
0, 10, fmt.Sprintf("正在打印:%d", j),
"", 1, "", false, 0, "",
)
}
if err := pdf.OutputFileAndClose("1.pdf"); err != nil {
panic(err.Error())
}
}
运行效果:
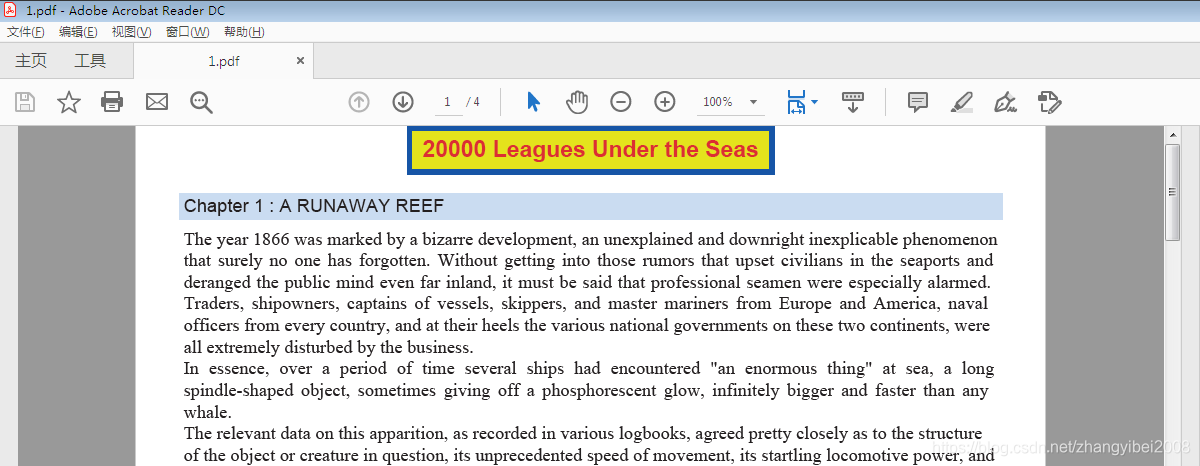
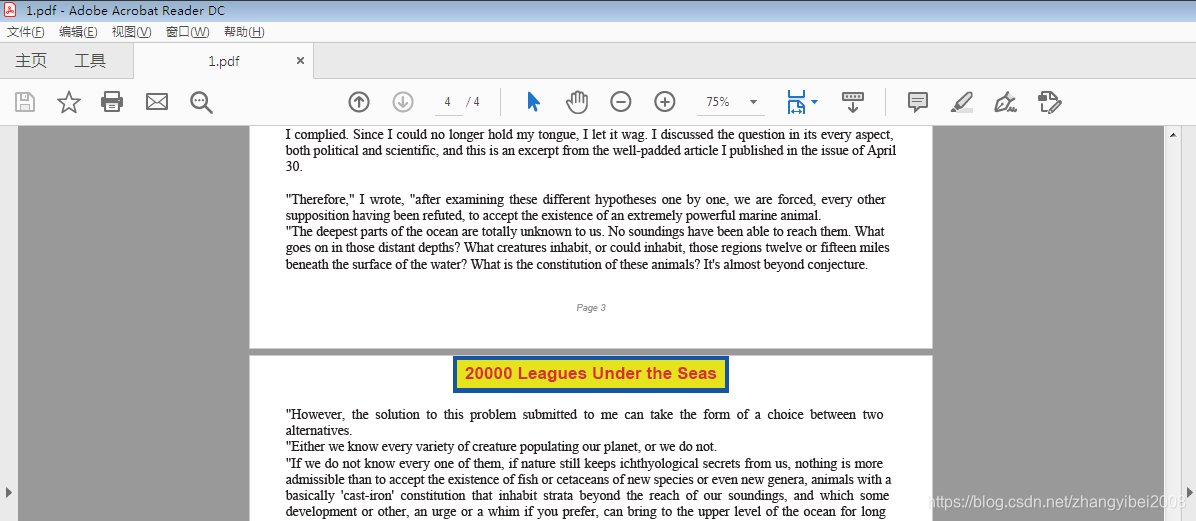
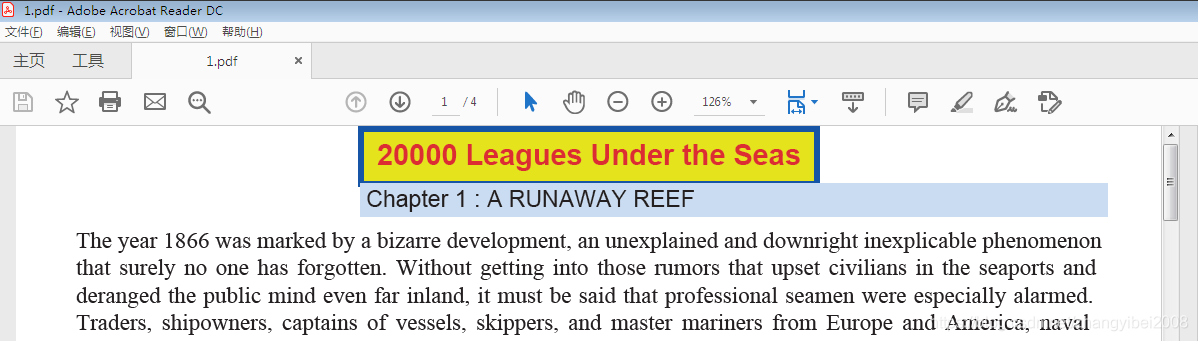
3.2 多行文字段落、行对齐、分页
代码来源:fpdf_test.go#L342
func main() {
	pdf := gofpdf.New("P", "mm", "A4", "")
	w, h := pdf.GetPageSize()
	fmt.Printf("pdf size, w:%.2f, h:%.2f", w, h) //pdf size, w:210.00, h:297.00

	titleStr := "20000 Leagues Under the Seas"
	pdf.SetTitle(titleStr, false)
	pdf.SetAuthor("Jules Verne", false)

	pdf.SetHeaderFuncMode(func() {
		pdf.SetFont("Arial", "B", 15)

		wd := pdf.GetStringWidth(titleStr) + 6
		pdf.SetY(0.6)            //先要设置 Y,然后再设置 X。否则,会导致 X 失效
		pdf.SetX((210 - wd) / 2) //水平居中的算法

		pdf.SetDrawColor(0, 80, 180)  //frame color
		pdf.SetFillColor(230, 230, 0) //background color
		pdf.SetTextColor(220, 50, 50) //text color

		pdf.SetLineWidth(1)

		pdf.CellFormat(wd, 10, titleStr, "1", 1, "CM", true, 0, "")
		//第 5 个参数,实际效果是:指定下一行的位置

		pdf.Ln(5)
	}, false)

	pdf.SetFooterFunc(func() {
		pdf.SetY(-15)
		pdf.SetFont("Arial", "I", 8)
		pdf.SetTextColor(128, 128, 128)
		pdf.CellFormat(
			0, 5,
			fmt.Sprintf("Page %d", pdf.PageNo()),
			"", 0, "C", false, 0, "",
		)
	})

	//标题
	chapterTitle := func(chapNum int, titleStr string) {
		pdf.SetFont("Arial", "", 12)
		pdf.SetFillColor(200, 220, 255) //background color
		pdf.CellFormat(
			0, 6,
			fmt.Sprintf("Chapter %d : %s", chapNum, titleStr),
			"", 1, "L", true, 0, "",
		)
		pdf.Ln(2)
	}

	//主体
	chapterBody := func(fileStr string) {
		textStr, err := ioutil.ReadFile(fileStr)
		if err != nil {
			pdf.SetError(err)
		}

		pdf.SetFont("Times", "", 12)

		//输出对齐文本
		pdf.MultiCell(0, 5, string(textStr), "", "", false)

		pdf.Ln(-1)

		pdf.SetFont("", "I", 0)
		pdf.Cell(0, 5, "(end of excerpt)")
	}

	//印刷每一页
	printChapter := func(chapNum int, titleStr, fileStr string) {
		pdf.AddPage()
		chapterTitle(chapNum, titleStr)
		chapterBody(fileStr)
	}

	printChapter(1, "A RUNAWAY REEF", "./text/20k_c1.txt")
	printChapter(2, "THE PROS AND CONS", "./text/20k_c2.txt")

	if err := pdf.OutputFileAndClose("1.pdf"); err != nil {
		panic(err.Error())
	}
}
运行效果:
3.2.1 小结1:CellFormat() 第 5 个参数 ln
pdf.CellFormat() 中的第 5 个参数 ln,其数据类型是 int。
3.2.1.1 先略微修改一下代码
为了让后续的演示看起来更加清晰,这里将 3.2 的代码中,SetHeaderFuncMode() 函数片段中的最后一行 pdf.Ln(1) 注释了,也就是不采取创建空行。(其他代码可改可不改)
pdf.SetHeaderFuncMode(func() {
		pdf.SetFont("Arial", "B", 15)

		wd := pdf.GetStringWidth(titleStr) + 6
		pdf.SetY(0.6)            //先要设置 Y,然后再设置 X。否则,会导致 X 失效
		pdf.SetX((210 - wd) / 2) //水平居中的算法

		pdf.SetDrawColor(0, 80, 180)  //frame color
		pdf.SetFillColor(230, 230, 0) //background color
		pdf.SetTextColor(220, 50, 50) //text color

		pdf.SetLineWidth(1)

		pdf.CellFormat(wd, 10, titleStr, "1", 2, "CM", true, 0, "")

		//pdf.Ln(1) //这行注释了
	}, false)
Ln(h float64) 表示:创建一个高度为 h 的空行。
3.2.1.2 官方文档对 ln 的描述
// ln indicates where the current position should go after the call. Possible
// values are 0 (to the right), 1 (to the beginning of the next line), and 2
// (below). Putting 1 is equivalent to putting 0 and calling Ln() just after.
Google 翻译:ln 指示呼叫后当前位置应该去哪里。 可能的值为 0(在右边),1(在下一行的开头)和 2(在下面)。放置 1 等同于放置 0,并在其后调用 Ln()。
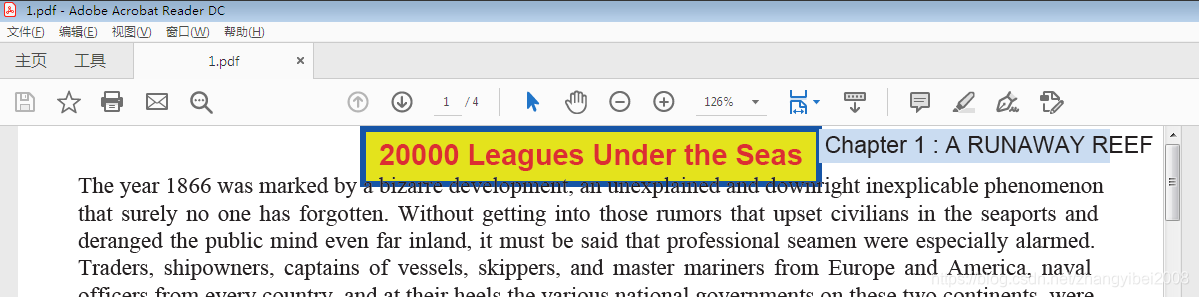
3.2.1.3 个人总结:这个参数就是指定下一行的位置
0:表示不换行,并紧跟在这个 Cell 的右边。
效果如下图所示:
1:发生换行,并在下一行的顶头位置。
效果如下图所示:
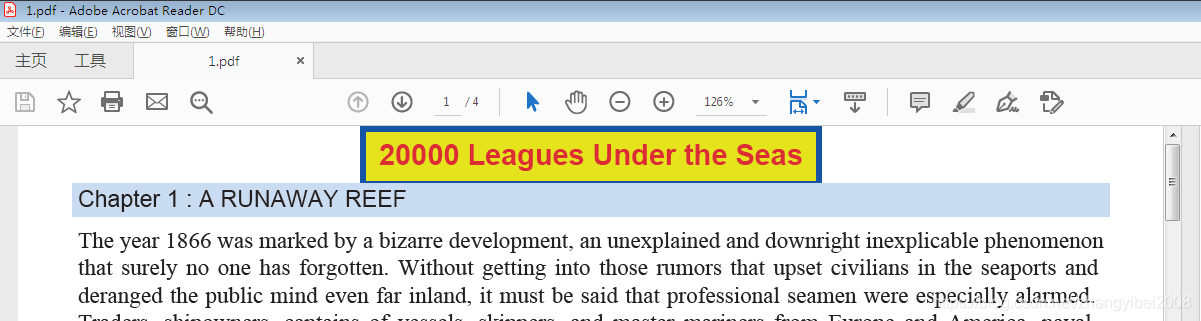
2:发生换行,但是会在这个 Cell 的下方。
效果如下图所示:
3.2.1.4 个人认为官方文档的一句话有错误
0、1、2,这三个值的最终效果,差别很大。从最终效果来看,我认为官方文档的这句话:
Putting 1 is equivalent to putting 0 and calling Ln() just after.
有错误,描述与实际效果不相同。
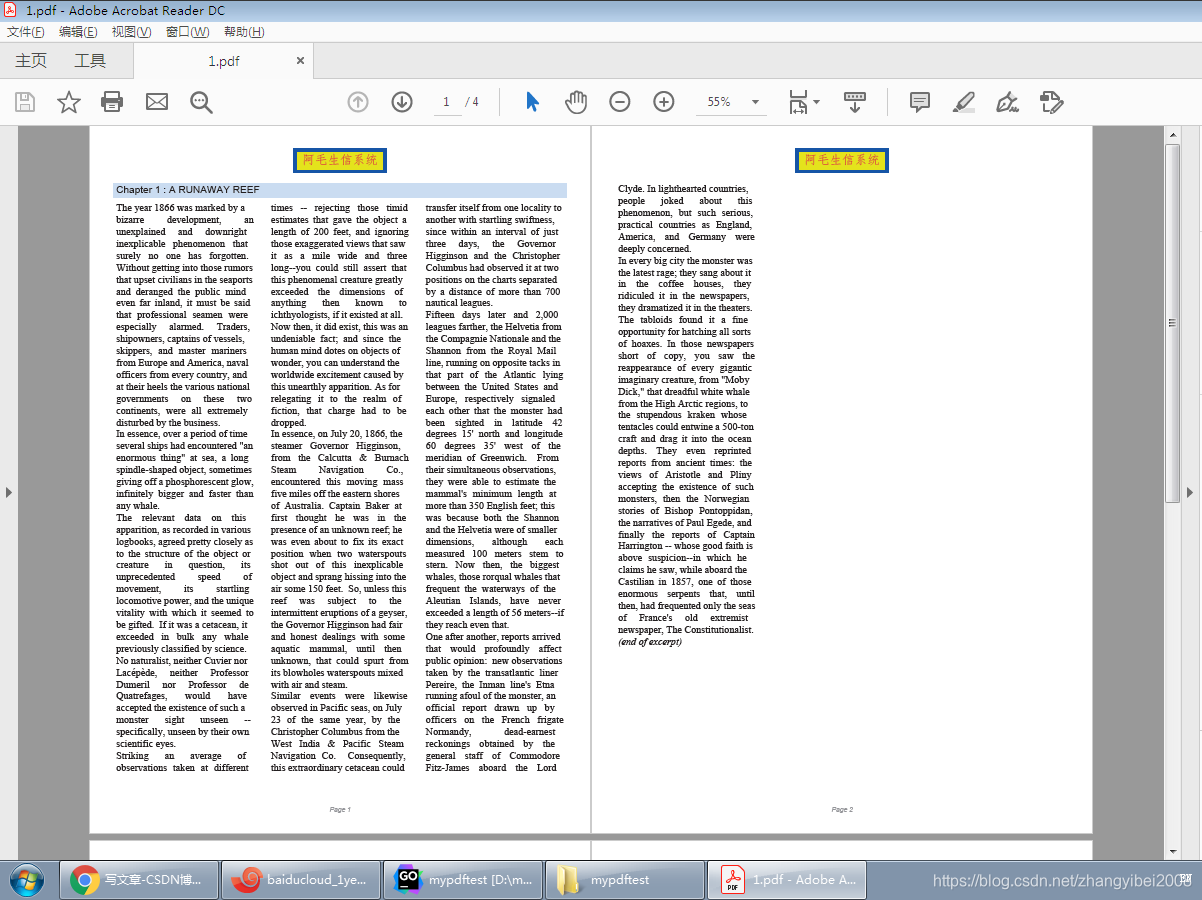
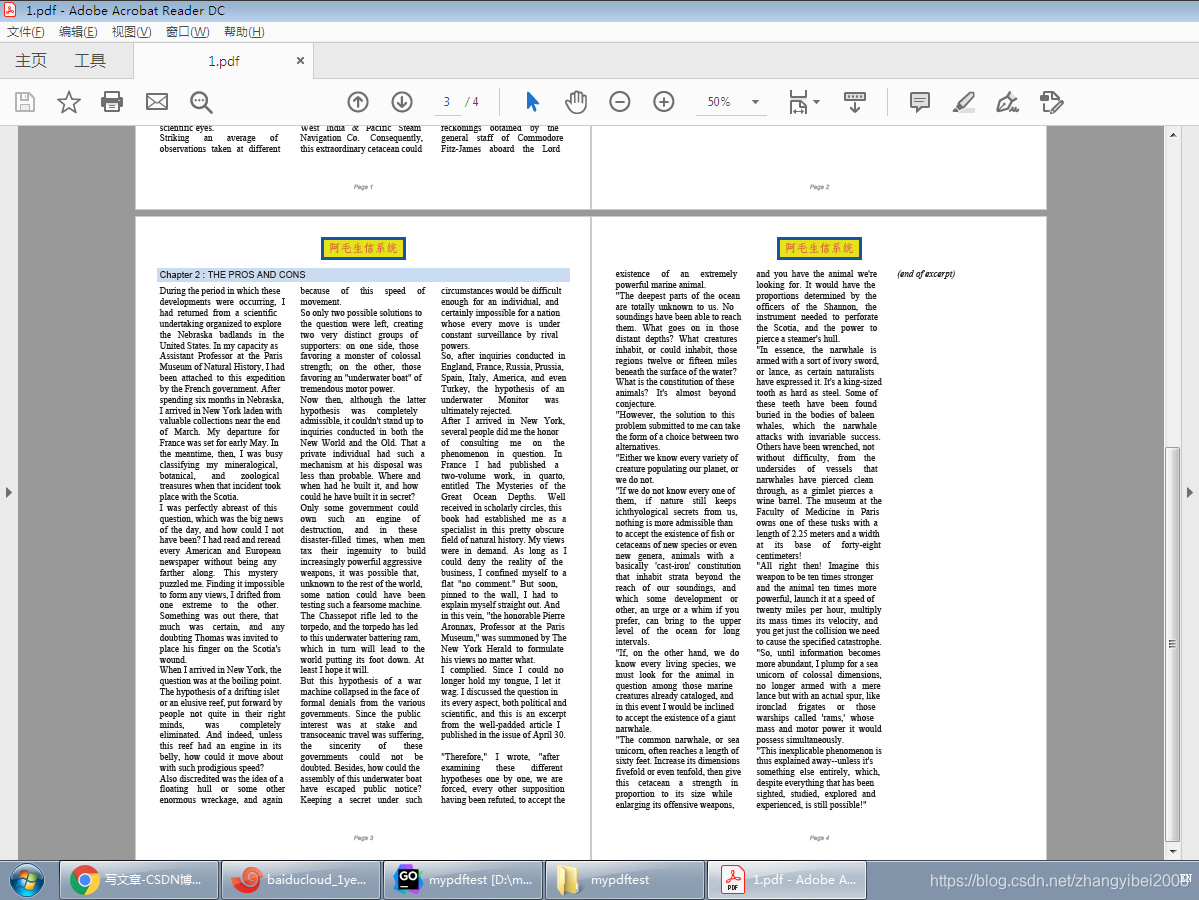
3.3 生成多列文档
代码来源:fpdf_test.go#L420
import (
	"fmt"
	"github.com/jung-kurt/gofpdf"
	"io/ioutil"
)

func main() {
	var y0 float64
	var crrntCol int

	pdf := gofpdf.New("P", "mm", "A4", "")
	pdf.SetDisplayMode("fullpage", "TwoColumnLeft")

	//添加“仿宋”字体
	pdf.AddUTF8Font("simfang", "", "simfang.ttf")

	pdf.SetAuthor("毛莹", true)
	titleStr := "阿毛生信系统"
	pdf.SetTitle(titleStr, true)

	setCol := func(col int) {
		//根据给定的列,设置位置
		crrntCol = col
		x := 10.0 + float64(col)*65.0
		pdf.SetLeftMargin(x)
		pdf.SetX(x)
	}

	//标题
	chapterTitle := func(chapNum int, titleStr string) {
		pdf.SetFont("Arial", "", 12)
		pdf.SetFillColor(200, 220, 255) //background color
		pdf.CellFormat(
			0, 6,
			fmt.Sprintf("Chapter %d : %s", chapNum, titleStr),
			"", 1, "L", true, 0, "",
		)
		pdf.Ln(2)
		y0 = pdf.GetY()
	}

	chapterBody := func(fileStr string) {
		txtBuf, err := ioutil.ReadFile(fileStr)
		if err != nil {
			panic(err)
		}

		pdf.SetFont("Times", "", 12)
		pdf.MultiCell(60, 5, string(txtBuf), "", "", false)

		pdf.SetFont("", "I", 0)
		pdf.Cell(0, 5, "(end of excerpt)")

		setCol(0) //返回第一列
	}

	printChapter := func(num int, titleStr, fileStr string) {
		pdf.AddPage()
		chapterTitle(num, titleStr)
		chapterBody(fileStr)
	}

	//判定是否需要分页
	pdf.SetAcceptPageBreakFunc(func() bool {
		if crrntCol < 2 {
			setCol(crrntCol + 1)
			pdf.SetY(y0)

			return false //继续保持在当前页
		}

		setCol(0)

		return true //执行分页
	})

	pdf.SetHeaderFunc(func() {
		pdf.SetFont("simfang", "", 15) //设置“仿宋”字体

		wd := pdf.GetStringWidth(titleStr) + 6
		pdf.SetX((210 - wd) / 2)

		pdf.SetDrawColor(0, 80, 180)  //frame color
		pdf.SetFillColor(230, 230, 0) //background color
		pdf.SetTextColor(220, 50, 50) //text color

		pdf.SetLineWidth(1)

		pdf.CellFormat(wd, 9, titleStr, "1", 1, "C", true, 0, "")

		pdf.Ln(5)

		y0 = pdf.GetY() //保存纵坐标
	})

	pdf.SetFooterFunc(func() {
		pdf.SetY(-15)
		pdf.SetFont("Arial", "I", 8)
		pdf.SetTextColor(128, 128, 128)
		pdf.CellFormat(
			0, 10,
			fmt.Sprintf("Page %d", pdf.PageNo()),
			"", 0, "C", false, 0, "",
		)
	})

	printChapter(1, "A RUNAWAY REEF", "./text/20k_c1.txt")
	printChapter(2, "THE PROS AND CONS", "./text/20k_c2.txt")

	if err := pdf.OutputFileAndClose("1.pdf"); err != nil {
		panic(err.Error())
	}
}
运行效果:
3.3.1 小结1:印刷每段文字之前,最好设置一下字体
在每一段 Cell() 或者 Text() 文字之前,都要调用 pdf.SetFont() 设置好字体,不然就会沿用上一个已设置的字体。
如果文字内容没有任何复合字符,那么用默认的字体是没有问题。但如果出现了复合字符,那么就要提前设置好一个能够支持该复合字符的字体,否则就是乱码。
比如,我有一段文字内容,里面既有中文也有英文。此时,就必须要设置好一个能够识别中文字符的字体。
演示,将上例代码中的 chapterBody 函数修改成如下(其他代码可改可不改):
chapterBody := func(fileStr string) {
		txtBuf, err := ioutil.ReadFile(fileStr)
		if err != nil {
			panic(err)
		}

		//统计 unicode 字符的数量
		runeLen := utf8.RuneCount(txtBuf)

		//把最终的 unicode 字符放入这个 []rune
		result := make([]rune, runeLen)

		//读取到的内容是 []byte 类型,但内容中有中文,需要用 utf8.DecodeRune() 转换为 unicode 字符
		for i := 0; runeLen > 0; i++ {
			r, size := utf8.DecodeRune(txtBuf)
			result[i] = r
			txtBuf = txtBuf[size:]
			runeLen--
		}

		//可以打印到控制台,看一下效果
		fmt.Println(result)
		fmt.Println(string(result))

		pdf.SetFont("simfang", "", 14)

		pdf.MultiCell(90, 5, string(result), "", "", false)
		pdf.Cell(0, 5, "(本文已结束)")

		setCol(0) //返回第一列
	}
运行效果:
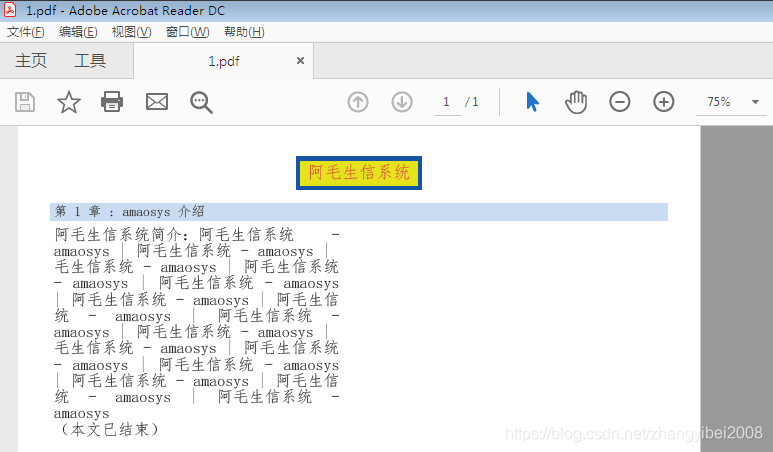
备注:如果内容中有日文、德文等复合字符,就需要去找到对应的字体去支持它们。字体不支持这个复合字符,也会变成乱码。
3.3.2 小结2:建议将所有 isUTF8 属性,赋值为 true
3.3.2.1 isUTF8 参数简介
有很多涉及到设置文档属性的方法,例如:
func (f *Fpdf) SetProducer(producerStr string, isUTF8 bool)
func (f *Fpdf) SetTitle(titleStr string, isUTF8 bool)
func (f *Fpdf) SetSubject(subjectStr string, isUTF8 bool)
func (f *Fpdf) SetAuthor(authorStr string, isUTF8 bool)
func (f *Fpdf) SetKeywords(keywordsStr string, isUTF8 bool)
func (f *Fpdf) SetCreator(creatorStr string, isUTF8 bool)
func (f *Fpdf) addFont(familyStr, styleStr, fileStr string, isUTF8 bool)
这些方法中,都有一个 isUTF8 参数,其类型为 bool。该参数指定了是否以 UTF-8 编码来处理字符串。
- 设置为
true时:
字符串将以UTF-8编码来处理。 - 设置为
false时:
字符串将以ISO-8859-1编码来处理。
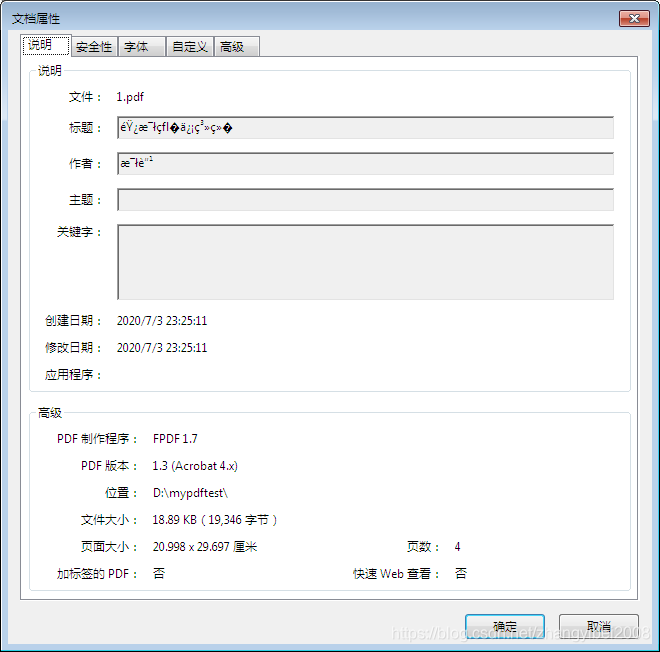
3.3.2.2 演示两者的不同结果
我的系统是 Windows,并且已安装了 Adobe Reader。使用 Adobe Reader 打开 PDF 文件,按 Ctrl + D 组合键,查看此 PDF 文件的属性。
- 设置为
true时
能够正常显示中文字:

- 设置为
false时
中文就变成了乱码:
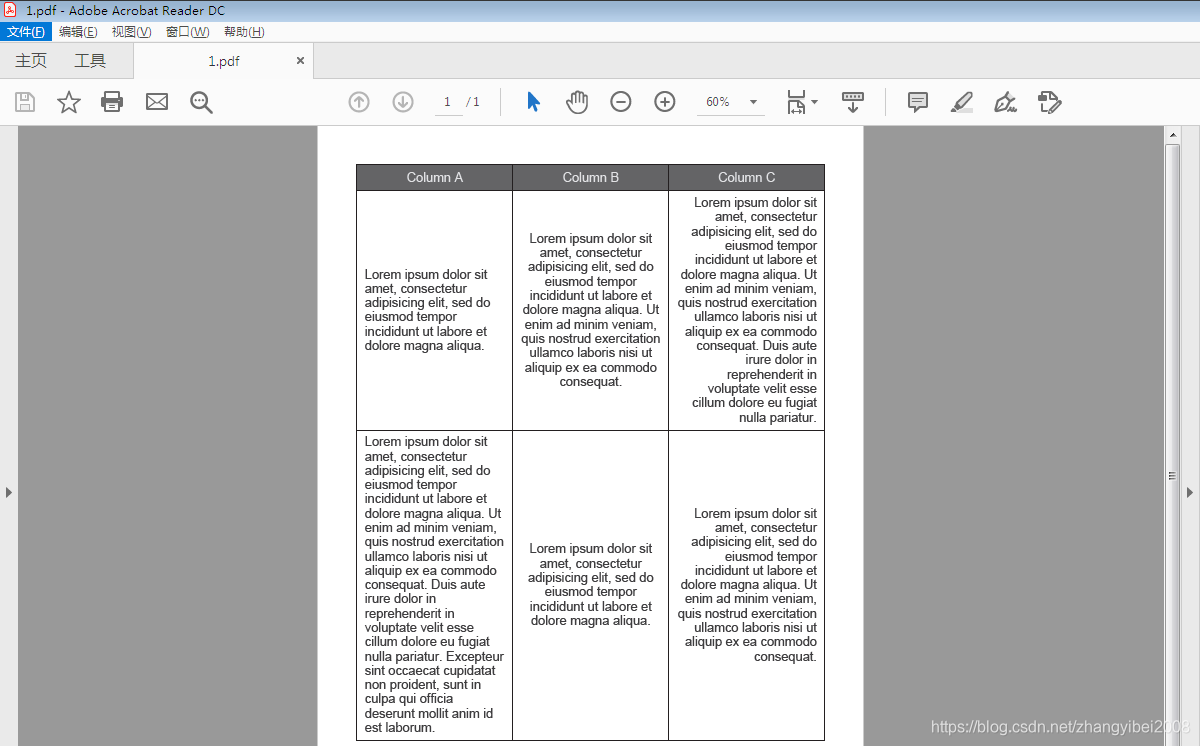
3.4 制作表格
代码来源:fpdf_test.go#L525
func loremList() []string {
	return []string{
		"Lorem ipsum dolor sit amet, consectetur adipisicing elit, sed do eiusmod " +
			"tempor incididunt ut labore et dolore magna aliqua.",
		"Ut enim ad minim veniam, quis nostrud exercitation ullamco laboris nisi ut " +
			"aliquip ex ea commodo consequat.",
		"Duis aute irure dolor in reprehenderit in voluptate velit esse cillum " +
			"dolore eu fugiat nulla pariatur.",
		"Excepteur sint occaecat cupidatat non proident, sunt in culpa qui " +
			"officia deserunt mollit anim id est laborum.",
	}
}

func main() {
	const (
		colCount = 3
		colWd    = 60.0
		marginH  = 15.0
		lineHt   = 5.5
		cellGap  = 2.0
	)

	type cellType struct {
		str  string
		list [][]byte
		ht   float64
	}

	var (
		cellList [colCount]cellType
		cell     cellType
	)

	pdf := gofpdf.New("P", "mm", "A4", "") // 210 x 297

	header := [colCount]string{"Column A", "Column B", "Column C"}
	alignList := [colCount]string{"L", "C", "R"}
	strList := loremList()

	pdf.SetMargins(marginH, 15, marginH)
	pdf.SetFont("Arial", "", 14)
	pdf.AddPage()

	//设置表格第一行的样式(也就是在设置 <thead> 标签的样式)
	pdf.SetTextColor(224, 224, 224)
	pdf.SetFillColor(64, 64, 64)
	for colJ := 0; colJ < colCount; colJ++ {
		pdf.CellFormat(colWd, 10, header[colJ], "1", 0, "CM", true, 0, "")
	}
	pdf.Ln(-1)

	//设置每一行
	pdf.SetTextColor(24, 24, 24)
	pdf.SetFillColor(255, 255, 255)
	y := pdf.GetY()
	count := 0
	for rowJ := 0; rowJ < 2; rowJ++ {
		maxHt := lineHt

		//计算单元格的高度
		for colJ := 0; colJ < colCount; colJ++ {
			count++
			if count > len(strList) {
				count = 1
			}
			cell.str = strings.Join(strList[:count], " ")
			cell.list = pdf.SplitLines([]byte(cell.str), colWd-cellGap*2)
			cell.ht = float64(len(cell.list)) * lineHt
			if cell.ht > maxHt {
				maxHt = cell.ht
			}
			cellList[colJ] = cell
		}

		//循环渲染每个单元格
		x := marginH
		for colJ := 0; colJ < colCount; colJ++ {
			pdf.Rect(x, y, colWd, maxHt+cellGap*2, "D")
			cell = cellList[colJ]
			cellY := y + cellGap + (maxHt-cell.ht)/2
			for splitJ := 0; splitJ < len(cell.list); splitJ++ {
				pdf.SetXY(x+cellGap, cellY)
				pdf.CellFormat(colWd-cellGap*2, lineHt, string(cell.list[splitJ]), "", 0, alignList[colJ], false, 0, "")
				cellY += lineHt
			}
			x += colWd
		}
		y += maxHt + cellGap*2
	}

	if err := pdf.OutputFileAndClose("1.pdf"); err != nil {
		panic(err.Error())
	}
}
运行效果:
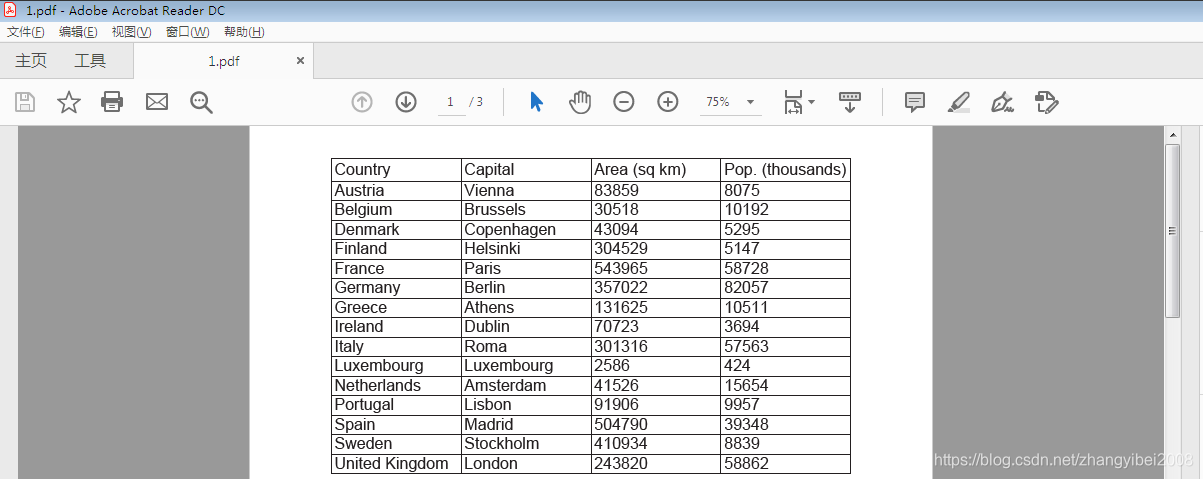
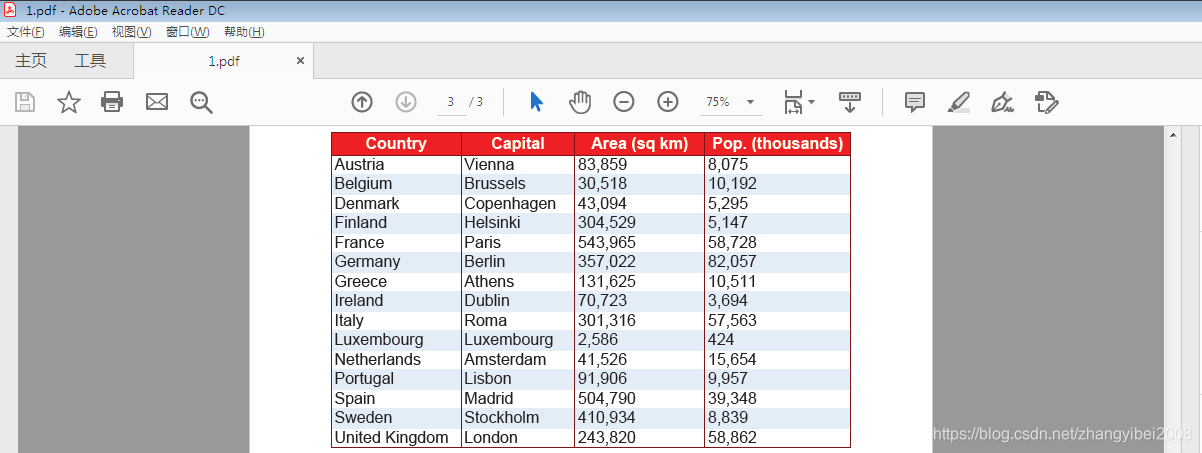
3.5 设置表格样式
代码来源:fpdf_test.go#L606
//strDelimit converts 'ABCDEFG' to, for example, 'A,BCD,EFG'
func strDelimit(str string, sepstr string, sepcount int) string {
	pos := len(str) - sepcount
	for pos > 0 {
		str = str[:pos] + sepstr + str[pos:]
		pos = pos - sepcount
	}
	return str
}

func main() {
	pdf := gofpdf.New("P", "mm", "A4", "") // 210 x 297

	type countryType struct {
		nameStr, capitalStr, areaStr, popStr string
	}
	countryList := make([]countryType, 0, 8)
	header := []string{"Country", "Capital", "Area (sq km)", "Pop. (thousands)"}

	loadData := func(fileStr string) {
		fl, err := os.Open(fileStr)
		if err != nil {
			panic(err)
		}

		defer fl.Close()

		scanner := bufio.NewScanner(fl)
		var c countryType
		for scanner.Scan() {
			//Austria;Vienna;83859;8075
			lineStr := scanner.Text()
			list := strings.Split(lineStr, ";")

			if len(list) == 4 {
				c.nameStr = list[0]
				c.capitalStr = list[1]
				c.areaStr = list[2]
				c.popStr = list[3]
				countryList = append(countryList, c)
			} else {
				fmt.Printf("error tokenizing %s\n", lineStr)
			}
		}

		if len(countryList) == 0 {
			fmt.Printf("error loading data from %s\n", fileStr)
		}
	}

	//简单的表格
	basicTable := func() {
		left := (210.0 - 4*40) / 2
		pdf.SetX(left)

		for _, str := range header {
			pdf.CellFormat(40, 7, str, "1", 0, "", false, 0, "")
		}

		pdf.Ln(-1)

		for _, c := range countryList {
			pdf.SetX(left)
			pdf.CellFormat(40, 6, c.nameStr, "1", 0, "", false, 0, "")
			pdf.CellFormat(40, 6, c.capitalStr, "1", 0, "", false, 0, "")
			pdf.CellFormat(40, 6, c.areaStr, "1", 0, "", false, 0, "")
			pdf.CellFormat(40, 6, c.popStr, "1", 0, "", false, 0, "")
			pdf.Ln(-1)
		}
	}

	//Better table
	improvedTable := func() {
		w := []float64{40.0, 35.0, 40.0, 45.0} //列宽
		wSum := 0.0

		for _, v := range w {
			wSum += v
		}

		left := (210 - wSum) / 2
		pdf.SetX(left)

		for j, str := range header {
			pdf.CellFormat(w[j], 7, str, "1", 0, "C", false, 0, "")
		}

		pdf.Ln(-1)

		for _, c := range countryList {
			pdf.SetX(left)
			pdf.CellFormat(w[0], 6, c.nameStr, "LR", 0, "", false, 0, "")
			pdf.CellFormat(w[1], 6, c.capitalStr, "LR", 0, "", false, 0, "")
			pdf.CellFormat(w[2], 6, strDelimit(c.areaStr, ",", 3), "LR", 0, "", false, 0, "")
			pdf.CellFormat(w[3], 6, strDelimit(c.popStr, ",", 3), "LR", 0, "", false, 0, "")
			pdf.Ln(-1)
		}

		pdf.SetX(left)
		pdf.CellFormat(wSum, 0, "", "T", 0, "", false, 0, "")
	}

	//Colored table
	fancyTable := func() {
		pdf.SetFillColor(255, 0, 0)
		pdf.SetTextColor(255, 255, 255)
		pdf.SetDrawColor(128, 0, 0)
		pdf.SetLineWidth(.3)
		pdf.SetFont("", "B", 0)

		w := []float64{40, 35, 40, 45}
		wSum := 0.0

		for _, v := range w {
			wSum += v
		}

		left := (210 - wSum) / 2
		pdf.SetX(left)

		for j, str := range header {
			pdf.CellFormat(w[j], 7, str, "1", 0, "C", true, 0, "")
		}

		pdf.Ln(-1)

		pdf.SetFillColor(224, 235, 255)
		pdf.SetTextColor(0, 0, 0)
		pdf.SetFont("", "", 0)

		fill := false
		for _, c := range countryList {
			pdf.SetX(left)
			pdf.CellFormat(w[0], 6, c.nameStr, "LR", 0, "", fill, 0, "")
			pdf.CellFormat(w[1], 6, c.capitalStr, "LR", 0, "", fill, 0, "")
			pdf.CellFormat(w[2], 6, strDelimit(c.areaStr, ",", 3), "LR", 0, "", fill, 0, "")
			pdf.CellFormat(w[3], 6, strDelimit(c.popStr, ",", 3), "LR", 0, "", fill, 0, "")
			pdf.Ln(-1)
			fill = !fill
		}
		pdf.SetX(left)
		pdf.CellFormat(wSum, 0, "", "T", 0, "", false, 0, "")
	}

	loadData("./text/countries.txt")
	pdf.SetFont("Arial", "", 14)

	pdf.AddPage()
	basicTable()

	pdf.AddPage()
	improvedTable()

	pdf.AddPage()
	fancyTable()

	if err := pdf.OutputFileAndClose("1.pdf"); err != nil {
		panic(err.Error())
	}
}
运行效果:

3.6 添加链接、简单的 HTML
代码来源:fpdf_test.go#L744
func main() {
	pdf := gofpdf.New("P", "mm", "A4", "") // 210 x 297

	pdf.AddPage()

	//点击链接,跳转到当前文档中的位置
	pdf.SetFont("Helvetica", "", 20)
	_, lineHt := pdf.GetFontSize()
	pdf.Write(lineHt, "To find out what's new in this tutorial, click ")

	pdf.SetFont("", "U", 0)
	link := pdf.AddLink() //添加链接
	pdf.WriteLinkID(lineHt, "here", link) //注册这个链接

	//添加图片链接、基础的 HTML <a> 标签链接
	pdf.AddPage()
	pdf.SetLink(link, 0, -1) //使用刚才已注册好的链接
	pdf.Image("./images/logo.png", 10, 12, 30, 0, false, "", 0, "http://www.fpdf.org")
	pdf.SetLeftMargin(45)
	pdf.SetFontSize(14)
	_, lineHt = pdf.GetFontSize()
	htmlStr := `You can now easily print text mixing different styles: <b>bold</b>, ` +
		`<i>italic</i>, <u>underlined</u>, or <b><i><u>all at once</u></i></b>!<br><br>` +
		`<center>You can also center text.</center>` +
		`<right>Or align it to the right.</right>` +
		`You can also insert links on text, such as ` +
		`<a href="https://github.com/jung-kurt/gofpdf/blob/master/fpdf_test.go">gofpdf github link.</a>, or on an image: click on the logo.`
	html := pdf.HTMLBasicNew()
	html.Write(lineHt, htmlStr)

	if err := pdf.OutputFileAndClose("1.pdf"); err != nil {
		panic(err.Error())
	}
}
运行结果:

鼠标移动移动到 “here” 处,指针图标会变成手型图标,点击后会发生跳转。如下画面:
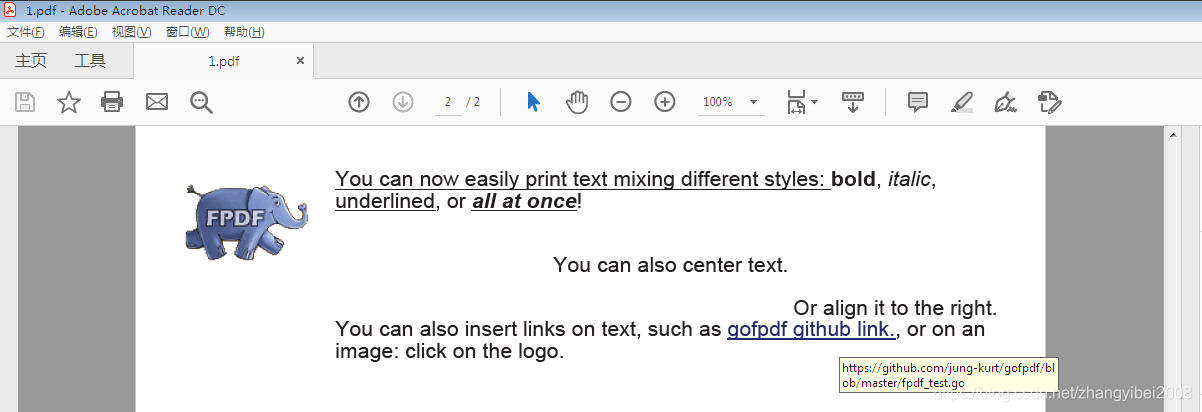
点击大象图案,或者 “gofpdf github link.”,都可以在浏览器中打开这个网站。
3.7 使用第三方字体
代码来源:fpdf_test.go#L778
func main() {
pdf := gofpdf.New("P", "mm", "A4", "") // 210 x 297
pdf.AddFont("Calligrapher", "", "./font/calligra.json")
pdf.AddPage()
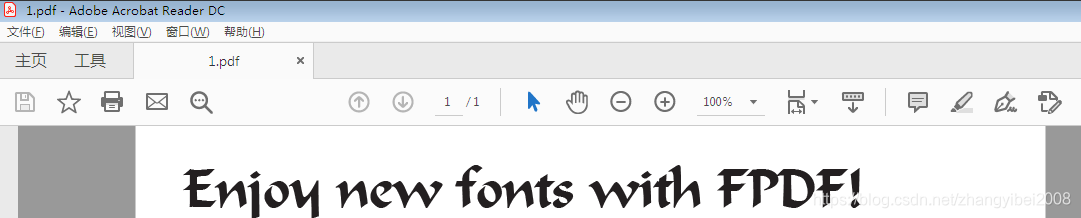
pdf.SetFont("Calligrapher", "", 35)
pdf.Cell(0, 10, "Enjoy new fonts with FPDF!")
if err := pdf.OutputFileAndClose("1.pdf"); err != nil {
panic(err)
}
}
运行效果:
3.7.1 注意事项1:json 文件中 calligra.z 的路径问题
3.7.1.1 目录结构
这是我的目录结构:
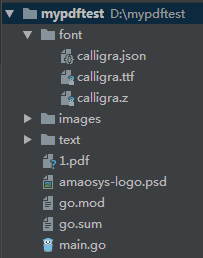
官方的示例代码中,加载的是 calligra.json 文件,然后再去映射各个字体。
在这个 json 文件中,大概第 1250 个字符开始。有一个 File 字段,指定了另一个依赖文件的路径,其原本的值是 "calligra.z"。
3.7.1.2 修改
需要将这个值改一下,改成:参照 main.go 文件的路径。最终结果如下:

3.7.1.3 路径是参照 main.go 文件来写的
calligra.json 文件存放在项目根目录的 font 文件夹中,main.go 文件启动整个程序。那么以 main.go 文件作为参照物来说:calligra.json 它存放的路径是在 main.go 目录下的 font 文件夹中。
main.go 文件的路径是 ./main.go,参照着这个路径来写 calligra.json 文件的路径,就是 ./font/calligra.z。(相对路径与绝对路径,均参照这个 main.go 文件)。
官方示例中,也是将这个 json 文件放置在项目根目录下的 font 文件夹中。但是,我在实践的时候,报了这个异常:panic: open calligra.z: The system cannot find the file specified.,无法找到这个文件。
后来点进 calligra.json 文件中,将 File 的值改成了上图中的路径值,就能成功了。改成绝对路径也可以:/font/calligra.z 。总之一句话:一切路径参照这个 main.go 文件的路径。
3.8 使用 Write() 系列函数设置对齐文本
代码来源:fpdf_test.go#L792
func main() {
pdf := gofpdf.New("P", "mm", "A4", "") // 210 x 297
pdf.SetLeftMargin(50.0)
pdf.SetRightMargin(50.0)
pdf.AddPage()
pdf.SetFont("Helvetica", "", 12)
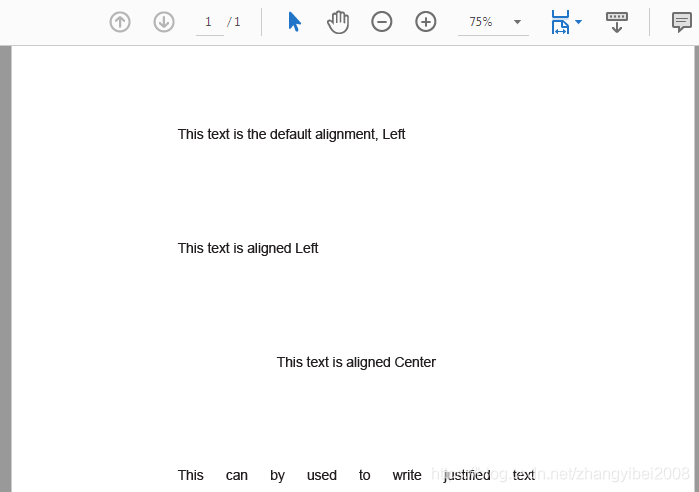
pdf.WriteAligned(0, 35, "This text is the default alignment, Left", "")
pdf.Ln(35)
pdf.WriteAligned(0, 35, "This text is aligned Left", "L")
pdf.Ln(35)
pdf.WriteAligned(0, 35, "This text is aligned Center", "C")
pdf.Ln(35)
line := "This can by used to write justified text"
leftMargin, _, rightMargin, _ := pdf.GetMargins()
pageWidth, _ := pdf.GetPageSize()
pageWidth -= leftMargin + rightMargin
pdf.SetWordSpacing((pageWidth - pdf.GetStringWidth(line)) / float64(strings.Count(line, " ")))
pdf.WriteAligned(pageWidth, 35, line, "L")
if err := pdf.OutputFileAndClose("1.pdf"); err != nil {
panic(err)
}
}
运行效果:
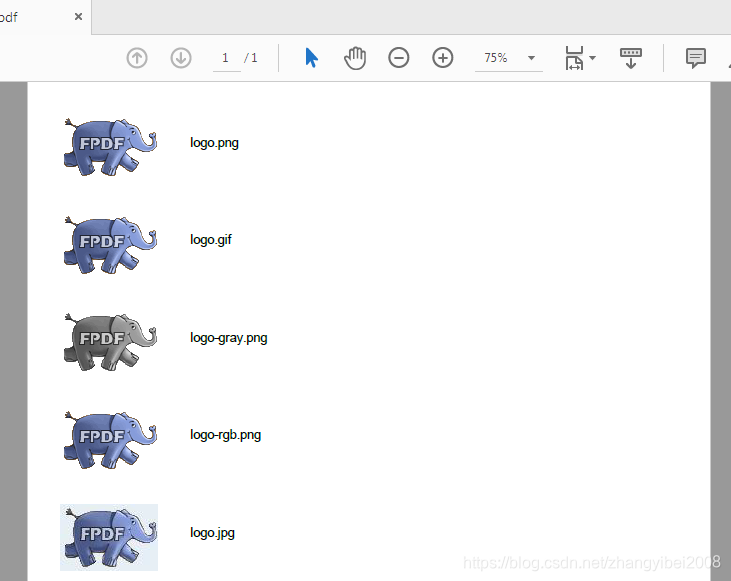
3.9 文档中插入多张图片
代码来源:fpdf_test.go#L820
func main() {
	pdf := gofpdf.New("P", "mm", "A4", "") // 210 x 297

	pdf.AddPage()
	pdf.SetFont("Arial", "", 11)

	pdf.Image("./images/logo.png", 10, 10, 30, 0, false, "", 0, "")
	pdf.Text(50, 20, "logo.png")

	pdf.Image("./images/logo.gif", 10, 40, 30, 0, false, "", 0, "")
	pdf.Text(50, 50, "logo.gif")

	pdf.Image("./images/logo-gray.png", 10, 70, 30, 0, false, "", 0, "")
	pdf.Text(50, 80, "logo-gray.png")

	pdf.Image("./images/logo-rgb.png", 10, 100, 30, 0, false, "", 0, "")
	pdf.Text(50, 110, "logo-rgb.png")

	pdf.Image("./images/logo.jpg", 10, 130, 30, 0, false, "", 0, "")
	pdf.Text(50, 140, "logo.jpg")

	if err := pdf.OutputFileAndClose("1.pdf"); err != nil {
		panic(err)
	}
}
运行效果:
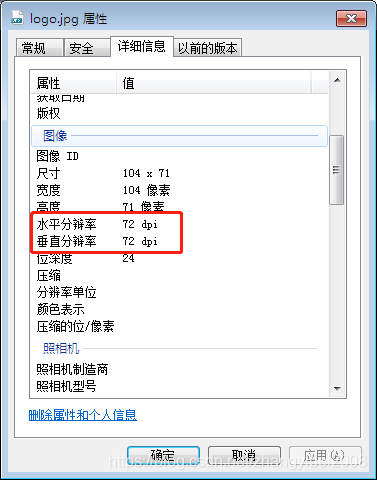
3.9.1 最终图片的呈现计算方式是以 dpi 为计量单位
pdf 的内容都是印刷的方式写入到文件中,所以,所有的图片都是以 dpi 为计量单位。为的就是方便后续渲染、打印。
dpi 的描述可以参考这篇文章:link
3.9.1.1 影响最终 dpi 渲染的 3 个因素
1.图片的原始 dpi 数值。
2.Image() 函数中 w 和 h 设置的 dpi 数值。
3.pdf 设置的页面单位(mm / cm)。
最终的 dpi 渲染值,是综合这 3 个因素而得出。
3.9.1.2 Image() 函数中,w 和 h 参数的描述
如果 w 和 h 均为 0,则图像以 96 dpi 渲染。
如果 w 或 h 为零,则将从另一个维度计算得出,以便保持宽高比。
如果 w 和/或 h 为 -1,则将从 ImageInfoType 对象读取该尺寸的 dpi。PNG文件可以包含 dpi 信息(如果存在的话),该信息将填充在 ImageInfoType 对象中,并用于“宽度”,“高度”和“范围”计算中。否则,可以使用 SetDpi() 函数将 dpi 从默认值 72 更改。
如果 w 和 h 为其他任何负值,则它们的绝对值表示其 dpi 范围。
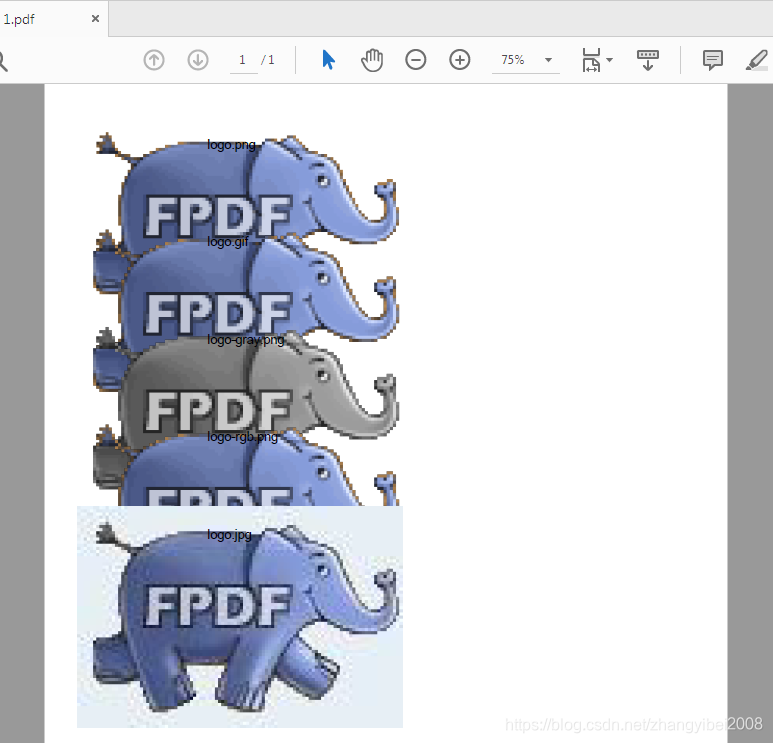
3.9.1.3 图片像素不变,变的只是 dpi 渲染方式
图片渲染方式是由最终的 dpi 数值所决定。
首先查看一下一张图片的属性:
pdf 页面设置单位为 mm,将 Image() 中的 w 参数设置为 100 后,得到下图效果:
使用 Adobe Reader 打开这个 pdf 文件,选中一张图片,复制它。
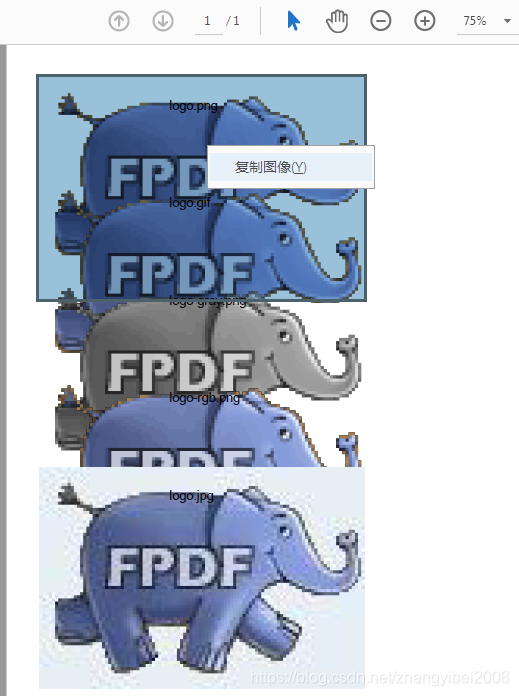
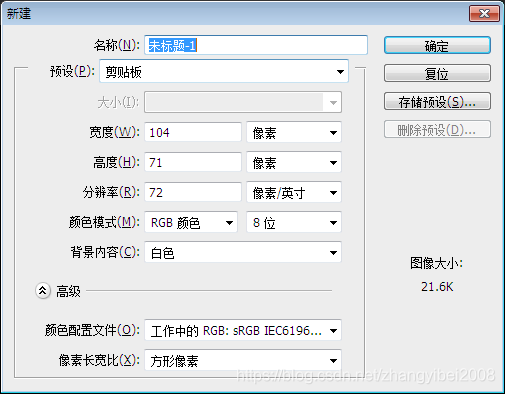
打开 Photoshop,然后 “新建” 一个新的 PS 文件。PS 它会读取剪切板中的内容,如果剪切板中的内容是图片,那么新建一个新的 PS 文件时,它会自动将像素调整为剪切板中图片的像素大小。
可以看到,尽管在 pdf 中,这张图片看起来很大,但图片像素根本没有发生变化:
因为在 Image() 函数中,设置了 w 的值为 100。所以,渲染 dpi 的值发生了改变。最终印刷 pdf 的时候,图片就根据了这个变大的 dpi 值进行渲染。
3.10 影响图像水平放置的参数
代码来源:fpdf_test.go#L843
func main() {
var opt gofpdf.ImageOptions
pdf := gofpdf.New("P", "mm", "A4", "") // 210 x 297
pdf.AddPage()
pdf.SetFont("Arial", "", 11)
opt.ImageType = "png"
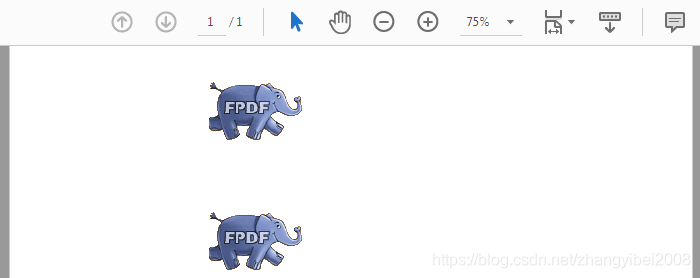
pdf.ImageOptions("./images/logo.png", 10, 10, 30, 0, false, opt, 0, "")
opt.AllowNegativePosition = true
pdf.ImageOptions("./images/logo.png", -10, 50, 30, 0, false, opt, 0, "")
if err := pdf.OutputFileAndClose("1.pdf"); err != nil {
panic(err)
}
}
运行效果:

3.10.1 AllowNegativePosition 属性的说明
AllowNegativePosition 这个属性隶属于 gofpdf.ImageOptions 结构体中。
官方文档对这个属性的描述:
AllowNegativePosition can be set to true in order to prevent the default
coercion of negative x values to the current x position.
Google 翻译后:
可以将 AllowNegativePosition 设置为 true,以防止将负 x 值默认强制转换为当前 x 位置。
实际作用:
是否允许负 x 值生效。指定这个属性为 true 后,如果图片的横坐标设置了负数,那么这张就可以溢出到横坐标(如 3.10 代码的运行结果,第二张大象图片,就是溢出了横坐标)。
3.10.2 两个 ImageOptions 字面量不要搞错了
将图片印刷进 pdf 文件的是:pdf.ImageOptions() 方法。设置图片选项的是:gofpdf.ImageOptions 属性。
3.10.2.1 两个字面量的区别
3.10.2.1.1 用途
pdf.ImageOptions() 方法是将图片印刷进 pdf 文件中,起到的是渲染的作用,真正实现让人在 pdf 中能够看到这张图片。
gofpdf.ImageOptions 属性是设置图片的一些选项。它有 3 个属性:图片格式、DPI 选项、是否允许负 x 值生效。
3.10.2.1.2 pdf.ImageOptions() 是方法
方法的本质就是:一个函数关联给了一个字面量。ImageOptions() 方法是 gofpdf.Fpdf 这个结构体的关联函数。
3.10.2.1.3 gofpdf.ImageOptions 是属性
ImageOptions 属性是:gofpdf 包下的 ImageOptions 结构体,其中包含了如下 3 个字段:
type ImageOptions struct {
	ImageType             string
	ReadDpi               bool
	AllowNegativePosition bool
}
3.10.2.2 两个字面量的共同点
1.都是在 gofpdf 包下。
2.都是结构体类型。
3.10.3 将 AllowNegativePosition 属性设置为 falase
将 AllowNegativePosition 属性设置为 falase 后,就会强制将负 x 的值,转为正 x 值。也就是负 x 值不生效了。
运行效果:
3.11 从 io.Reader 中加载图像,并注册它
代码来源:fpdf_test.go#L863
func main() {
var (
opt gofpdf.ImageOptions
fl *os.File
err error
)
pdf := gofpdf.New("P", "mm", "A4", "")
pdf.AddPage()
pdf.SetFont("Arial", "", 11)
fl, err = os.Open("./images/logo.png")
if err != nil {
panic(err)
return
}
opt.ImageType = "png"
opt.AllowNegativePosition = true
//从 fl 中加载文件,并注册图像。注册名为 logo(类似于注册一个事件,名为 logo)
_ = pdf.RegisterImageOptionsReader("logo", opt, fl)
fl.Close() //注册完,就可以关闭这个文件了
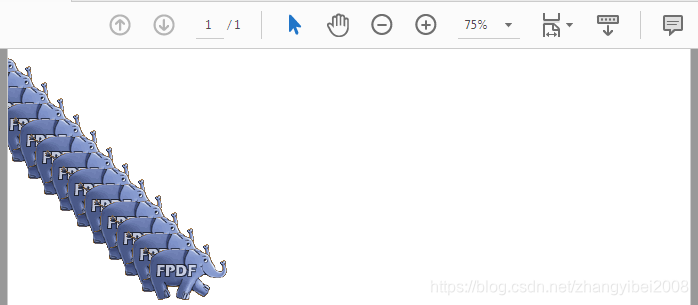
for x := -20.0; x <= 40.0; x += 5 {
//使用这个名为 logo 的注册图像(类似调用 logo 的事件)
pdf.ImageOptions("logo", x, x+20, 0, 0, false, opt, 0, "")
}
if err := pdf.OutputFileAndClose("1.pdf"); err != nil {
panic(err)
}
}
运行效果:
3.11.1 注册图像的优势
pdf.RegisterImageOptionsReader() 最大的优势在于:一次注册,到处使用。
调用 pdf.RegisterImageOptionsReader() 方法进行注册时,不会立即使用这张图片(不会立即渲染这张图片),需要在 pdf.Image() 系列方法中使用这个注册名称时,才会将图片渲染到 pdf 中。
如果某张图片会重复多次使用,那就把这张图片通过 pdf.RegisterImageOptionsReader() 方法,注册成图像信息。之后就可以反复使用这个图像信息的名称来渲染这张图片,再也不用每用一次都去重新读取、重新设置了,提高效率。
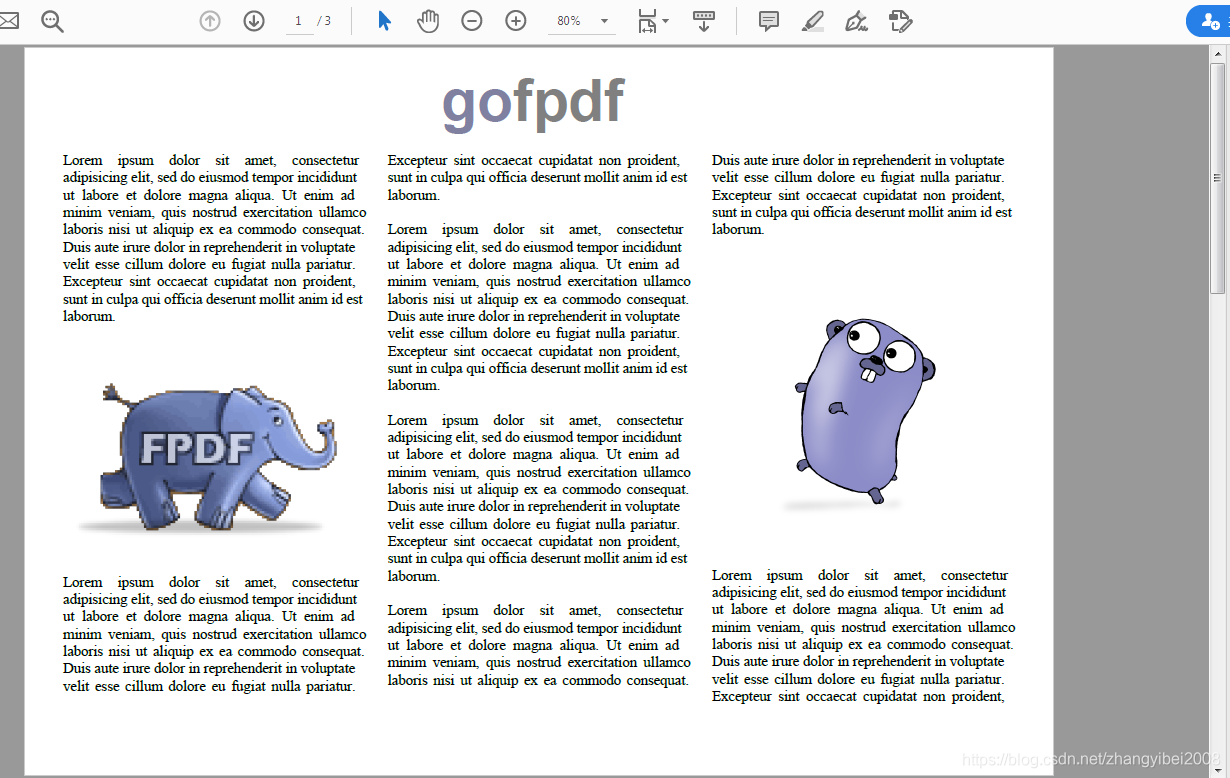
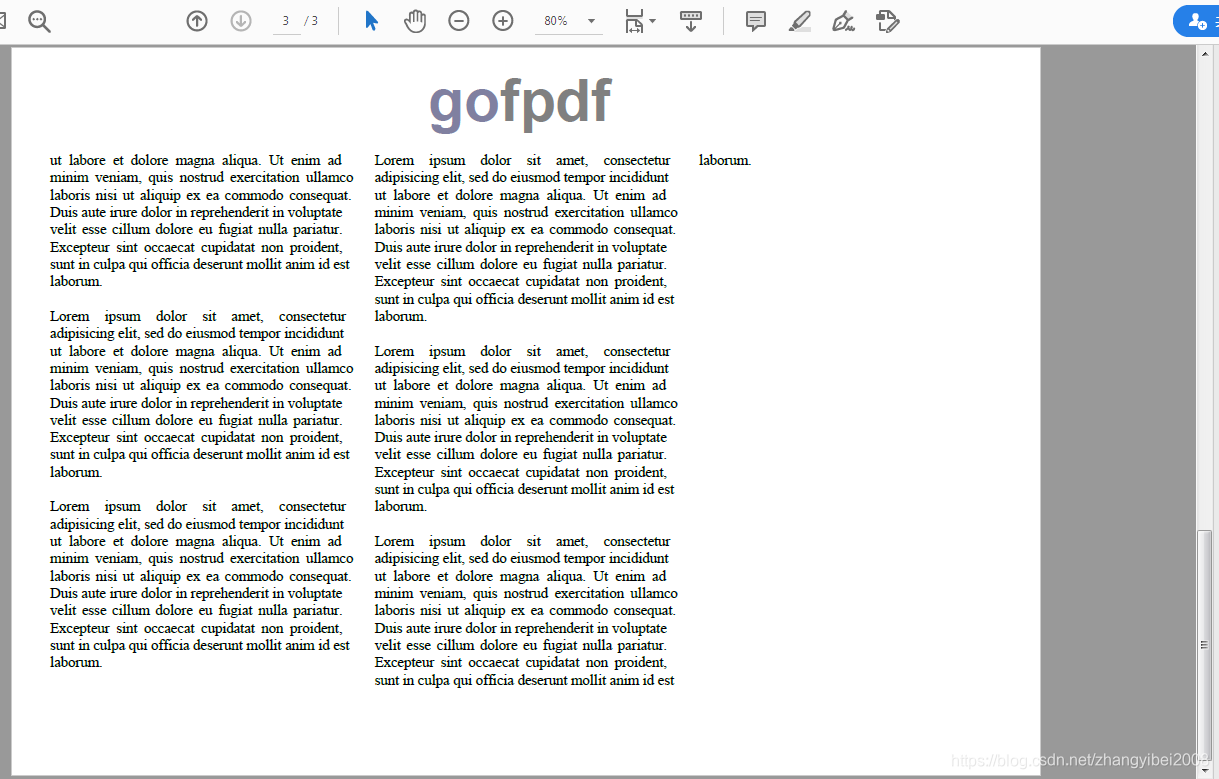
3.12 制作相框样式的 pdf
把 gofpdf.New() 方法中的 orientationStr 这个字符串参数,设置成字符串值 L。即可让 pdf 变成相框样式。
代码来源:fpdf_test.go#L892
func loremList() []string {
	return []string{
		"Lorem ipsum dolor sit amet, consectetur adipisicing elit, sed do eiusmod " +
			"tempor incididunt ut labore et dolore magna aliqua.",
		"Ut enim ad minim veniam, quis nostrud exercitation ullamco laboris nisi ut " +
			"aliquip ex ea commodo consequat.",
		"Duis aute irure dolor in reprehenderit in voluptate velit esse cillum " +
			"dolore eu fugiat nulla pariatur.",
		"Excepteur sint occaecat cupidatat non proident, sunt in culpa qui " +
			"officia deserunt mollit anim id est laborum.",
	}
}

func lorem() string {
	return strings.Join(loremList(), " ")
}

func main() {
	var (
		y0       float64
		crrntCol int
	)

	const (
		pageWd = 297.0 //A4 210.0 x 297.0
		margin = 10.0
		gutter = 4
		colNum = 3
		colWd  = (pageWd - 2*margin - (colNum-1)*gutter) / colNum
	)

	//把 orientationStr 这个字符串参数,设置成 "L"。即可让 pdf 变成相框样式
	pdf := gofpdf.New("L", "mm", "A4", "")

	loremStr := lorem()

	setCol := func(col int) {
		crrntCol = col
		x := margin + float64(col)*(colWd+gutter)
		pdf.SetLeftMargin(x)
		pdf.SetX(x)
	}

	pdf.SetHeaderFunc(func() {
		titleStr := "gofpdf"
		pdf.SetFont("Helvetica", "B", 48)
		wd := pdf.GetStringWidth(titleStr) + 6
		pdf.SetX((pageWd - wd) / 2)
		pdf.SetTextColor(128, 128, 160)
		pdf.Write(12, titleStr[:2])
		pdf.SetTextColor(128, 128, 128)
		pdf.Write(12, titleStr[2:])
		pdf.Ln(20)
		y0 = pdf.GetY()
	})

	pdf.SetAcceptPageBreakFunc(func() bool {
		if crrntCol < colNum-1 {
			setCol(crrntCol + 1)
			pdf.SetY(y0)

			return false //开启新的一列,而不是新的一页
		}

		setCol(0)
		return true
	})

	pdf.AddPage()
	pdf.SetFont("Times", "", 12)

	for j := 0; j < 20; j++ {
		if j == 1 {
			pdf.Image("./images/fpdf.png", -1, 0, colWd, 0, true, "", 0, "")
		} else if j == 5 {
			pdf.Image("./images/golang-gopher.png", -1, 0, colWd, 0, true, "", 0, "")
		}

		pdf.MultiCell(colWd, 5, loremStr, "", "", false)
		pdf.Ln(-1)
	}

	if err := pdf.OutputFileAndClose("1.pdf"); err != nil {
		panic(err)
	}
}
运行结果:

3.13 gocov 工具报告
涉及路径时,依然注意:要参照着 main.go 文件的所在目录来写 font 路径。
代码来源:fpdf_test.go#L952
func main() {
	var err error

	err = gofpdf.MakeFont("./font/CalligrapherRegular.pfb", "./font/cp1252.map", "font", nil, true)
	if err != nil {
		panic(err)
		return
	}

	pdf := gofpdf.New("", "", "", "")
	pdf.SetFontLocation("font")

	pdf.SetTitle("世界", true)
	pdf.SetAuthor("世界", true)
	pdf.SetSubject("世界", true)
	pdf.SetCreator("世界", true)
	pdf.SetKeywords("世界", true)

	pdf.AddFont("Calligrapher", "", "CalligrapherRegular.json")
	pdf.AddPage()
	pdf.SetFont("Calligrapher", "", 16)
	pdf.Writef(5, "\x95 %s \x95", pdf)

	if err := pdf.OutputFileAndClose("1.pdf"); err != nil {
		panic(err)
	}
}
运行结果:

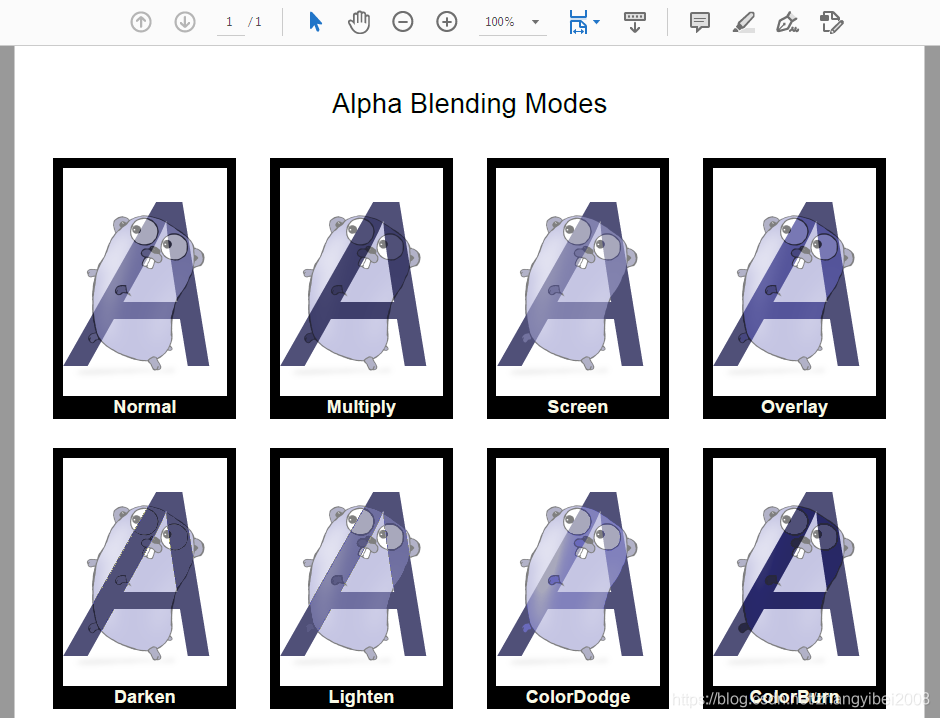
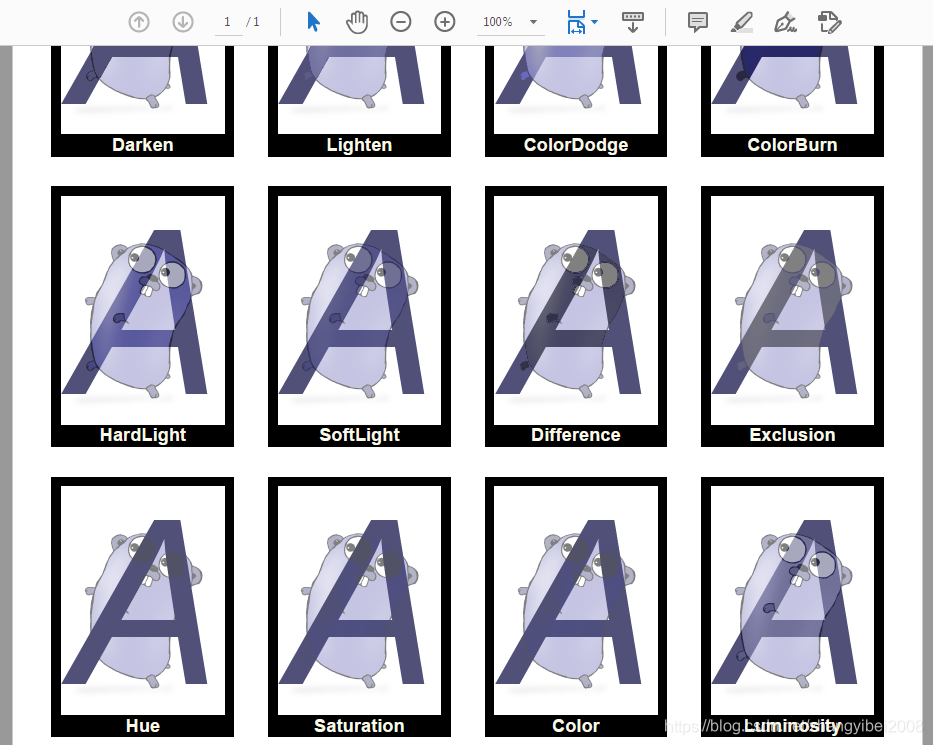
3.14 透明度的设置
代码来源:fpdf_test.go#L1060
func main() {
	const (
		gapX  = 10.0
		gapY  = 9.0
		rectW = 40.0
		rectH = 58.0
		pageW = 210
	)

	//设置透明度的方法:pdf.SetAlpha()。其中 blendModeStr 参数的值,只能是这些
	modeList := []string{
		"Normal", "Multiply", "Screen", "Overlay",
		"Darken", "Lighten", "ColorDodge", "ColorBurn", "HardLight", "SoftLight",
		"Difference", "Exclusion", "Hue", "Saturation", "Color", "Luminosity",
	}

	pdf := gofpdf.New("", "", "", "")
	pdf.SetLineWidth(2)
	pdf.SetAutoPageBreak(false, 0)
	pdf.AddPage()
	pdf.SetFont("Helvetica", "", 18)
	pdf.SetXY(0, gapY)
	pdf.SetTextColor(0, 0, 0)

	pdf.CellFormat(float64(pageW), gapY, "Alpha Blending Modes", "", 0, "C", false, 0, "")
	j := 0
	y := 3 * gapY

	for col := 0; col < 4; col++ {
		x := gapX
		for row := 0; row < 4; row++ {
			//画一个黑色的外框框
			pdf.Rect(x, y, rectW, rectH, "D")

			//框框的底部,画一个黑色的长方形。并在长方形中,写上白色的文字内容
			pdf.SetFont("Helvetica", "B", 12)
			pdf.SetFillColor(0, 0, 0)
			pdf.SetTextColor(250, 250, 230)
			pdf.SetXY(x, y+rectH-4)
			pdf.CellFormat(rectW, 5, modeList[j], "", 0, "C", true, 0, "")

			//外框框中,写上一个大写的斜体 A
			pdf.SetFont("Helvetica", "I", 150)
			pdf.SetTextColor(80, 80, 120)
			pdf.SetXY(x, y+2)
			pdf.CellFormat(rectW, rectH, "A", "", 0, "C", false, 0, "")

			//设置的 golang-gopher.png 透明度。注意:融合模式 blendModeStr 的值需要一个字符串
			pdf.SetAlpha(0.5, modeList[j])
			pdf.Image("./images/golang-gopher.png", x-gapX, y, rectW+2*gapX, 0, false, "", 0, "")

			//一个设置完了,把透明度重置为正常模式,方便进行下一个案例演示
			pdf.SetAlpha(1.0, "Normal")

			x += rectW + gapX
			j++
		}
		y += rectH + gapY
	}

	if err := pdf.OutputFileAndClose("1.pdf"); err != nil {
		panic(err)
	}
}
运行结果:
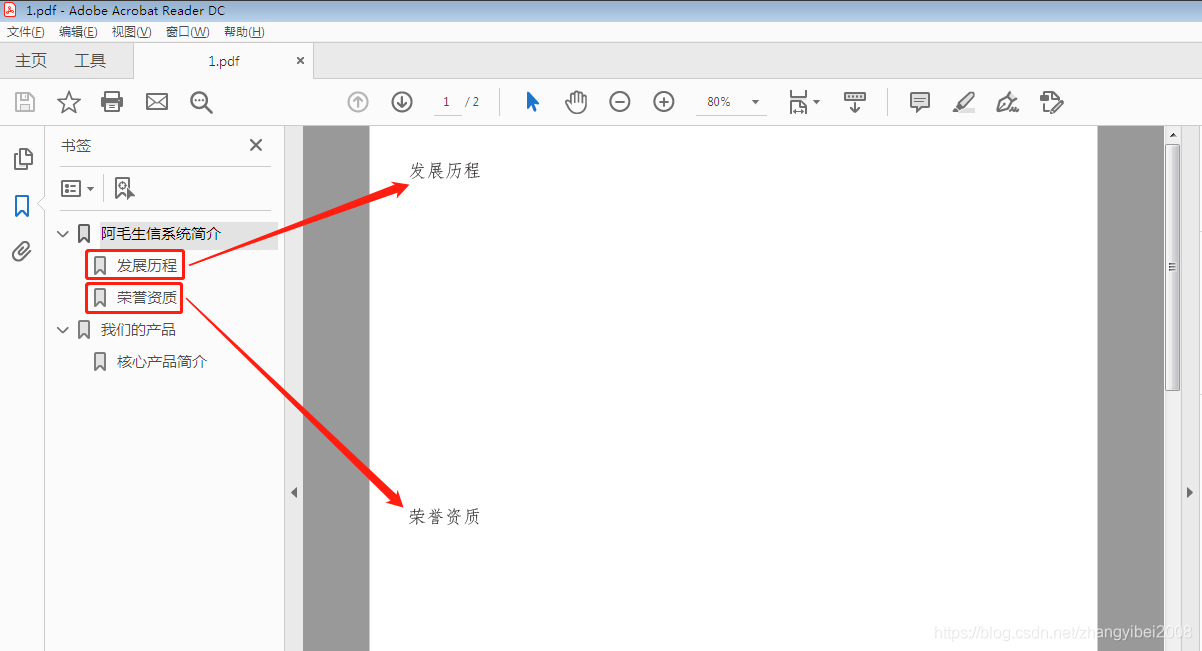
3.15 生成书签
代码来源:fpdf_test.go#L1248
func main() {
	pdf := gofpdf.New("P", "mm", "A4", "")

	//添加 "仿宋" 字体
	pdf.AddUTF8Font("fangsong", "", "simfang.ttf")

	pdf.AddPage()

	//使用字体
	pdf.SetFont("fangsong", "", 15)

	pdf.Bookmark("阿毛生信系统简介", 0, 0) //顶级书签,并且不显示该书签在 pdf 中
	pdf.Bookmark("发展历程", 1, -1) //二级书签,名称叫“发展历程”,显示在 pdf 中
	pdf.Cell(0, 6, "发展历程") //点击“发展历程”这个书签,即会跳转到 pdf 中“发展历程”的所在位置
	pdf.Ln(100) //空出几行,为了演示跳转效果
	pdf.Bookmark("荣誉资质", 1, -1) //二级书签,名称叫“荣誉资质”,显示在 pdf 中
	pdf.Cell(0, 6, "荣誉资质") //点击“荣誉资质”这个书签,即会跳转到 pdf 中“荣誉资质”的所在位置

	pdf.AddPage()
	pdf.Bookmark("我们的产品", 0, 0)
	pdf.Bookmark("核心产品简介", 1, -1)
	pdf.Cell(0, 6, "核心产品简介")

	if err := pdf.OutputFileAndClose("1.pdf"); err != nil {
		panic(err)
	}
}
运行结果:
点击书签,即会跳转到各自书签的所在位置。
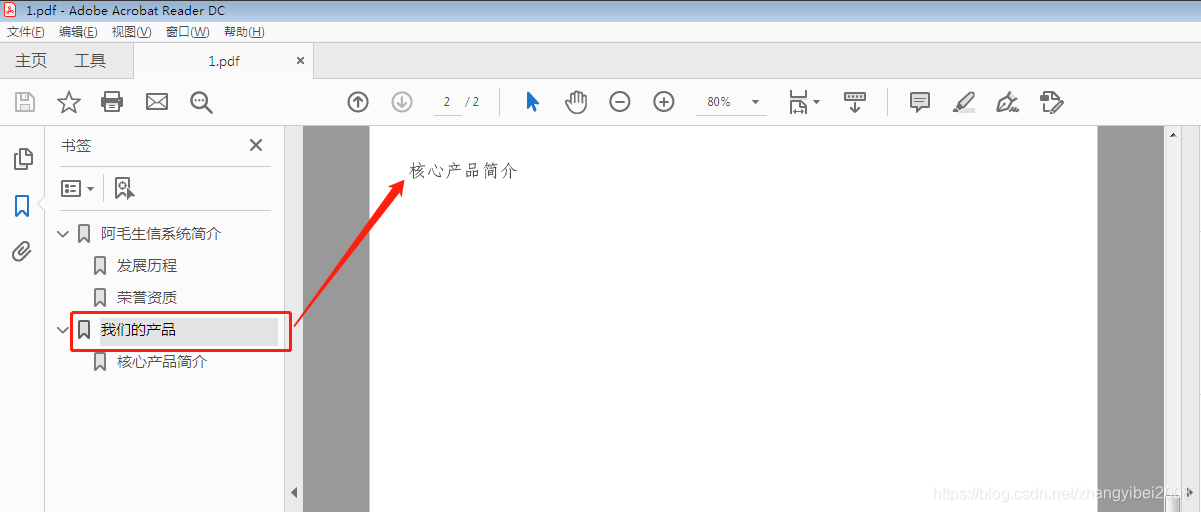
3.15.1 pdf.Bookmark() 方法
该方法的完整参数列表:func (f *Fpdf) Bookmark(txtStr string, level int, y float64)
官方文档对于这个方法的描述:
Bookmark sets a bookmark that will be displayed in a sidebar outline. txtStr is the title of the bookmark. level specifies the level of the bookmark in the outline; 0 is the top level, 1 is just below, and so on.
y specifies the vertical position of the bookmark destination in the current page; -1 indicates the current position.
Google 翻译+自己的理解:
设置一个书签,该书签将显示在侧边栏轮廓中。txtStr 是书签的标题。level 指定大纲中书签的级别:0 是最高级别,1 处于 0 之下,依此类推。
y 指定书签目标在当前页面中的垂直位置。-1 表示当前位置,0 表示不显示到 pdf 中。
3.16 pdf 添加其他的 pdf
3.16.1 需求
读取一个已存在的 pdf 中的内容,添加到新的 pdf。
感谢网友 @yellowriver007 提出了这个需求,使我有机会接触到了这个知识点。
3.16.2 准备工作
1.一个有内容的 pdf 文件。
2.下载好以下 2 个第三方 Go 依赖库:
"github.com/jung-kurt/gofpdf"
"github.com/jung-kurt/gofpdf/contrib/gofpdi"
3.16.3 键入代码
// 需求:读取一个本地 pdf 中的内容,写入到一个新的 pdf 中
/*
实现该需求的第三方库的地址:
https://github.com/jung-kurt/gofpdf/tree/master/contrib/gofpdi

作者给出的教程代码:
https://github.com/jung-kurt/gofpdf/blob/master/contrib/gofpdi/gofpdi_test.go

网友对此库使用的交流,建议看看,会有收获:
https://github.com/jung-kurt/gofpdf/issues/258
*/

package main

import (
	"bytes"
	"fmt"
	"github.com/jung-kurt/gofpdf"
	"github.com/jung-kurt/gofpdf/contrib/gofpdi"
	"io"
)

// 作者给出的教程:新生成一个 pdf 文件,返回这个 pdf 的 io,作为源文件。
// 此例是读取一个本地的 pdf 中的内容,然后写入到新的 pdf 文件里。因此,不使用作者的这个函数。
// https://github.com/jung-kurt/gofpdf/blob/master/contrib/gofpdi/gofpdi_test.go#L66
func getTemplatePdf() (io.ReadSeeker, error) {
	tpdf := gofpdf.New("P", "pt", "A4", "")
	tpdf.AddPage()
	tpdf.SetFont("Arial", "", 12)
	tpdf.Text(20, 20, "Example Page 1")
	tpdf.AddPage()
	tpdf.Text(20, 20, "Example Page 2")
	tbuf := bytes.Buffer{}
	err := tpdf.Output(&tbuf)

	return bytes.NewReader(tbuf.Bytes()), err
}

func main() {
	// create new pdf
	pdf := gofpdf.New("P", "pt", "A4", "")

	// for testing purposes, get an arbitrary template pdf as stream
	//rs, _ := getTemplatePdf()

	// create a new Importer instance
	imp := gofpdi.NewImporter()

	// import first page and determine page sizes
	//tpl := imp.ImportPageFromStream(pdf, &rs, 1, "/MediaBox")

	// 这里是对一个本地的 pdf 的读取
	// `./1.pdf` 这个路径,换成自己 pdf 文件的所在路径
	tpl := imp.ImportPage(pdf, "./1.pdf", 1, "/MediaBox")
	pageSizes := imp.GetPageSizes()
	nrPages := len(imp.GetPageSizes())

	// add all pages from template pdf
	for i := 1; i <= nrPages; i++ {
		pdf.AddPage()
		if i > 1 {
			//tpl = imp.ImportPageFromStream(pdf, &rs, i, "/MediaBox")
			// `./1.pdf` 这个路径,换成自己 pdf 文件的所在路径
			tpl = imp.ImportPage(pdf, "./1.pdf", i, "/MediaBox")
		}
		imp.UseImportedTemplate(pdf, tpl, 0, 0, pageSizes[i]["/MediaBox"]["w"], pageSizes[i]["/MediaBox"]["h"])
	}

	if err := pdf.OutputFileAndClose("./test.pdf"); err != nil {
		panic(err)
	}

	fmt.Println("done")
}
编译、运行,打开这个 test.pdf 文件,可以看到最终效果如下:

找不到其他有内容的 pdf 文件,拿了单位的 OA 文件作为源文件,部分敏感内容已涂抹,请见谅。已确认源 pdf 文件中的所有内容,都已写入了这个新的 test.pdf 文件。
3.16.4 目录结构

3.17 图片旋转
3.17.1 首先看下效果
直接上代码:
package main

import (
	"github.com/jung-kurt/gofpdf"
)

func main() {
	//设置页面参数
	pdf := gofpdf.New("P", "mm", "A4", "")

	//添加一页
	pdf.AddPage()

	pdf.TransformBegin()            // begin transform
	pdf.TransformRotate(45, 70, -5) // 逆时针旋转 45 度

	//将图片放入到 pdf 文档中
	//ImageOptions(src, x, y, width, height, flow, options, link, linkStr)
	pdf.ImageOptions(
		"1.jpg",
		0, 0,
		0, 0,
		false,
		gofpdf.ImageOptions{ImageType: "jpg", ReadDpi: false},
		0,
		"",
	)
	pdf.TransformEnd() // end transform

	// 新添加一页
	pdf.AddPage()
	pdf.TransformBegin()
	pdf.TransformRotate(-45, 0, 60) // 顺时针旋转 45 度

	pdf.ImageOptions(
		"1.jpg",
		0, 0,
		0, 0,
		false,
		gofpdf.ImageOptions{ImageType: "jpg", ReadDpi: false},
		0,
		"",
	)
	pdf.TransformEnd()

	if err := pdf.OutputFileAndClose("1.pdf"); err != nil {
		panic(err.Error())
	}
}
运行代码,打开生成的 pdf,可以看到效果如下:


3.17.2 pdfg.TransformRotate() 方法的描述
作者对于这个方法的描述如下:
TransformRotate rotates the following text, drawings and images around the center point (x, y). angle is specified in degrees and measured counter-clockwise from the 3 o'clock position.
The TransformBegin() example demonstrates this method.
Google 翻译大意:“变换旋转”使以下文本,图形和图像围绕中心点(x,y)旋转。 角度以度为单位指定,并从3点钟位置逆时针测量。
没看懂这个描述,因此图片旋转后,我一直调不好图片的位置,恳请各位看官指点。
一些值得注意的点,以及遇到的坑
1 Windows下最好别用记事本
在学习 3.3.1 案例的时候,使用了记事本去写一些中文+英文。好了,一运行,PDF 的第一个字符一直都是一个空心的方块。想了半天,才记起来,Windows 的记事本会出现 “boom 头”,这个讨厌的东西。“boom 头” 是 3 个无法显示的空字符,这个是 Windows 特有的问题。Unix 以及 Linux 系统,不会有这个问题。后来在云服务器上用 vim 写了内容,再下载到本地。再次运行代码,就没有任何问题了。
参考文献
1.极简入门
2.link1
3.link2
4.gofpdf 官方文档


 3139
3139

 被折叠的 条评论
为什么被折叠?
被折叠的 条评论
为什么被折叠?
 到【灌水乐园】发言


