


一、准备将要识别的图片、SD卡(TF卡亲测,可以使用)
二、将要识别的图片进行保存
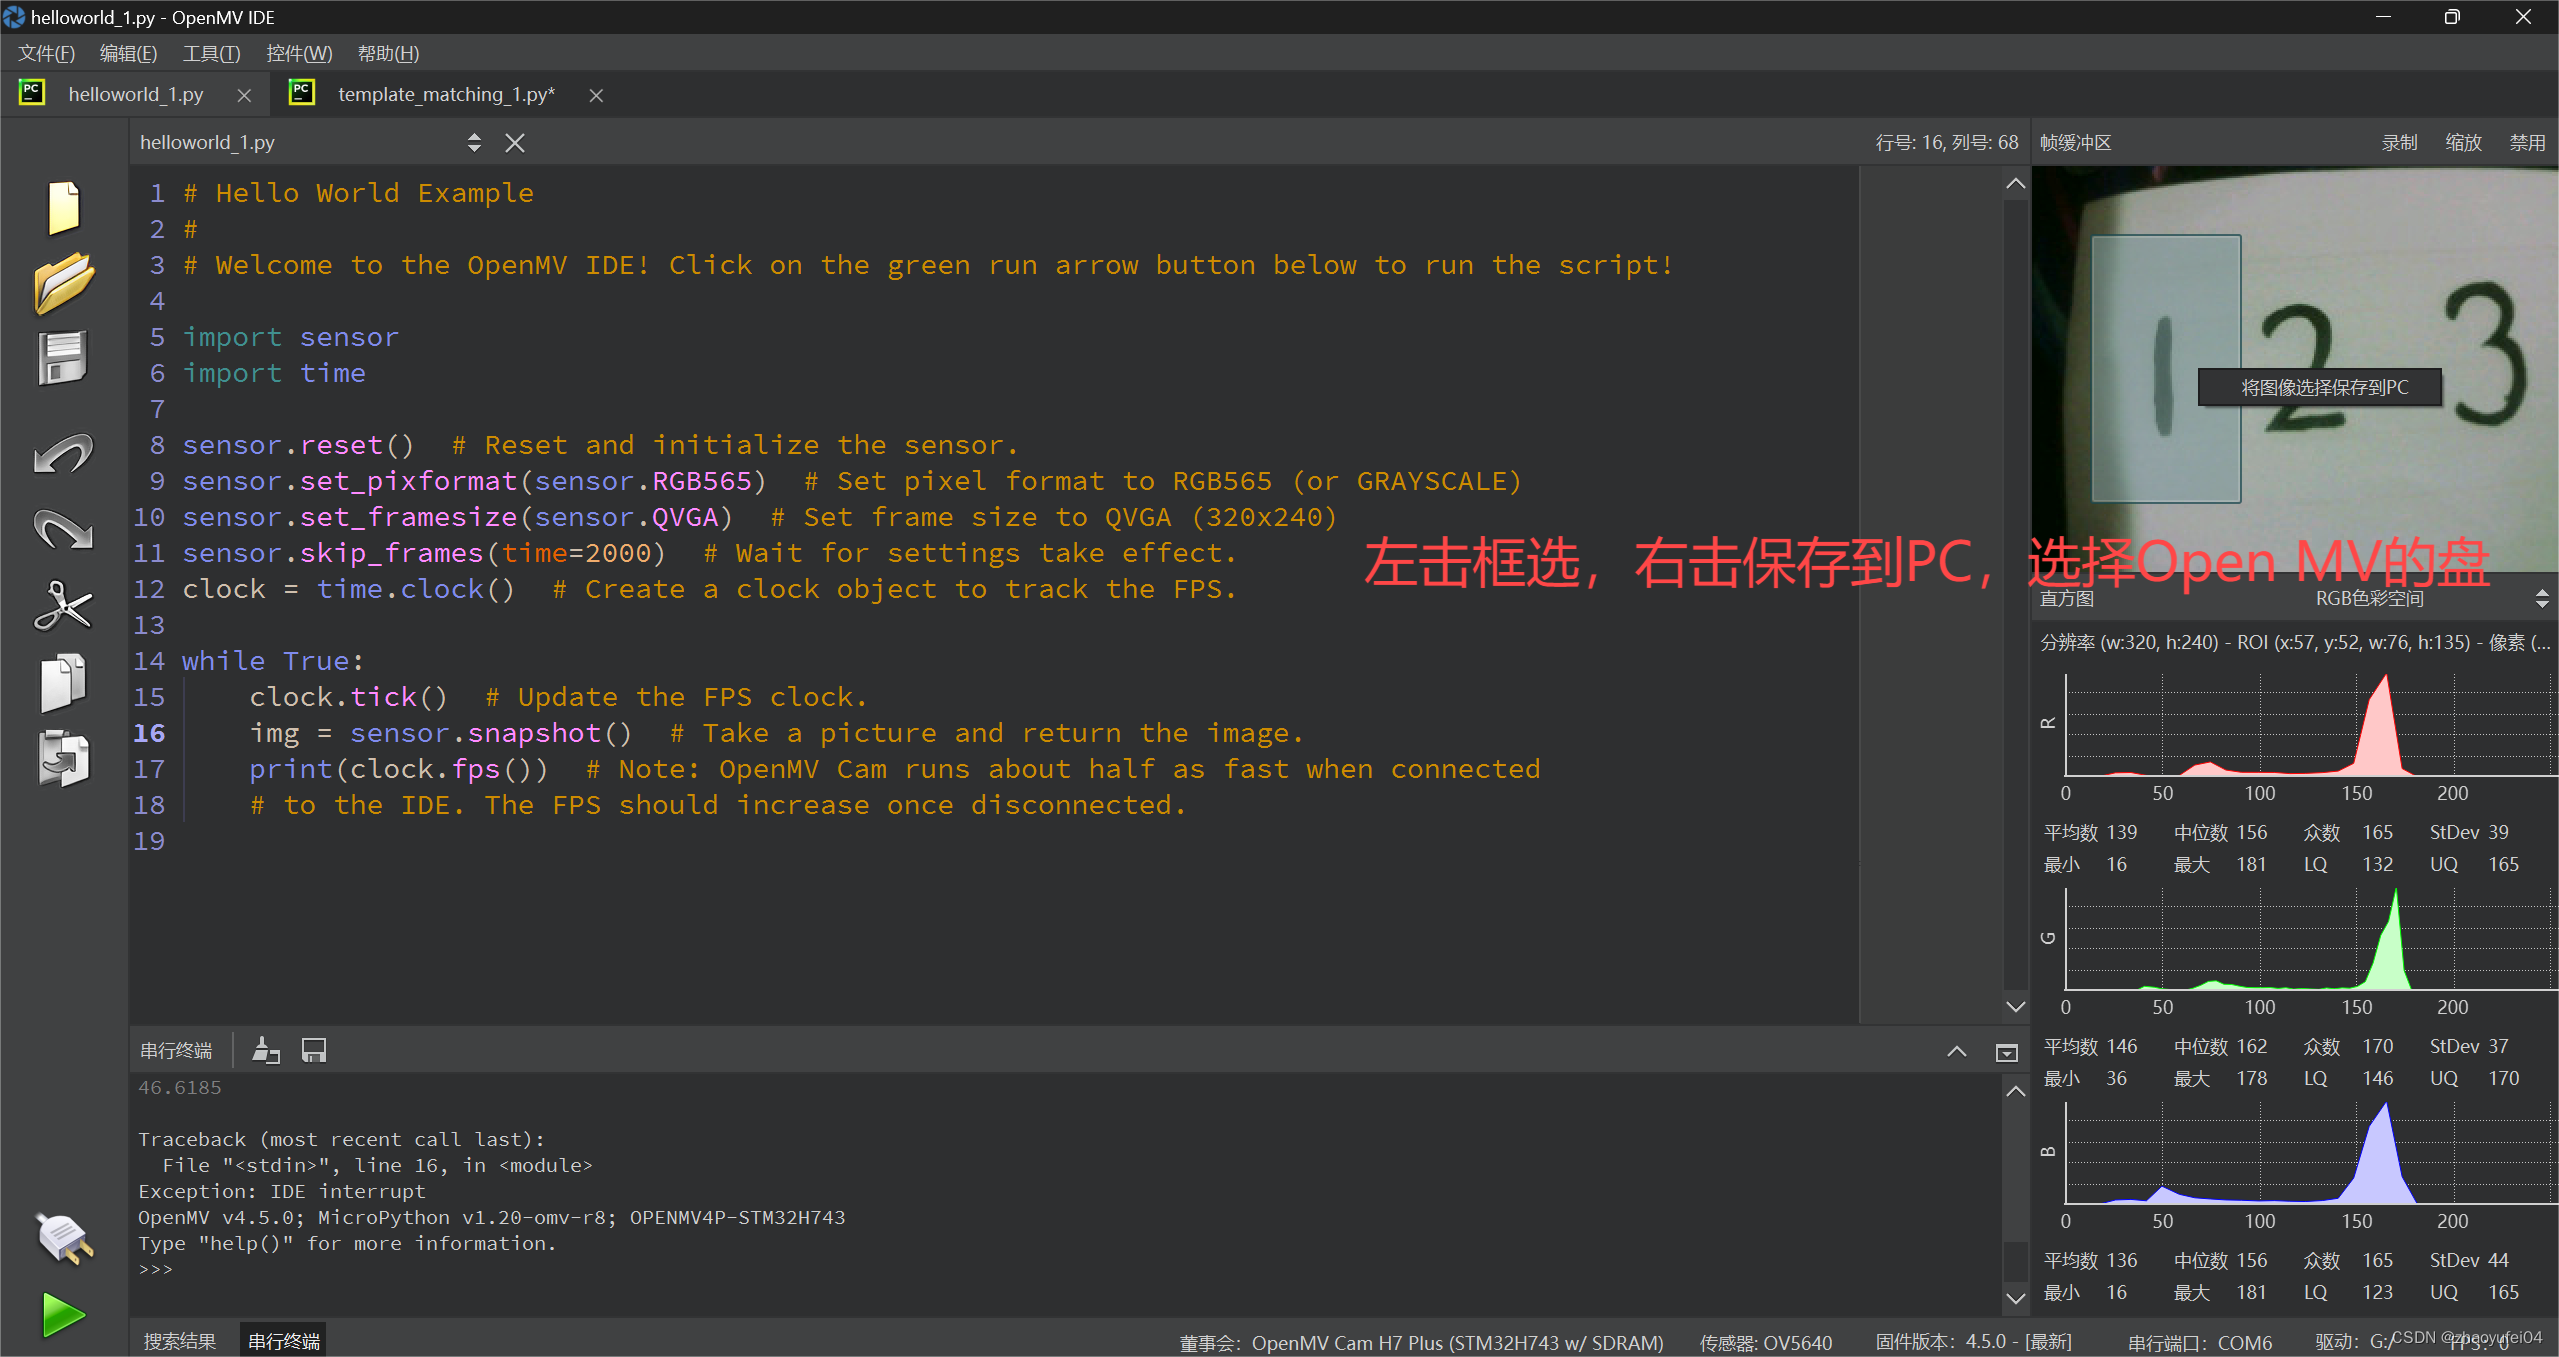
可以通过hello,world的代码进行保存
# Hello World Example
#
# Welcome to the OpenMV IDE! Click on the green run arrow button below to run the script!

import sensor
import time

sensor.reset()  # Reset and initialize the sensor.
sensor.set_pixformat(sensor.RGB565)  # Set pixel format to RGB565 (or GRAYSCALE)
sensor.set_framesize(sensor.QVGA)  # Set frame size to QVGA (320x240)
sensor.skip_frames(time=2000)  # Wait for settings take effect.
clock = time.clock()  # Create a clock object to track the FPS.

while True:
    clock.tick()  # Update the FPS clock.
    img = sensor.snapshot()  # Take a picture and return the image.
    print(clock.fps())  # Note: OpenMV Cam runs about half as fast when connected
    # to the IDE. The FPS should increase once disconnected.
将摄像头对准要识别的图片,点击暂停右上方截取。
三、图片的的转化(BMP→BGM)
链接:BMP轉PGM轉換器。在线自由 — Convertio
注意!未注册次数有限(应该是6次,注册要花钱)
四:源码
# Template Matching Example - Normalized Cross Correlation (NCC)
#
# This example shows off how to use the NCC feature of your OpenMV Cam to match
# image patches to parts of an image... expect for extremely controlled environments
# NCC is not all to useful.
#
# WARNING: NCC supports needs to be reworked! As of right now this feature needs
# a lot of work to be made into somethin useful. This script will remain to show
# that the functionality exists, but, in its current state is inadequate.

import time
import sensor
import image
from image import SEARCH_EX

# from image import SEARCH_DS

# Reset sensor
sensor.reset()

# Set sensor settings
sensor.set_contrast(1)
sensor.set_gainceiling(16)
# Max resolution for template matching with SEARCH_EX is QQVGA
sensor.set_framesize(sensor.QQVGA)
# You can set windowing to reduce the search image.
# sensor.set_windowing(((640-80)//2, (480-60)//2, 80, 60))
sensor.set_pixformat(sensor.GRAYSCALE)

# Load template.
# Template should be a small (eg. 32x32 pixels) grayscale image.
template = image.Image("/1.pgm")

clock = time.clock()

# Run template matching
while True:
    clock.tick()
    img = sensor.snapshot()

    # find_template(template, threshold, [roi, step, search])
    # ROI: The region of interest tuple (x, y, w, h).
    # Step: The loop step used (y+=step, x+=step) use a bigger step to make it faster.
    # Search is either image.SEARCH_EX for exhaustive search or image.SEARCH_DS for diamond search
    #
    # Note1: ROI has to be smaller than the image and bigger than the template.
    # Note2: In diamond search, step and ROI are both ignored.
    r = img.find_template(
        template, 0.70, step=4, search=SEARCH_EX
    )  # , roi=(10, 0, 60, 60))
    if r:
        img.draw_rectangle(r)

    print(clock.fps())
五、常见问题
1,如何修改识别的图像

改 “ . ” 前面的文件名字
2,报错怎么办
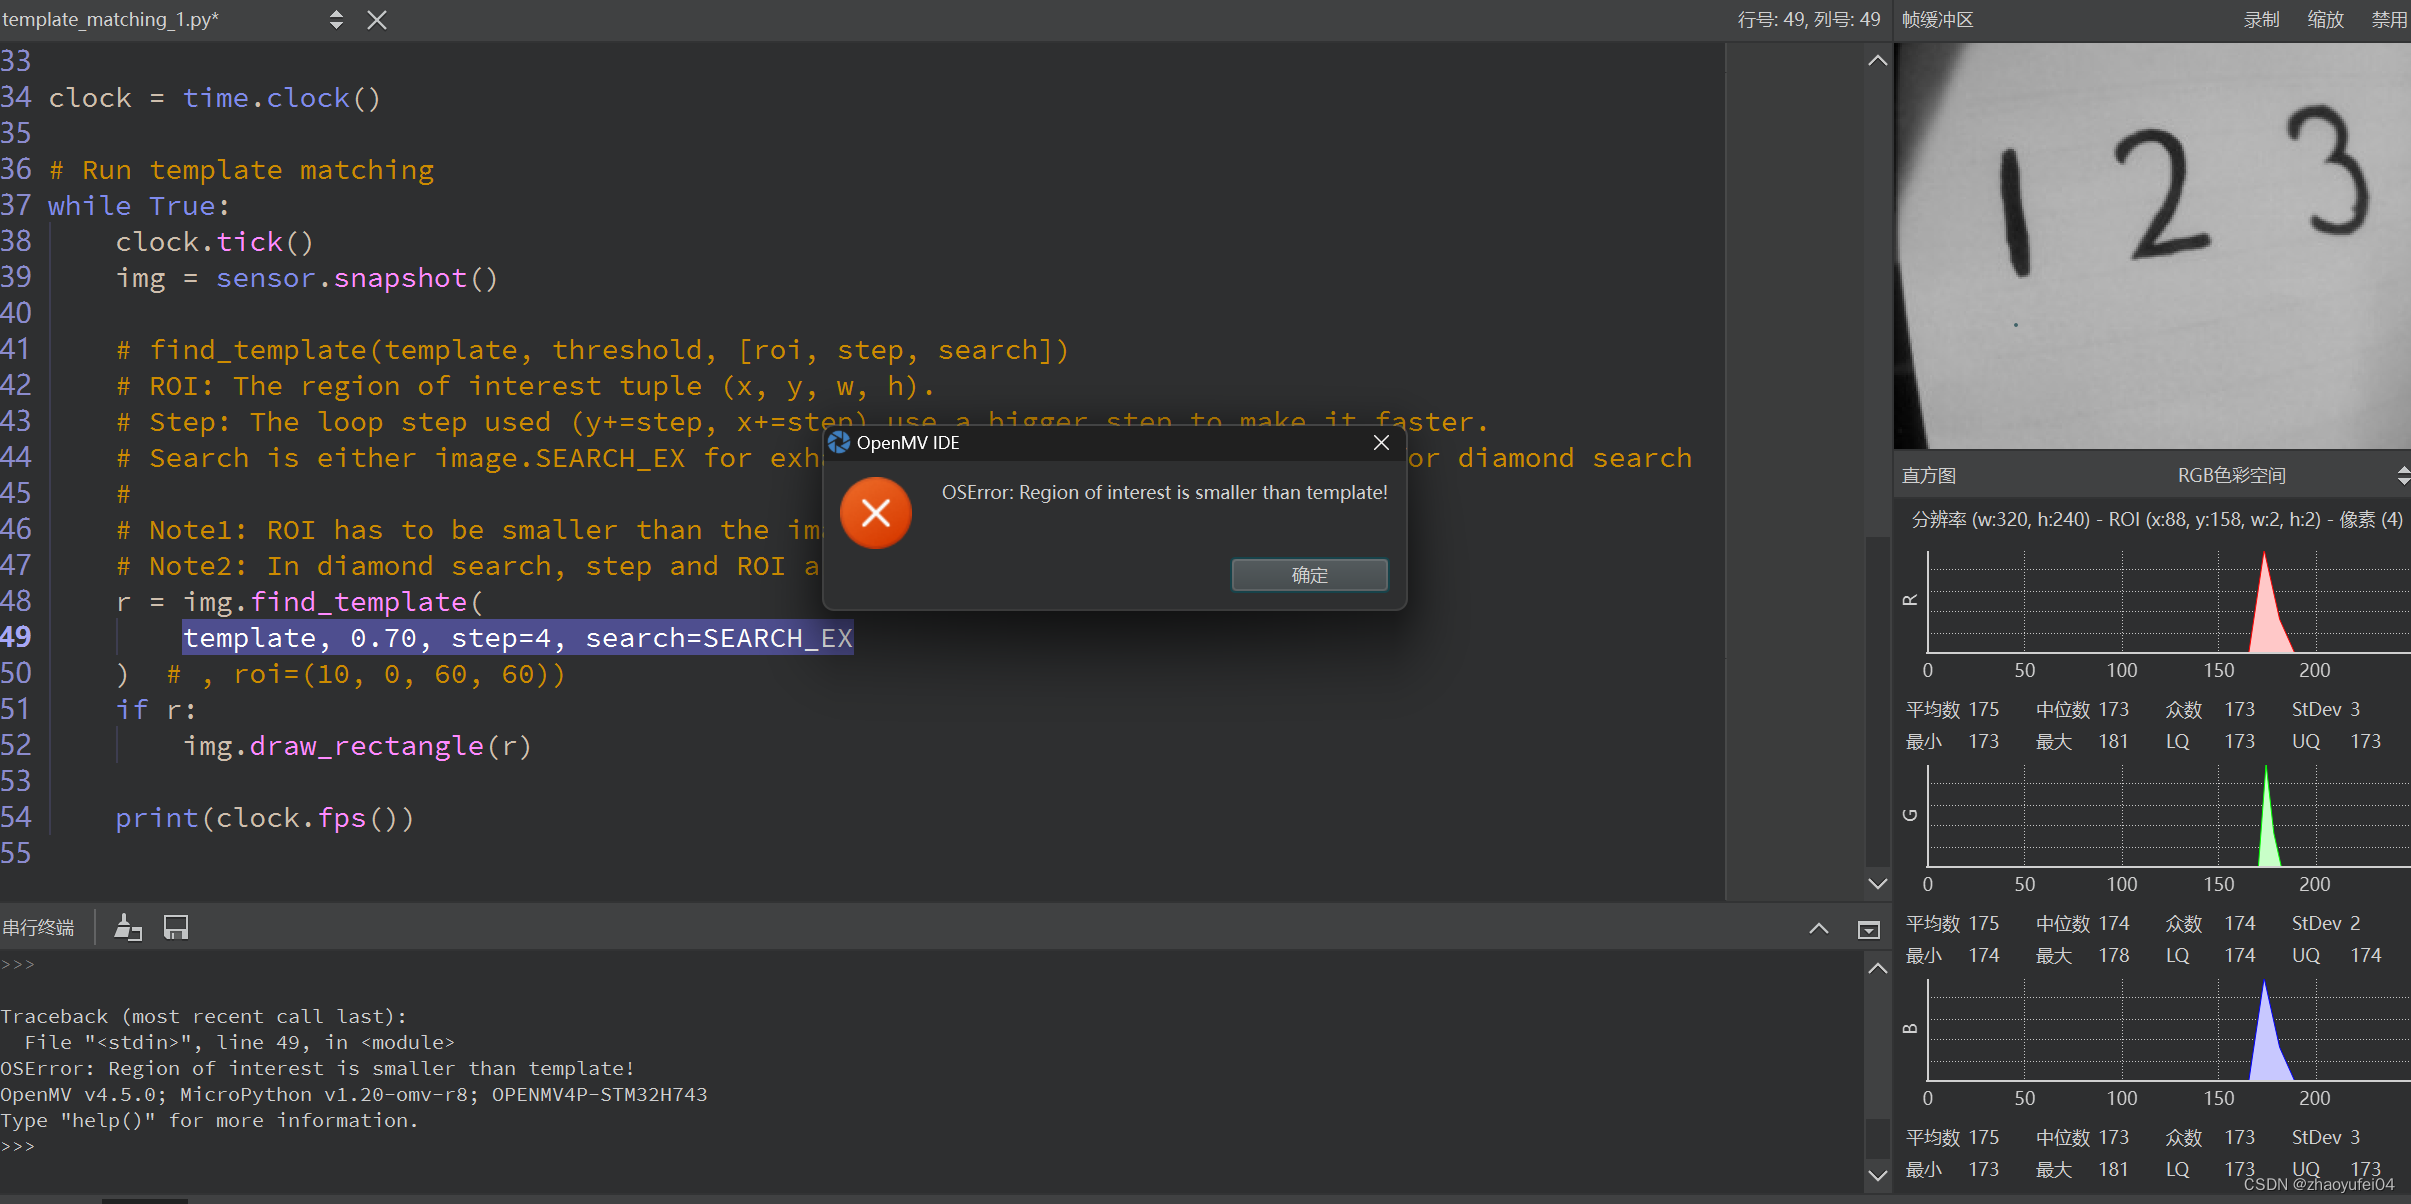
两种解决办法
①可能是拍照片距离过近,重新拍摄截取就好
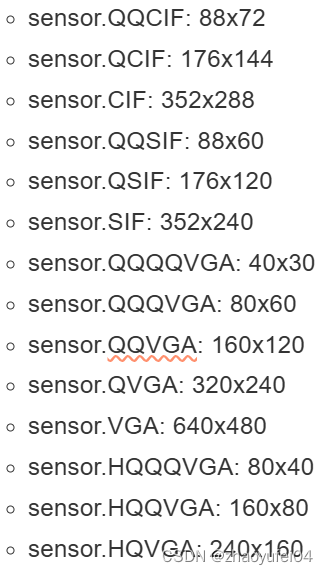
②如果你的Openm等级足够高(4及以上)可以把源码中的QQVGA进行换成QVGA
理由:QVGA支持像素点更高
效果:


 2917
2917

 被折叠的 条评论
为什么被折叠?
被折叠的 条评论
为什么被折叠?
 到【灌水乐园】发言


