


EventRecorder 是可使用下载的线进行通信,不需要额外的线,通信速率也很高。
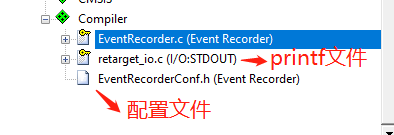
添加步骤

添加步骤如图,前提是开启微库情况下。
配置

这里有几种选择,第一个是除M0内核外都可使用,然后是系统时钟,下面就是自己实现的定时器,这里暂时选这个做一个演示效果。
port
uint32_t tim_count;
void HAL_TIM_PeriodElapsedCallback(TIM_HandleTypeDef *htim)
{
    if (htim->Instance == TIM17)
    {
//        __HAL_TIM_CLEAR_IT();
        tim_count++;
    }
}

/**
  Setup timer hardware
  \return       status (1=Success, 0=Failure)
*/
uint32_t EventRecorderTimerSetup (void)
{
  tim_count = 0;
  htim17.Instance = TIM17;
  htim17.Init.Prescaler = 4800-1;
  htim17.Init.CounterMode = TIM_COUNTERMODE_UP;
  htim17.Init.Period = 10-1;
  htim17.Init.ClockDivision = TIM_CLOCKDIVISION_DIV1;
  htim17.Init.RepetitionCounter = 0;
  htim17.Init.AutoReloadPreload = TIM_AUTORELOAD_PRELOAD_ENABLE;
  if (HAL_TIM_Base_Init(&htim17) != HAL_OK)
  {
    Error_Handler();
  }
  __HAL_TIM_SET_COUNTER(&htim17,0);
  HAL_TIM_Base_Start_IT(&htim17);
  return 1;
}

/**
  Get timer frequency
  \return       timer frequency in Hz
*/
uint32_t EventRecorderTimerGetFreq (void) {
    return 48000000/(htim17.Init.Prescaler+1)/(htim17.Init.Period+1);
//    return 1000;
}

/**
  Get timer count
  \return       timer count (32-bit)
*/
uint32_t EventRecorderTimerGetCount (void) {
    return tim_count;
}
这里选择自己实现的时钟,就需要对三个函数进行实现,
- EventRecorderTimerSetup
- EventRecorderTimerGetFreq
- EventRecorderTimerGetCount
阅读源码就会发现 EventRecorder 开关功能都是在文件"RTE_Components.h"定义
#define CMSIS_device_header "stm32f0xx.h"

/*  Keil.ARM Compiler::Compiler:Event Recorder:DAP:1.4.0 */
#define RTE_Compiler_EventRecorder
          #define RTE_Compiler_EventRecorder_DAP
/*  Keil.ARM Compiler::Compiler:I/O:STDOUT:EVR:1.2.0 */
#define RTE_Compiler_IO_STDOUT          /* Compiler I/O: STDOUT */
          #define RTE_Compiler_IO_STDOUT_EVR      /* Compiler I/O: STDOUT EVR */
下载器配置
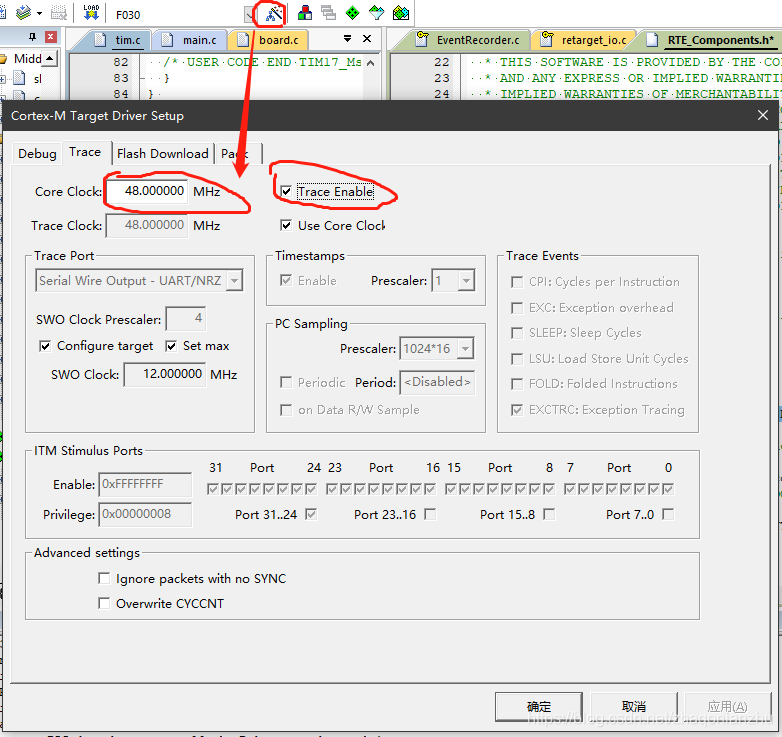
到这里就可以从

到这里就完成了。
可惜M0的F0系列不支持trace功能。白白浪费了时间。在F4上已经验证实现。


 3316
3316


 被折叠的 条评论
为什么被折叠?
被折叠的 条评论
为什么被折叠?
 到【灌水乐园】发言


