


1.平常开发通常使用第三方推送, 这里自己整理记录不使用第三方推送的操作流程。
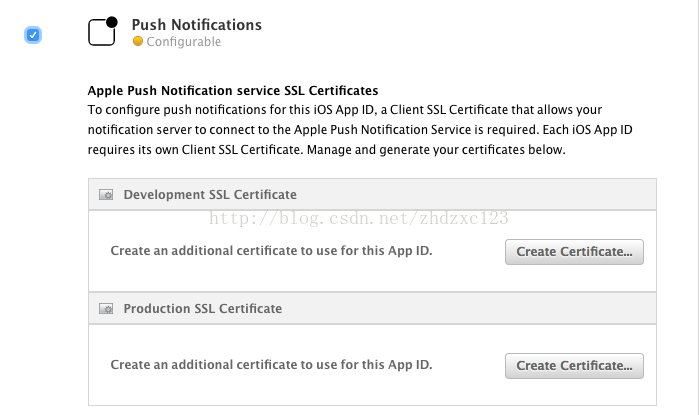
2.登陆 https://developer.apple.com, 在Identifiers App IDs 下, 找到需要推送的app, 找到推送选项, 勾选, 上传文件, 生成证书,下载并导入钥匙链。
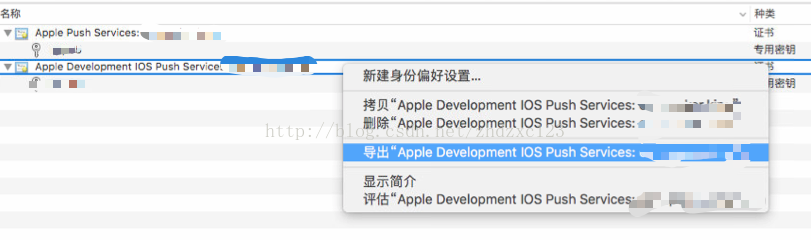
3.在钥匙链中找到我们下载的证书,
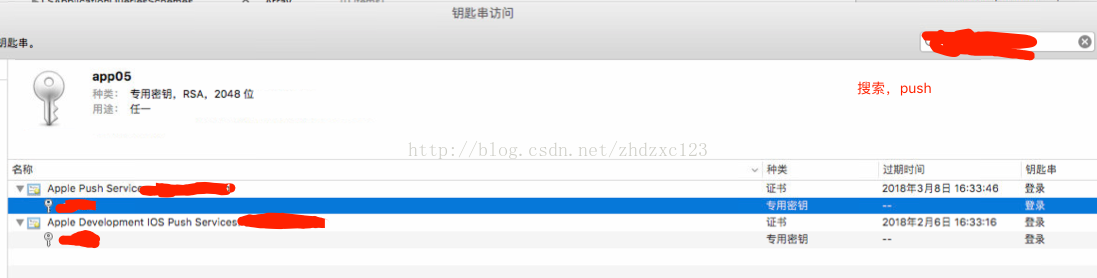
4.接下里竞选中Apple xxxx Services 导出, 格式为.p12文件给自己服务器。 至此, 证书已经导出完成。
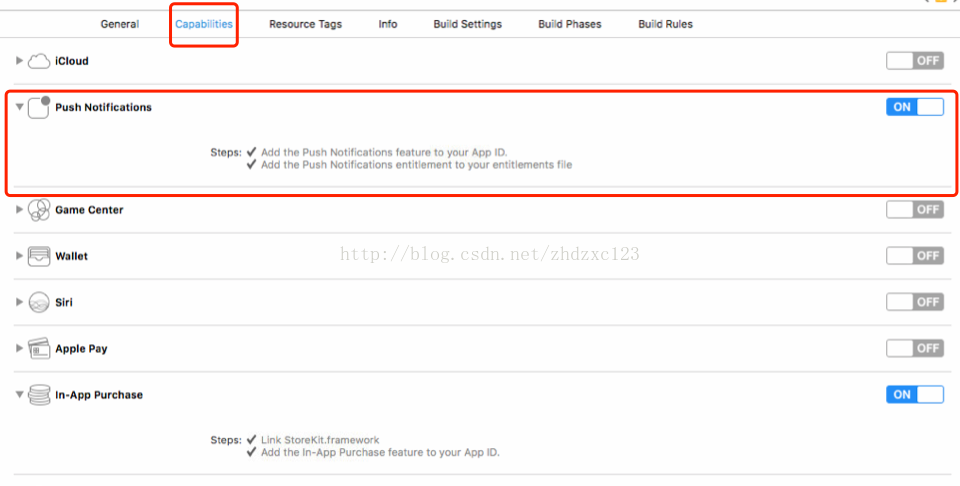
5.xcode 设置:
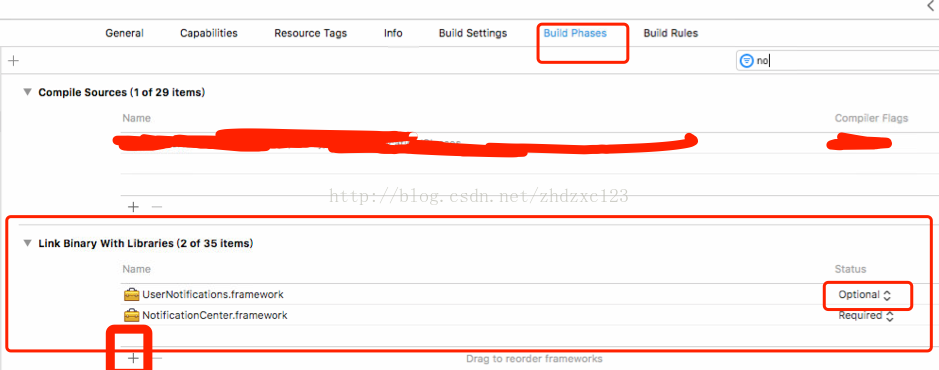
framework导入, 需要注意UserNotifications, 如果在编译报错, 适配iOS8以下版本, 这里要选optional.
6.代码,请求推送权限
UIUserNotificationType type = UIUserNotificationTypeAlert | UIUserNotificationTypeBadge | UIUserNotificationTypeSound;
    UIUserNotificationSettings *settings = [UIUserNotificationSettings settingsForTypes:type categories:nil];
    [[UIApplication sharedApplication] registerUserNotificationSettings:settings];
获取token, 上传服务器,
- (void)application:(UIApplication *)application didRegisterForRemoteNotificationsWithDeviceToken:(NSData *)deviceToken
{
    //获取token , 上传服务器
}
7,客户端单独测试。这里使用php 代码进行测试, 因为mac 自带。
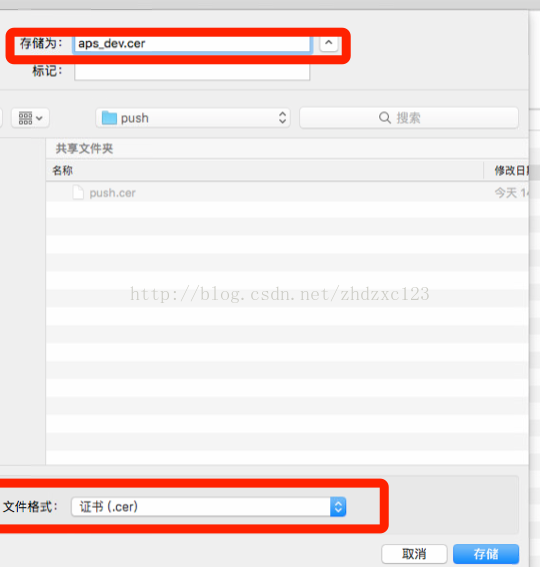
导出证书,并且命名为aps_dev.cer
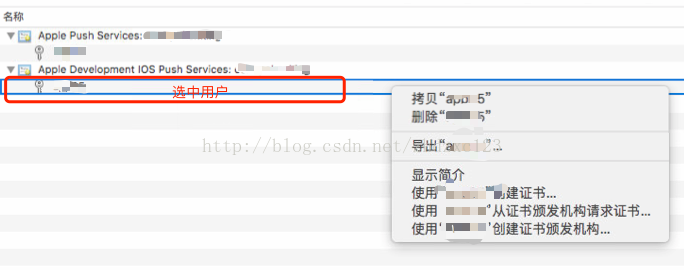
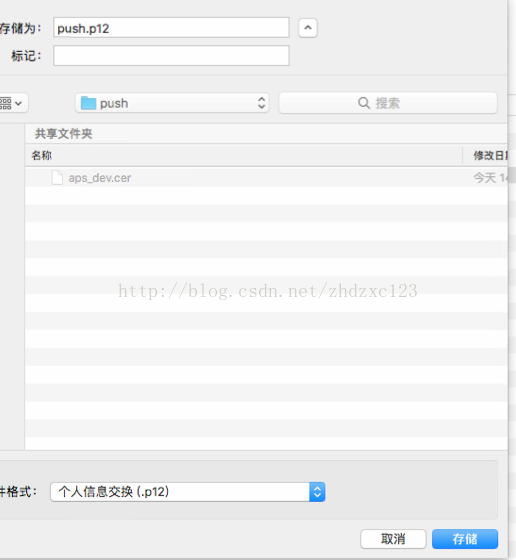
同样操作, 导出.p12文件。设置密码123456
接下来, 打开控制台, cd 到存储目录 .
执行以下操作:
a. openssl x509 -in aps_dev.cer -inform der -out PushChatCert.pem
b. openssl pkcs12 -nocerts -out PushChatKey.pem -in push.p12
c. cat PushChatCert.pem PushChatKey.pem > ck.pem
至此, 文件已经制作完毕,打开文本编辑器。 输入php 代码, 并执行, 即可
<?php

// Put your device token here (without spaces):
$deviceToken = '450f094a8c9032189ab06d3e26725d247150d5fa71520c6ee5cf1641d54ccc34 ';

// Put your private key's passphrase here:密语
$passphrase = '123456';

// Put your alert message here:
$message = '820fc655ec5d2ead8d37889689e0c8f078a6d236a40e25d9d80072f88125ec1c';


$ctx = stream_context_create();
stream_context_set_option($ctx, 'ssl', 'local_cert', 'ck.pem');
stream_context_set_option($ctx, 'ssl', 'passphrase', $passphrase);
stream_context_set_option($ctx, 'ssl', 'verify_peer', false);

// Open a connection to the APNS server
$fp = stream_socket_client(
	'ssl://gateway.sandbox.push.apple.com:2195', $err,
	$errstr, 60, STREAM_CLIENT_CONNECT|STREAM_CLIENT_PERSISTENT, $ctx);
// $fp = stream_socket_client(
// 	'ssl://gateway.push.apple.com:2195', $err,
// 	$errstr, 60, STREAM_CLIENT_CONNECT|STREAM_CLIENT_PERSISTENT, $ctx);

if (!$fp)
	exit("Failed to connect: $err $errstr" . PHP_EOL);

echo 'Connected to APNS' . PHP_EOL;

// Create the payload body
$body['aps'] = array(
	'alert' => $message,
	'sound' => 'default',
	'badge' => 0
	);

// Encode the payload as JSON
$payload = json_encode($body);

// Build the binary notification
$msg = chr(0) . pack('n', 32) . pack('H*', $deviceToken) . pack('n', strlen($payload)) . $payload;

// Send it to the server
$result = fwrite($fp, $msg, strlen($msg));

if (!$result)
	echo 'Message not delivered' . PHP_EOL;
else
	echo 'Message successfully delivered' . PHP_EOL;

// Close the connection to the server
fclose($fp);

?>
文件中写入的相对路径, php 要放在同一个目录下面。
网上有些推送信息太老, 有点不适用了。在此记录方便后面使用。


 287
287


 被折叠的 条评论
为什么被折叠?
被折叠的 条评论
为什么被折叠?
 到【灌水乐园】发言


