


1. 滚动视图是指拥有很多内容,屏幕显示不完,需要通过滚动来显示完整的视图。也就是右边的滚动条啦。
分两种:HorizontalScrollView:水平滚动视图。
ScrollView:垂直滚动视图。
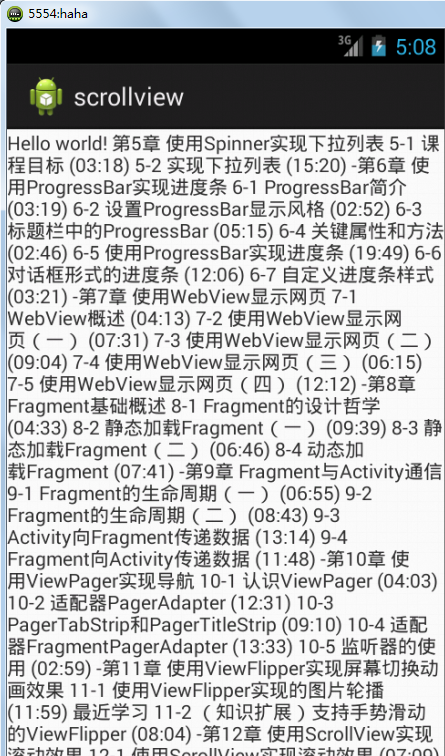
2. 案例一:不使用ScrollView的情况:
第一步:在String.xml文件中增加content的长文本。代码略。
第二步:在main布局文件中添加一个TextView控件:
<?xml version="1.0" encoding="utf-8"?>
<LinearLayout xmlns:android="http://schemas.android.com/apk/res/android"
    android:layout_width="match_parent"
    android:layout_height="match_parent"
    android:orientation="vertical" >

	<TextView
	    android:id="@+id/content"
	    android:layout_width="match_parent"
	    android:layout_height="wrap_content"
	    />

</LinearLayout>package com.example.scrollview;
import android.os.Bundle;
import android.app.Activity;
import android.view.Menu;
import android.widget.TextView;
public class MainActivity extends Activity {
private TextView tv;
@Override
protected void onCreate(Bundle savedInstanceState) {
super.onCreate(savedInstanceState);
setContentView(R.layout.main);
tv = (TextView) findViewById(R.id.content);
// 括号里的这两个函数,都是系统自带的,用来获取资源的。这里获取了res中values中String文件中的内容。
tv.setText(getResources().getString(R.string.content));
}
}
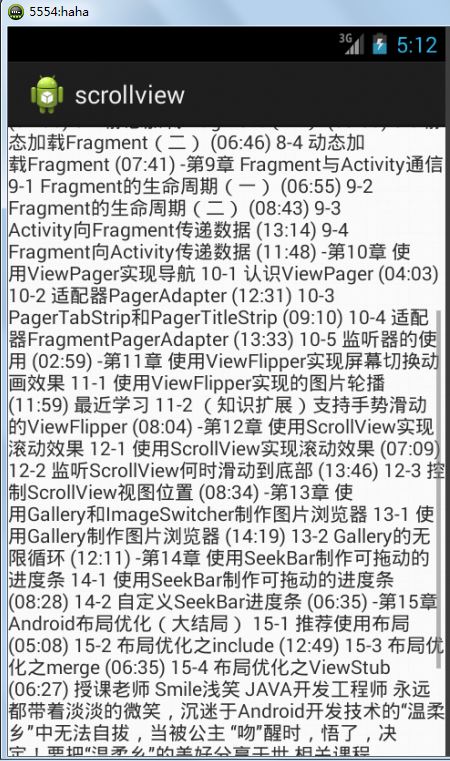
3. 案例二:
那改变的方法呢超简单,只需要将main布局文件中的TextView控件放置在ScrollView控件中即可:
<?xml version="1.0" encoding="utf-8"?>
<LinearLayout xmlns:android="http://schemas.android.com/apk/res/android"
    android:layout_width="match_parent"
    android:layout_height="match_parent"
    android:orientation="vertical" >

    <ScrollView
        android:layout_width="match_parent"
        android:layout_height="wrap_content"
        android:id="@+id/scroll"
        >

		<TextView
		    android:id="@+id/content"
		    android:layout_width="match_parent"
		    android:layout_height="wrap_content"
		    />

	</ScrollView>
</LinearLayout>
如果想要将右侧的滚动条隐藏,只需要给ScrollView控件添加属性:
android:scrollbars="none"<?xml version="1.0" encoding="utf-8"?>
<LinearLayout xmlns:android="http://schemas.android.com/apk/res/android"
android:layout_width="match_parent"
android:layout_height="match_parent"
android:orientation="vertical" >
<HorizontalScrollView
android:layout_width="match_parent"
android:layout_height="wrap_content"
android:id="@+id/scroll"
android:scrollbars="none"
>
<TextView
android:id="@+id/content"
android:layout_width="match_parent"
android:layout_height="wrap_content"
/>
</HorizontalScrollView >
</LinearLayout>
效果图:这里只有一行啦:
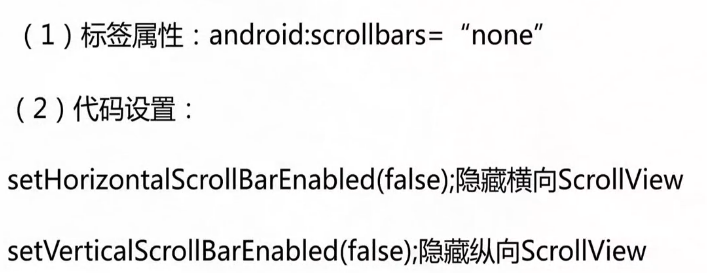
4. 隐藏ScrollView滚动条:两种选一种就好了。
5. 监听ScrollView何时滑动到底部:
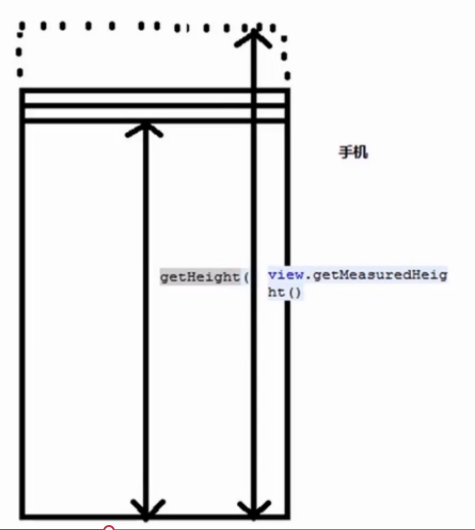
首先说一个点:getMeasuredHeight()包含了隐藏部分的高度。
第一步:在String.xml中添加xiaoxiao的追加文本信息。略
第二步:修改活动文件MainActivity,添加监听器:
package com.example.scrollview;
import android.os.Bundle;
import android.app.Activity;
import android.util.Log;
import android.view.Menu;
import android.view.MotionEvent;
import android.view.View;
import android.view.View.OnTouchListener;
import android.widget.ScrollView;
import android.widget.TextView;
public class MainActivity extends Activity {
private TextView tv;
private ScrollView scroll;
@Override
protected void onCreate(Bundle savedInstanceState) {
super.onCreate(savedInstanceState);
setContentView(R.layout.main);
tv = (TextView) findViewById(R.id.content);
// 括号里的这两个函数,都是系统自带的,用来获取资源的。这里获取了res中values中String文件中的内容。
tv.setText(getResources().getString(R.string.content));
scroll = (ScrollView) findViewById(R.id.scroll);
scroll.setOnTouchListener(new OnTouchListener() {
@Override
public boolean onTouch(View v, MotionEvent event) {
// 判断手势滑动
switch (event.getAction()) {
// 当手指抬起:
case MotionEvent.ACTION_POINTER_UP:
break;
// 当手指落下:
case MotionEvent.ACTION_DOWN:
break;
// 当手指在滑动:这个案例主要讨论滑动的这个手势,上两个不讨论了。
case MotionEvent.ACTION_MOVE:
/*
* (1)getScrollY()----滚动条滑动的距离,从0开始计算
* (2)getMeasuredHeight()
* (3)getHeight()
*/
// 顶部状态
if (scroll.getScaleY() <= 0) {
Log.i("Main", "滑动到顶部");
}
// 底部状态
// TextView的总高度 = 一屏幕的高度 + 滚动条滚动距离,关于这个表达式,老师用的是<=,难解
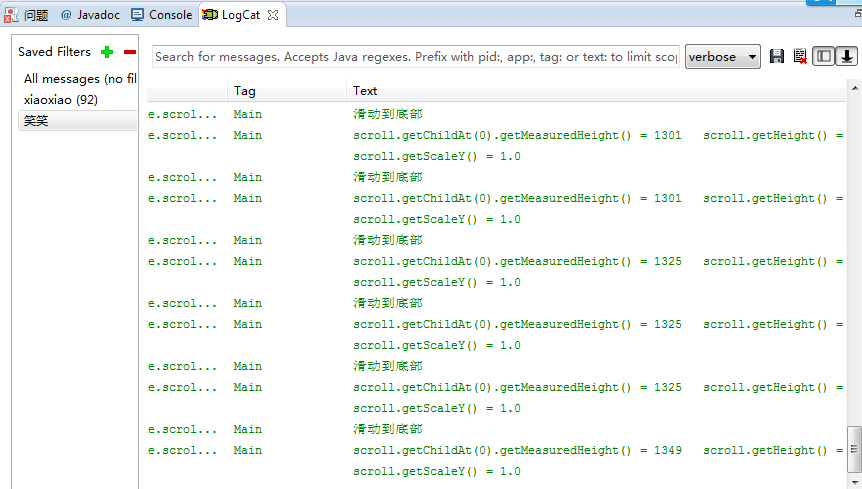
if (scroll.getChildAt(0).getMeasuredHeight() > scroll.getHeight() + scroll.getScaleY()) {
Log.i("Main", "滑动到底部");
Log.i("Main",
"scroll.getChildAt(0).getMeasuredHeight() = "
+ scroll.getChildAt(0).getMeasuredHeight()
+ " scroll.getHeight() = "
+ scroll.getHeight()
+ " scroll.getScaleY() = "
+ scroll.getScaleY());
// 追加文本。
tv.append(getResources().getString(R.string.xiaoxiao));
}
break;
default:
break;
}
return false;
}
});
}
}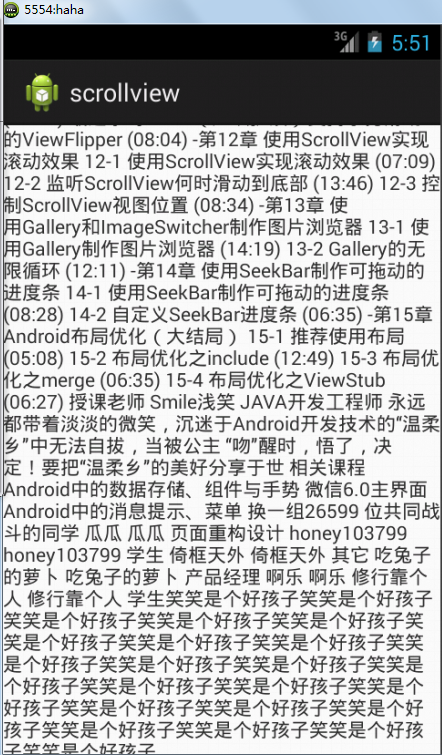
文字在不断增加时,长度也在不断变化:
6. 控制ScrollView的视图位置:
第一步:在main布局文件中添加两个按钮:
<?xml version="1.0" encoding="utf-8"?>
<LinearLayout xmlns:android="http://schemas.android.com/apk/res/android"
    android:layout_width="match_parent"
    android:layout_height="match_parent"
    android:orientation="vertical" >

    <Button
        android:id="@+id/up"
        android:layout_width="wrap_content"
        android:layout_height="wrap_content"
        android:text="UP"
        />

    <Button
        android:id="@+id/down"
        android:layout_width="wrap_content"
        android:layout_height="wrap_content"
        android:text="DOWN"
        />

    <ScrollView
        android:layout_width="match_parent"
        android:layout_height="wrap_content"
        android:id="@+id/scroll"
        android:scrollbars="none"
        >

		<TextView
		    android:id="@+id/content"
		    android:layout_width="match_parent"
		    android:layout_height="wrap_content"
		    />

	</ScrollView >
</LinearLayout>
package com.example.scrollview;

import android.os.Bundle;
import android.app.Activity;
import android.util.Log;
import android.view.Menu;
import android.view.MotionEvent;
import android.view.View;
import android.view.View.OnClickListener;
import android.view.View.OnTouchListener;
import android.widget.Button;
import android.widget.ScrollView;
import android.widget.TextView;

public class MainActivity extends Activity implements OnClickListener{

	private TextView tv;
	private ScrollView scroll;
	private Button up_btn;
	private Button down_btn;

	@Override
	protected void onCreate(Bundle savedInstanceState) {
		super.onCreate(savedInstanceState);
		setContentView(R.layout.main);

		tv = (TextView) findViewById(R.id.content);
		// 括号里的这两个函数,都是系统自带的,用来获取资源的。这里获取了res中values中String文件中的内容。
		tv.setText(getResources().getString(R.string.content));

		up_btn = (Button) findViewById(R.id.up);
		down_btn = (Button) findViewById(R.id.down);
		up_btn.setOnClickListener(this);
		down_btn.setOnClickListener(this);

		scroll = (ScrollView) findViewById(R.id.scroll);
		scroll.setOnTouchListener(new OnTouchListener() {

			@Override
			public boolean onTouch(View v, MotionEvent event) {
				// 判断手势滑动
				switch (event.getAction()) {
				// 当手指抬起:
				case MotionEvent.ACTION_POINTER_UP:
					break;
				// 当手指落下:
				case MotionEvent.ACTION_DOWN:
					break;
				// 当手指在滑动:这个案例主要讨论滑动的这个手势,上两个不讨论了。
				case MotionEvent.ACTION_MOVE:
					/*
					 * (1)getScrollY()----滚动条滑动的距离,从0开始计算 (2)getMeasuredHeight()
					 * (3)getHeight()
					 */

					// 顶部状态
					if (scroll.getScaleY() <= 0) {
						Log.i("Main", "滑动到顶部");
					}

					// 底部状态
					// TextView的总高度 = 一屏幕的高度 + 滚动条滚动距离,关于这个表达式,老师用的是<=,难解
					if (scroll.getChildAt(0).getMeasuredHeight() > scroll
							.getHeight() + scroll.getScaleY()) {
						Log.i("Main", "滑动到底部");
						Log.i("Main",
								"scroll.getChildAt(0).getMeasuredHeight() = "
										+ scroll.getChildAt(0)
												.getMeasuredHeight()
										+ "   scroll.getHeight() = "
										+ scroll.getHeight()
										+ "   scroll.getScaleY() = "
										+ scroll.getScaleY());

						// 追加文本。
						tv.append(getResources().getString(R.string.xiaoxiao));
					}

					break;
				default:
					break;
				}
				return false;
			}
		});
	}

	@Override
	public void onClick(View arg0) {
		// scrollTo:参考系是滚动条的最开始的位置。效果也就是点一次以后第二次没有反应了。
		// scrollBy:相对前一次的位置去滚动对应的距离。
		/*
		 * 如果想实现像读小说一样返回来可以再次返回上次阅读的地方,
		 * 那么就可以通过保存上次的阅读位置,
		 * 然后返回后通过这些函数来实现滚动。
		 * */
		switch(arg0.getId()){
		case R.id.up:
			// 向上滚动30的距离。
			scroll.scrollBy(0, -30);
			break;
		case R.id.down:
			// 向下滚动30的距离。
			scroll.scrollBy(0, 30);
			break;
		}
	}
}


 4627
4627


 被折叠的 条评论
为什么被折叠?
被折叠的 条评论
为什么被折叠?
 到【灌水乐园】发言


