


深入解读SSD:ssd_common.py,ssd_vgg_300.py,custom_layers.py
https://blog.csdn.net/c20081052/article/details/80391627
本文参考链接:
https://blog.csdn.net/c20081052/article/details/80455449
import os
import math
import random
import numpy as np
import tensorflow as tf
import cv2
slim = tf.contrib.slim
#get_ipython().magic(‘matplotlib inline’)
import matplotlib.pyplot as plt
import matplotlib.image as mpimg
import sys
sys.path.append(’…/’)
from nets import ssd_vgg_300, ssd_common, np_methods
from preprocessing import ssd_vgg_preprocessing
from notebooks import visualization_camera #visualization
TensorFlow session: grow memory when needed. TF, DO NOT USE ALL MY GPU MEMORY!!!
gpu_options = tf.GPUOptions(allow_growth=True)
config = tf.ConfigProto(log_device_placement=False, gpu_options=gpu_options)
isess = tf.InteractiveSession(config=config)
## SSD 300 Model
The SSD 300 network takes 300x300 image inputs. In order to feed any image, the latter is resize to this input shape (i.e.Resize.WARP_RESIZE). Note that even though it may change the ratio width / height, the SSD model performs well on resized images (and it is the default behaviour in the original Caffe implementation).
SSD anchors correspond to the default bounding boxes encoded in the network. The SSD net output provides offset on the coordinates and dimensions of these anchors.
Input placeholder.
net_shape = (300, 300)
data_format = ‘NHWC’
img_input = tf.placeholder(tf.uint8, shape=(None, None, 3))
Evaluation pre-processing: resize to SSD net shape.
image_pre, labels_pre, bboxes_pre, bbox_img = ssd_vgg_preprocessing.preprocess_for_eval(
img_input, None, None, net_shape, data_format, resize=ssd_vgg_preprocessing.Resize.WARP_RESIZE)
image_4d = tf.expand_dims(image_pre, 0)
Define the SSD model.
reuse = True if ‘ssd_net’ in locals() else None
ssd_net = ssd_vgg_300.SSDNet()
with slim.arg_scope(ssd_net.arg_scope(data_format=data_format)):
predictions, localisations, _, _ = ssd_net.net(image_4d, is_training=False, reuse=reuse)
Restore SSD model.
ckpt_filename = ‘…/checkpoints/ssd_300_vgg.ckpt’ #可更改为自己的模型路径
ckpt_filename = ‘…/checkpoints/VGG_VOC0712_SSD_300x300_ft_iter_120000.ckpt’
isess.run(tf.global_variables_initializer())
saver = tf.train.Saver()
saver.restore(isess, ckpt_filename)
SSD default anchor boxes.
ssd_anchors = ssd_net.anchors(net_shape)
## Post-processing pipeline
The SSD outputs need to be post-processed to provide proper detections. Namely, we follow these common steps:
* Select boxes above a classification threshold;
* Clip boxes to the image shape;
* Apply the Non-Maximum-Selection algorithm: fuse together boxes whose Jaccard score > threshold;
* If necessary, resize bounding boxes to original image shape.
Main image processing routine.
def process_image(img, select_threshold=0.5, nms_threshold=.45, net_shape=(300, 300)):
# Run SSD network.
rimg, rpredictions, rlocalisations, rbbox_img = isess.run([image_4d, predictions, localisations, bbox_img],
feed_dict={img_input: img})
# Get classes and bboxes from the net outputs.
rclasses, rscores, rbboxes = np_methods.ssd_bboxes_select(
        rpredictions, rlocalisations, ssd_anchors,
        select_threshold=select_threshold, img_shape=net_shape, num_classes=21, decode=True)

rbboxes = np_methods.bboxes_clip(rbbox_img, rbboxes)
rclasses, rscores, rbboxes = np_methods.bboxes_sort(rclasses, rscores, rbboxes, top_k=400)
rclasses, rscores, rbboxes = np_methods.bboxes_nms(rclasses, rscores, rbboxes, nms_threshold=nms_threshold)
# Resize bboxes to original image shape. Note: useless for Resize.WARP!
rbboxes = np_methods.bboxes_resize(rbbox_img, rbboxes)
return rclasses, rscores, rbboxes
# Test on some demo image and visualize output.
path = ‘…/demo/’
image_names = sorted(os.listdir(path))
img = mpimg.imread(path + image_names[-5])
rclasses, rscores, rbboxes = process_image(img)
# visualization.bboxes_draw_on_img(img, rclasses, rscores, rbboxes, visualization.colors_plasma)
visualization.plt_bboxes(img, rclasses, rscores, rbboxes)
following are added for camera demo####
cap = cv2.VideoCapture(r’D:\person.avi’)
fps = cap.get(cv2.CAP_PROP_FPS)
size = (int(cap.get(cv2.CAP_PROP_FRAME_WIDTH)), int(cap.get(cv2.CAP_PROP_FRAME_HEIGHT)))
fourcc = cap.get(cv2.CAP_PROP_FOURCC)
#fourcc = cv2.CAP_PROP_FOURCC(*‘CVID’)
print(‘fps=%d,size=%r,fourcc=%r’%(fps,size,fourcc))
delay=30/int(fps)
while(cap.isOpened()):
ret,frame = cap.read()
if ret==True:
image = Image.open(image_path)
gray = cv2.cvtColor(frame, cv2.COLOR_BGR2GRAY)
      image = frame
      # the array based representation of the image will be used later in order to prepare the
      # result image with boxes and labels on it.
      image_np = image
image_np = load_image_into_numpy_array(image)
      # Expand dimensions since the model expects images to have shape: [1, None, None, 3]
      image_np_expanded = np.expand_dims(image_np, axis=0)
      # Actual detection.
      rclasses, rscores, rbboxes =  process_image(image_np)
      # Visualization of the results of a detection.
      visualization_camera.bboxes_draw_on_img(image_np, rclasses, rscores, rbboxes)
plt.figure(figsize=IMAGE_SIZE)
plt.imshow(image_np)
      cv2.imshow('frame',image_np)
      cv2.waitKey(np.uint(delay))
      print('Ongoing...')
  else:
      break
cap.release()
cv2.destroyAllWindows()
其中
cap = cv2.VideoCapture(r’D:\person.avi’) 是你读取视频的文件目录,自行更改。以下是visualization_camera.py内容:
# Copyright 2017 Paul Balanca. All Rights Reserved.
Licensed under the Apache License, Version 2.0 (the “License”);
you may not use this file except in compliance with the License.
You may obtain a copy of the License at
http://www.apache.org/licenses/LICENSE-2.0
Unless required by applicable law or agreed to in writing, software
distributed under the License is distributed on an “AS IS” BASIS,
WITHOUT WARRANTIES OR CONDITIONS OF ANY KIND, either express or implied.
See the License for the specific language governing permissions and
limitations under the License.
==============================================================================
import cv2
import random
import matplotlib.pyplot as plt
import matplotlib.image as mpimg
import matplotlib.cm as mpcm
#added 20180516#####
def num2class(n):
import SSD_Tensorflow_master.datasets.pascalvoc_2007 as pas
x=pas.pascalvoc_common.VOC_LABELS.items()
for name,item in x:
if n in item:
#print(name)
return name
#adden end #########
===========================================================================
Some colormaps.
===========================================================================
def colors_subselect(colors, num_classes=21):
dt = len(colors) // num_classes
sub_colors = []
for i in range(num_classes):
color = colors[i*dt]
if isinstance(color[0], float):
sub_colors.append([int(c * 255) for c in color])
else:
sub_colors.append([c for c in color])
return sub_colors
colors_plasma = colors_subselect(mpcm.plasma.colors, num_classes=21)
colors_tableau = [(255, 255, 255), (31, 119, 180), (174, 199, 232), (255, 127, 14), (255, 187, 120),
(44, 160, 44), (152, 223, 138), (214, 39, 40), (255, 152, 150),
(148, 103, 189), (197, 176, 213), (140, 86, 75), (196, 156, 148),
(227, 119, 194), (247, 182, 210), (127, 127, 127), (199, 199, 199),
(188, 189, 34), (219, 219, 141), (23, 190, 207), (158, 218, 229)]
===========================================================================
OpenCV drawing.
===========================================================================
def draw_lines(img, lines, color=[255, 0, 0], thickness=2):
“”“Draw a collection of lines on an image.
“””
for line in lines:
for x1, y1, x2, y2 in line:
cv2.line(img, (x1, y1), (x2, y2), color, thickness)
def draw_rectangle(img, p1, p2, color=[255, 0, 0], thickness=2):
cv2.rectangle(img, p1[::-1], p2[::-1], color, thickness)
def draw_bbox(img, bbox, shape, label, color=[255, 0, 0], thickness=2):
p1 = (int(bbox[0] * shape[0]), int(bbox[1] * shape[1]))
p2 = (int(bbox[2] * shape[0]), int(bbox[3] * shape[1]))
cv2.rectangle(img, p1[::-1], p2[::-1], color, thickness)
p1 = (p1[0]+15, p1[1])
cv2.putText(img, str(label), p1[::-1], cv2.FONT_HERSHEY_DUPLEX, 0.5, color, 1)
def bboxes_draw_on_img(img, classes, scores, bboxes, colors=dict(), thickness=2):
shape = img.shape
####add 20180516#####
#colors=dict()
####add #############
for i in range(bboxes.shape[0]):
bbox = bboxes[i]
if classes[i] not in colors:
colors[classes[i]] = (random.random(), random.random(), random.random())
p1 = (int(bbox[0] * shape[0]), int(bbox[1] * shape[1]))
p2 = (int(bbox[2] * shape[0]), int(bbox[3] * shape[1]))
cv2.rectangle(img, p1[::-1], p2[::-1], colors[classes[i]], thickness)
s = ‘%s/%.3f’ % (num2class(classes[i]), scores[i])
p1 = (p1[0]-5, p1[1])
cv2.putText(img, s, p1[::-1], cv2.FONT_HERSHEY_DUPLEX, 0.4, colors[classes[i]], 1)
===========================================================================
Matplotlib show…
===========================================================================
def plt_bboxes(img, classes, scores, bboxes, figsize=(10,10), linewidth=1.5):
“”“Visualize bounding boxes. Largely inspired by SSD-MXNET!
“””
fig = plt.figure(figsize=figsize)
plt.imshow(img)
height = img.shape[0]
width = img.shape[1]
colors = dict()
for i in range(classes.shape[0]):
cls_id = int(classes[i])
if cls_id >= 0:
score = scores[i]
if cls_id not in colors:
colors[cls_id] = (random.random(), random.random(), random.random())
ymin = int(bboxes[i, 0] * height)
xmin = int(bboxes[i, 1] * width)
ymax = int(bboxes[i, 2] * height)
xmax = int(bboxes[i, 3] * width)
rect = plt.Rectangle((xmin, ymin), xmax - xmin,
ymax - ymin, fill=False,
edgecolor=colors[cls_id],
linewidth=linewidth)
plt.gca().add_patch(rect)
##class_name = str(cls_id) #commented 20180516
#### added 20180516#####
class_name = num2class(cls_id)
#### added end #########
plt.gca().text(xmin, ymin - 2,
‘{?} | {:.3f}’.format(class_name, score),
bbox=dict(facecolor=colors[cls_id], alpha=0.5),
fontsize=12, color=‘white’)
plt.show()
OK 了,运行上面那个ssd_notebook_camera.py文件,以下是视频检测结果(带目标类别名称):视频流的检测效果没有那么好,可能是训练模型用的是它自带推荐的,可自行训练试试效果。(我这还是CPU跑的……)

</article>
下面是我改过的
第一个文件
ssd_notebook_camera.py代码如下:
#coding: utf-8
import os
import math
import random
import numpy as np
import tensorflow as tf
import cv2
slim = tf.contrib.slim
#get_ipython().magic(‘matplotlib inline’)
import matplotlib.pyplot as plt
import matplotlib.image as mpimg
import sys
sys.path.append(’/home/hp/zjc/Tensorflow/Deeplearning/SSD-Tensorflow-master/’)
from nets import ssd_vgg_300, ssd_common, np_methods
from preprocessing import ssd_vgg_preprocessing
from notebooks import visualization_camera #visualization
#TensorFlow session: grow memory when needed. TF, DO NOT USE ALL MY GPU MEMORY!!!
gpu_options = tf.GPUOptions(allow_growth=True)
config = tf.ConfigProto(log_device_placement=False, gpu_options=gpu_options)
isess = tf.InteractiveSession(config=config)
#SSD 300 Model
#The SSD 300 network takes 300x300 image inputs. In order to feed any image, the latter is resize to this input shape (i.e.Resize.WARP_RESIZE). Note that even though it may change the ratio width / height, the SSD model performs well on resized images (and it is the default behaviour in the original Caffe implementation).
#SSD anchors correspond to the default bounding boxes encoded in the network. The SSD net output provides offset on the coordinates and dimensions of these anchors.
#Input placeholder.
net_shape = (300, 300)
data_format = ‘NHWC’
img_input = tf.placeholder(tf.uint8, shape=(None, None, 3))
#Evaluation pre-processing: resize to SSD net shape.
image_pre, labels_pre, bboxes_pre, bbox_img = ssd_vgg_preprocessing.preprocess_for_eval(
img_input, None, None, net_shape, data_format, resize=ssd_vgg_preprocessing.Resize.WARP_RESIZE)
image_4d = tf.expand_dims(image_pre, 0)
#Define the SSD model.
reuse = True if ‘ssd_net’ in locals() else None
ssd_net = ssd_vgg_300.SSDNet()
with slim.arg_scope(ssd_net.arg_scope(data_format=data_format)):
predictions, localisations, _, _ = ssd_net.net(image_4d, is_training=False, reuse=reuse)
#Restore SSD model.
ckpt_filename = ‘/home/hp/zjc/Tensorflow/Deeplearning/SSD-Tensorflow-master/checkpoints/ssd_300_vgg.ckpt’ #可更改为自己的模型路径
#ckpt_filename = ‘…/checkpoints/VGG_VOC0712_SSD_300x300_ft_iter_120000.ckpt’
isess.run(tf.global_variables_initializer())
saver = tf.train.Saver()
saver.restore(isess, ckpt_filename)
#SSD default anchor boxes.
ssd_anchors = ssd_net.anchors(net_shape)
#Post-processing pipeline
#The SSD outputs need to be post-processed to provide proper detections. Namely, we follow these common steps:
#* Select boxes above a classification threshold;
#* Clip boxes to the image shape;
#* Apply the Non-Maximum-Selection algorithm: fuse together boxes whose Jaccard score > threshold;
#* If necessary, resize bounding boxes to original image shape.
#Main image processing routine.
def process_image(img, select_threshold=0.5, nms_threshold=.45, net_shape=(300, 300)):
# Run SSD network.
rimg, rpredictions, rlocalisations, rbbox_img = isess.run([image_4d, predictions, localisations, bbox_img],
q feed_dict={img_input: img})
# Get classes and bboxes from the net outputs.
rclasses, rscores, rbboxes = np_methods.ssd_bboxes_select(
        rpredictions, rlocalisations, ssd_anchors,
        select_threshold=select_threshold, img_shape=net_shape, num_classes=21, decode=True)

rbboxes = np_methods.bboxes_clip(rbbox_img, rbboxes)
rclasses, rscores, rbboxes = np_methods.bboxes_sort(rclasses, rscores, rbboxes, top_k=400)
rclasses, rscores, rbboxes = np_methods.bboxes_nms(rclasses, rscores, rbboxes, nms_threshold=nms_threshold)
# Resize bboxes to original image shape. Note: useless for Resize.WARP!
rbboxes = np_methods.bboxes_resize(rbbox_img, rbboxes)
return rclasses, rscores, rbboxes
#Test on some demo image and visualize output.
#path = ‘…/demo/’
#image_names = sorted(os.listdir(path))
#img = mpimg.imread(path + image_names[-5])
#rclasses, rscores, rbboxes = process_image(img)
#visualization.bboxes_draw_on_img(img, rclasses, rscores, rbboxes, visualization.colors_plasma)
#visualization.plt_bboxes(img, rclasses, rscores, rbboxes)
cap = cv2.VideoCapture(0)
while(cap.isOpened()):
ret,frame = cap.read()
if ret==True:
#image = Image.open(image_path)
#gray = cv2.cvtColor(frame, cv2.COLOR_BGR2GRAY)
image = frame
# the array based representation of the image will be used later in order to prepare the
# result image with boxes and labels on it.
image_np = image
#image_np = load_image_into_numpy_array(image)
# Expand dimensions since the model expects images to have shape: [1, None, None, 3]
image_np_expanded = np.expand_dims(image_np, axis=0)
# Actual detection.
rclasses, rscores, rbboxes = process_image(image_np)
# Visualization of the results of a detection.
visualization_camera.bboxes_draw_on_img(image_np, rclasses, rscores, rbboxes)
#plt.figure(figsize=IMAGE_SIZE)
#plt.imshow(image_np)
cv2.imshow(‘frame’,image_np)
cv2.waitKey(np.uint(delay))
print(‘Ongoing…’)
else:
break
cap.release()
cv2.destroyAllWindows()
其中
sys.path.append(’/home/hp/zjc/Tensorflow/Deeplearning/SSD-Tensorflow-master/’)是给模块的路径,在我这里不加这个找不到net模块,net模块的路径为/home/hp/zjc/Tensorflow/Deeplearning/SSD-Tensorflow-master/nets/
ckpt_filename = ‘/home/hp/zjc/Tensorflow/Deeplearning/SSD-Tensorflow-master/checkpoints/ssd_300_vgg.ckpt’ 是给的模型的路径
这里是你读取视频的文件目录,自行更改,在win下   cap = cv2.VideoCapture(r’D:\person.avi’)

如果在ubuntu下模仿如下                       cap = cv2.VideoCapture(r’/home/hp/zjc/Tensorflow/Deeplearning/SSD-Tensorflow-master/Video/input/car.mp4’)

如果想用电脑自带摄像头用                      cap = cv2.VideoCapture(0)
第二个文件
以下是visualization_camera.py内容:
# Copyright 2017 Paul Balanca. All Rights Reserved.
Licensed under the Apache License, Version 2.0 (the “License”);
you may not use this file except in compliance with the License.
You may obtain a copy of the License at
http://www.apache.org/licenses/LICENSE-2.0
Unless required by applicable law or agreed to in writing, software
distributed under the License is distributed on an “AS IS” BASIS,
WITHOUT WARRANTIES OR CONDITIONS OF ANY KIND, either express or implied.
See the License for the specific language governing permissions and
limitations under the License.
==============================================================================
import cv2
import random
import matplotlib.pyplot as plt
import matplotlib.image as mpimg
import matplotlib.cm as mpcm
#added 20180516#####
def num2class(n):
import SSD_Tensorflow_master.datasets.pascalvoc_2007 as pas
x=pas.pascalvoc_common.VOC_LABELS.items()
for name,item in x:
if n in item:
#print(name)
return name
#adden end #########
===========================================================================
Some colormaps.
===========================================================================
def colors_subselect(colors, num_classes=21):
dt = len(colors) // num_classes
sub_colors = []
for i in range(num_classes):
color = colors[i*dt]
if isinstance(color[0], float):
sub_colors.append([int(c * 255) for c in color])
else:
sub_colors.append([c for c in color])
return sub_colors
colors_plasma = colors_subselect(mpcm.plasma.colors, num_classes=21)
colors_tableau = [(255, 255, 255), (31, 119, 180), (174, 199, 232), (255, 127, 14), (255, 187, 120),
(44, 160, 44), (152, 223, 138), (214, 39, 40), (255, 152, 150),
(148, 103, 189), (197, 176, 213), (140, 86, 75), (196, 156, 148),
(227, 119, 194), (247, 182, 210), (127, 127, 127), (199, 199, 199),
(188, 189, 34), (219, 219, 141), (23, 190, 207), (158, 218, 229)]
===========================================================================
OpenCV drawing.
===========================================================================
def draw_lines(img, lines, color=[255, 0, 0], thickness=2):
“”“Draw a collection of lines on an image.
“””
for line in lines:
for x1, y1, x2, y2 in line:
cv2.line(img, (x1, y1), (x2, y2), color, thickness)
def draw_rectangle(img, p1, p2, color=[255, 0, 0], thickness=2):
cv2.rectangle(img, p1[::-1], p2[::-1], color, thickness)
def draw_bbox(img, bbox, shape, label, color=[255, 0, 0], thickness=2):
p1 = (int(bbox[0] * shape[0]), int(bbox[1] * shape[1]))
p2 = (int(bbox[2] * shape[0]), int(bbox[3] * shape[1]))
cv2.rectangle(img, p1[::-1], p2[::-1], color, thickness)
p1 = (p1[0]+15, p1[1])
cv2.putText(img, str(label), p1[::-1], cv2.FONT_HERSHEY_DUPLEX, 0.5, color, 1)
def bboxes_draw_on_img(img, classes, scores, bboxes, colors=dict(), thickness=2):
shape = img.shape
####add 20180516#####
#colors=dict()
####add #############
for i in range(bboxes.shape[0]):
bbox = bboxes[i]
if classes[i] not in colors:
colors[classes[i]] = (random.random(), random.random(), random.random())
p1 = (int(bbox[0] * shape[0]), int(bbox[1] * shape[1]))
p2 = (int(bbox[2] * shape[0]), int(bbox[3] * shape[1]))
cv2.rectangle(img, p1[::-1], p2[::-1], colors[classes[i]], thickness)
s = ‘%s/%.3f’ % (num2class(classes[i]), scores[i])
p1 = (p1[0]-5, p1[1])
cv2.putText(img, s, p1[::-1], cv2.FONT_HERSHEY_DUPLEX, 0.4, colors[classes[i]], 1)
===========================================================================
Matplotlib show…
===========================================================================
def plt_bboxes(img, classes, scores, bboxes, figsize=(10,10), linewidth=1.5):
“”“Visualize bounding boxes. Largely inspired by SSD-MXNET!
“””
fig = plt.figure(figsize=figsize)
plt.imshow(img)
height = img.shape[0]
width = img.shape[1]
colors = dict()
for i in range(classes.shape[0]):
cls_id = int(classes[i])
if cls_id >= 0:
score = scores[i]
if cls_id not in colors:
colors[cls_id] = (random.random(), random.random(), random.random())
ymin = int(bboxes[i, 0] * height)
xmin = int(bboxes[i, 1] * width)
ymax = int(bboxes[i, 2] * height)
xmax = int(bboxes[i, 3] * width)
rect = plt.Rectangle((xmin, ymin), xmax - xmin,
ymax - ymin, fill=False,
edgecolor=colors[cls_id],
linewidth=linewidth)
plt.gca().add_patch(rect)
##class_name = str(cls_id) #commented 20180516
#### added 20180516#####
class_name = num2class(cls_id)
#### added end #########
plt.gca().text(xmin, ymin - 2,
‘{?} | {:.3f}’.format(class_name, score),
bbox=dict(facecolor=colors[cls_id], alpha=0.5),
fontsize=12, color=‘white’)
plt.show()
OK 了,运行上面那个ssd_notebook_camera.py文件,以下是视频检测结果(带目标类别名称):视频流的检测效果没有那么好,可能是训练模型用的是它自带推荐的,可自行训练试试效果。(我这还是CPU跑的……)
其中我遇到的问题有三个
我遇到的问题有三个
问题一:
用到的压缩包SSD-Tensorflow-master解压之后在会有一个datasets文件夹里面有pascalvoc_2007.py文件。
此文件会在本片博客的第二个文件里面有调用:import SSD_Tensorflow_master.datasets.pascalvoc_2007 as pas
所以要按照路径添加文件,路径如下/home/hp/zjc/Tensorflow/Deeplearning/SSD-Tensorflow-master/notebooks/SSD_Tensorflow_master/datasets
这里的datasets文件里面有pascalvoc_2007.py
(重点)这里的SSD_Tensorflow_master文件夹就是压缩包SSD-Tensorflow-master解压之后改了名字,粘贴进了上面的路径里。
下面我会贴图详介绍路径。
问题二:
我遇到找不到SSD_Tensorflow_master模块的问题,解决办法是在visualization_camera.py文件里面添加
import sys
sys.path.append(’/home/hp/zjc/Tensorflow/Deeplearning/SSD-Tensorflow-master/notebooks/’)
因为SSD_Tensorflow_master文件夹在这个路径下
问题三:
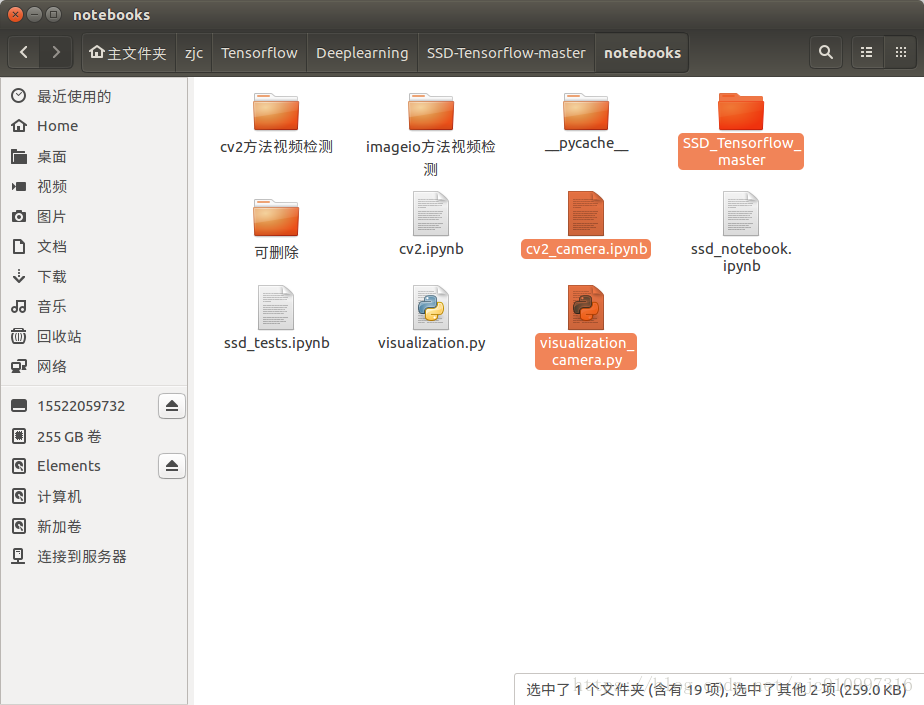
注意!第一个文件(我起名为cv2_camera.ipynb,因为我在ubuntu jupyter下跑的)
第二个文件(我起名为visualization_camera.py)
连个文件都要放在notebooks目录下
这两个文件原件可以私信我,发给你
如果仅对视频进行处理可以参考我另外一篇文章
https://mp.csdn.net/mdeditor/82878162#


 被折叠的 条评论
为什么被折叠?
被折叠的 条评论
为什么被折叠?
 到【灌水乐园】发言


