


前两篇已经讲解了ImageAI实现图片预测以及图片物体检测的方法,现在再来讲解一下ImageAI的第三个功能视频中的物体检测。
准备工作以及ImageAI的安装可以详见上一篇 Image Prediction: ImageAI (一)
Object Detection:ImageAI (二)
本篇github官方地址:https://github.com/OlafenwaMoses/ImageAI/blob/master/imageai/Detection/VIDEO.md
Video Object Detection and Tracking
这里它提供了三种不同的模型供我们选择:(ImageAI至少需要更新到2.0.2 后两个模型是新加的)
RetinaNet (Size = 145 mb, high performance and accuracy, with longer detection time)
YOLOv3 (Size = 237 mb, moderate performance and accuracy, with a moderate detection time)
TinyYOLOv3 (Size = 34 mb, optimized for speed and moderate performance, with fast detection time)
代码如下 很简单
from imageai.Detection import VideoObjectDetection
import os
import time
#计时
start = time.time()

 #当前文件目录
execution_path = os.getcwd()

detector = VideoObjectDetection()
detector.setModelTypeAsTinyYOLOv3() #设置需要使用的模型
detector.setModelPath( os.path.join(execution_path, "yolo-tiny.h5")) #加载已经训练好的模型数据
detector.loadModel()

 #设置输入视频地址 输出地址 每秒帧数等
video_path = detector.detectObjectsFromVideo(input_file_path=os.path.join(execution_path, "traffic.mp4"), output_file_path=os.path.join(execution_path, "traffic_detected"), frames_per_second=20, log_progress=True)
print(video_path)
#结束计时
end = time.time()
print ("\ncost time:",end-start)
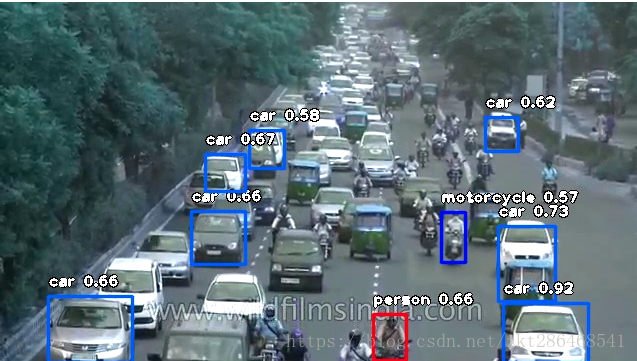
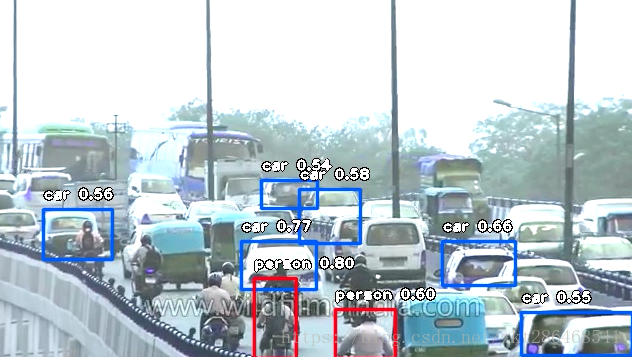
最终可以得到检测好的视频文件traffic_detected.mp4
截图如下:
Custom Video Object Detection 自定义视频对象检测
ImageAI 的模型(RetinaNet),可以检测 80 种不同类型的对象。包括:
person, bicycle, car, motorcycle, airplane, bus, train, truck, boat, traffic light, fire hydrant, stop_sign, parking meter, bench, bird, cat, dog, horse, sheep, cow, elephant, bear, zebra, giraffe, backpack, umbrella, handbag, tie, suitcase, frisbee, skis, snowboard, sports ball, kite, baseball bat, baseball glove, skateboard, surfboard, tennis racket, bottle, wine glass, cup, fork, knife, spoon, bowl, banana, apple, sandwich, orange, broccoli, carrot, hot dog, pizza, donot, cake, chair, couch, potted plant, bed, dining table, toilet, tv, laptop, mouse, remote, keyboard, cell phone, microwave, oven, toaster, sink, refrigerator, book, clock, vase, scissors, teddy bear, hair dryer, toothbrush.
部分代码如下:
execution_path = os.getcwd()

detector = VideoObjectDetection()
detector.setModelTypeAsRetinaNet()
detector.setModelPath( os.path.join(execution_path , "resnet50_coco_best_v2.0.1.h5"))
detector.loadModel()

custom_objects = detector.CustomObjects(person=True, bicycle=True, motorcycle=True)

video_path = detector.detectCustomObjectsFromVideo(custom_objects=custom_objects, input_file_path=os.path.join(execution_path, "traffic.mp4"), output_file_path=os.path.join(execution_path, "traffic_custom_detected"), frames_per_second=20, log_progress=True)
print(video_path)
可以看到多了一条custom_objects = detector.CustomObjects(person=True, bicycle=True, motorcycle=True)
这里定义了需要检测的物体,person,bicycle以及motorcycle
然后在detector.detectCustomObjectsFromVideo中添加了一个参数custom_objects=custom_objects
通过这样生成的视频中就只会检测自定义的那些物体了!
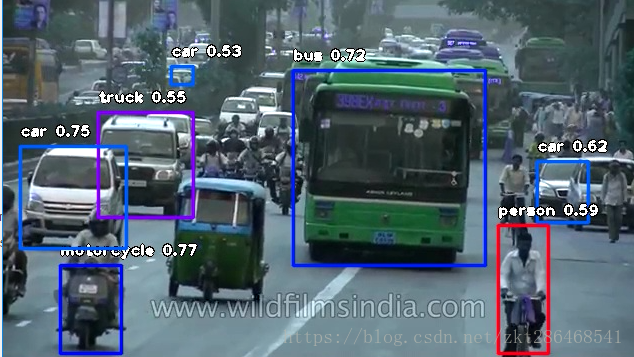
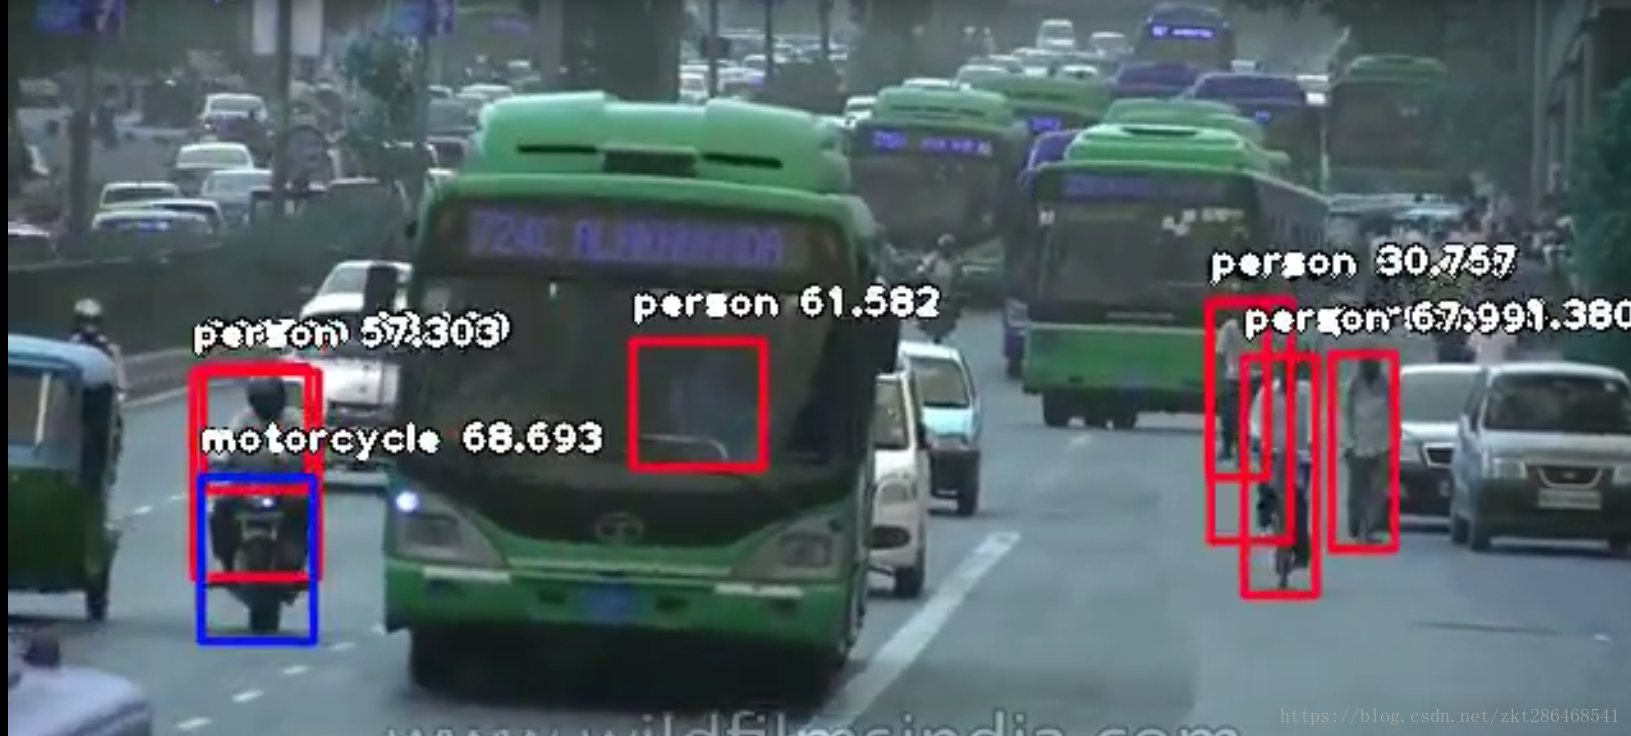
截图如下:
可以看到上图已经不检测汽车这些物体了 只检测除了person以及motorcycle
Video Detection Speed 视频检测速度
在load的时候添加参数detection_speed
detector.loadModel(detection_speed="fast")
以下是官方提供的数据:
视频长度= 1分钟24秒,检测速度=”normal”,最小百分比概率= 50(默认值),检测时间= 29分钟3秒
视频长度= 1分钟24秒,检测速度=”fast”,最小百分比概率= 40,检测时间= 11分钟6秒
视频长度= 1分钟24秒,检测速度=”faster”,最小百分比概率= 30,检测时间= 7分47秒
视频长度= 1分钟24秒,检测速度=”fastest”,最小百分比概率= 20,检测时间= 6分钟20秒
视频长度= 1分钟24秒,检测速度=”flash”,最小百分比概率= 10,检测时间= 3分55
代码以及模型文件放在了网盘上,有需要可以自行下载
链接: https://pan.baidu.com/s/1kgvu_95U7f6AB1rJkpm9Cg 提取码: r3n6


 1288
1288


 被折叠的 条评论
为什么被折叠?
被折叠的 条评论
为什么被折叠?
 到【灌水乐园】发言


