


Zabbix
前言
暂无
一、内网离线安装
1.下载离线RPM包
可在自己电脑双网虚拟机上或者双网linux服务器上下载好离线包。
1.1配置国内镜像源
#使用国内镜像源——阿里云源
rpm -Uvh https://mirrors.aliyun.com/zabbix/zabbix/5.0/rhel/7/x86_64/zabbix-release-5.0-1.el7.noarch.rpm

#更改使用国内镜像源
sed -i 's#http://repo.zabbix.com#https://mirrors.aliyun.com/zabbix#' /etc/yum.repos.d/zabbix.repo

#清除所有缓存
yum clean all
1.2下载zabbix所需rpm包
--yum --downloadonly参数代表只下载不安装
--下载zabbix-server和zabbix-agent
yum install zabbix-server-mysql zabbix-agent --downloadonly --downloaddir=/tmp/offline_rpm
#如报没有downloadonly功能,下载即可
yum install yum-plugin-downloadonly
--下载 Red Hat Software Collections:方便php高版本的安装。
yum install centos-release-scl --downloadonly --downloaddir=/tmp/offline_rpm
#安装 Software Collections。
yum install centos-release-scl -y
#将[zabbix-frontend]下的 enabled 改为 1.
vi /etc/yum.repos.d/zabbix.repo
[zabbix-frontend]
name=Zabbix Official Repository frontend - $basearch
baseurl=https://mirrors.aliyun.com/zabbix/zabbix/5.0/rhel/7/$basearch/frontend
enabled=1
gpgcheck=1
gpgkey=file:///etc/pki/rpm-gpg/RPM-GPG-KEY-ZABBIX-A14FE591
--下载 Zabbix前端web软件包。
yum install zabbix-web-mysql-scl zabbix-apache-conf-scl --downloadonly --downloaddir=/tmp/offline_rpm
--下载mariadb
yum install mariadb-server.x86_64 --downloadonly --downloaddir=/tmp/offline_rpm
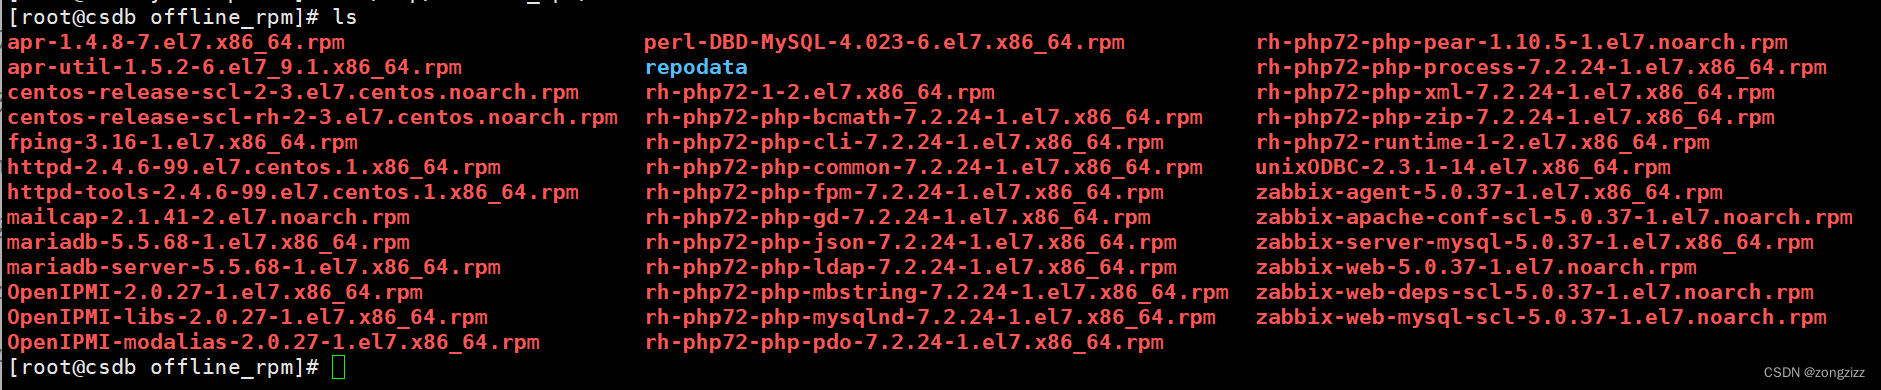
--创建本地yum源
# 使用createrepo来创建repository仓库
createrepo /tmp/offline_rpm
如报错-bash:createrepo:command not found,则先yum install createrepo -y,运行成功后在/tmp/offline_rpm下会出现repodata文件夹
2.内网服务器安装zabbix
2.1内网服务器环境准备
将在双网服务器上下载的离线rpm文件夹offline_rpm拷贝到内网服务器/tmp下
修改主机名、关闭防火墙、修改selinux
2.2修改yum源
将原yum源备份,配置本地离线yum源
[root@grafana-server offline_rpm]# cd /etc/yum.repos.d/
[root@grafana-server yum.repos.d]# ls
bak  new.repo
[root@grafana-server yum.repos.d]# cat new.repo
[New]
name=New
baseurl=file:///tmp/offline_rpm
gpgcheck=0
enabled=1
[root@grafana-server yum.repos.d]#yum clean all
2.3安装
--安装zabbix-server和agent
yum install zabbix-server-mysql zabbix-agent -y
yum install centos-release-scl -y
--上面两部安装完后会多出两个repo,要把他移到bak中
cd /etc/yum.repos.d/
mv CentOS-SCLo-scl* bak/
--安装mariadb
yum -y install perl-DBD-MySQL-4.023-6.el7.x86_64.rpm
yum -y install mariadb*
--安装web
cd /tmp/offline_rpm
--这里在安装web和apache的时候提示缺少依赖,于是我就将包全都安装了
一般用这个可以安装yum install zabbix-web-mysql-scl zabbix-apache-conf-scl –y
不行的话就全安装yum install -y *
2.4配置数据库
#启动
systemctl start mariadb

#设置开机自启动
systemctl enable mariadb

#查看
systemctl status mariadb

--初始化数据库,配置登录密码
[root@grafana-server offline_rpm]# mysql_secure_installation

NOTE: RUNNING ALL PARTS OF THIS SCRIPT IS RECOMMENDED FOR ALL MariaDB
      SERVERS IN PRODUCTION USE!  PLEASE READ EACH STEP CAREFULLY!

In order to log into MariaDB to secure it, we'll need the current
password for the root user.  If you've just installed MariaDB, and
you haven't set the root password yet, the password will be blank,
so you should just press enter here.

Enter current password for root (enter for none):
OK, successfully used password, moving on...

Setting the root password ensures that nobody can log into the MariaDB
root user without the proper authorisation.

Set root password? [Y/n] y
New password:
Re-enter new password:
Password updated successfully!
Reloading privilege tables..
 ... Success!


By default, a MariaDB installation has an anonymous user, allowing anyone
to log into MariaDB without having to have a user account created for
them.  This is intended only for testing, and to make the installation
go a bit smoother.  You should remove them before moving into a
production environment.

Remove anonymous users? [Y/n] y
 ... Success!

Normally, root should only be allowed to connect from 'localhost'.  This
ensures that someone cannot guess at the root password from the network.

Disallow root login remotely? [Y/n] n
 ... skipping.

By default, MariaDB comes with a database named 'test' that anyone can
access.  This is also intended only for testing, and should be removed
before moving into a production environment.

Remove test database and access to it? [Y/n] y
 - Dropping test database...
 ... Success!
 - Removing privileges on test database...
 ... Success!

Reloading the privilege tables will ensure that all changes made so far
will take effect immediately.

Reload privilege tables now? [Y/n] y
 ... Success!

Cleaning up...

All done!  If you've completed all of the above steps, your MariaDB
installation should now be secure.

Thanks for using MariaDB!

--初始化zabbix库,编码utf-8
[root@grafana-server offline_rpm]# mysql -uroot -p
Enter password:
Welcome to the MariaDB monitor.  Commands end with ; or \g.
Your MariaDB connection id is 9
Server version: 5.5.68-MariaDB MariaDB Server

Copyright (c) 2000, 2018, Oracle, MariaDB Corporation Ab and others.

Type 'help;' or '\h' for help. Type '\c' to clear the current input statement.

MariaDB [(none)]>
MariaDB [(none)]> create database zabbix character set utf8 collate utf8_bin;
Query OK, 1 row affected (0.00 sec)

MariaDB [(none)]>
MariaDB [(none)]> create user zabbix@localhost identified by 'zabbix';
Query OK, 0 rows affected (0.00 sec)

MariaDB [(none)]>
MariaDB [(none)]> grant all privileges on zabbix.* to zabbix@localhost;
Query OK, 0 rows affected (0.00 sec)

MariaDB [(none)]> flush privileges;
Query OK, 0 rows affected (0.00 sec)
--导入zabbix初始库
[root@grafana-server offline_rpm]# zcat /usr/share/doc/zabbix-server-mysql*/create.sql.gz | mysql -uzabbix -p zabbix
Enter password:
2.5配置zabbix_server.conf
--填写zabbix用户数据库密码
vi /etc/zabbix/zabbix_server.conf
DBPassword=zabbix
2.6配置php配置文件
#将注释;去掉,并修改为
#php_value[date.timezone] = Asia/Shanghai
vi /etc/opt/rh/rh-php72/php-fpm.d/zabbix.conf
php_value[date.timezone] = Asia/Shanghai
2.7启动服务
#启动
systemctl start zabbix-server zabbix-agent httpd rh-php72-php-fpm

#设置开机自启动
systemctl enable zabbix-server zabbix-agent httpd rh-php72-php-fpm

#查看
systemctl status zabbix-server zabbix-agent httpd rh-php72-php-fpm
3.配置zabbix web界面
3.1登录web界面输入ip/zabbix进入首次配置界面


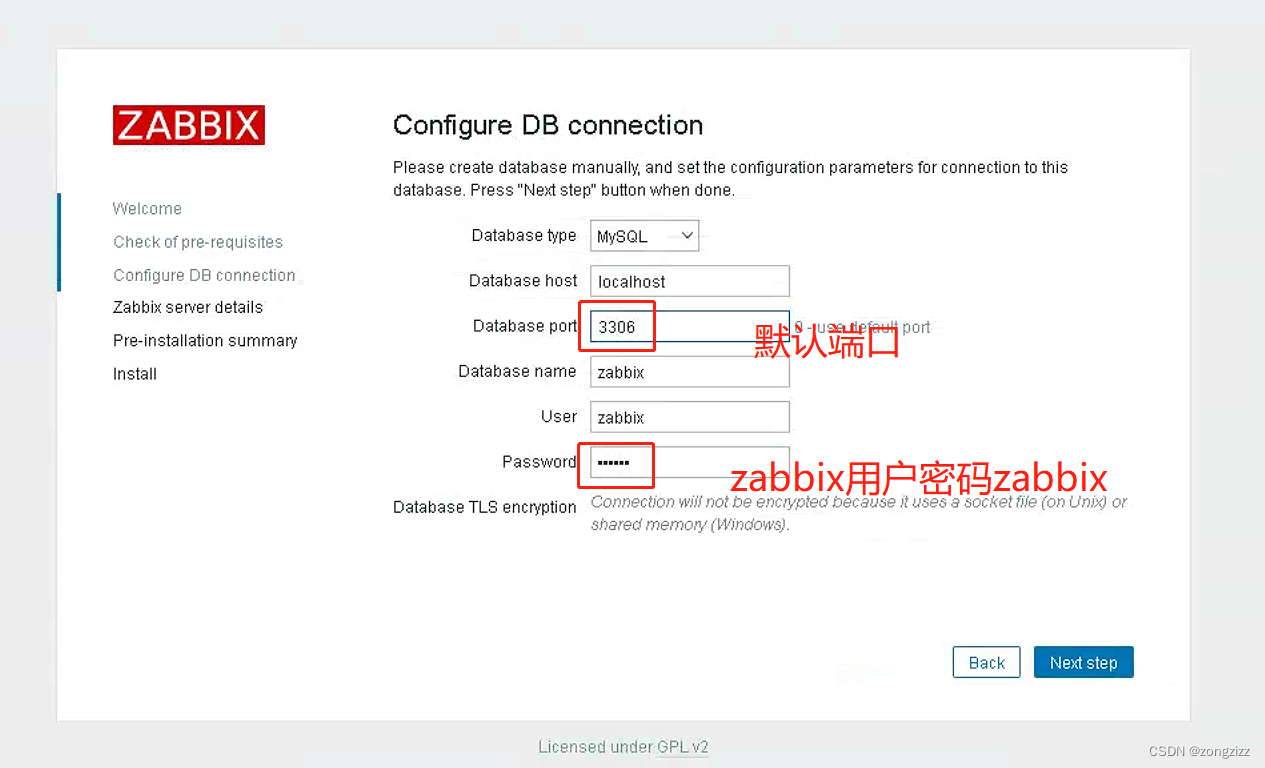

登录:默认用户名为Admin 密码为zabbix
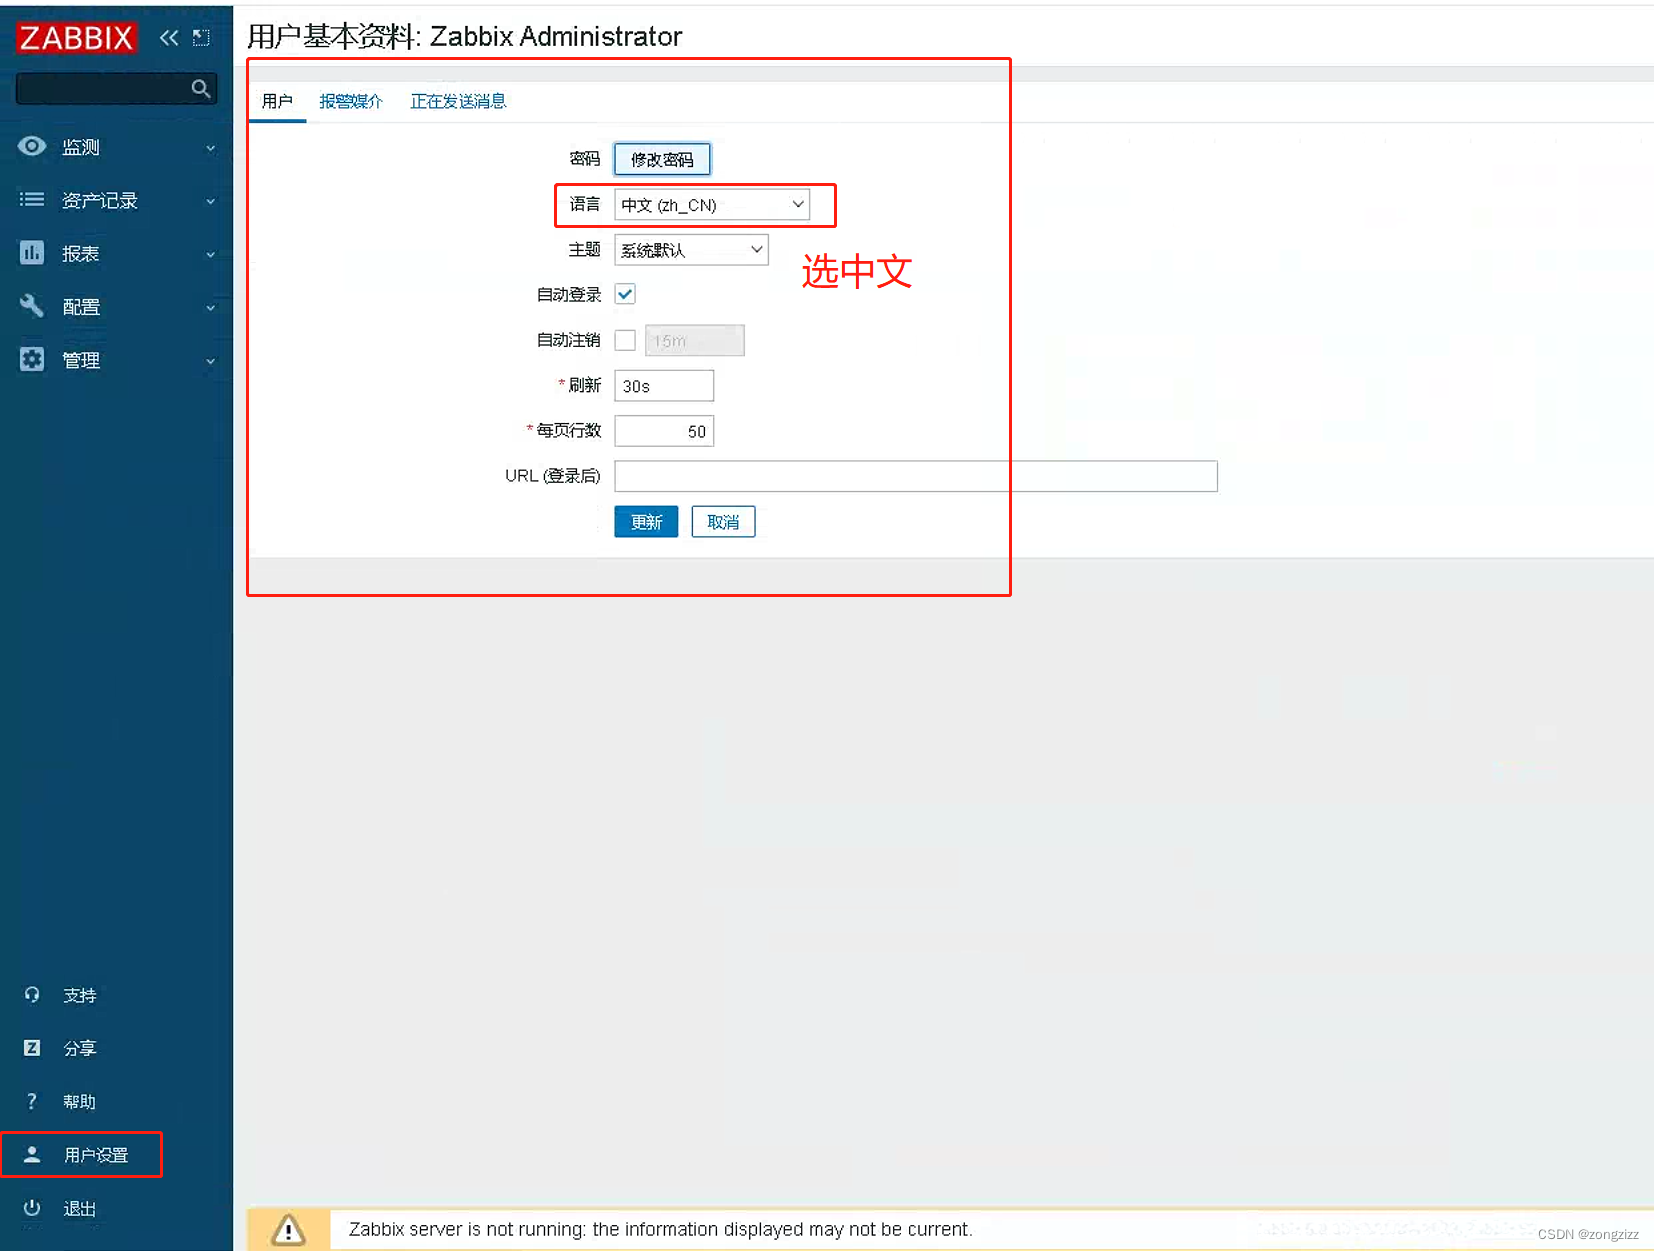
3.2配置界面为中文
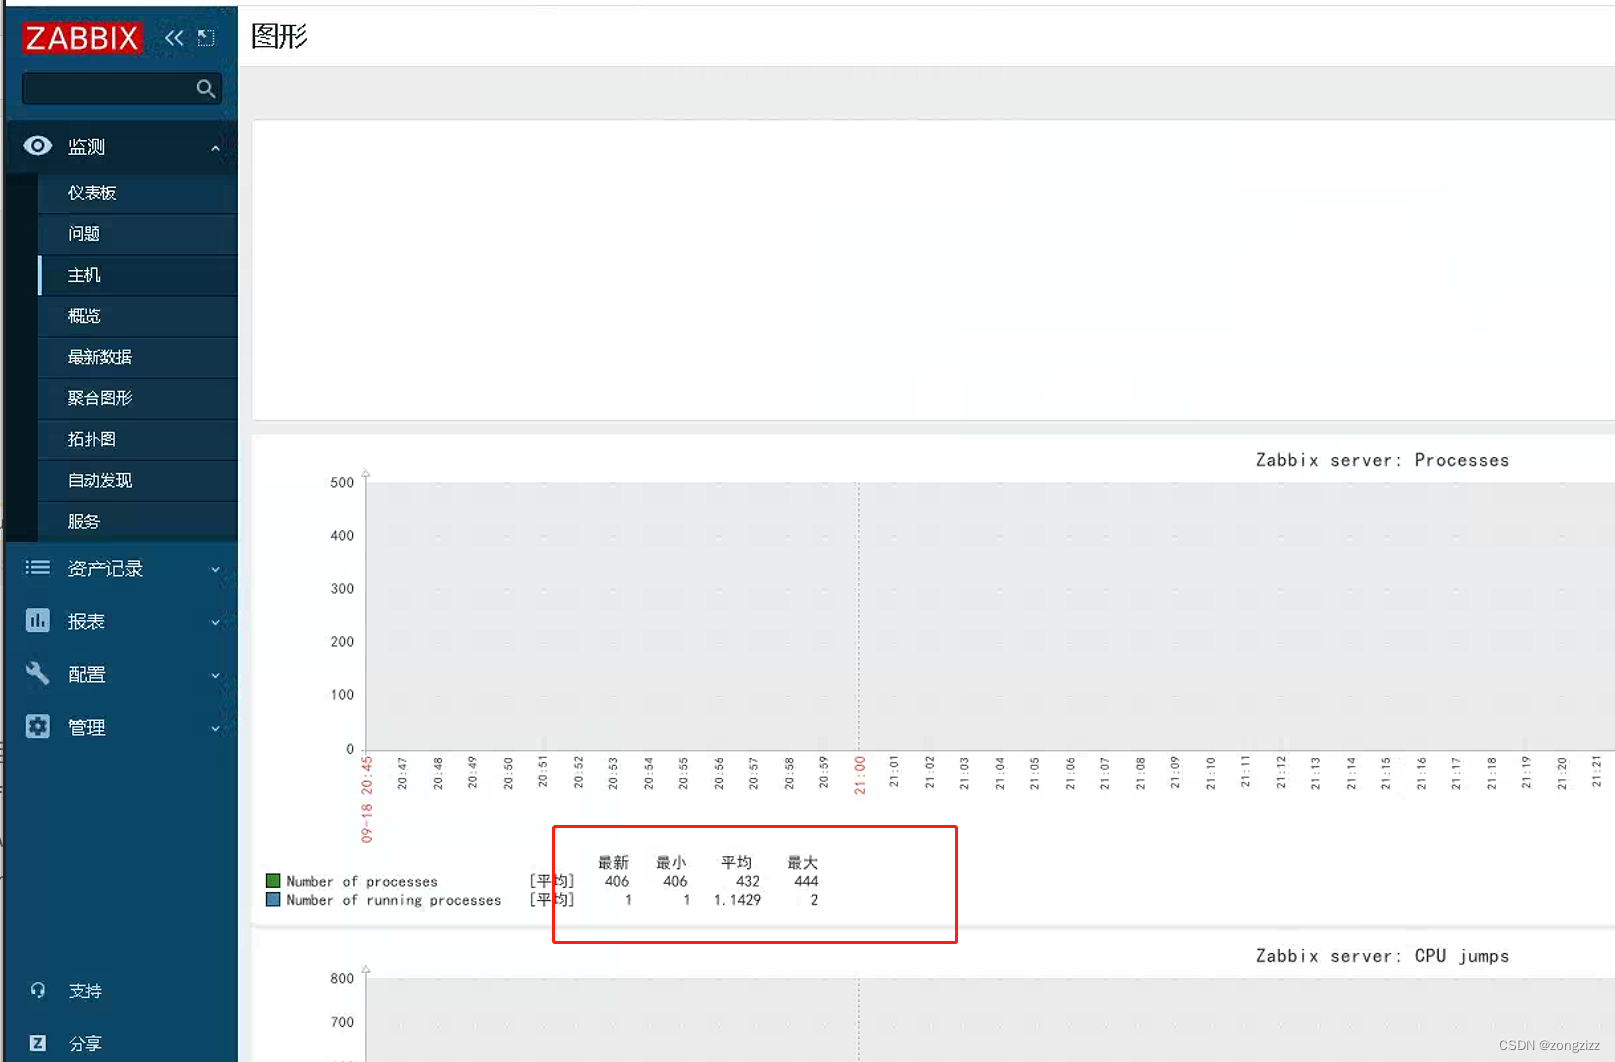
3.3图形乱码修改
将simhei.ttf放到/usr/share/fonts/dejavu/目录
[root@grafana-server ~]# cd /usr/share/fonts/dejavu/
[root@grafana-server dejavu]# mv DejaVuSans.ttf DejaVuSans.ttf.bak
[root@grafana-server dejavu]# ln -s simhei.ttf DejaVuSans.ttf
刷新web界面即可
二、agent安装配置
1.agent安装
离线包里有agent的rpm包
[root@nptdb1 soft]# rpm -ivh zabbix-agent-5.0.37-1.el7.x86_64.rpm
warning: zabbix-agent-5.0.37-1.el7.x86_64.rpm: Header V4 RSA/SHA512 Signature, key ID a14fe591: NOKEY
Preparing... ################################# [100%]
Updating / installing...
1:zabbix-agent-5.0.37-1.el7 ################################# [100%]
--启动agent
[root@nptdb1 soft]# systemctl start zabbix-agent.service
[root@nptdb1 soft]# systemctl enable zabbix-agent.service
--配置conf
修改内容如下
# zabbix 服务端地址
Server=101.15.60.34
# zabbix活动服务器地址
ServerActive=101.15.60.34
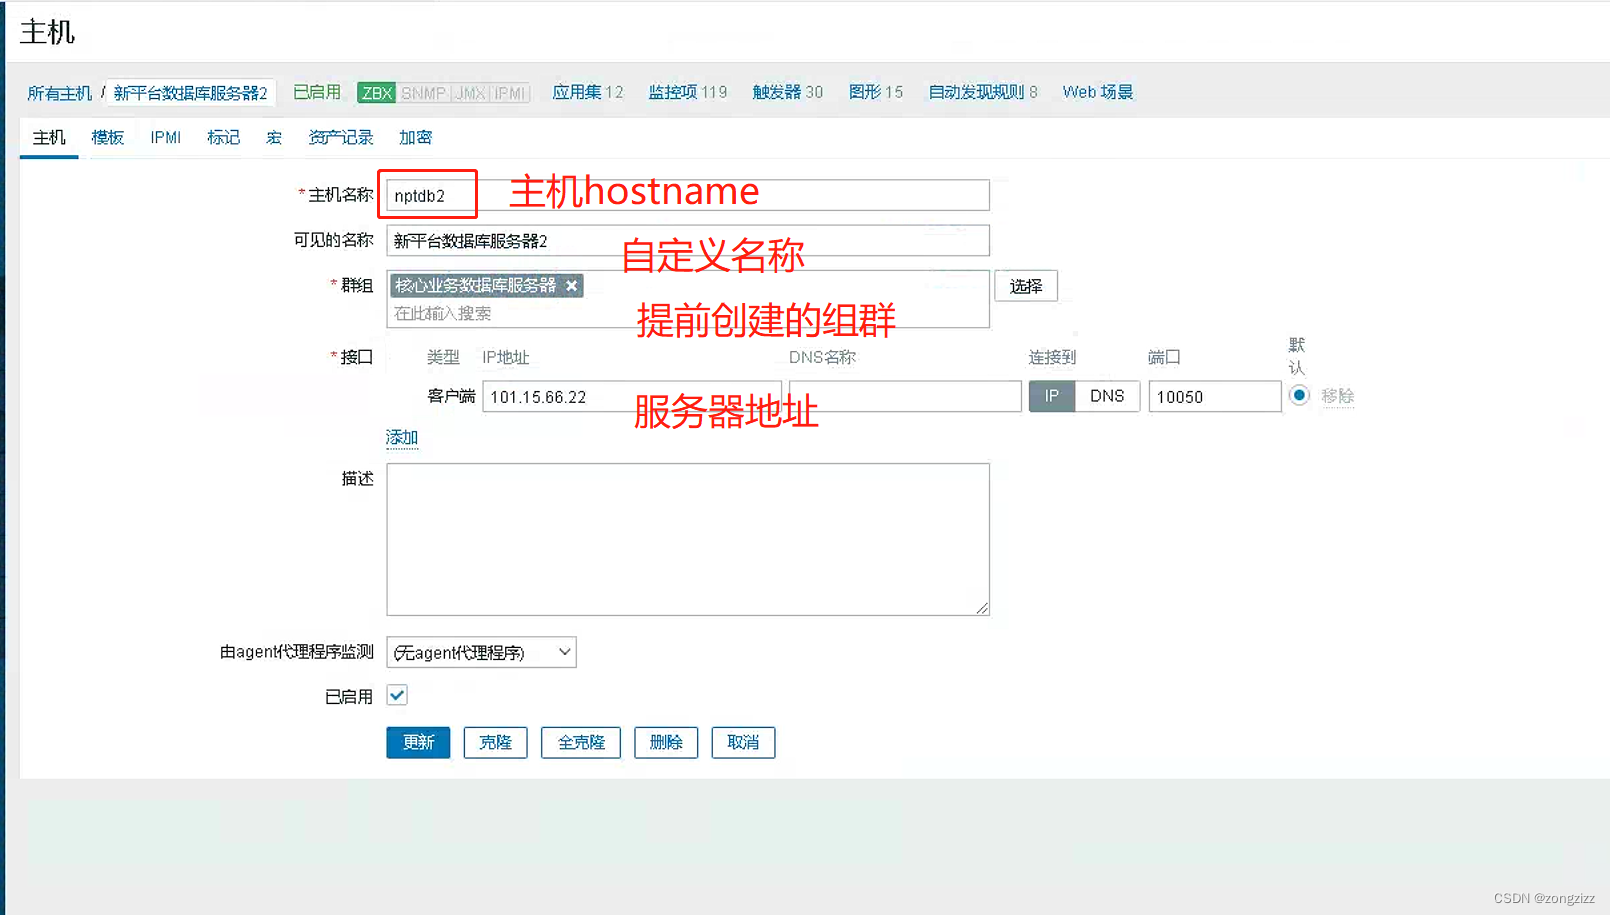
# 主机名,也就是要监控的那台主机名,在web页面添加主机时需设置相同
hostname=nptdb1
[root@nptdb1 zabbix]# cd /etc/zabbix/
[root@nptdb1 zabbix]# pwd
/etc/zabbix
[root@nptdb1 zabbix]# ls
zabbix_agentd.conf zabbix_agentd.d
[root@nptdb1 zabbix]# vi zabbix_agentd.conf
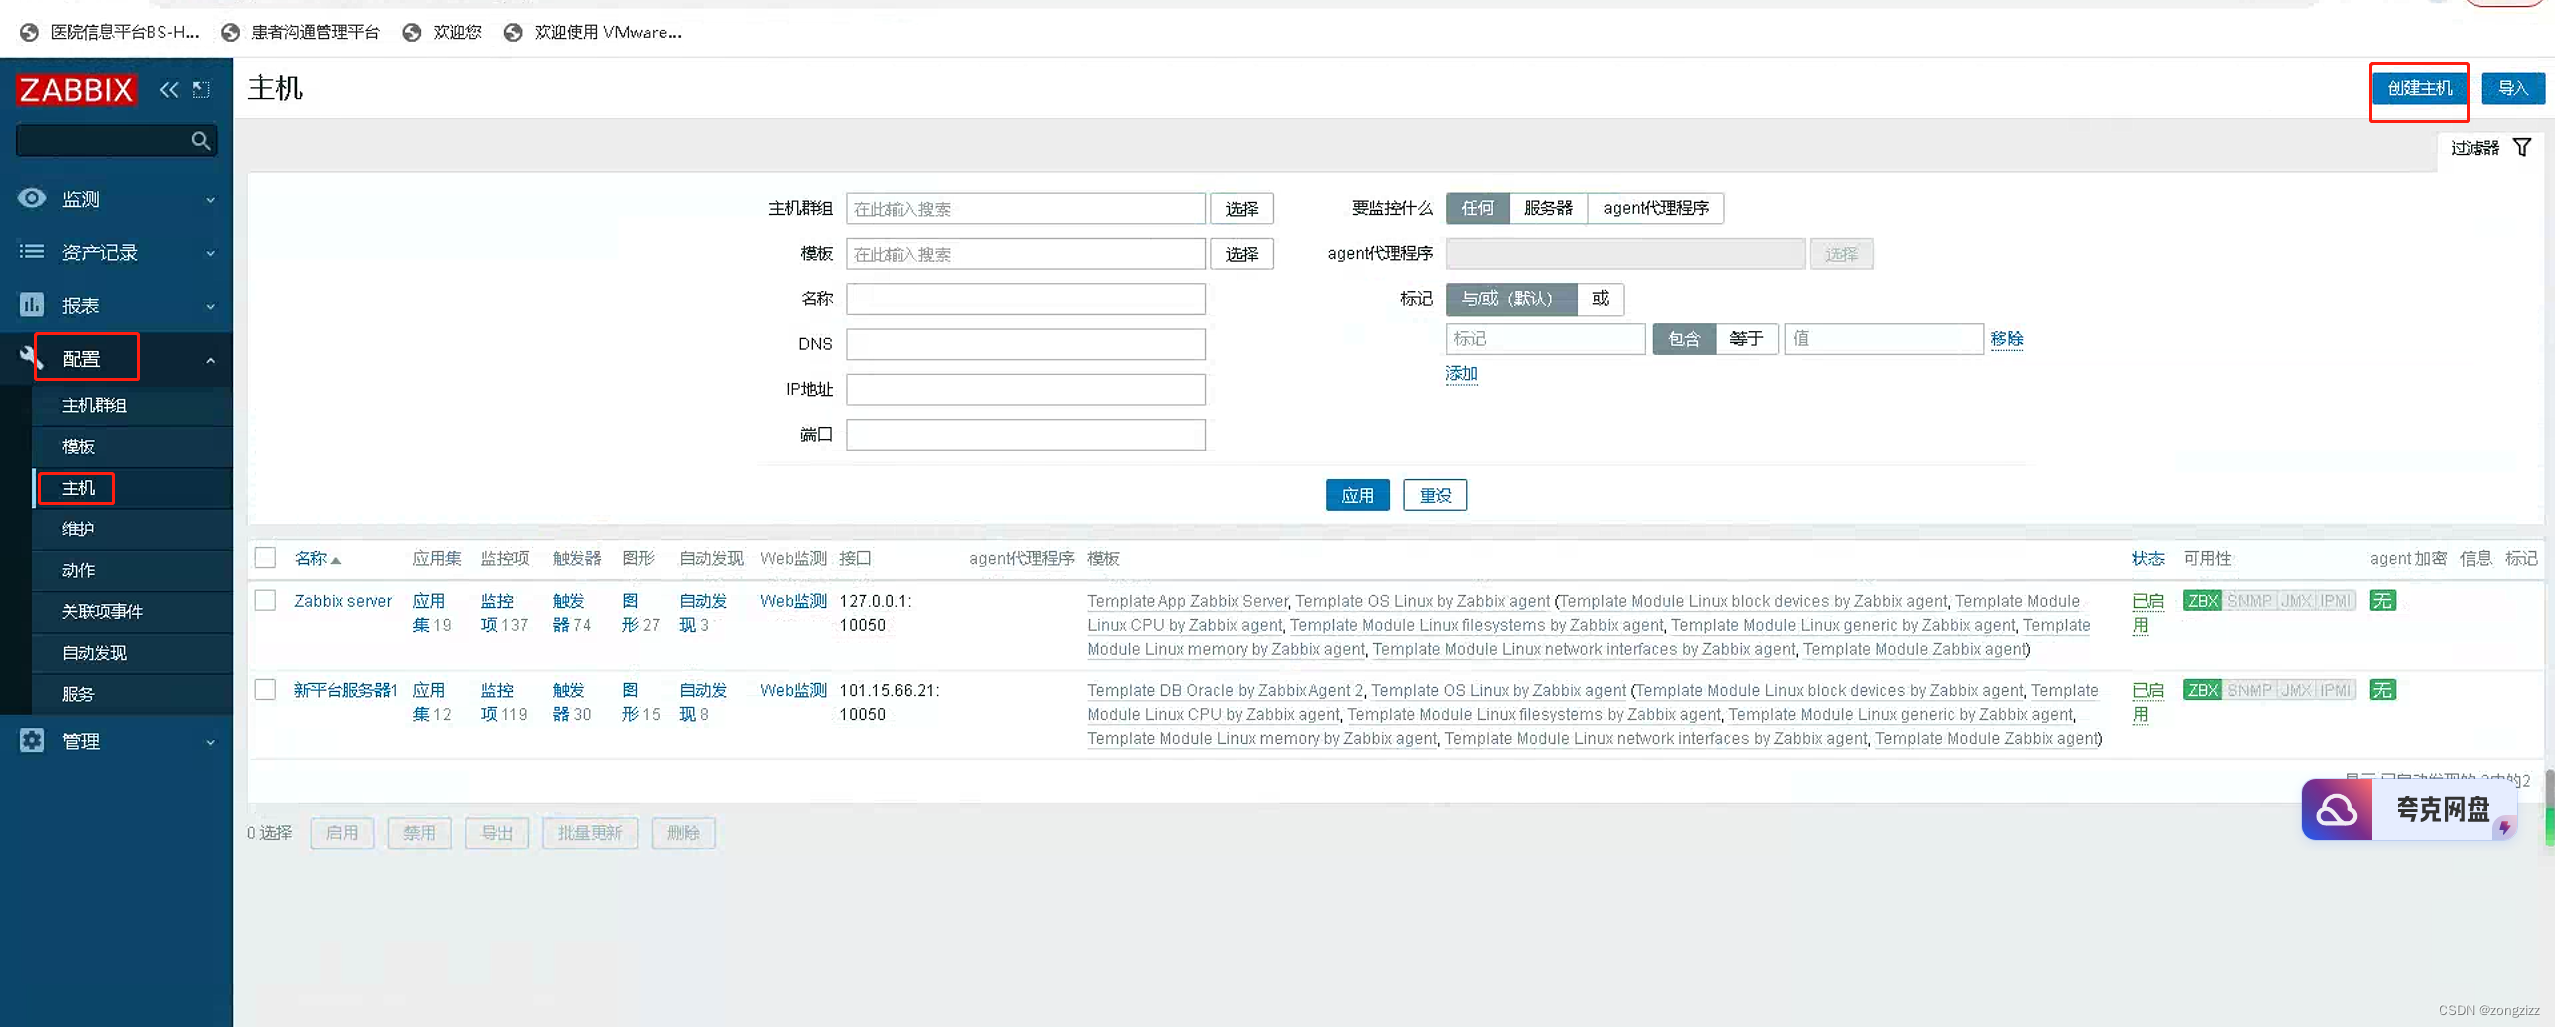
2.web界面主机添加
创建主机
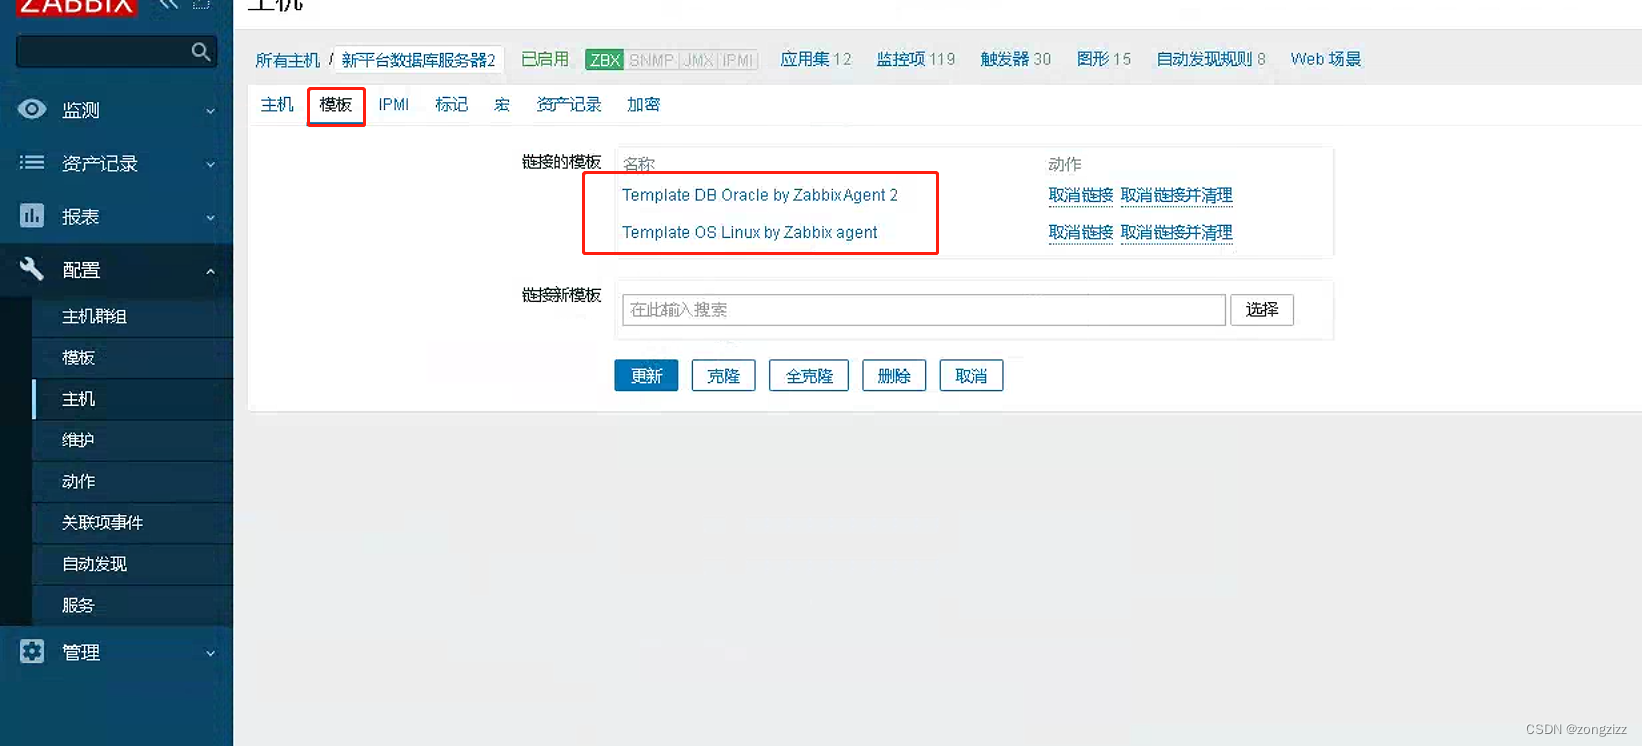
选择监控项模板
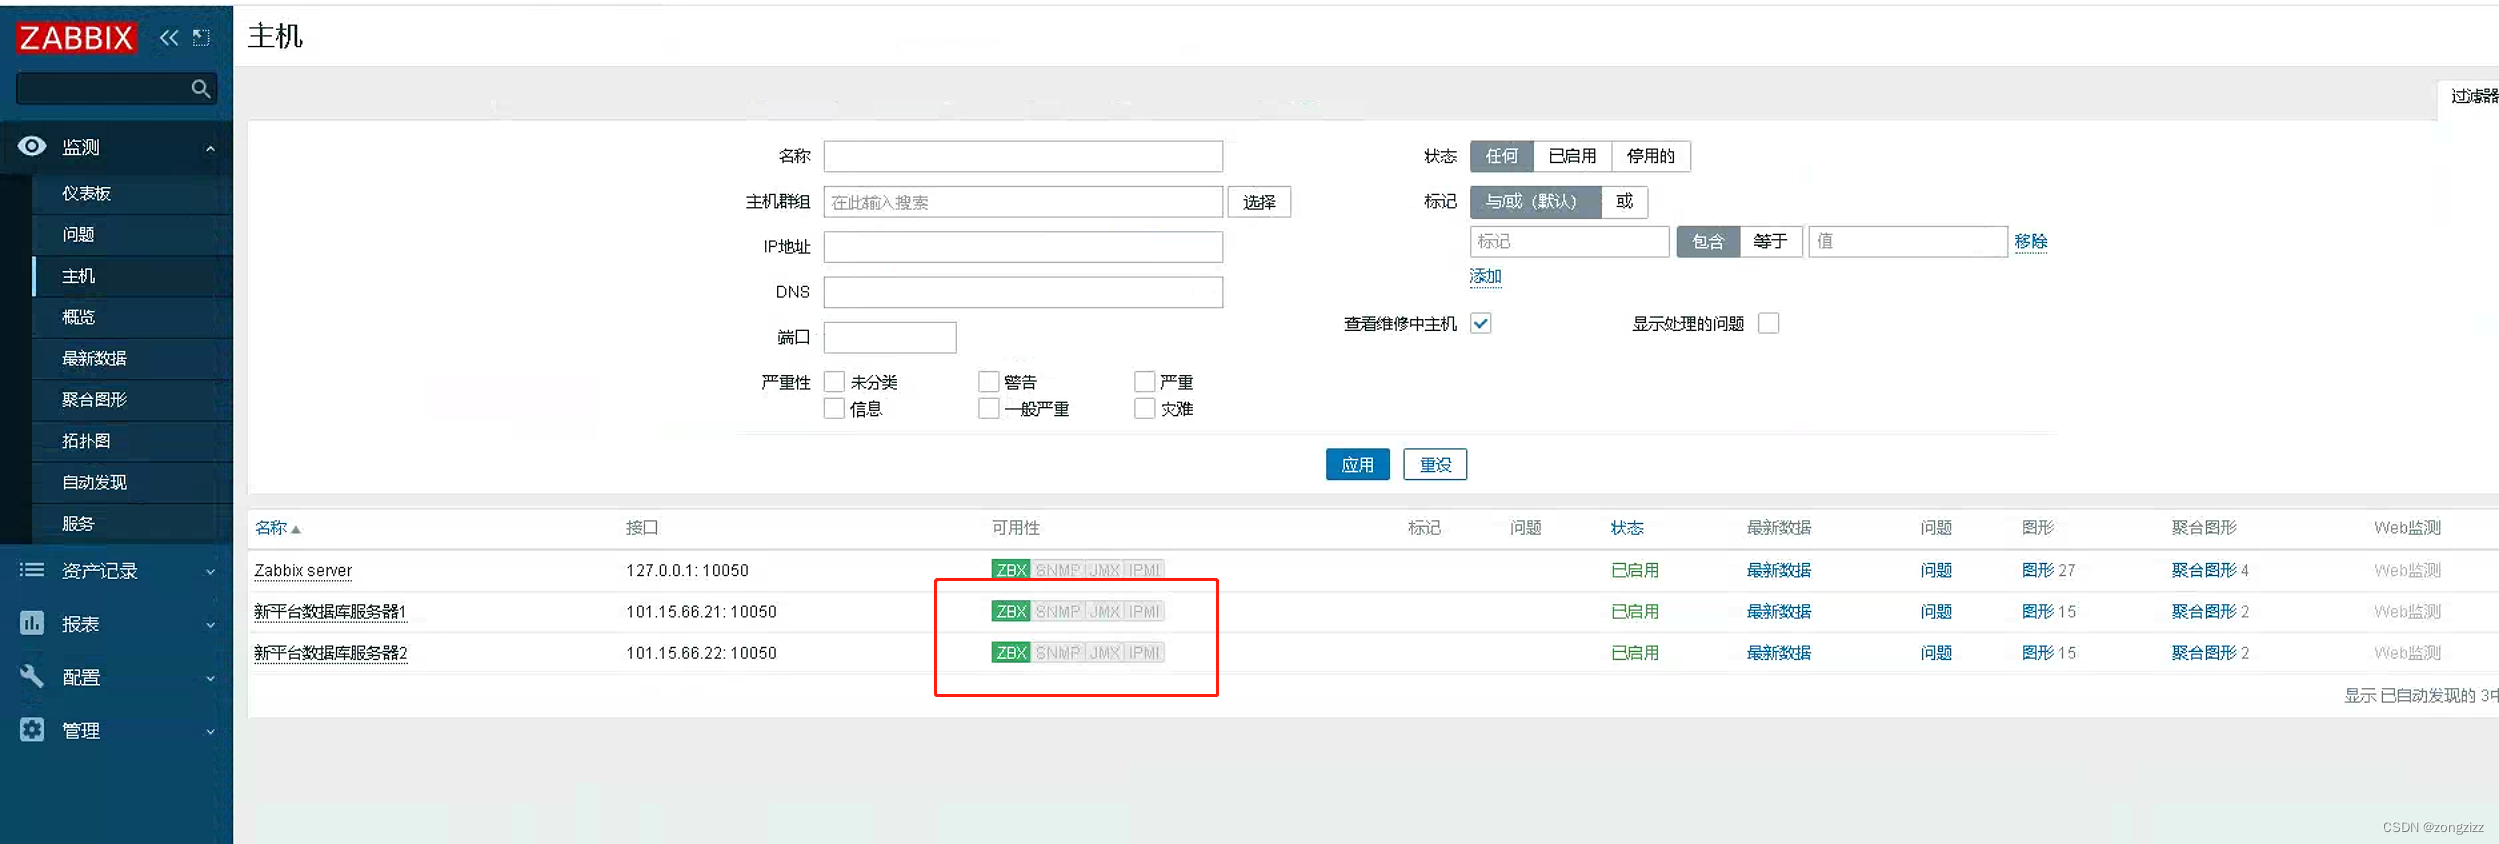
添加完成后几分钟后刷新web界面查看主机,ZBX显示为绿色代表监控正常
zabbix-get安装
下载rpm包,下载地址:http://repo.zabbix.com/zabbix/5.0/rhel/7/x86_64/选择对应版本rpm包
[root@grafana-server soft]# ls
bin  conf  sbin  zabbix_agent-5.0.37-linux-3.0-amd64-static.tar.gz  zabbix-get-5.0.37-1.el7.x86_64.rpm
[root@grafana-server soft]# rpm -ivh zabbix-get-5.0.37-1.el7.x86_64.rpm
warning: zabbix-get-5.0.37-1.el7.x86_64.rpm: Header V4 RSA/SHA512 Signature, key ID a14fe591: NOKEY
Preparing...                          ################################# [100%]
Updating / installing...
   1:zabbix-get-5.0.37-1.el7          ################################# [100%]
[root@grafana-server soft]# zabbix-get
bash: zabbix-get: command not found...
[root@grafana-server soft]# zabbix_get
usage:
  zabbix_get -s host-name-or-IP [-p port-number] [-I IP-address] -k item-key
  zabbix_get -s host-name-or-IP [-p port-number] [-I IP-address]
                --tls-connect cert --tls-ca-file CA-file
                [--tls-crl-file CRL-file] [--tls-agent-cert-issuer cert-issuer]
                [--tls-agent-cert-subject cert-subject]
                --tls-cert-file cert-file --tls-key-file key-file
                [--tls-cipher13 cipher-string] [--tls-cipher cipher-string]
                -k item-key
  zabbix_get -s host-name-or-IP [-p port-number] [-I IP-address]
                --tls-connect psk --tls-psk-identity PSK-identity
                --tls-psk-file PSK-file [--tls-cipher13 cipher-string]
                [--tls-cipher cipher-string] -k item-key
  zabbix_get -h
  zabbix_get -V


 1045
1045


 被折叠的 条评论
为什么被折叠?
被折叠的 条评论
为什么被折叠?
 到【灌水乐园】发言


