


先看plugin.xml:
plugin.xml定义了你的插件所需要的结构和设置,它由一些元素来提供有关这个插件的详细配置信息
打开plugins/cordova-plugin-camera/plugin.xml
//这里只截取android块的
<plugin xmlns="http://apache.org/cordova/ns/plugins/1.0"
    xmlns:android="http://schemas.android.com/apk/res/android"
    xmlns:rim="http://www.blackberry.com/ns/widgets"
    id="cordova-plugin-camera"
    version="2.4.0">
    <name>Camera</name>
    <description>Cordova Camera Plugin</description>
    <license>Apache 2.0</license>
    <keywords>cordova,camera</keywords>
    <repo>https://git-wip-us.apache.org/repos/asf/cordova-plugin-camera.git</repo>
    <issue>https://issues.apache.org/jira/browse/CB/component/12320645</issue>

    <dependency id="cordova-plugin-compat" version="^1.1.0" />

    <js-module src="www/CameraConstants.js" name="Camera">
        <clobbers target="Camera" />
    </js-module>

    <js-module src="www/CameraPopoverOptions.js" name="CameraPopoverOptions">
        <clobbers target="CameraPopoverOptions" />
    </js-module>


    <js-module src="www/Camera.js" name="camera">
        <clobbers target="navigator.camera" />
    </js-module>


    <!-- android -->
    <platform name="android">
        <config-file target="res/xml/config.xml" parent="/*">
            <feature name="Camera">
                <param name="android-package" value="org.apache.cordova.camera.CameraLauncher"/>
            </feature>
        </config-file>
        <config-file target="AndroidManifest.xml" parent="/*">
            <uses-permission android:name="android.permission.WRITE_EXTERNAL_STORAGE" />
        </config-file>
        <config-file target="AndroidManifest.xml" parent="application">
          <provider
              android:name="android.support.v4.content.FileProvider"
              android:authorities="${applicationId}.provider"
              android:exported="false"
              android:grantUriPermissions="true" >
              <meta-data
                  android:name="android.support.FILE_PROVIDER_PATHS"
                  android:resource="@xml/provider_paths"/>
          </provider>
        </config-file>

        <source-file src="src/android/CameraLauncher.java" target-dir="src/org/apache/cordova/camera" />
        <source-file src="src/android/CordovaUri.java" target-dir="src/org/apache/cordova/camera" />
        <source-file src="src/android/FileHelper.java" target-dir="src/org/apache/cordova/camera" />
        <source-file src="src/android/ExifHelper.java" target-dir="src/org/apache/cordova/camera" />
        <source-file src="src/android/xml/provider_paths.xml" target-dir="res/xml" />

        <js-module src="www/CameraPopoverHandle.js" name="CameraPopoverHandle">
            <clobbers target="CameraPopoverHandle" />
          </js-module>

        <framework src="com.android.support:support-v4:24.1.1+" />

      </platform>
 </plugin>
xmlns:命名空间(android xml文件下很常见)
id:插件的标识,即发布到plugin.cordova.io的ID
version:插件的版本号
name:插件的名称
description:插件的描述信息
keywords:关键字
dependency:依赖其它插件,该插件被其独特的NPM的ID或URL GitHub的引用。
platform:平台
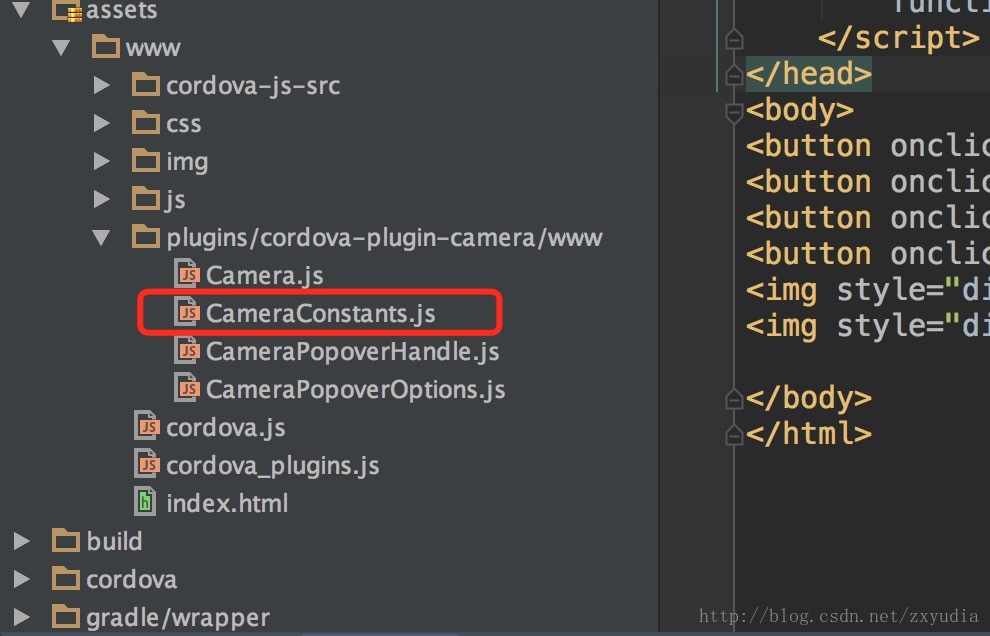
js-module:每一个js-moudle对应一个文件,会根据对应插件里的文件插入相应的assets/www目录下,具体位置是由src指明的。
src:相对于plugin.xml文件插件中的文件
name:提供模块名称的最后一部分。它一般可以是你喜欢的,如果你想使用cordova.require导入你的插件的其他部分在JavaScript代码只在乎。对于js-module模块名称是你的插件的ID后跟名称的值。
clobbers:js-module元素内标记。用于指定module.exports被插入在window对象的命名空间。你可以有很多的clobbers只要你喜欢。(ps:不懂)举个例子eg:
 <js-module src="www/CameraConstants.js" name="Camera">
        <clobbers target="Camera" />
    </js-module>
这里的moudle.expoets被插入到window对象window.Camera
而CameraConstants.js则被插入到assets/www/cordova-plugin-camera/www/
插入规则是:相对于assets/www/id名/src路径
看platform name=”android”下的目录:
 <platform name="android">
        <config-file target="res/xml/config.xml" parent="/*">
            <feature name="Camera">
                <param name="android-package" value="org.apache.cordova.camera.CameraLauncher"/>
            </feature>
        </config-file>
        <config-file target="AndroidManifest.xml" parent="/*">
            <uses-permission android:name="android.permission.WRITE_EXTERNAL_STORAGE" />
        </config-file>
        <config-file target="AndroidManifest.xml" parent="application">
          <provider
              android:name="android.support.v4.content.FileProvider"
              android:authorities="${applicationId}.provider"
              android:exported="false"
              android:grantUriPermissions="true" >
              <meta-data
                  android:name="android.support.FILE_PROVIDER_PATHS"
                  android:resource="@xml/provider_paths"/>
          </provider>
        </config-file>

        <source-file src="src/android/CameraLauncher.java" target-dir="src/org/apache/cordova/camera" />
        <source-file src="src/android/CordovaUri.java" target-dir="src/org/apache/cordova/camera" />
        <source-file src="src/android/FileHelper.java" target-dir="src/org/apache/cordova/camera" />
        <source-file src="src/android/ExifHelper.java" target-dir="src/org/apache/cordova/camera" />
        <source-file src="src/android/xml/provider_paths.xml" target-dir="res/xml" />

        <js-module src="www/CameraPopoverHandle.js" name="CameraPopoverHandle">
            <clobbers target="CameraPopoverHandle" />
          </js-module>

        <framework src="com.android.support:support-v4:24.1.1+" />

      </platform>
android插入看起来就方便多了,从上面看一个事配置config-file,一个是source-file。一个插入配置信息,一个插入文件。要插入的文件夹如果存在就插入,如果不存在就新建文件夹,在插入,逻辑就是这个样子。这里就不截图了,把一个插件add进入,编译后,打开项目都可以清楚的看到。
下面看看html中的代码,就是index.html,上一篇用到的:
<!DOCTYPE html>
<html>
<head>
    <title>调用照相机插件</title>
    <style type="text/css">
        button{
            margin: 10px;
            background-color: pink;
            padding: 3px;
            border: 0px;
        }
    </style>
    <script type="text/javascript" charset="utf-8" src="cordova.js"></script>
    <script type="text/javascript" charset="utf-8">
    var pictureSource;   // picture source
    var destinationType; // sets the format of returned value
    // Wait for device API libraries to load   等待phoneGap连接设备
    document.addEventListener("deviceready",onDeviceReady,false);
        // device APIs are available    //phoneGape准备jiuxu,可以使用!
        function onDeviceReady() {
            pictureSource=navigator.camera.PictureSourceType;
            destinationType=navigator.camera.DestinationType;
        }

        // Called when a photo is successfully retrieved    //当成功获得一张照片的Base64编码数据后被调用
        function onPhotoDataSuccess(imageData) {
        // Uncomment to view the base64-encoded image data      //取消注释以查看Base64编码的图像数据
        console.log(imageData);
        // Get image handle      //获取图像句柄
        var smallImage = document.getElementById('smallImage');
        // Unhide image elements      //取消隐藏的图像元素
        smallImage.style.display = 'block';
        // Show the captured photo      // The in-line CSS rules are used to resize the image
        // 显示拍摄的照片
        // 使用内嵌CSS规则来缩放图片
        smallImage.src = "data:image/jpeg;base64," + imageData;
        }

        // Called when a photo is successfully retrieved    //当成功得到一张照片的URI后被调用
        function onPhotoURISuccess(imageURI) {
        // Uncomment to view the image file URI
        // Get image handle
        // 取消注释以查看图片文件的URI
        // 获取图片句柄
         console.log(imageURI);
        var largeImage = document.getElementById('largeImage');
        // Unhide image elements      // 取消隐藏的图像元素
        largeImage.style.display = 'block';
        // Show the captured photo      // The in-line CSS rules are used to resize the image
        // 显示拍摄的照片
        // 使用内嵌CSS规则来缩放图片
        largeImage.src = imageURI;
        }

        // A button will call this function    //“Capture Photo”按钮点击事件触发函数
        function capturePhoto() {
        // Take picture using device camera and retrieve image as base64-encoded string
         使用设备上的摄像头拍照,并获得Base64编码字符串格式的图像
        navigator.camera.getPicture(onPhotoDataSuccess, onFail, { quality: 50,        destinationType: destinationType.DATA_URL });
        }

        // A button will call this function    //“Capture Editable Photo”按钮点击事件触发函数
        function capturePhotoEdit() {
        // Take picture using device camera, allow edit, and retrieve image as base64-encoded string
        // 使用设备上的摄像头拍照,并获得Base64编码字符串格式的可编辑图像
        navigator.camera.getPicture(onPhotoDataSuccess, onFail, { quality: 20, allowEdit: true,        destinationType: destinationType.DATA_URL });
        }

        // A button will call this function
        //“From Photo Library”/“From Photo Album”按钮点击事件触发函数
        function getPhoto(source) {
        // Retrieve image file location from specified source
        // 从设定的来源处获取图像文件URI
        navigator.camera.getPicture(onPhotoURISuccess, onFail, { quality: 50,        destinationType: destinationType.FILE_URI,        sourceType: source });
        }

        // Called if something bad happens.    //当有错误发生时触发此函数
        function onFail(message) {      alert('Failed because: ' + message);    }
    </script>
</head>
<body>
<button onclick="capturePhoto();">拍照</button> <br>
<button onclick="capturePhotoEdit();">拍照并可编辑图片</button> <br>
<button onclick="getPhoto(pictureSource.PHOTOLIBRARY);">获取相册</button><br>
<button onclick="getPhoto(pictureSource.SAVEDPHOTOALBUM);">另一种方法获取相册</button><br>
<img style="display:none;width:60px;height:60px;" id="smallImage" src="" />
<img style="display:none;" id="largeImage" src="" />

</body>
</html>
最上面的就不说了,style修饰button的,最下面也不说了,button点击事件。这里要说的是fuction里面系统调用照相机的这块代码,方法名及传递参数的含义:
//方法
camera.getPicture
eg:navigator.camera.getPicture( cameraSuccess, cameraError, [ cameraOptions ] );
说明:camera.getPicture函数打开设备的默认摄像头,使用户可以拍照(如果 Camera.sourceType 设置为Camera.PictureSourceType.CAMERA,这也是默认值)可以不设置Camera.sourceType这个参数。(对应第一种,进行拍照)
如果设置Camera.sourceType=Camera.PictureSourceType.PHOTOLIBRARY或Camera.PictrueSourceType.SAVEDPHOTOALBUM系统会弹出选择兑换框,用户可以从相册中选择图片(对应我们的第三种和第四种,调用系统相册)
返回值会按照用户通过CameraOptions参数所设定的格式之一发送给cameraSuccess回调函数:
一个字符串,包含Base64编码的照片图像(默认情况)
一个字符串,表示本地存储的图像文件位置。
eg:
//拍照并获取Base64编码图像:
navigator.camera.getPicture(onSuccess, onFail, { quality: 50 });

function onSuccess(imageData) {
   var image = document.getElementById('myImage');
   image.src = "data:image/jpeg;base64," + imageData;
}

function onFail(message) {
   alert('Failed because: ' + message);
}
eg:
//拍照并获取图像文件路径:
navigator.camera.getPicture(onSuccess, onFail, { quality: 50,
                destinationType: Camera.DestinationType.FILE_URI });

function onSuccess(imageURI) {
    var image = document.getElementById('myImage');
    image.src = imageURI;
}

function onFail(message) {
    alert('Failed because: ' + message);
}
两种方式的区别就在于:destinationType的设置参数不同。
你可以对编码的图片或URI做任何处理,例如:
  通过img标签渲染图片(参看后续范例)
  存储为本地数据(LocalStorage,Lawnchair*等)
  将数据发送到远程服务器
说说各参数的意义:
//定制摄像头设置的可选参数
{   quality : 75,
    destinationType : Camera.DestinationType.DATA_URL,
    sourceType : Camera.PictureSourceType.CAMERA,
    allowEdit : true,
    encodingType : Camera.EncodingType.JPEG,
    targetWidth : 100,
targetHeight : 100};quality:存储图片的质量,范围[0,100],这个和android一样。(数字类型)
destiationType:选择返回的数据格式通过通过navigator.camera.DestinationType进行定义。(数字类型)
Camera.DestinationType = {
DATA_URL : 0, //返回Base64编码字符串的图像数据
FILE_URI : 1 //返回图像文件的URI
}
sourceType:设定图片来源。通过nagivator.camera.PictureSourceType进行定义。(数字类型)
Camera.PictureSourceType = {
PHOTOLIBRARY : 0,
CAMERA : 1,
SAVEDPHOTOALBUM : 2
}
allowEdit:在选择图片进行操作之前允许对其进行简单编辑。(布尔类型)
EncodingType:选择返回图像文件的编码方式,通过navigator.camera.EncodingType进行定义。(数字类型)
Camera.EncodingType = {
JPEG : 0, // 返回JPEG格式图片
PNG : 1 // 返回PNG格式图片
};
targetWidth:以像素为单位的图像缩放宽度,必须和targetHeight同时使用。相应的宽高比保持不变。(数字类型)
targetHeight:以像素为单位的图像缩放高度,必须和targetWidth同时使用。相应的宽高比保持不变。(数字类型)
MediaType:设置选择图片的类型,只有当PictureSourceType is PHOTOLIBRARY or SAVEDPHOTOALBUM时才会生效,该参数由nagivator.camera.MediaType (数字类型)定义
Camera.MediaType = {
PICTURE: 0, // allow selection of still pictures only. DEFAULT. Will return format specified via DestinationType
//默认值,返回的是Picture,返回由DestinationType指定的格式
VIDEO: 1, // allow selection of video only, WILL ALWAYS RETURN FILE_URI
//选出的只能是video类型,返回值是FILE_URI
ALLMEDIA : 2 //allow selection from all media types 允许选出的是所有类型就写到这里了,已经标的很详细了,有问题,留言拍砖,多多指教…
代码及搭建上一篇例子:http://blog.csdn.net/zxyudia/article/details/61436289
转载地址请表明:http://blog.csdn.net/zxyudia/article/details/61618315
参考文章:http://www.phonegapcn.com/docs/zh/cn/camera.html


 1562
1562

 被折叠的 条评论
为什么被折叠?
被折叠的 条评论
为什么被折叠?
 到【灌水乐园】发言


