


蓝牙打开流程:
android蓝牙打开流程之Off状态至BleOn状态-CSDN博客
android蓝牙打开流程之BleOn状态至On状态-CSDN博客
App通过BluetoothAdapter.java中的getDefaultAdapter函数获取BluetoothAdapter的实例,可通过BluetoothAdapter对本机蓝牙设备进行一些操作。
打开蓝牙一般有两种方式:
1. 直接调用BluetoothAdapter的enable函数,一般来说仅为包含用于更改系统设置的用户界面的应用程序所使用,比如无线设置等;示例:
BluetoothAdapter.getDefaultAdapter().enable();2. 通过发送ACTION_REQUEST_ENABLE Intent,系统会弹框请求用户许可去打开蓝牙;示例:
  Intent enableBtIntent = new Intent(BluetoothAdapter.ACTION_REQUEST_ENABLE);
  startActivityForResult(enableBtIntent, REQUEST_ENABLE_BT);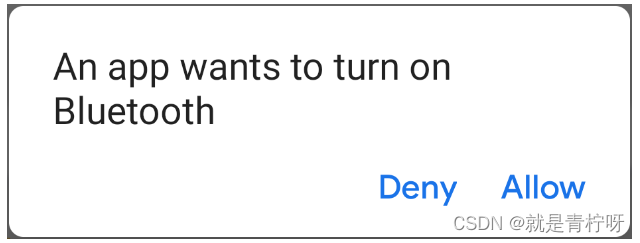
不管是哪种方式,最后都会通过AIDL接口调用BluetoothManagerService.java的enable函数。
IBluetoothManager.aidl定义了enable接口
interface IBluetoothManager
{
    boolean enable(String packageName);
}
BluetoothManagerService继承IBluetoothManager.Stub,并且实现了enable方法
class BluetoothManagerService extends IBluetoothManager.Stub {

    public boolean enable(String packageName) throws RemoteException {
        ...

        synchronized (mReceiver) {
            mQuietEnableExternal = false;
            mEnableExternal = true;
            // waive WRITE_SECURE_SETTINGS permission check
            sendEnableMsg(false,
                    BluetoothProtoEnums.ENABLE_DISABLE_REASON_APPLICATION_REQUEST,
                    packageName);
        }
    }
}
BluetoothManagerService.java的enable函数经过一些权限检查,最终会通过sendEnableMsg函数发送MESSAGE_ENABLE消息。
在MESSAGE_ENABLE的处理中,
如果之前有调用BluetoothAdapter的enableBLE函数,那么此时mBluetooth不为空,当前状态为STATE_BLE_ON,会继续启动BR相关。
如果没有调用BluetoothAdapter的enableBLE函数,那么此时mBluetooth为空,走首次打开的流程。
这里还有一个比较重要的变量mQuietEnable,静默打开模式,如果是true,那么蓝牙打开之后不会自动连接之前已经连接过的设备。
case MESSAGE_ENABLE:
     // Use service interface to get the exact state
     try {
         mBluetoothLock.readLock().lock();
         if (mBluetooth != null) {
             int state = mBluetooth.getState();
             if (state == BluetoothAdapter.STATE_BLE_ON) {
                 Slog.w(TAG, "BT Enable in BLE_ON State, going to ON");
                 mBluetooth.onLeServiceUp();
                 persistBluetoothSetting(BLUETOOTH_ON_BLUETOOTH);
                 break;
             }
          }
     }
     mQuietEnable = (msg.arg1 == 1);
     if (mBluetooth == null) {
         handleEnable(mQuietEnable);
     }
在handleEnable函数中,如果是首次打开,可以看到会通过doBind绑定IBluetooth;IBluetooth位于AdapterService.java中,AdapterService.java属于Bluetooth.apk,所以这里也会拉起Bluetooth.apk。
private void handleEnable(boolean quietMode) {

    ...

    if ((mBluetooth == null) && (!mBinding)) {
        //Start bind timeout and bind
        Message timeoutMsg = mHandler.obtainMessage(MESSAGE_TIMEOUT_BIND);
        mHandler.sendMessageDelayed(timeoutMsg, TIMEOUT_BIND_MS);
        Intent i = new Intent(IBluetooth.class.getName());
        if (!doBind(i, mConnection, Context.BIND_AUTO_CREATE | Context.BIND_IMPORTANT,
                        UserHandle.CURRENT)) {
             mHandler.removeMessages(MESSAGE_TIMEOUT_BIND);
         } else {
             mBinding = true;
         }
    }
}

boolean doBind(Intent intent, ServiceConnection conn, int flags, UserHandle user) {
    ComponentName comp = intent.resolveSystemService(mContext.getPackageManager(), 0);
    intent.setComponent(comp);
    if (comp == null || !mContext.bindServiceAsUser(intent, conn, flags, user)) {
        Slog.e(TAG, "Fail to bind to: " + intent);
        return false;
    }
    return true;
}

<service android:process="@string/process"
     android:name="com.android.bluetooth.btservice.AdapterService"
     android:exported="true"
     android:permission="android.permission.ACCESS_BLUETOOTH_SHARE">
     <intent-filter>
          <action android:name="android.bluetooth.IBluetooth"/>
     </intent-filter>
</service>
按照android启动service的流程,AdapterService中的onCreate会被调用进行一些初始化,其中initNative函数值得关注一下,由这个函数开启蓝牙协议栈初始化。
initNative通过JNI最终调用协议栈的init函数。
int ret = sBluetoothInterface->init(
            &sBluetoothCallbacks, isGuest == JNI_TRUE ? 1 : 0,
            isCommonCriteriaMode == JNI_TRUE ? 1 : 0, configCompareResult, flags,
            isAtvDevice == JNI_TRUE ? 1 : 0, user_data_directory);
协议栈init函数实现在bluetooth.cc中。
static int init(bt_callbacks_t* callbacks) {
  LOG_INFO(LOG_TAG, "%s", __func__);

  if (interface_ready()) return BT_STATUS_DONE;

#ifdef BLUEDROID_DEBUG
  allocation_tracker_init();
#endif

  bt_hal_cbacks = callbacks;
  stack_manager_get_interface()->init_stack();
  btif_debug_init();
  return BT_STATUS_SUCCESS;
}
最终会在stack_manager.cc中进行协议栈初始化以及一些模块的初始化;其中比较熟悉的是BTIF_CONFIG_MODULE,它会有一个文件存储在/data/misc/bluedroid/bt_config.conf,保存本机和对端设备的一些信息,包含name address linkkey等等。
static void init_stack(void) {
  // This is a synchronous process. Post it to the thread though, so
  // state modification only happens there. Using the thread to perform
  // all stack operations ensures that the operations are done serially
  // and do not overlap.
  semaphore_t* semaphore = semaphore_new(0);
  thread_post(management_thread, event_init_stack, semaphore);
  semaphore_wait(semaphore);
  semaphore_free(semaphore);
}

// Synchronous function to initialize the stack
static void event_init_stack(void* context) {
  semaphore_t* semaphore = (semaphore_t*)context;

  LOG_INFO(LOG_TAG, "%s is initializing the stack", __func__);

  if (stack_is_initialized) {
    LOG_INFO(LOG_TAG, "%s found the stack already in initialized state",
             __func__);
  } else {
    module_management_start();

    module_init(get_module(OSI_MODULE));
    module_init(get_module(BT_UTILS_MODULE));
    module_init(get_module(BTIF_CONFIG_MODULE));
    btif_init_bluetooth();

    // stack init is synchronous, so no waiting necessary here
    stack_is_initialized = true;
  }
浅显涉及了一下协议栈之后再回到framework,按照android启动service的流程,启动侧会有onServiceConnected的成功回调,所以BluetoothManagerService.java中会收到onServiceConnected的回调。
private class BluetoothServiceConnection implements ServiceConnection {
    public void onServiceConnected(ComponentName componentName, IBinder service) {
        String name = componentName.getClassName();
        if (DBG) {
            Slog.d(TAG, "BluetoothServiceConnection: " + name);
        }
        Message msg = mHandler.obtainMessage(MESSAGE_BLUETOOTH_SERVICE_CONNECTED);
        if (name.equals("com.android.bluetooth.btservice.AdapterService")) {
            msg.arg1 = SERVICE_IBLUETOOTH;
        } else if (name.equals("com.android.bluetooth.gatt.GattService")) {
            msg.arg1 = SERVICE_IBLUETOOTHGATT;
        } else {
            Slog.e(TAG, "Unknown service connected: " + name);
            return;
        }
        msg.obj = service;
        mHandler.sendMessage(msg);
    }
}
如果是AdapterService的话会调用enable函数,这里也可以看出mQuietEnable的含义,如果为true的话,仅仅打开蓝牙不会自动连接之前连过的设备。
case MESSAGE_BLUETOOTH_SERVICE_CONNECTED: {
...
    try {
        if (!mQuietEnable) {
            if (!mBluetooth.enable()) {
                Slog.e(TAG, "IBluetooth.enable() returned false");
            }
         } else {
             if (!mBluetooth.enableNoAutoConnect()) {
                 Slog.e(TAG, "IBluetooth.enableNoAutoConnect() returned false");
             }
         }
    }
}
开始向Adapter状态机发送BLE_TURN_ON的消息。
public synchronized boolean enable(boolean quietMode) {
    ...
    mQuietmode = quietMode;
    mAdapterStateMachine.sendMessage(AdapterState.BLE_TURN_ON);
    return true;
}
Adapter状态机的初始状态为OffState
private AdapterState(AdapterService service) {
    super(TAG);
    addState(mOnState);
    addState(mBleOnState);
    addState(mOffState);
    addState(mTurningOnState);
    addState(mTurningOffState);
    addState(mTurningBleOnState);
    addState(mTurningBleOffState);

    setInitialState(mOffState);
}
所以在OffState处理BLE_TURN_ON消息,直接转移到TurningBleOnState状态。
private class OffState extends BaseAdapterState {

    @Override
    public boolean processMessage(Message msg) {
        switch (msg.what) {
            case BLE_TURN_ON:
                transitionTo(mTurningBleOnState);
                break;
        }
        return true;
    }
}
TurningBleOnState的enter函数通过调用bringUpBle开启GATT service,方式是通过startService拉起GattService,GattService.java位于Bluetooth.apk中。
private class TurningBleOnState extends BaseAdapterState {

    @Override
    public void enter() {
        super.enter();
        sendMessageDelayed(BLE_START_TIMEOUT, BLE_START_TIMEOUT_DELAY);
        mAdapterService.bringUpBle();
    }
}

void bringUpBle() {
    mAdapterProperties.init(mRemoteDevices);

    debugLog("bleOnProcessStart() - Make Bond State Machine");
    mBondStateMachine = BondStateMachine.make(this, mAdapterProperties, mRemoteDevices);

    mJniCallbacks.init(mBondStateMachine, mRemoteDevices);
    //Start Gatt service
    setProfileServiceState(GattService.class, BluetoothAdapter.STATE_ON);
}

private void setProfileServiceState(Class service, int state) {
    Intent intent = new Intent(this, service);
    intent.putExtra(EXTRA_ACTION, ACTION_SERVICE_STATE_CHANGED);
    intent.putExtra(BluetoothAdapter.EXTRA_STATE, state);
    startService(intent);
}
GattService继承ProfileService,所以先执行ProfileService的onCreate/onStartCommand,最终会通过doStart调用到GattService的start函数,进行gatt协议栈初始化以及开启广播/扫描类。
public class GattService extends ProfileService {
    @Override
    protected boolean start() {
        if (DBG) {
            Log.d(TAG, "start()");
        }
        initializeNative();
        mAdapter = BluetoothAdapter.getDefaultAdapter();
        mAppOps = getSystemService(AppOpsManager.class);
        mAdvertiseManager = new AdvertiseManager(this, AdapterService.getAdapterService());
        mAdvertiseManager.start();

        mScanManager = new ScanManager(this);
        mScanManager.start();

        mPeriodicScanManager = new PeriodicScanManager(AdapterService.getAdapterService());
        mPeriodicScanManager.start();

        setGattService(this);
        return true;
    }
}

static void initializeNative(JNIEnv* env, jobject object) {
    ...
    sGattIf =
      (btgatt_interface_t*)btIf->get_profile_interface(BT_PROFILE_GATT_ID);
    bt_status_t status = sGattIf->init(&sGattCallbacks);
}

static bt_status_t btif_gatt_init(const btgatt_callbacks_t* callbacks) {
  bt_gatt_callbacks = callbacks;
  return BT_STATUS_SUCCESS;
}

public abstract class ProfileService extends Service {
    @Override
    public void onCreate() {
        if (DBG) {
            Log.d(mName, "onCreate");
        }
        super.onCreate();
        mAdapter = BluetoothAdapter.getDefaultAdapter();
        mBinder = initBinder();
        create();
    }

    @Override
    public int onStartCommand(Intent intent, int flags, int startId) {
        ...
        if (AdapterService.ACTION_SERVICE_STATE_CHANGED.equals(action)) {
            int state = intent.getIntExtra(BluetoothAdapter.EXTRA_STATE, BluetoothAdapter.ERROR);
            if (state == BluetoothAdapter.STATE_OFF) {
                doStop();
            } else if (state == BluetoothAdapter.STATE_ON) {
                doStart();
            }
        }
    }

    private void doStart() {
        ...
        mAdapterService.addProfile(this);
        mProfileStarted = start();
        mAdapterService.onProfileServiceStateChanged(this, BluetoothAdapter.STATE_ON);
    }
}
doStart函数还会调用onProfileServiceStateChanged函数,如果是GattService的话,就会调用协议栈的enable函数。
public void onProfileServiceStateChanged(ProfileService profile, int state) {
    ...
    Message m = mHandler.obtainMessage(MESSAGE_PROFILE_SERVICE_STATE_CHANGED);
    m.obj = profile;
    m.arg1 = state;
    mHandler.sendMessage(m);
}

case MESSAGE_PROFILE_SERVICE_STATE_CHANGED:
    debugLog("handleMessage() - MESSAGE_PROFILE_SERVICE_STATE_CHANGED");
    processProfileServiceStateChanged((ProfileService) msg.obj, msg.arg1);
    break;

private void processProfileServiceStateChanged(ProfileService profile, int state) {
    switch (state) {
        case BluetoothAdapter.STATE_ON:
            mRunningProfiles.add(profile);
            if (GattService.class.getSimpleName().equals(profile.getName())) {
                enableNativeWithGuestFlag();
            }

private void enableNativeWithGuestFlag() {
    boolean isGuest = UserManager.get(this).isGuestUser();
    if (!enableNative(isGuest)) {
        Log.e(TAG, "enableNative() returned false");
    }
}
协议栈进行一些模块的开启,比如BTSNOOP_MODULE用于HCI层数据的抓取;HCI_MODULE用于AP侧与蓝牙芯片侧链路的准备。
一切调用完毕会通过event_signal_stack_up通知framework。
static int enable(bool start_restricted) {
  ...
  stack_manager_get_interface()->start_up_stack_async();
  return BT_STATUS_SUCCESS;
}

static void start_up_stack_async(void) {
  thread_post(management_thread, event_start_up_stack, NULL);
}

// Synchronous function to start up the stack
static void event_start_up_stack(UNUSED_ATTR void* context) {
  ...
  // Include this for now to put btif config into a shutdown-able state
  module_start_up(get_module(BTIF_CONFIG_MODULE));
  bte_main_enable();

  btif_thread_post(event_signal_stack_up, NULL);
}

void bte_main_enable() {
  APPL_TRACE_DEBUG("%s", __func__);

  module_start_up(get_module(BTSNOOP_MODULE));
  module_start_up(get_module(HCI_MODULE));

  BTU_StartUp();
}
其中HCI Module比较关键,此时会通过hwbinder拿到client端。
btHci = V1_0::IBluetoothHci::getService();
btHci->initialize(callbacks);
server端属于厂商自定义实现,谷歌推荐一般是让厂商提供一个libbt-vendor.so。
通过OP传入命令来进行操作。
BT_VND_OP_POWER_CTRL 上电
BT_VND_OP_USERIAL_OPEN 打开数据节点
BT_VND_OP_FW_CFG 加载固件
Return<void> BluetoothHci::initialize(
     bool rc = VendorInterface::Initialize(
     }
}

static const char* VENDOR_LIBRARY_NAME = "libbt-vendor.so";
bool VendorInterface::Open(InitializeCompleteCallback initialize_complete_cb,
                           PacketReadCallback event_cb,
                           PacketReadCallback acl_cb,
                           PacketReadCallback sco_cb) {
    lib_handle_ = dlopen(VENDOR_LIBRARY_NAME, RTLD_NOW);
    lib_interface_ = reinterpret_cast<bt_vendor_interface_t*>(
                       dlsym(lib_handle_, VENDOR_LIBRARY_SYMBOL_NAME));
    int status = lib_interface_->init(&lib_callbacks, (unsigned char*)local_bda);

    lib_interface_->op(BT_VND_OP_POWER_CTRL, &power_state);
    int fd_count = lib_interface_->op(BT_VND_OP_USERIAL_OPEN, &fd_list);
    if (fd_count == 1) {
        hci::H4Protocol* h4_hci =
            new hci::H4Protocol(fd_list[0], intercept_events, acl_cb, sco_cb);
        fd_watcher_.WatchFdForNonBlockingReads(
            fd_list[0], [h4_hci](int fd) { h4_hci->OnDataReady(fd); });
        hci_ = h4_hci;
     } else {
        hci::MctProtocol* mct_hci =
            new hci::MctProtocol(fd_list, intercept_events, acl_cb);
        fd_watcher_.WatchFdForNonBlockingReads(
            fd_list[CH_EVT], [mct_hci](int fd) { mct_hci->OnEventDataReady(fd); });
        fd_watcher_.WatchFdForNonBlockingReads(
            fd_list[CH_ACL_IN],
            [mct_hci](int fd) { mct_hci->OnAclDataReady(fd); });
        hci_ = mct_hci;
     }

    lib_interface_->op(BT_VND_OP_FW_CFG, nullptr);
}
如上面所诉,一切调用完毕会通过event_signal_stack_up通知framework。
static void event_signal_stack_up(UNUSED_ATTR void* context) {
  // Notify BTIF connect queue that we've brought up the stack. It's
  // now time to dispatch all the pending profile connect requests.
  btif_queue_connect_next();
  HAL_CBACK(bt_hal_cbacks, adapter_state_changed_cb, BT_STATE_ON);
}
TurningBleOnState 状态收到BLE_STARTED之后,会转移状态至BleOnState。
void stateChangeCallback(int status) {
    if (status == AbstractionLayer.BT_STATE_OFF) {
        debugLog("stateChangeCallback: disableNative() completed");
    } else if (status == AbstractionLayer.BT_STATE_ON) {
        mAdapterStateMachine.sendMessage(AdapterState.BLE_STARTED);
    } else {
        Log.e(TAG, "Incorrect status " + status + " in stateChangeCallback");
    }
}

private class TurningBleOnState extends BaseAdapterState {
    @Override
    public boolean processMessage(Message msg) {
        switch (msg.what) {
            case BLE_STARTED:
                transitionTo(mBleOnState);
                break;
}


 476
476


 被折叠的 条评论
为什么被折叠?
被折叠的 条评论
为什么被折叠?
 到【灌水乐园】发言


