


最近在搞图片的显示,做了一个高斯模糊的效果,使用的是gitgub上写好的效果,
效果图如下,
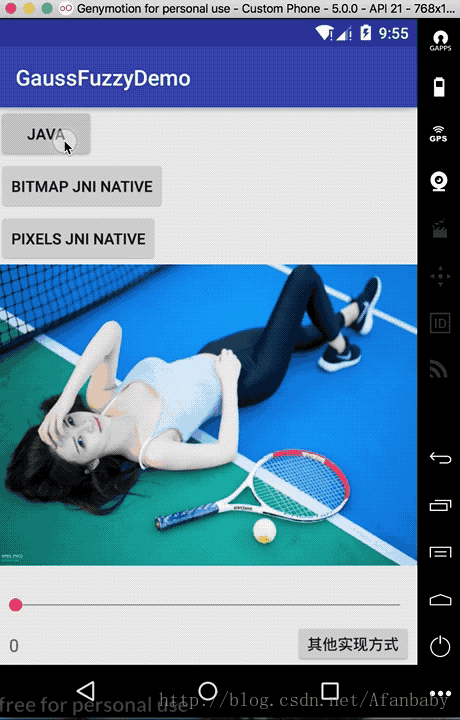
1.
(1)xml文件:
<?xml version="1.0" encoding="utf-8"?>
<LinearLayout xmlns:android="http://schemas.android.com/apk/res/android"
    xmlns:app="http://schemas.android.com/apk/res-auto"
    xmlns:tools="http://schemas.android.com/tools"
    android:layout_width="match_parent"
    android:layout_height="match_parent"
    android:orientation="vertical"
    tools:context="com.example.afanbaby.gaussfuzzydemo.MainActivity">


    <Button
        android:id="@+id/javaBtn"
        android:layout_width="wrap_content"
        android:layout_height="wrap_content"
        android:text="JAVA" />

    <Button
        android:id="@+id/bjnBtn"
        android:layout_width="wrap_content"
        android:layout_height="wrap_content"
        android:text="Bitmap JNI Native" />

    <Button
        android:id="@+id/pjnBtn"
        android:layout_width="wrap_content"
        android:layout_height="wrap_content"
        android:text="Pixels JNI Native" />

    <ImageView
        android:id="@+id/image"
        android:layout_width="match_parent"
        android:layout_height="276dp"
        android:background="@drawable/love"
        android:scaleType="fitXY" />

    <SeekBar
        android:id="@+id/seekBar"
        android:layout_width="match_parent"
        android:layout_height="wrap_content"
        android:layout_marginTop="20dp" />

    <LinearLayout
        android:layout_width="match_parent"
        android:layout_height="wrap_content"
        android:orientation="horizontal">

        <TextView
            android:id="@+id/text"
            android:layout_width="wrap_content"
            android:layout_height="wrap_content"
            android:layout_marginLeft="10dp"
            android:layout_marginTop="2dp"
            android:text="0"
            android:textSize="16sp" />

        <TextView
            android:layout_width="0dp"
            android:layout_height="wrap_content"
            android:layout_weight="1" />

        <Button
            android:id="@+id/otherBtn"
            android:layout_width="wrap_content"
            android:layout_height="wrap_content"
            android:layout_marginRight="5dp"
            android:text="其他实现方式" />

    </LinearLayout>

</LinearLayout>
(2)MainActivity:
import android.content.Context;
import android.content.Intent;
import android.graphics.Bitmap;
import android.graphics.drawable.BitmapDrawable;
import android.renderscript.Allocation;
import android.renderscript.Element;
import android.renderscript.RenderScript;
import android.renderscript.ScriptIntrinsicBlur;
import android.support.v7.app.AppCompatActivity;
import android.os.Bundle;
import android.view.View;
import android.widget.Button;
import android.widget.ImageView;
import android.widget.SeekBar;
import android.widget.TextView;
import android.widget.Toast;

import net.qiujuer.genius.blur.StackBlur;

import static android.R.attr.radius;

public class MainActivity extends AppCompatActivity implements View.OnClickListener {

    private Button javaBtn, bjnBtn, pjnBtn, otherBtn;
    private ImageView imageView;
    private int radius = 0;
    private SeekBar seekBar;
    private TextView textView;

    @Override
    protected void onCreate(Bundle savedInstanceState) {
        super.onCreate(savedInstanceState);
        setContentView(R.layout.activity_main);

        javaBtn = (Button) findViewById(R.id.javaBtn);
        bjnBtn = (Button) findViewById(R.id.bjnBtn);
        pjnBtn = (Button) findViewById(R.id.pjnBtn);
        otherBtn = (Button) findViewById(R.id.otherBtn);
        imageView = (ImageView) findViewById(R.id.image);
        seekBar = (SeekBar) findViewById(R.id.seekBar);
        textView = (TextView) findViewById(R.id.text);
        javaBtn.setOnClickListener(this);
        bjnBtn.setOnClickListener(this);
        pjnBtn.setOnClickListener(this);
        otherBtn.setOnClickListener(this);

        seekBar.setMax(100);
        seekBar.setOnSeekBarChangeListener(new SeekBar.OnSeekBarChangeListener() {
            @Override
            public void onProgressChanged(SeekBar seekBar, int i, boolean b) {
                Bitmap mBitmap1 = ((BitmapDrawable) getResources().getDrawable(R.drawable.love)).getBitmap();
                // Java
                Bitmap newBitmap1 = StackBlur.blur(mBitmap1, (int) i, false);
                imageView.setImageBitmap(newBitmap1);

                textView.setText(i + "");
            }

            @Override
            public void onStartTrackingTouch(SeekBar seekBar) {

            }

            @Override
            public void onStopTrackingTouch(SeekBar seekBar) {

            }
        });
    }

    @Override
    public void onClick(View view) {
        switch (view.getId()) {
            case R.id.javaBtn:
                Bitmap mBitmap1 = ((BitmapDrawable) getResources().getDrawable(R.drawable.love)).getBitmap();
                // Java
                Bitmap newBitmap1 = StackBlur.blur(mBitmap1, 20, false);
                imageView.setImageBitmap(newBitmap1);
                Toast.makeText(this, "使用java实现", Toast.LENGTH_SHORT).show();
                break;
            case R.id.bjnBtn:
                Bitmap mBitmap2 = ((BitmapDrawable) getResources().getDrawable(R.drawable.love)).getBitmap();
                // Bitmap JNI Native
                Bitmap newBitmap2 = StackBlur.blurNatively(mBitmap2, 20, false);
                imageView.setImageBitmap(newBitmap2);
                Toast.makeText(this, "使用Bitmap JNI Native实现", Toast.LENGTH_SHORT).show();
                break;
            case R.id.pjnBtn:
                Bitmap mBitmap3 = ((BitmapDrawable) getResources().getDrawable(R.drawable.love)).getBitmap();
                // Pixels JNI Native
                Bitmap newBitmap3 = StackBlur.blurNativelyPixels(mBitmap3, 20, false);
                imageView.setImageBitmap(newBitmap3);
                Toast.makeText(this, "使用Pixels JNI Native实现", Toast.LENGTH_SHORT).show();
                break;

            case R.id.otherBtn:
                startActivity(new Intent(this, TwoActivity.class));
                break;
        }
    }

}
2.当然我们还可以通过RenderScriprt,Glide方式来实现,
(1)xml布局:
<?xml version="1.0" encoding="utf-8"?>
<LinearLayout xmlns:android="http://schemas.android.com/apk/res/android"
    android:layout_width="match_parent"
    android:layout_height="match_parent"
    android:orientation="vertical">

    <Button
        android:id="@+id/renderScriprtBtn"
        android:layout_width="match_parent"
        android:layout_height="wrap_content"
        android:text="RenderScriprt" />


    <Button
        android:id="@+id/glideBtn"
        android:layout_width="match_parent"
        android:layout_height="wrap_content"
        android:text="Glide" />


    <ImageView
        android:id="@+id/image2"
        android:layout_width="match_parent"
        android:layout_height="276dp"
        android:background="@drawable/love"
        android:scaleType="fitXY" />

    <SeekBar
        android:id="@+id/seekBar2"
        android:layout_width="match_parent"
        android:layout_height="wrap_content"
        android:layout_marginTop="10dp" />

    <TextView
        android:id="@+id/text2"
        android:layout_width="wrap_content"
        android:layout_height="wrap_content"
        android:layout_marginLeft="10dp"
        android:text="o" />
</LinearLayout>
(2)TwoActivity:
import android.content.Context;
import android.graphics.Bitmap;
import android.graphics.drawable.BitmapDrawable;
import android.os.Bundle;
import android.renderscript.Allocation;
import android.renderscript.Element;
import android.renderscript.RenderScript;
import android.renderscript.ScriptIntrinsicBlur;
import android.support.annotation.Nullable;
import android.support.v7.app.AppCompatActivity;
import android.view.View;
import android.widget.Button;
import android.widget.ImageView;
import android.widget.SeekBar;
import android.widget.TextView;
import android.widget.Toast;

import com.bumptech.glide.Glide;

import jp.wasabeef.glide.transformations.BlurTransformation;

/**
 * Created by afanbaby on 2017/9/19.
 */

public class TwoActivity extends AppCompatActivity implements View.OnClickListener {

    private Button renderScriprtBtn, glideBtn;
    private ImageView imageView;
    private SeekBar seekBar;
    private TextView textView;

    @Override
    protected void onCreate(@Nullable Bundle savedInstanceState) {
        super.onCreate(savedInstanceState);
        setContentView(R.layout.activity_two);

        renderScriprtBtn = (Button) findViewById(R.id.renderScriprtBtn);
        glideBtn = (Button) findViewById(R.id.glideBtn);
        imageView = (ImageView) findViewById(R.id.image2);
        seekBar = (SeekBar) findViewById(R.id.seekBar2);
        textView = (TextView) findViewById(R.id.text2);
        renderScriprtBtn.setOnClickListener(this);
        glideBtn.setOnClickListener(this);

        seekBar.setMax(25);
        seekBar.setOnSeekBarChangeListener(new SeekBar.OnSeekBarChangeListener() {
            @Override
            public void onProgressChanged(SeekBar seekBar, int i, boolean b) {
                Bitmap mBitmap1 = ((BitmapDrawable) getResources().getDrawable(R.drawable.love)).getBitmap();
                Bitmap bitmap = blurBitmap(TwoActivity.this, mBitmap1, i);
                imageView.setImageBitmap(bitmap);
                textView.setText(i + "");
            }

            @Override
            public void onStartTrackingTouch(SeekBar seekBar) {

            }

            @Override
            public void onStopTrackingTouch(SeekBar seekBar) {

            }
        });
    }

    @Override
    public void onClick(View view) {
        switch (view.getId()) {
            case R.id.renderScriprtBtn:
                Toast.makeText(this, "RenderScriprt实现高斯模糊", Toast.LENGTH_SHORT).show();
                Bitmap mBitmap1 = ((BitmapDrawable) getResources().getDrawable(R.drawable.love)).getBitmap();
                Bitmap bitmap = blurBitmap(this, mBitmap1, 15);
                imageView.setImageBitmap(bitmap);
                break;

            case R.id.glideBtn:
                Toast.makeText(this, "Glide实现高斯模糊", Toast.LENGTH_SHORT).show();
                Glide.with(this).load(R.drawable.love).bitmapTransform(new BlurTransformation(this, 25)).into(imageView);

                break;
        }
    }

    /**
     * 获取模糊的图片
     *
     * @param context 上下文对象
     * @param bitmap  传入的bitmap图片
     * @param radius  模糊度(Radius最大只能设置25.f)
     * @return
     */
    public static Bitmap blurBitmap(Context context, Bitmap bitmap, int radius) {
        //用需要创建高斯模糊bitmap创建一个空的bitmap
        Bitmap outBitmap = Bitmap.createBitmap(bitmap.getWidth(), bitmap.getHeight(), Bitmap.Config.ARGB_8888);
        // 初始化Renderscript,该类提供了RenderScript context,创建其他RS类之前必须先创建这个类,其控制RenderScript的初始化,资源管理及释放
        RenderScript rs = RenderScript.create(context);
        // 创建高斯模糊对象
        ScriptIntrinsicBlur blurScript = ScriptIntrinsicBlur.create(rs, Element.U8_4(rs));
        // 创建Allocations,此类是将数据传递给RenderScript内核的主要方 法,并制定一个后备类型存储给定类型
        Allocation allIn = Allocation.createFromBitmap(rs, bitmap);
        Allocation allOut = Allocation.createFromBitmap(rs, outBitmap);
        //设定模糊度(注:Radius最大只能设置25.f)
        blurScript.setRadius(radius);
        // Perform the Renderscript
        blurScript.setInput(allIn);
        blurScript.forEach(allOut);
        // Copy the final bitmap created by the out Allocation to the outBitmap
        allOut.copyTo(outBitmap);
        // recycle the original bitmap
        // bitmap.recycle();
        // After finishing everything, we destroy the Renderscript.
        rs.destroy();
        return outBitmap;
    }
}
3.demo地址
本人菜鸟一个,有什么不对的地方希望大家指出评论,大神勿喷,希望大家一起学习进步!


 176
176


 被折叠的 条评论
为什么被折叠?
被折叠的 条评论
为什么被折叠?
 到【灌水乐园】发言


