


caffe 介绍
caffe是Berkely的深度学习框架,在流行的deep learning framework里属于使用人数很多的,github上的统计显示经常是使用量第一的
这里是官方地址,上面有介绍和安装的指南
caffe的优点
Expression: models + optimizations are plaintext schemas, not code.Speed: for state-of-the-art models and massive data.Modularity: to extend to new tasks and architectures.Openness: common code and reference models for reproducibility.Community: joint discussion, development, and modeling.
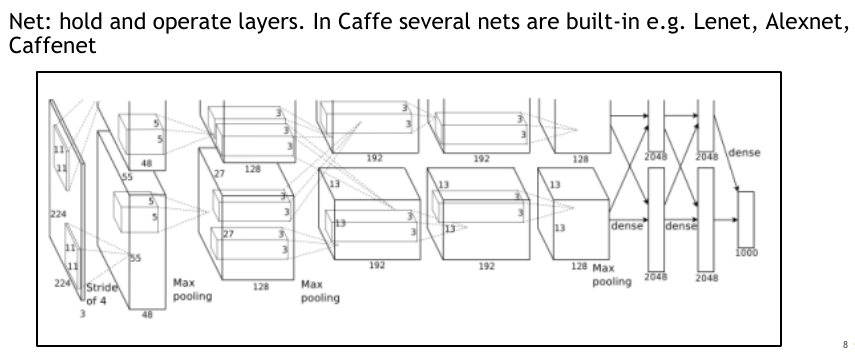
caffe结构
Layer interface + Net + Solver
caffe中的layer图示,以AlexNet的网络结构示例:
主要有:
- convolution layer
- pooling layer
- full-connected layer
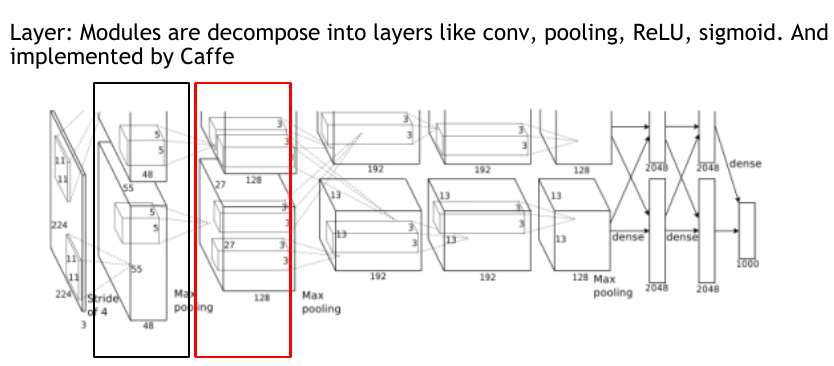
layer与layer之间单向流动,构成网络,同一个layer中的hidden unit不相连
caffe中同样内置了很多的经典网络,比如Alexnet,Lenet,Caffenet等
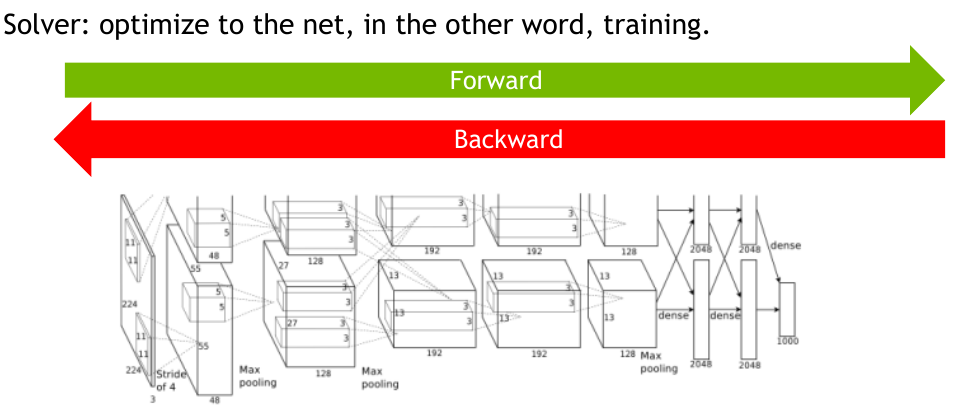
solver定义了网络的优化参数
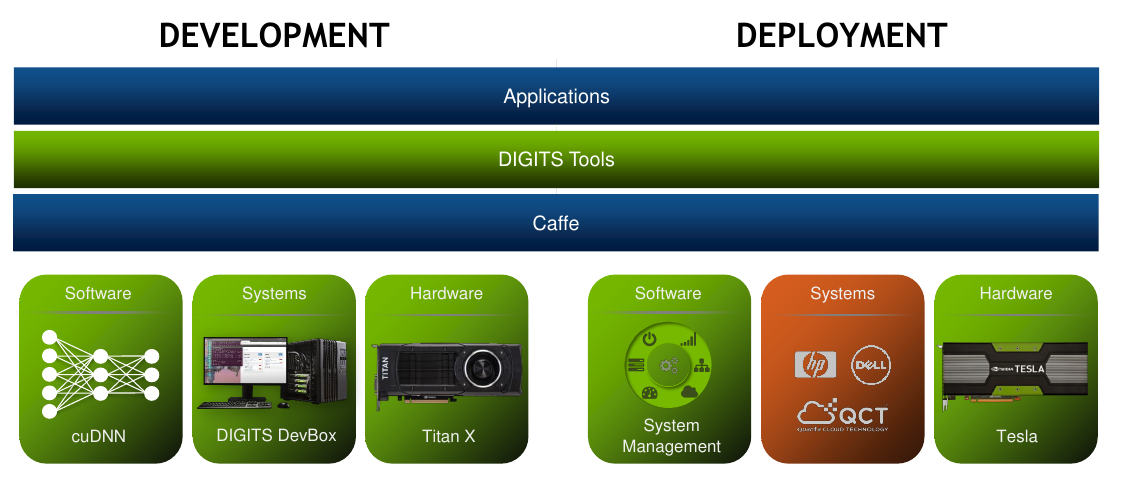
caffe和GPU
caffe可以利用cuda和cudnn来使用GPU来进行运算
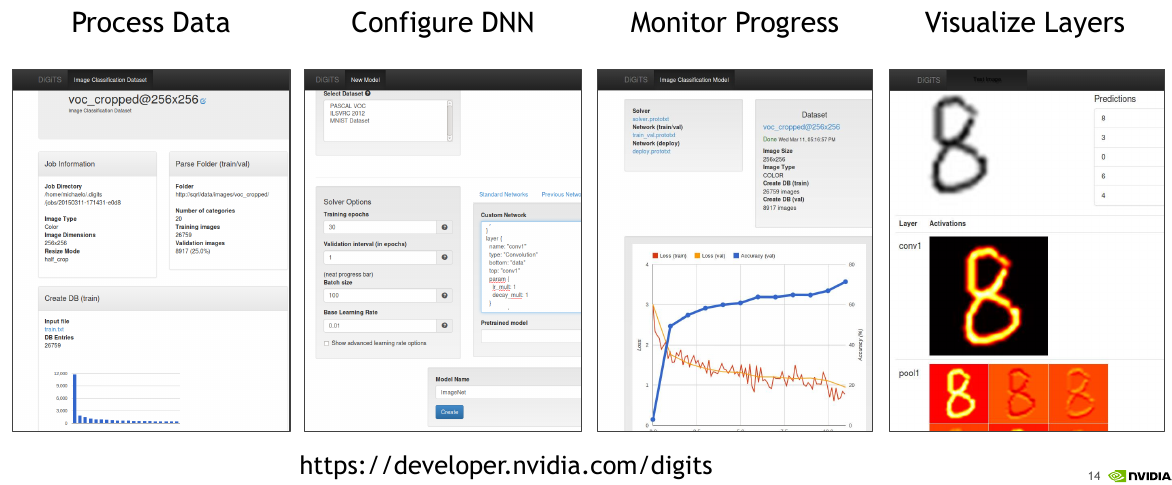
NVIDIA DIGITS则是一个网络服务器,它提供了一个方便的网络接口,用于训练和测试基于caffe的深度神经网络,提供了网页的形式来进行数据的处理,DNN的配置,进度监控和可视化
官方网址:HERE
使用caffe+digits,配合GPU(cuda+cudnn),可以说很爽!!!!
大家可以参考下这篇博客,具体的大家自己试试吧
使用GPU之后一个典型的caffe的程序结构,可能是这样的:
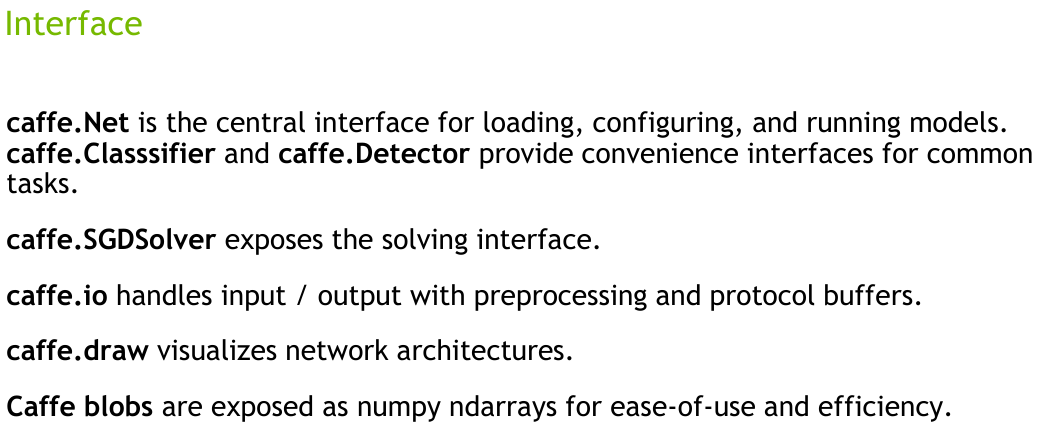
Caffe的python接口
主要有以下几个接口:
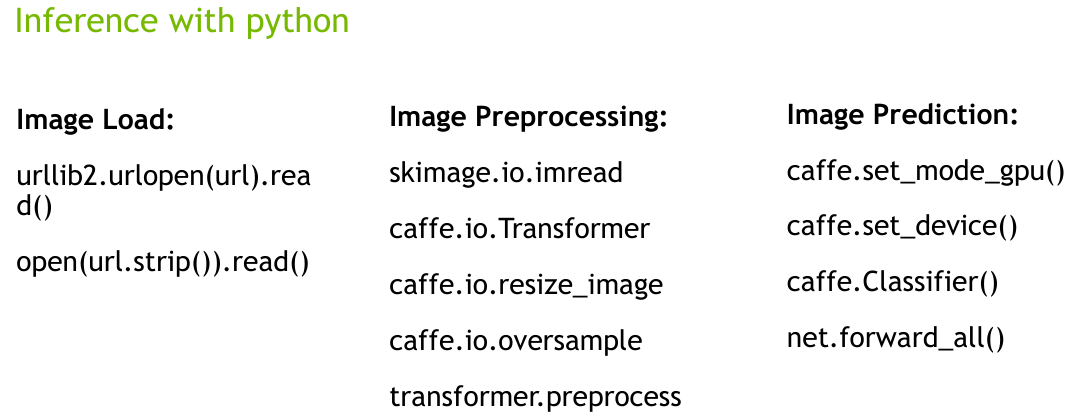
具体的像image load,image preprocess,image prediction,如下:
具体示例
说了上面这么多,恐怕很多人还是云里雾里的,我就结合一个具体的示例来说说如何进行image 的classification
假设:
1. 你已经把你的数据训练好了
2. 获得了你的caffe model
3. 保留了你的网络结构
现在就是来了一堆新图,在某个目录下,你要做的就是进行这些图像的classification,如何做???
示例:
# -*- coding: utf-8 -*-
#!/usr/bin/env python

import PIL
import Image
import sys
import time
import os
import numpy as np
from matplotlib import pyplot as plt

start = time.time()

# 将caffe模块加入到你的python路径中,不然会报caffe module not found的错误
caffe_root = '/home/gavinzhou/caffe-master/'
sys.path.insert(0, caffe_root + 'python')

# 包含测试image的文件夹
test_dir='/path/to/your/recognition/directory'

# classification的结果文件
answer = '/path/to/save/your/result/file/(txt csv 等都可以)'

# 网络结构文件
netProPath = 'path/to/your/net/.prototxt'

# 训练好的模型(caffe model)的路径
modelPath = '/path/to/your/caffe model/.caffemodel'

# Trained size
trainedSize  = 28

# Label path
sysTXTPath = '/path/to/your/synset_words.txt'

import caffe

# Set Caffe to CPU mode, load the net in the test phase for inference, and configure input preprocessing

caffe.set_mode_cpu()
net = caffe.Net(caffe_root + netProPath, caffe_root + modelPath, caffe.TEST)

# preprocessing
transformer = caffe.io.Transformer({'data': net.blobs['data'].data.shape})
transformer.set_transpose('data', (2,0,1))

# mean pixel file
transformer.set_mean('data', np.load(caffe_root + '/path/to/you/mean.npy').mean(1).mean(1))

# the reference model operates on images in [0,255] range instead of [0,1]
transformer.set_raw_scale('data', 255)

# the reference model has channels in BGR order instead of RGB
transformer.set_channel_swap('data', (2,1,0))

net.blobs['data'].reshape(1,3,trainedSize,trainedSize)

# 写入结果文件
output=open(answer, 'w')

# Load labels file
imagenet_labels_filename = caffe_root + sysTXTPath
labels = np.loadtxt(imagenet_labels_filename, str, delimiter= ':')

# 循环迭代进行每个图片的classification
for root,dirs,files in os.walk(test_dir):
    for i in xrange (0,files.__len__()):
        sf=os.path.join(root,files[i])
        output.write(((files[i]).split('.'))[0]+':')
        net.blobs['data'].data[...] = transformer.preprocess('data', caffe.io.load_image(sf))
        out = net.forward()
        # 这个是当前识别的图像的类别索引,需要到你自己定义的synsets_words中查找对应的类别名称
        index = out['prob'].argmax()
        output.write((labels[index][1]) + '\n')
        output.close()

end = time.time()
print 'All time used: '+ str(end-start) + ' seconds' 


 5475
5475


 被折叠的 条评论
为什么被折叠?
被折叠的 条评论
为什么被折叠?
 到【灌水乐园】发言


