TabLayout+ViewPaper实现滑动切换
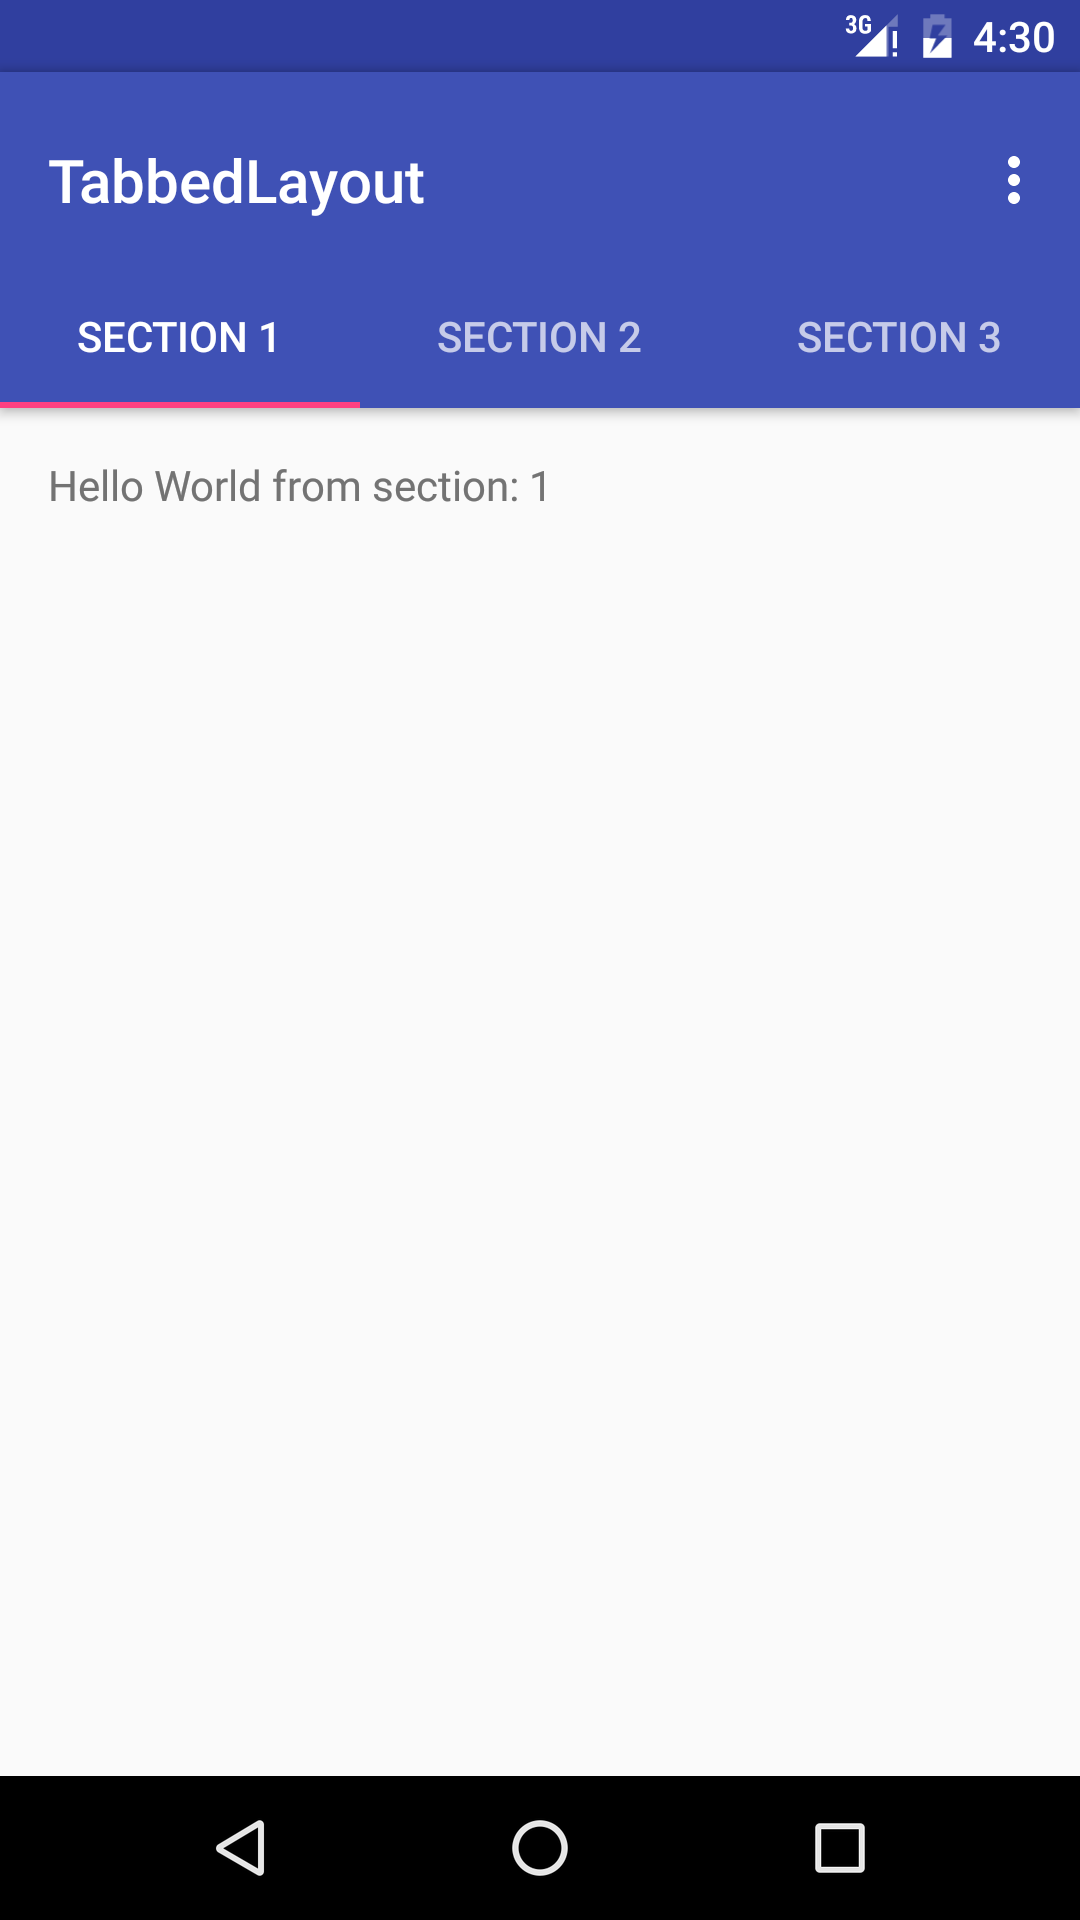
效果图如下:
涉及到的控件:
1. TabLayout
2. ViewPaper
首先在 build.gradle 导入相对应的包:
compile 'com.android.support:design:23.4.0'
布局
布局文件如下:
<?xml version="1.0" encoding="utf-8"?>
<LinearLayout xmlns:android="http://schemas.android.com/apk/res/android"
    xmlns:app="http://schemas.android.com/apk/res-auto"
    xmlns:tools="http://schemas.android.com/tools"
    android:id="@+id/main_content"
    android:layout_width="match_parent"
    android:layout_height="match_parent"
    android:fitsSystemWindows="true"
    android:orientation="vertical"
    tools:context="com.tangvim.tabbedlayout.MainActivity">

    <android.support.design.widget.AppBarLayout
        android:id="@+id/appbar"
        android:layout_width="match_parent"
        android:layout_height="wrap_content"
        android:paddingTop="@dimen/appbar_padding_top"
        android:theme="@style/AppTheme.AppBarOverlay">

        <android.support.v7.widget.Toolbar
            android:id="@+id/toolbar"
            android:layout_width="match_parent"
            android:layout_height="?attr/actionBarSize"
            android:background="?attr/colorPrimary"
            app:popupTheme="@style/AppTheme.PopupOverlay">

        </android.support.v7.widget.Toolbar>

        <android.support.design.widget.TabLayout
            android:id="@+id/tabs"
            android:layout_width="match_parent"
            android:layout_height="wrap_content" />

    </android.support.design.widget.AppBarLayout>

    <android.support.v4.view.ViewPager
        android:id="@+id/container"
        android:layout_width="match_parent"
        android:layout_height="match_parent" />

</LinearLayout>
这里的 TabLayout 嵌套在 AppBarLayout 里面,但是并没有使用到 AppBarLayout 的特有方法,暂且可以看成一个 LinearLayout 。
代码
public class MainActivity extends AppCompatActivity {

    private SectionsPagerAdapter mSectionsPagerAdapter;

    private ViewPager mViewPager;

    @Override
    protected void onCreate(Bundle savedInstanceState) {
        super.onCreate(savedInstanceState);
        setContentView(R.layout.activity_main);

        Toolbar toolbar = (Toolbar) findViewById(R.id.toolbar);
        setSupportActionBar(toolbar);
        // Create the adapter that will return a fragment for each of the three
        // primary sections of the activity.
        mSectionsPagerAdapter = new SectionsPagerAdapter(getSupportFragmentManager());

        // Set up the ViewPager with the sections adapter.
        mViewPager = (ViewPager) findViewById(R.id.container);
        mViewPager.setAdapter(mSectionsPagerAdapter);

        TabLayout tabLayout = (TabLayout) findViewById(R.id.tabs);
        tabLayout.setupWithViewPager(mViewPager);
    }
}
以上代码主要内容:
ViewPaper 上加载 Fragment ,ViewPager 调用 setAdapter() 方法。
TabLayout 与 ViewPaper 关联,TabLayout 调用 setupWithViewPager() 方法。
···
ViewPaper 适配器的定义如下:
public class SectionsPagerAdapter extends FragmentPagerAdapter {

    public SectionsPagerAdapter(FragmentManager fm) {
        super(fm);
    }

    @Override
    public Fragment getItem(int position) {
        // getItem is called to instantiate the fragment for the given page.
        // Return a PlaceholderFragment
        return PlaceholderFragment.newInstance(position + 1);
    }

    @Override
    public int getCount() {
        // Show 3 total pages.
        return 3;
    }

    @Override
    public CharSequence getPageTitle(int position) {
        switch (position) {
            case 0:
                return "SECTION 1";
            case 1:
                return "SECTION 2";
            case 2:
                return "SECTION 3";
        }
        return null;
    }
}在ViewPager里嵌套Fragment 使用到以下两个Adapter:
FragmentStatePagerAdapter多用于处理有很多页,并且数据动态性较大、占用内存较多的情况FragmentPageAdapter每一个生成的 Fragment 都将保存在内存之中,所以适用于那些数量也比较少的,相对静态的页
具体细节可以参考FragmentPageAdapter与FragmentStatePagerAdapter区别
···
Fragment 的定义如下:
public static class PlaceholderFragment extends Fragment {

    private static final String ARG_SECTION_NUMBER = "section_number";

    public PlaceholderFragment() {
    }

    public static PlaceholderFragment newInstance(int sectionNumber) {
        PlaceholderFragment fragment = new PlaceholderFragment();
        Bundle args = new Bundle();
        args.putInt(ARG_SECTION_NUMBER, sectionNumber);
        fragment.setArguments(args);
        return fragment;
    }

    @Override
    public View onCreateView(LayoutInflater inflater, ViewGroup container,
                             Bundle savedInstanceState) {
        View rootView = inflater.inflate(R.layout.fragment_main, container, false);
        TextView textView = (TextView) rootView.findViewById(R.id.section_label);
        textView.setText(getString(R.string.section_format, getArguments().getInt(ARG_SECTION_NUMBER)));
        return rootView;
    }
}
上面的 Fragment 定义方法跟普通的碎片没有什么区别。
如果需要加载大量数据的时候,适配器选用 FragmentStatePagerAdapter 碎片的加载方式也顺应使用懒加载,复写 setUserVisibleHint() 方法。参考Fragment懒加载实战
//ViewPager其他页面的Fragment,我们进行判断后再加载数据。懒加载的重点!
@CallSuper
@Override
public void setUserVisibleHint(boolean isVisibleToUser) {
    super.setUserVisibleHint(isVisibleToUser);
    /*
    View创建完成以后才开始初始化数据,
    而Fragment在ViewPager里,setUserVisibleHint()会在在onCreateView()前自动调用。
    所以第一次启动Fragment时,自动调用setUserVisibleHint()无法实现初始化数据的任务。
    */
    if (isVisibleToUser && !isDataLoaded && isViewCreated){
        initData();
    }
}


 本文介绍如何使用TabLayout和ViewPager实现页面滑动切换效果。通过示例代码详细讲解了组件的配置方法,包括布局文件设置及Java代码实现,并探讨了不同场景下Fragment适配器的选择。


 4214
4214

 被折叠的 条评论
为什么被折叠?


