


前言
在Android中有很多的控件来供大家使用,但是和强大的IOS相比,Android所提供的控件平淡了许多,由于Android的开源可以让每个开发者都能创建自己的视图控件来满足自己的需求,正因为这样就出现各种各样的自定义控件,久而久之就形成了自定义视图框架。
这里介绍两种方法
1、给每一个需要配置自定义属性的子控件外面包裹一层自定义容器
2、自定义LayoutInflater将xml布局加载进来(实例化里面每一个控件,并且将控件里面的参数设置到控件类身上)
Part 1、子控件外面包裹一层自定义容器
效果~
功能分析:
外面一层为自定义ScrollView用来监听滑动,里面是一个容器,这里为什么要是自定义的呢?这里的自定义容器作用是为了动态的为每个View包裹一层容器,如果你不适用自定义的容器那你将要对每一个控件包裹一层自定义容器,这样便不能实现自定义View框架了。
接下来说一下具体的流程:
首先我们先定义一些自定义属性
    <declare-styleable name="DiscrollView_LayoutParams">
        <attr name="discrollve_alpha" format="boolean"/>
        <attr name="discrollve_scaleX" format="boolean"/>
        <attr name="discrollve_scaleY" format="boolean"/>
        <attr name="discrollve_fromBgColor" format="color"/>
        <attr name="discrollve_toBgColor" format="color"/>
        <attr name="discrollve_translation"/>
        <attr name="discrollve_rotate" format="integer"></attr>
    </declare-styleable>

    <attr name="discrollve_translation">
        <flag name="fromTop" value="0x01"/>
        <flag name="fromBottom" value="0x02"/>
        <flag name="fromLeft" value="0x04"/>
        <flag name="fromRight" value="0x08"/>
</attr><?xml version="1.0" encoding="utf-8"?>
<com.andly.administrator.andly_animframe.copydiscrollview.MyScrollView
xmlns:android="http://schemas.android.com/apk/res/android"
xmlns:tools="http://schemas.android.com/tools"
xmlns:discrollve="http://schemas.android.com/apk/res-auto"
android:id="@+id/activity_copy_main"
android:layout_width="match_parent"
android:layout_height="match_parent"
tools:context="com.andly.administrator.andly_animframe.copydiscrollview.CopyMainActivity">
<com.andly.administrator.andly_animframe.copydiscrollview.MyLinearLayout
android:layout_width="match_parent"
android:layout_height="match_parent">
<TextView
android:layout_width="match_parent"
android:layout_height="600dp"
android:background="@android:color/white"
android:textColor="@android:color/black"
android:textSize="25sp"
android:padding="25dp"
tools:visibility="gone"
android:gravity="center"
android:fontFamily="serif"
android:text="" />
<View
android:layout_width="match_parent"
android:layout_height="200dp"
discrollve:discrollve_fromBgColor="@android:color/holo_red_dark"
discrollve:discrollve_toBgColor="@android:color/holo_blue_dark"
/>
<ImageView
android:layout_width="200dp"
android:layout_height="150dp"
discrollve:discrollve_alpha="true"
discrollve:discrollve_translation="fromLeft|fromBottom"
android:src="@drawable/pic2" />
<TextView
android:layout_width="match_parent"
android:layout_height="wrap_content"
android:padding="20dp"
android:fontFamily="serif"
android:gravity="center"
android:text="眼见范冰冰与李晨在一起了,孩子会取名李冰冰;李冰冰唯有嫁给范伟,生个孩子叫范冰冰,方能扳回一城。"
android:textSize="23sp"
discrollve:discrollve_alpha="true"
discrollve:discrollve_translation="fromBottom" />
<ImageView
android:layout_width="wrap_content"
android:layout_height="wrap_content"
android:layout_margin="20dp"
android:layout_gravity="center"
android:src="@drawable/pic4"
discrollve:discrollve_scaleX="true"
discrollve:discrollve_scaleY="true" />
<ImageView
android:layout_width="wrap_content"
android:layout_height="wrap_content"
android:layout_margin="20dp"
android:layout_gravity="center"
android:src="@drawable/pic5"
discrollve:discrollve_translation="fromLeft|fromBottom"
discrollve:discrollve_rotate="360"/>
<ImageView
android:layout_width="wrap_content"
android:layout_height="wrap_content"
android:layout_margin="20dp"
android:layout_gravity="center"
android:src="@drawable/pic6"
discrollve:discrollve_translation="fromLeft|fromBottom"
/>
<ImageView
android:layout_width="wrap_content"
android:layout_height="wrap_content"
android:layout_margin="20dp"
android:layout_gravity="center"
android:src="@drawable/pic7"
discrollve:discrollve_translation="fromLeft|fromBottom"
/>
<ImageView
android:layout_width="wrap_content"
android:layout_height="wrap_content"
android:layout_margin="20dp"
android:layout_gravity="center"
android:src="@drawable/pic8"
discrollve:discrollve_translation="fromLeft|fromBottom"
/>
</com.andly.administrator.andly_animframe.copydiscrollview.MyLinearLayout>
</com.andly.administrator.andly_animframe.copydiscrollview.MyScrollView>接下来自定义LinearLayout,它的作用不光为每个控件包裹一层容器还需要将自定义属性传递给包裹的容器
    @Override
    public void addView(View child, int index, ViewGroup.LayoutParams params) {
        MyLayoutParams ps = (MyLayoutParams) params;
        if (!isCustomValue(ps)) {
            super.addView(child, index, params);
        } else {
            layout = new MyFramementLayout(getContext());
            layout.setDiscrollve_alpha(ps.discrollve_alpha);
            layout.setDiscrollve_scaleX(ps.discrollve_scaleX);
            layout.setDiscrollve_scaleY(ps.discrollve_scaleY);
            layout.setDiscrollve_fromBgColor(ps.discrollve_fromBgColor);
            layout.setDiscrollve_toBgColor(ps.discrollve_toBgColor);
            layout.setDiscrollve_translation(ps.discrollve_translation);
            layout.setDiscrollve_rotate(ps.discrollve_rotate);
            layout.addView(child);
            super.addView(layout, index, params);
        }

} void rInflate(XmlPullParser parser, View parent, final AttributeSet attrs,
boolean finishInflate) throws XmlPullParserException, IOException {
final int depth = parser.getDepth();
int type;
while (((type = parser.next()) != XmlPullParser.END_TAG ||
parser.getDepth() > depth) && type != XmlPullParser.END_DOCUMENT) {
if (type != XmlPullParser.START_TAG) {
continue;
}
final String name = parser.getName();
if (TAG_REQUEST_FOCUS.equals(name)) {
parseRequestFocus(parser, parent);
} else if (TAG_INCLUDE.equals(name)) {
if (parser.getDepth() == 0) {
throw new InflateException("<include /> cannot be the root element");
}
parseInclude(parser, parent, attrs);
} else if (TAG_MERGE.equals(name)) {
throw new InflateException("<merge /> must be the root element");
} else if (TAG_1995.equals(name)) {
final View view = new BlinkLayout(mContext, attrs);
final ViewGroup viewGroup = (ViewGroup) parent;
final ViewGroup.LayoutParams params = viewGroup.generateLayoutParams(attrs);
rInflate(parser, view, attrs, true);
viewGroup.addView(view, params);
} else {
final View view = createViewFromTag(parent, name, attrs);
final ViewGroup viewGroup = (ViewGroup) parent;
final ViewGroup.LayoutParams params = viewGroup.generateLayoutParams(attrs);
rInflate(parser, view, attrs, true);
viewGroup.addView(view, params);
}
}
if (finishInflate) parent.onFinishInflate();
} @Override
public LayoutParams generateLayoutParams(AttributeSet attrs) {
//解析xml
return new MyLayoutParams(this.getContext(), attrs);
} @Override
public static class MyLayoutParams extends LinearLayout.LayoutParams {
boolean discrollve_alpha;
boolean discrollve_scaleX;
boolean discrollve_scaleY;
int discrollve_fromBgColor;
int discrollve_toBgColor;
int discrollve_translation;
int discrollve_rotate;
public MyLayoutParams(Context c, AttributeSet attrs) {
super(c, attrs);
TypedArray ta = c.obtainStyledAttributes(attrs, R.styleable.DiscrollView_LayoutParams);
discrollve_alpha = ta.getBoolean(R.styleable.DiscrollView_LayoutParams_discrollve_alpha, false);
discrollve_scaleX = ta.getBoolean(R.styleable.DiscrollView_LayoutParams_discrollve_scaleX, false);
discrollve_scaleY = ta.getBoolean(R.styleable.DiscrollView_LayoutParams_discrollve_scaleY, false);
discrollve_fromBgColor = ta.getInt(R.styleable.DiscrollView_LayoutParams_discrollve_fromBgColor, -1);
discrollve_toBgColor = ta.getInt(R.styleable.DiscrollView_LayoutParams_discrollve_toBgColor, -1);
discrollve_translation = ta.getInt(R.styleable.DiscrollView_LayoutParams_discrollve_translation, -1);
discrollve_rotate = ta.getInt(R.styleable.DiscrollView_LayoutParams_discrollve_rotate,-1);
ta.recycle();
}
} @Override
public void scrollViews(float rate) {//rate:0 - 1
if (discrollve_alpha) {
setAlpha(rate);
}
if (discrollve_scaleX) {
setScaleX(rate);
}
if (discrollve_scaleY) {
setScaleY(rate);
}
if (isTranslation(TRANSLATION_FROM_TOP)) {//从-height~0
setTranslationY(-mHeight * (1 - rate));
}
if (isTranslation(TRANSLATION_FROM_BOTTOM)) {//从height~0
setTranslationY(mHeight * (1 - rate));
}
if (isTranslation(TRANSLATION_FROM_LEFT)) {//-width~0
setTranslationX(-mWidth * (1 - rate));
}
if (isTranslation(TRANSLATION_FROM_RIGHT)) {//width~0
setTranslationX(mWidth * (1 - rate));
}
if(discrollve_rotate != -1){
setRotation(discrollve_rotate*rate);
}
//颜色渐变
if (discrollve_fromBgColor != -1 && discrollve_toBgColor != -1) {
setBackgroundColor((Integer) mEvaluator.evaluate(rate, discrollve_fromBgColor, discrollve_toBgColor));
}
} @Override
protected void onScrollChanged(int l, int t, int oldl, int oldt) {
super.onScrollChanged(l, t, oldl, oldt);
mHeight = getHeight();
for (int i = 0; i < mContent.getChildCount(); i++) {
if (!(mContent.getChildAt(i) instanceof MyScrollViewInterface)) {//这里过滤掉没有定义自定义属性的控件
continue;
}
MyScrollViewInterface viewInterface = (MyScrollViewInterface) mContent.getChildAt(i);
View view = mContent.getChildAt(i);//得到包裹的容器
int childHeight = view.getHeight();//包裹容器的高度
int childTop = view.getTop();
int absoluteTop = childTop - t;//包裹容器顶部到屏幕顶部
if(absoluteTop <= mHeight){
int childChangeHeight = mHeight - absoluteTop;//得到包裹容器未显示的高度
viewInterface.scrollViews(clamp(childChangeHeight / (float) childHeight, 1.0f, 0f));
}
}
}
private float clamp(float s, float max, float min) {
return Math.max(Math.min(s, max), min);
}
Part 2、自定义LayoutInflater将xml布局加载进来
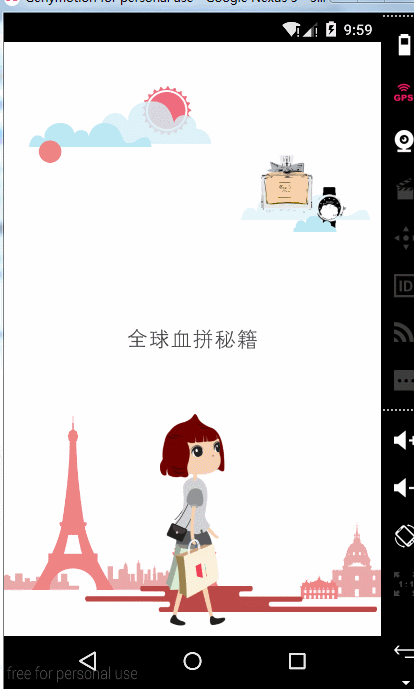
效果~
根据上面的源码分析继续进入便走到了LayoutInflater的createViewFromTag的方法
    /*
     * default visibility so the BridgeInflater can override it.
     */
    View createViewFromTag(View parent, String name, AttributeSet attrs) {
        ......
        try {
            View view;
            if (mFactory2 != null) view = mFactory2.onCreateView(parent, name, mContext, attrs);
            else if (mFactory != null) view = mFactory.onCreateView(name, mContext, attrs);
            else view = null;

            if (view == null && mPrivateFactory != null) {
                view = mPrivateFactory.onCreateView(parent, name, mContext, attrs);
            }
            //(2)
            if (view == null) {
                if (-1 == name.indexOf('.')) {
                    view = onCreateView(parent, name, attrs);
                } else {
                    view = createView(name, null, attrs);
                }
            }

            if (DEBUG) System.out.println("Created view is: " + view);
            return view;
        ......
    }
通过上面的代码不难想象我们可以自定义LayoutInflater类传入一个自定义的Factory类,然后在自定义的Factory类onCreateView方法里面获取到每个子View的属性,但值得注意的是通过这种方法来实现的话,需要实现(2)下面代码
首先我们先定义自定义属性
    <attr name="a_in" format="float" />
    <attr name="a_out" format="float" />
    <attr name="x_in" format="float" />
    <attr name="x_out" format="float" />
    <attr name="y_in" format="float" />
<attr name="y_out" format="float" />public class ParallaxLayoutInflater extends LayoutInflater {
private ParallaxFragment fragment;
protected ParallaxLayoutInflater(LayoutInflater original, Context newContext,ParallaxFragment fragment) {
super(original, newContext);
this.fragment = fragment;
//重新设置布局加载器的工厂
//工厂:创建布局文件中所有的视图
setFactory(new ParallaxFactory(this));
}
@Override
public LayoutInflater cloneInContext(Context newContext) {
return new ParallaxLayoutInflater(this,newContext,fragment);
}
} class ParallaxFactory implements LayoutInflater.Factory{
private LayoutInflater inflater;
private final String[] sClassPrefix = {
"android.widget.",
"android.view."
};
public ParallaxFactory(LayoutInflater inflater) {
this.inflater = inflater;
}
@Override
public View onCreateView(String name, Context context,AttributeSet attrs) {
View view = null;
if (view == null) {
view = createViewOrFailQuietly(name,context,attrs);//创建View的过程
}
if (view != null) {
setViewTag(view,context,attrs);//获取自定义的属性,通过相应的标签关联到视图上
fragment.getParallaxViews().add(view);
}
return view;
}
}1、在onCreateView方法中创建View
	private View createViewOrFailQuietly(String name, String prefix,Context context,AttributeSet attrs) {
			try {
				return inflater.createView(name, prefix, attrs);//通过系统的Inflater来创建视图
			} catch (Exception e) {
				return null;
			}
		}
		private View createViewOrFailQuietly(String name, Context context,AttributeSet attrs) {
			if (name.contains(".")) {//自定义控件将前缀设置为空
				createViewOrFailQuietly(name, null, context, attrs);
			}
			for (String prefix : sClassPrefix) {//系统视图,这里通过对每个前缀都进行遍历判空来判断是否为真正的前缀
				View view = createViewOrFailQuietly(name, prefix, context, attrs);
				if (view != null) {
					return view;
				}
			}
			return null;
} private void setViewTag(View view, Context context, AttributeSet attrs) {
int[] attrIds = {
R.attr.a_in,
R.attr.a_out,
R.attr.x_in,
R.attr.x_out,
R.attr.y_in,
R.attr.y_out};
TypedArray a = context.obtainStyledAttributes(attrs, attrIds);
if (a != null && a.length() > 0) {
ParallaxViewTag tag = new ParallaxViewTag();
tag.alphaIn = a.getFloat(0, 0f);
tag.alphaOut = a.getFloat(1, 0f);
tag.xIn = a.getFloat(2, 0f);
tag.xOut = a.getFloat(3, 0f);
tag.yIn = a.getFloat(4, 0f);
tag.yOut = a.getFloat(5, 0f);
view.setTag(R.id.parallax_view_tag,tag);
}
a.recycle();
} @Override
public void onPageScrolled(int position, float positionOffset,
int positionOffsetPixels) {
this.containerWidth = getWidth();
//获取到进入的页面
ParallaxFragment inFragment = null;
try {
inFragment = fragments.get(position - 1);
} catch (Exception e) {}
//获取到退出的页面
ParallaxFragment outFragment = null;
try {
outFragment = fragments.get(position);
} catch (Exception e) {}
if (inFragment != null) {
List<View> inViews = inFragment.getParallaxViews();//获取到Fragment上的所有视图,实现动画效果
if (inViews != null) {
for (View view : inViews) {
ParallaxViewTag tag = (ParallaxViewTag) view.getTag(R.id.parallax_view_tag);//获取标签,从标签中获取所有动画的参数
if (tag == null) {//tag为空的时候没有设置自定义属性
continue;
}
ViewHelper.setTranslationY(view, (containerWidth - positionOffsetPixels) * tag.yIn);
ViewHelper.setTranslationX(view, (containerWidth - positionOffsetPixels) * tag.xIn);
}
}
}
if(outFragment != null){
List<View> outViews = outFragment.getParallaxViews();
if (outViews != null) {
for (View view : outViews) {
ParallaxViewTag tag = (ParallaxViewTag) view.getTag(R.id.parallax_view_tag);
if (tag == null) {
continue;
}
ViewHelper.setTranslationY(view, 0 - positionOffsetPixels * tag.yOut);
ViewHelper.setTranslationX(view, 0 - positionOffsetPixels * tag.xOut);
}
}
}
} @Override
public void onPageSelected(int position) {
if (position == adapter.getCount() - 1) {
iv_man.setVisibility(INVISIBLE);
}else{
iv_man.setVisibility(VISIBLE);
}
} @Override
public void onPageScrollStateChanged(int state) {
AnimationDrawable animation = (AnimationDrawable) iv_man.getBackground();
switch (state) {
case ViewPager.SCROLL_STATE_DRAGGING:
animation.start();
break;
case ViewPager.SCROLL_STATE_IDLE:
animation.stop();
break;
default:
break;
}
}


 2077
2077

 被折叠的 条评论
为什么被折叠?
被折叠的 条评论
为什么被折叠?
 到【灌水乐园】发言


