


- 先配置基础环境
修改网卡配置文件:BOOTPROTO=static
IPADDR=192.168.200.130
NETMASK=255.255.255.0
GATEWAY=192.168.200.2
保存退出,重启网络服务:systemctl restart network
关闭防火墙:systemctl stop firewalld
关闭selinux:setenforce 0
修改主机名:hostnamectl set-hostname Nginx.lenovo.com
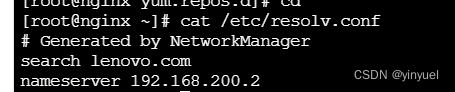
配置外网访问DNS文件:vi /etc/resolv.conf
2.下载阿里云centos7基础yum源文件:
如果没有wget软件,先安装:yum -y install wget
![]()
安装完查看是否有本地源:a.有,关闭本地源
进入 /etc/yum.repos.d/文件名.repo中 enabled=1改为enabled=0
b.没有,删除网络源
rm -rf C*

wget -O /etc/yum.repos.d/CentOS-Base.repo https://mirrors.aliyun.com/repo/Centos-7.repo
或者curl /etc/yum.repos.d/CentOS-Base.repo https://mirrors.aliyun.com/repo/Centos-7.repo
获取到阿里的网络镜像文件后,需要打开文件将所有的http改为https ,所有的gpgcheck=1 改为gpgcheck=0

3.基于Nginx完成的负载均衡
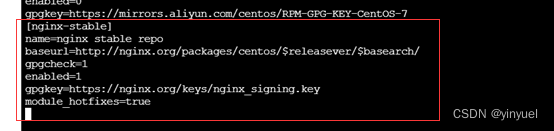
- 配置nignx软件的yum源
[nginx-stable]
name=nginx stable repo
baseurl=http://nginx.org/packages/centos/$releasever/$basearch/
gpgcheck=1
enabled=1
gpgkey=https://nginx.org/keys/nginx_signing.key
module_hotfixes=true
2.安装nginx
yum -y install nginx
3.启动服务
systemctl start nginx
注:nginx 使用tcp80端口,请注意与其他web服务冲突
4.配置Nginx开启反向代理访问
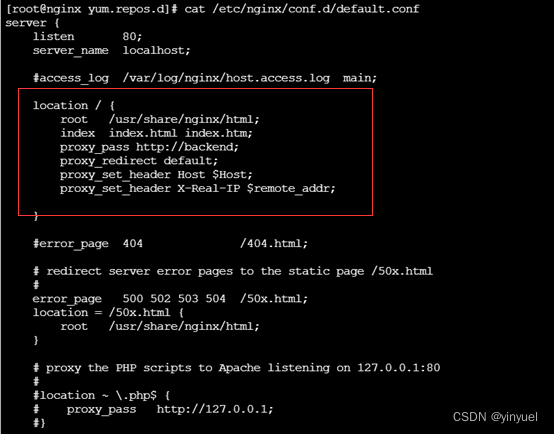
vi /etc/nginx/conf.d/default.conf
server {
…
location / {
proxy_pass http://backend;
proxy_redirect default;
#设置代理
proxy_set_header Host $Host;
proxy_set_header X-Real-IP $remote_addr;
}
}
5.配置反向代理的主机是谁
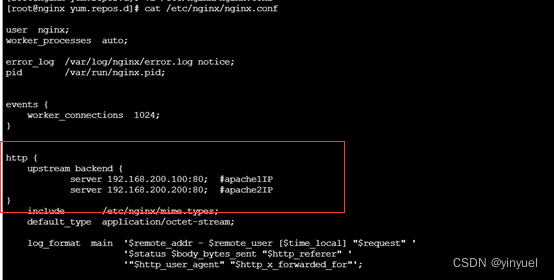
vi /etc/nginx/nginx.conf
http{
…
upstream backend {
server 192.168.200.100:80; apache1IP
server 192.168.200.200:80; apache2IP
}
}
6.访问验证
重启服务:systemctl restart nginx
验证:在浏览器上输入http://nginxip 访问,多次刷新
查看apache的/var/log/httpd/acess_log 查看最后一行 确认访问者IP为nginxIP

Apache1:查看访问日志 /var/log/httpd/access_log
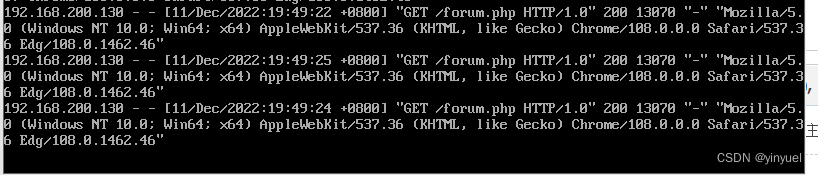

Apache2:查看访问日志 /var/log/httpd/access_log


 156
156


 被折叠的 条评论
为什么被折叠?
被折叠的 条评论
为什么被折叠?
 到【灌水乐园】发言


