[root@stw2 ~]# mysql_secure_installation
NOTE: RUNNING ALL PARTS OF THIS SCRIPT IS RECOMMENDED FOR ALL MariaDB
SERVERS IN PRODUCTION USE! PLEASE READ EACH STEP CAREFULLY!
In order to log into MariaDB to secure it, we'll need the current
password for the root user. If you've just installed MariaDB, and
you haven't set the root password yet, the password will be blank,
so you should just press enter here.
Enter current password for root (enter for none):
OK, successfully used password, moving on...
Setting the root password ensures that nobody can log into the MariaDB
root user without the proper authorisation.
Set root password? [Y/n] y //设置数据库的root用户的密码,密码是123456
New password:
Re-enter new password:
Password updated successfully!
Reloading privilege tables..
... Success!
By default, a MariaDB installation has an anonymous user, allowing anyone
to log into MariaDB without having to have a user account created for
them. This is intended only for testing, and to make the installation
go a bit smoother. You should remove them before moving into a
production environment.
Remove anonymous users? [Y/n] y //是否移除匿名用户
... Success!
Normally, root should only be allowed to connect from 'localhost'. This
ensures that someone cannot guess at the root password from the network.
Disallow root login remotely? [Y/n] n //是否不允许root用户远程登录
... skipping.
By default, MariaDB comes with a database named 'test' that anyone can
access. This is also intended only for testing, and should be removed
before moving into a production environment.
Remove test database and access to it? [Y/n] y //是否移除测试的数据库
- Dropping test database...
... Success!
- Removing privileges on test database...
... Success!
Reloading the privilege tables will ensure that all changes made so far
will take effect immediately.
Reload privilege tables now? [Y/n] y //是否重新加载权限列表
... Success!
Cleaning up...
All done! If you've completed all of the above steps, your MariaDB
installation should now be secure.
Thanks forusing MariaDB!
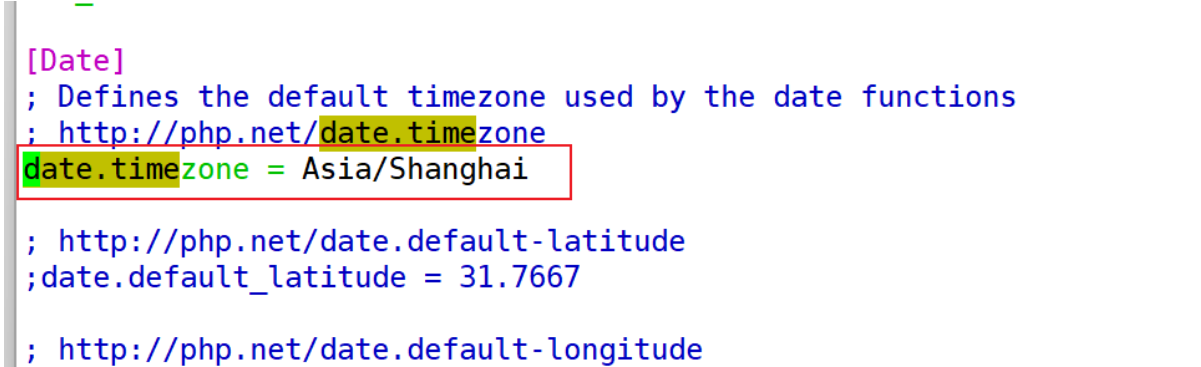
[root@stw2 ~]# vim /etc/php.ini [root@stw2 ~]# systemctl restart php-fpm[root@stw2 ~]# systemctl enable php-fpm
Created symlink from/etc/systemd/system/multi-user.target.wants/php-fpm.service to /usr/lib/systemd/system/php-fpm.service.
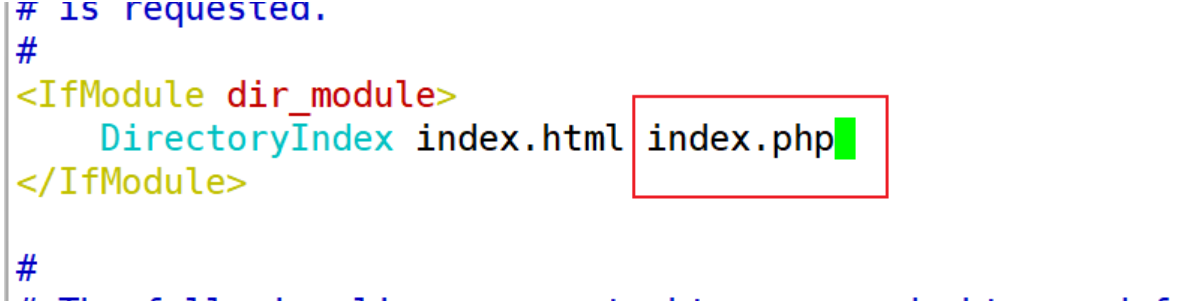
8、配置默认网页
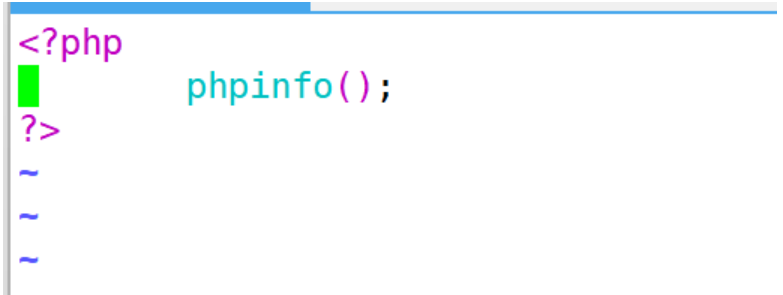
[root@stw2 ~]# vim /etc/httpd/conf/httpd.conf [root@stw2 ~]# cd /var/www/html[root@stw2 html]# ls[root@stw2 html]# vim index.php[root@stw2 html]# systemctl restart httpd[root@stw2 html]# systemctl enable httpd
Created symlink from/etc/systemd/system/multi-user.target.wants/httpd.service to /usr/lib/systemd/system/httpd.service.
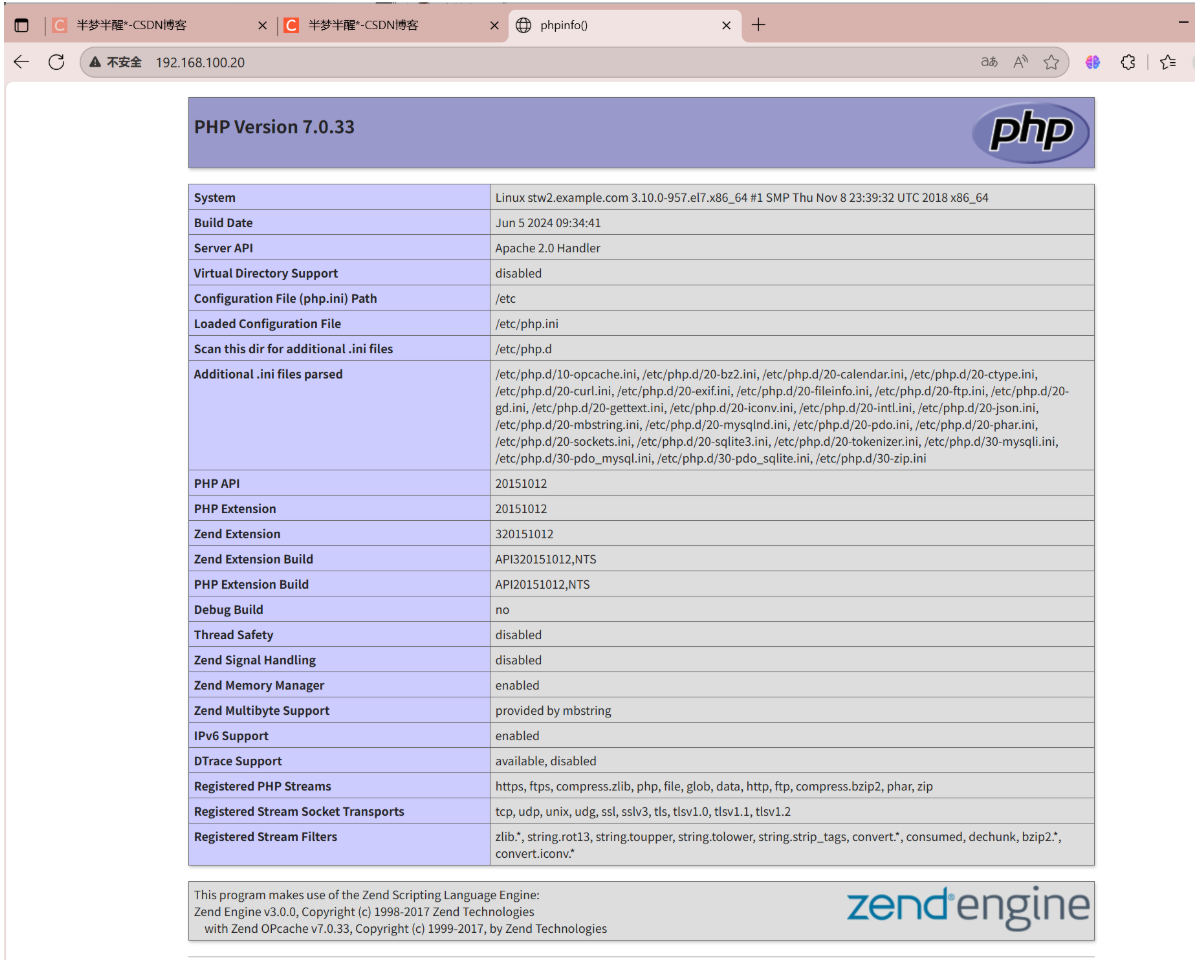
9、测试访问lamp基础架构
10、将压缩包上传并解压
[root@stw2 ~]# ls
anaconda-ks.cfg Documents initial-setup-ks.cfg Pictures Templates
Desktop Downloads Music Public Videos
[root@stw2 ~]# rz -E //不用敲命令直接将压缩包丢进来
rz waiting to receive.[root@stw2 ~]# ls
anaconda-ks.cfg Documents initial-setup-ks.cfg Pictures Templates wordpress-6.5.5.tar.gz
Desktop Downloads Music Public Videos
[root@stw2 ~]# tar -xzvf wordpress-6.5.5.tar.gz [root@stw2 ~]# ls
anaconda-ks.cfg Documents initial-setup-ks.cfg Pictures Templates wordpress
Desktop Downloads Music Public Videos wordpress-6.5.5.tar.gz
11、将解压之后的压缩包复制移动到/var/www/html,并为之设置权限
[root@stw2 ~]# cp -r wordpress /var/www/html/[root@stw2 ~]# cd /var/www/html/[root@stw2 html]# ls
index.php wordpress
[root@stw2 html]# ll
total 8
-rw-r--r-- 1 root root 21 Aug 18 15:59 index.php
drwxr-xr-x 5 root root 4096 Aug 18 16:06 wordpress
[root@stw2 html]# chown -R apache:apache wordpress/[root@stw2 html]# ll
total 8
-rw-r--r-- 1 root root 21 Aug 18 15:59 index.php
drwxr-xr-x 5 apache apache 4096 Aug 18 16:06 wordpress
[root@stw2 html]# chmod -R 775 wordpress/
12、为wordpress配置数据库
[root@stw2 ~]# mysql -uroot -p //root用户登录,输入密码
Enter password:
Welcome to the MariaDB monitor. Commands end with ; or \g.
Your MariaDB connection id is 11
Server version: 5.5.68-MariaDB MariaDB Server
Copyright (c) 2000, 2018, Oracle, MariaDB Corporation Ab and others.Type'help;' or '\h'for help.Type'\c' to clear the current input statement.
MariaDB [(none)]> show databases;+--------------------+| Database |+--------------------+| information_schema || mysql || performance_schema |+--------------------+
3 rows in set(0.00 sec)
MariaDB [(none)]> create database wordpress_db;//创建数据库wordpress_db
Query OK, 1 row affected (0.00 sec)
MariaDB [(none)]> create user 'wordpress_user'@'localhost' identified by '123456';
Query OK, 0 rows affected (0.00 sec)//为wordpress_db数据库创建一个用户和密码
MariaDB [(none)]> grant all on wordpress_db.* to 'wordpress_user'@'localhost';
Query OK, 0 rows affected (0.00 sec)//给刚刚创建的用户权限
MariaDB [(none)]> show databases;+--------------------+| Database |+--------------------+| information_schema || mysql || performance_schema || wordpress_db |+--------------------+
4 rows in set(0.00 sec)
MariaDB [(none)]> flush privileges;
Query OK, 0 rows affected (0.00 sec)
MariaDB [(none)]> exit
Bye
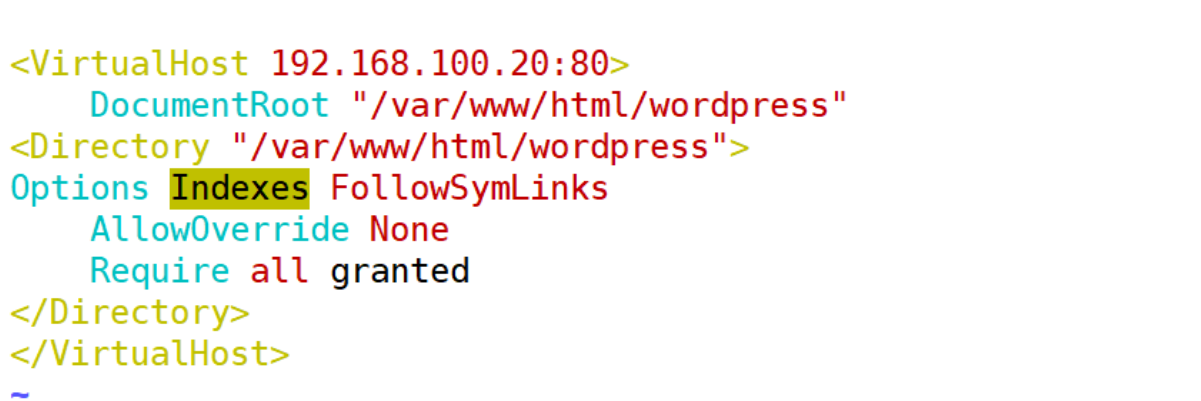
13、为wordpress配置站点
[root@stw2 ~]# cp -p /usr/share/doc/httpd-2.4.6/httpd-vhosts.conf /etc/httpd/conf.d[root@stw2 ~]# vim /etc/httpd/conf.d/httpd-vhosts.conf [root@stw2 wordpress]# vim /etc/httpd/conf/httpd.conf //将主配置文件中的一个两个内容复制
[root@stw2 ~]# systemctl restart httpd


 2240
2240

 被折叠的 条评论
为什么被折叠?
被折叠的 条评论
为什么被折叠?
 到【灌水乐园】发言


