


 本文介绍了Redux的核心概念,包括Action、Reducer、store和Dispatch的使用,展示了如何在React应用中实现状态管理,以及如何处理异步逻辑、高阶组件和持久化存储。通过实例说明了Redux在实际项目中的应用方式。
文章目录
什么是Redux
Redux 是 JavaScript 应用的状态容器,提供可预测的状态管理。
安装
# NPM
npm install redux
相关概念
Action
action 是一个具有 type 字段的普通 JavaScript 对象。你可以将 action 视为描述应用程序中发生了什么的事件.
type 字段是一个字符串,给这个 action 一个描述性的名字,比如"todos/todoAdded"。我们通常把那个类型的字符串写成“域/事件名称”,其中第一部分是这个 action 所属的特征或类别,第二部分是发生的具体事情。
const addTodoAction = {
  type: 'todos/todoAdded',
  payload: 'Buy milk'
}
Reducer
reducer 是一个函数,接收当前的 state 和一个 action 对象,必要时决定如何更新状态,并返回新状态。函数签名是:(state, action) => newState。 你可以将 reducer 视为一个事件监听器,它根据接收到的 action(事件)类型处理事件。
Reducer 必需符合以下规则:
- 仅使用 state 和 action 参数计算新的状态值
- 禁止直接修改 state。必须通过复制现有的 state 并对复制的值进行更改的方式来做 不可变更新(immutable updates)。
- 禁止任何异步逻辑、依赖随机值或导致其他“副作用”的代码
reducer 函数内部的逻辑通常遵循以下步骤:
- 检查 reducer 是否关心这个 action,如果是,则复制 state,使用新值更新 state 副本,然后返回新 state
- 否则,返回原来的 state 不变
const initialState = { value: 0 }

function counterReducer(state = initialState, action) {
  // 检查 reducer 是否关心这个 action
  if (action.type === 'counter/increment') {
    // 如果是,复制 `state`
    return {
      ...state,
      // 使用新值更新 state 副本
      value: state.value + 1
    }
  }
  // 返回原来的 state 不变
  return state
}
Reducer 可以在内部使用任何类型的逻辑来决定新状态应该是什么,如 if/else、switch、循环等等。
store
当前 Redux 应用的 state 存在于一个名为 store 的对象中。
store 是通过传入一个 reducer 来创建的,并且有一个名为 getState 的方法,它返回当前状态值:
import { configureStore } from '@reduxjs/toolkit'

const store = configureStore({ reducer: counterReducer })

console.log(store.getState())
// {value: 0}
Dispatch
Redux store 有一个方法叫 dispatch。更新 state 的唯一方法是调用 store.dispatch() 并传入一个 action 对象。 store 将执行所有 reducer 函数并计算出更新后的 state,调用 getState() 可以获取新 state。
store.dispatch({ type: 'counter/increment' })

console.log(store.getState())
// {value: 1}
我们通常调用 action creator 来调用 action:
const increment = () => {
  return {
    type: 'counter/increment'
  }
}

store.dispatch(increment())

console.log(store.getState())
// {value: 2}
示例
官网基础示例
应用的整体全局状态以对象树的方式存放于单个 store。 唯一改变状态树(state tree)的方法是创建 action,一个描述发生了什么的对象,并将其 dispatch 给 store。 要指定状态树如何响应 action 来进行更新,你可以编写纯 reducer 函数,这些函数根据旧 state 和 action 来计算新 state。
import { createStore } from 'redux'

/**
 * 这是一个 reducer 函数:接受当前 state 值和描述“发生了什么”的 action 对象,它返回一个新的 state 值。
 * reducer 函数签名是 : (state, action) => newState
 *
 * Redux state 应该只包含普通的 JS 对象、数组和原语。
 * 根状态值通常是一个对象。 重要的是,不应该改变 state 对象,而是在 state 发生变化时返回一个新对象。
 *
 * 你可以在 reducer 中使用任何条件逻辑。 在这个例子中,我们使用了 switch 语句,但这不是必需的。
 *
 */
function counterReducer(state = { value: 0 }, action) {
  switch (action.type) {
    case 'counter/incremented':
      return { value: state.value + 1 }
    case 'counter/decremented':
      return { value: state.value - 1 }
    default:
      return state
  }
}

// 创建一个包含应用程序 state 的 Redux store。
// 它的 API 有 { subscribe, dispatch, getState }.
let store = createStore(counterReducer)

// 你可以使用 subscribe() 来更新 UI 以响应 state 的更改。
// 通常你会使用视图绑定库(例如 React Redux)而不是直接使用 subscribe()。
// 可能还有其他用例对 subscribe 也有帮助。

store.subscribe(() => console.log(store.getState()))

// 改变内部状态的唯一方法是 dispatch 一个 action。
// 这些 action 可以被序列化、记录或存储,然后再重放。
store.dispatch({ type: 'counter/incremented' })
// {value: 1}
store.dispatch({ type: 'counter/incremented' })
// {value: 2}
store.dispatch({ type: 'counter/decremented' })
// {value: 1}
实战案例
以一个加减案例学会redux
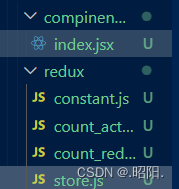
在index.jsx中

import React, { Component } from 'react'
import store from '../../redux/store'
//引入action
import { createIncrementAction,createDecrementAction } from '../../redux/count_actions'
export default class Count extends Component {
// state = { count: 0 }
// componentDidMount() {
// store.subscribe(() => {
// this.setState({})
// })
// }
//加法
increment = () => {
const { value } = this.selectNumber
//通知redux加value
store.dispatch(createIncrementAction(value*1))
}
//减法
decrement = () => {
const { value } = this.selectNumber
store.dispatch(createDecrementAction(value*1))
}
//奇数加
incrementIfOdd = () => {
const { value } = this.selectNumber
const count = store.getState()
if (count % 2 !== 0) {
store.dispatch(createIncrementAction(value*1))
}
}
//异步加
incrementAsy = () => {
const { value } = this.selectNumber
setTimeout(() => {
store.dispatch(createIncrementAction(value*1))
}, 500)
}
render() {
return (
<div>
<h1>当前求和为:{store.getState()}</h1>
<select ref={c => this.selectNumber = c}>
<option value="1">1</option>
<option value="2">2</option>
<option value="3">3</option>
</select>
<button onClick={this.increment}>+</button>
<button onClick={this.decrement}>-</button>
<button onClick={this.incrementIfOdd}>当前求和为奇数再加</button>
<button onClick={this.incrementAsy}>异步加</button>
</div>
)
}
}
在store中如何编写
//引入createStore
import { legacy_createStore as createStore } from 'redux'
//引入为count服务的reducer
import countReducer from './count_reducer'


export default createStore(countReducer)
编写reducer
import { INCREMENT, DECREMENT } from './constant'
//接收俩参数,之前的对象,动作对象
export default function countReducer(preState, action) {

    console.log(preState, action);

    if (preState === undefined) preState = 0
    const { type, data } = action
    switch (type) {
        case INCREMENT:
            return preState + data

        case DECREMENT:
            return preState - data
        default:
            return preState
    }

}
在action中编写
import { INCREMENT, DECREMENT } from './constant'

//专门为count组件生成action对象


export const createIncrementAction = data => ({ type: INCREMENT, data })

export const createDecrementAction = data => ({ type: DECREMENT, data })
constants
//定义action种type类型的常量值

export const INCREMENT = 'increment'
export const DECREMENT = 'decrement'
编写异步逻辑
到目前为止,我们应用程序中的所有逻辑都是同步的。首先 dispatch action,store 调用 reducer 来计算新状态,然后 dispatch 函数完成并结束。但是,JavaScript 语言有很多编写异步代码的方法,我们的应用程序通常具有异步逻辑,比如从 API 请求数据之类的事情。我们需要一个地方在我们的 Redux 应用程序中放置异步逻辑。
redux-thunk
thunk 是一种特定类型的 Redux 函数,可以包含异步逻辑。Thunk 是使用两个函数编写的:
- 一个内部 thunk 函数,它以 dispatch 和 getState 作为参数
- 外部创建者函数,它创建并返回 thunk 函数
import thunk from 'redux-thunk';
 import {applyMiddleware} from "redux";
 const store = createStore(fetchReducer, applyMiddleware(thunk));
 const  getComingSoon = ()=>{
 //进行异步请求
return (dispatch,store)=>{
 }
 }
redux-promise
import promiseMiddleware from 'redux-promise';
 const store = createStore(fetchReducer, applyMiddleware(thunk,promiseMiddleware));
 const getComingSoon = ()=>{
 //进行异步请求
return axios.get(`****`).then(res=>{
 return {
 type:"cominglist",
 info:res.data.data
 }
 })
 }
HOC与context通信在react-redux底层中的应用
(1) connect 是HOC, 高阶组件
(2) Provider组件,可以让容器组件拿到state , 使用了context
高阶组件构建与应用
HOC不仅仅是一个方法,确切说应该是一个组件工厂,获取低阶组件,生成高阶组件。
(1)代码复用,代码模块化
(2)增删改props
(3) 渲染劫持
// Child.js
 //高阶函数
function Control(wrappedComponent) {
 return class MyControl extends React.Component {
 render(){
 if(!this.props.data) {
 return <div>loading...</div>
 }
 return <wrappedComponent {...props} />
 }
 }
 }
 class MyComponent extends React.Component {
 render(){
 return <div>{this.props.data}</div>
 }
 }
 export default Control(MyComponent); //高阶组件
//Parent.js
 import MyControlComponent from "./Child"
 <MyControlComponent data={this.state.value}/>
 //在父级传入data是null的时候,这一块儿就只会显示loading...,
 //不会显示组件的具体内容,如果data不为null, 就显示真实组件信息。
持久化管理
import {persistStore, persistReducer} from 'redux-persist';
 import storage from 'redux-persist/lib/storage';
 import autoMergeLevel2 from 'redux-persist/lib/stateReconciler/autoMergeLevel2';
 const persistConfig = {
 key: 'kerwin',
 storage: storage,
 //localStorage: import storage from 'redux-persist/lib/storage'
 //sessionStorage: import storageSession from 'redux-persist/lib/storage/session'
 stateReconciler: autoMergeLevel2
//控制在本地存储中,新老状态怎么合并,覆盖?或者合并?
};
 //改造reducer
 const myPersistReducer = persistReducer(persistConfig, reducer)
 //改造store
 export const persistor = persistStore(store)
 //改造根组件
import {persistor} from './Store'
 import {PersistGate} from 'redux-persist/lib/integration/react';
 <PersistGate loading={null} persistor={persistor}>
 ...
 </PersistGate>


 440
440


 被折叠的 条评论
为什么被折叠?
被折叠的 条评论
为什么被折叠?
 到【灌水乐园】发言


