


一、按钮控件Button
1.按钮控件Button由TextView派生而来,它们之间的区别有:
(1)Button拥有默认的按钮背景,而TextView默认无背景;
(2)Button的内部文本默认居中对齐,而TextView的内部文本默认靠左对齐;
(3)Button会默认将英文字母转为大写,而TextView保持原始的英文大小写;
例如:
<?xml version="1.0" encoding="utf-8"?>
<LinearLayout xmlns:android="http://schemas.android.com/apk/res/android"
    android:layout_width="match_parent"
    android:layout_height="match_parent"
    android:orientation="vertical"
    android:padding="5dp">

    <TextView
        android:layout_width="match_parent"
        android:layout_height="wrap_content"
        android:text="下面的按钮英文默认大写"
        android:textColor="@color/black"
        android:textSize="17sp"/>

    <Button
        android:layout_width="match_parent"
        android:layout_height="wrap_content"
        android:text="Hello World"
        android:textColor="@color/black"
        android:textSize="17sp"/>


</LinearLayout>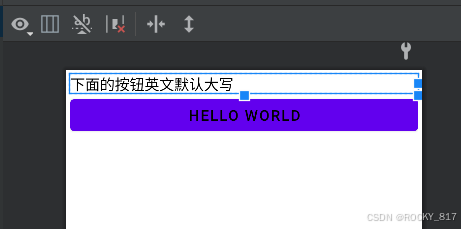
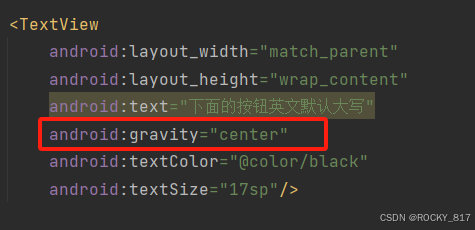
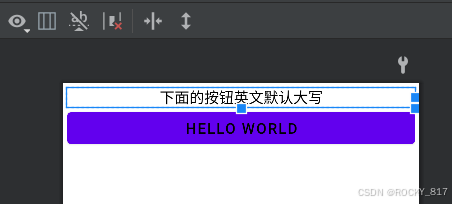
这里TextView默认靠左对齐,加上gravity后可居中
2.按钮控件的新增属性
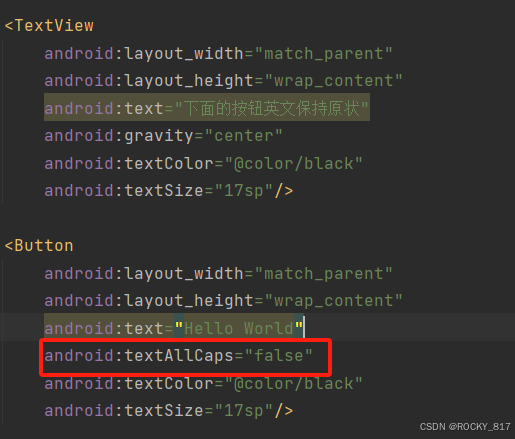
与TextView相比,Button增加了两个新属性:
(1)textAllCaps属性,它指定了是否将英文字母转为大写,为true是表示自动转为大写,为false表示不做大写转换。
例如:
<?xml version="1.0" encoding="utf-8"?>
<LinearLayout xmlns:android="http://schemas.android.com/apk/res/android"
    android:layout_width="match_parent"
    android:layout_height="match_parent"
    android:orientation="vertical"
    android:padding="5dp">

    <TextView
        android:layout_width="match_parent"
        android:layout_height="wrap_content"
        android:text="下面的按钮英文默认大写"
        android:gravity="center"
        android:textColor="@color/black"
        android:textSize="17sp"/>

    <Button
        android:layout_width="match_parent"
        android:layout_height="wrap_content"
        android:text="Hello World"
        android:textColor="@color/black"
        android:textSize="17sp"/>

    <TextView
        android:layout_width="match_parent"
        android:layout_height="wrap_content"
        android:text="下面的按钮英文保持原状"
        android:gravity="center"
        android:textColor="@color/black"
        android:textSize="17sp"/>

    <Button
        android:layout_width="match_parent"
        android:layout_height="wrap_content"
        android:text="Hello World"
        android:textAllCaps="false"
        android:textColor="@color/black"
        android:textSize="17sp"/>


</LinearLayout>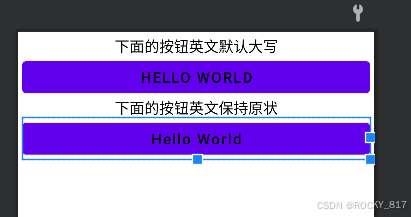
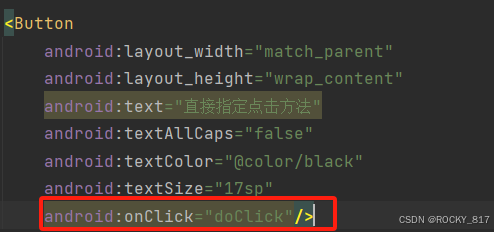
(2)onClick属性,它用来接管用户的点击动作,指定了点击按钮时要触发哪个方法;
例如:
<?xml version="1.0" encoding="utf-8"?>
<LinearLayout xmlns:android="http://schemas.android.com/apk/res/android"
    android:layout_width="match_parent"
    android:layout_height="match_parent"
    android:orientation="vertical"
    android:padding="5dp">

    <TextView
        android:layout_width="match_parent"
        android:layout_height="wrap_content"
        android:text="下面的按钮英文默认大写"
        android:gravity="center"
        android:textColor="@color/black"
        android:textSize="17sp"/>

    <Button
        android:layout_width="match_parent"
        android:layout_height="wrap_content"
        android:text="Hello World"
        android:textColor="@color/black"
        android:textSize="17sp"/>

    <TextView
        android:layout_width="match_parent"
        android:layout_height="wrap_content"
        android:text="下面的按钮英文保持原状"
        android:gravity="center"
        android:textColor="@color/black"
        android:textSize="17sp"/>

    <Button
        android:layout_width="match_parent"
        android:layout_height="wrap_content"
        android:text="Hello World"
        android:textAllCaps="false"
        android:textColor="@color/black"
        android:textSize="17sp"/>

    <Button
        android:layout_width="match_parent"
        android:layout_height="wrap_content"
        android:text="直接指定点击方法"
        android:textAllCaps="false"
        android:textColor="@color/black"
        android:textSize="17sp"
        android:onClick="doClick"/>

</LinearLayout>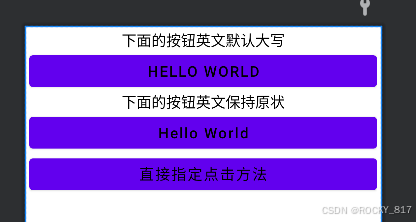

<?xml version="1.0" encoding="utf-8"?>
<LinearLayout xmlns:android="http://schemas.android.com/apk/res/android"
    android:layout_width="match_parent"
    android:layout_height="match_parent"
    android:orientation="vertical"
    android:padding="5dp">

    <TextView
        android:layout_width="match_parent"
        android:layout_height="wrap_content"
        android:text="下面的按钮英文默认大写"
        android:gravity="center"
        android:textColor="@color/black"
        android:textSize="17sp"/>

    <Button
        android:layout_width="match_parent"
        android:layout_height="wrap_content"
        android:text="Hello World"
        android:textColor="@color/black"
        android:textSize="17sp"/>

    <TextView
        android:layout_width="match_parent"
        android:layout_height="wrap_content"
        android:text="下面的按钮英文保持原状"
        android:gravity="center"
        android:textColor="@color/black"
        android:textSize="17sp"/>

    <Button
        android:layout_width="match_parent"
        android:layout_height="wrap_content"
        android:text="Hello World"
        android:textAllCaps="false"
        android:textColor="@color/black"
        android:textSize="17sp"/>

    <Button
        android:layout_width="match_parent"
        android:layout_height="wrap_content"
        android:text="直接指定点击方法"
        android:textAllCaps="false"
        android:textColor="@color/black"
        android:textSize="17sp"
        android:onClick="doClick"/>

    <TextView
        android:id="@+id/tv_result"
        android:layout_width="match_parent"
        android:layout_height="wrap_content"
        android:text="这里查看按钮的点击结果"
        android:textColor="@color/black"
        android:textSize="17sp"/>

</LinearLayout>
先创建一个工具包获取当前时间:
package com.example.chapter01.utils;

import java.text.SimpleDateFormat;
import java.util.Date;

public class DateUtil {
    public static String getNowTime() {
        SimpleDateFormat sdf = new SimpleDateFormat("HH:MM:SS");
        return sdf.format(new Date());
    }
}
然后Java代码:
package com.example.chapter01;

import androidx.appcompat.app.AppCompatActivity;

import android.os.Bundle;
import android.view.View;
import android.widget.Button;
import android.widget.TextView;

import com.example.chapter01.utils.DateUtil;

public class ButtonStyleActivity extends AppCompatActivity {

    private TextView tv_result;

    @Override
    protected void onCreate(Bundle savedInstanceState) {
        super.onCreate(savedInstanceState);
        setContentView(R.layout.activity_button_style);
        tv_result = findViewById(R.id.tv_result);
    }

    public void doClick(View view) {
        String desc = String.format("%s 您点击了按钮: %s", DateUtil.getNowTime(),((Button) view).getText());
        tv_result.setText(desc);
    }
}
发布运行: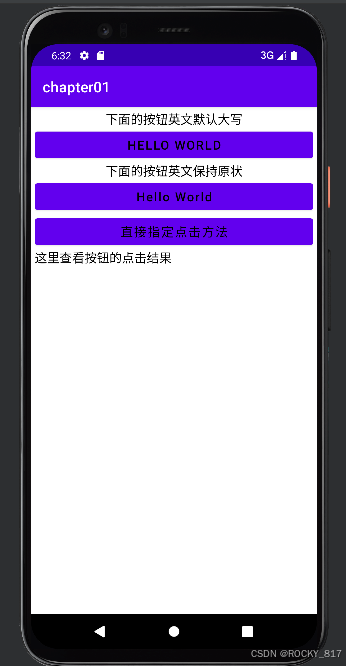
然后点击按钮: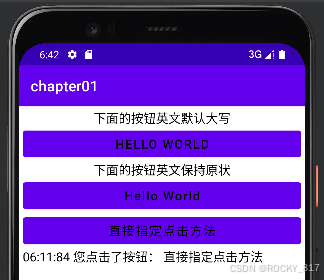
二、点击事件和长按事件
监听器,意思是专门监听控件的动作行为。只有控件发生了指定的动作,监听器才会触发开关去执行对应的代码逻辑。
按钮控件有两种常用的监听器:
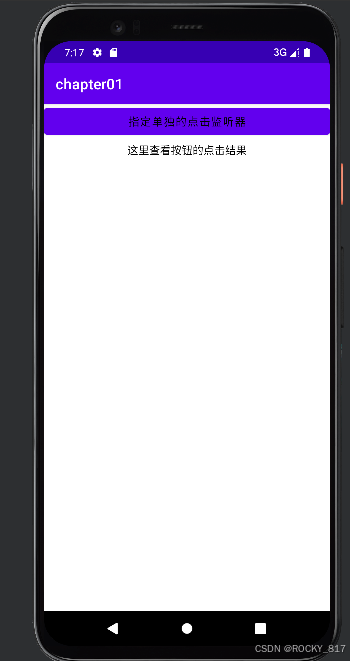
1.点击监听器,通过setOnClickListener方法设置。按钮被按住少于500毫秒时,会触发点击事件
例如:
<?xml version="1.0" encoding="utf-8"?>
<LinearLayout xmlns:android="http://schemas.android.com/apk/res/android"
    android:layout_width="match_parent"
    android:layout_height="match_parent"
    android:orientation="vertical">

    <Button
        android:id="@+id/btn_click_singe"
        android:layout_width="match_parent"
        android:layout_height="wrap_content"
        android:text="指定单独的点击监听器"
        android:textColor="#000000"
        android:textSize="15sp"/>

    <TextView
        android:id="@+id/tv_result"
        android:layout_width="match_parent"
        android:layout_height="wrap_content"
        android:padding="5dp"
        android:gravity="center"
        android:textColor="#000000"
        android:textSize="15sp"
        android:text="这里查看按钮的点击结果"/>

</LinearLayout>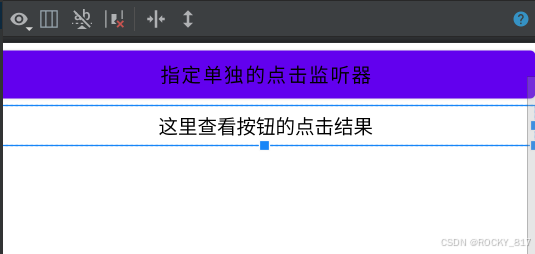
package com.example.chapter01;
import androidx.appcompat.app.AppCompatActivity;
import android.os.Bundle;
import android.view.View;
import android.widget.Button;
import android.widget.TextView;
import com.example.chapter01.utils.DateUtil;
public class ButtonClickActivity extends AppCompatActivity {
private TextView tv_result;
@Override
protected void onCreate(Bundle savedInstanceState) {
super.onCreate(savedInstanceState);
setContentView(R.layout.activity_button_click);
tv_result = findViewById(R.id.tv_result);
Button btn_click_single = findViewById(R.id.btn_click_singe);
btn_click_single.setOnClickListener(new MyOnclickListener(tv_result));
}
static class MyOnclickListener implements View.OnClickListener{
private final TextView tv_result;
public MyOnclickListener(TextView tv_result) {
this.tv_result = tv_result;
}
@Override
public void onClick(View v) {
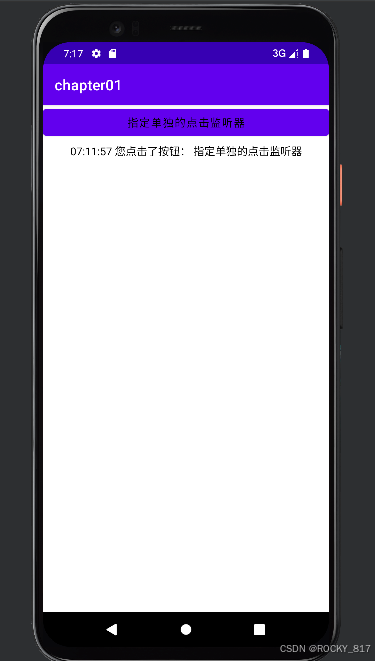
String desc = String.format("%s 您点击了按钮: %s", DateUtil.getNowTime(),((Button) v).getText());
tv_result.setText(desc);
}
}
}发布运行:
点击按钮:
2.长按监听器,通过setOnLongClickListener方法设置。按钮被按住超过500毫秒时,会触发长按事件。
例如:
<?xml version="1.0" encoding="utf-8"?>
<LinearLayout xmlns:android="http://schemas.android.com/apk/res/android"
    android:layout_width="match_parent"
    android:layout_height="match_parent"
    android:orientation="vertical">

    <Button
        android:id="@+id/btn_long_click"
        android:layout_width="match_parent"
        android:layout_height="wrap_content"
        android:text="指定长按的点击监听器"
        android:textColor="#000000"
        android:textSize="15sp"/>

    <TextView
        android:id="@+id/tv_result"
        android:layout_width="match_parent"
        android:layout_height="wrap_content"
        android:padding="5dp"
        android:gravity="center"
        android:textColor="#000000"
        android:textSize="15sp"
        android:text="这里查看按钮的点击结果"/>

</LinearLayout>
package com.example.chapter01;
import androidx.appcompat.app.AppCompatActivity;
import android.os.Bundle;
import android.widget.Button;
import android.widget.TextView;
import com.example.chapter01.utils.DateUtil;
public class ButtonLongClickActivity extends AppCompatActivity {
@Override
protected void onCreate(Bundle savedInstanceState) {
super.onCreate(savedInstanceState);
setContentView(R.layout.activity_button_long_click);
TextView tv_result = findViewById(R.id.tv_result);
Button btn_long_click = findViewById(R.id.btn_long_click);
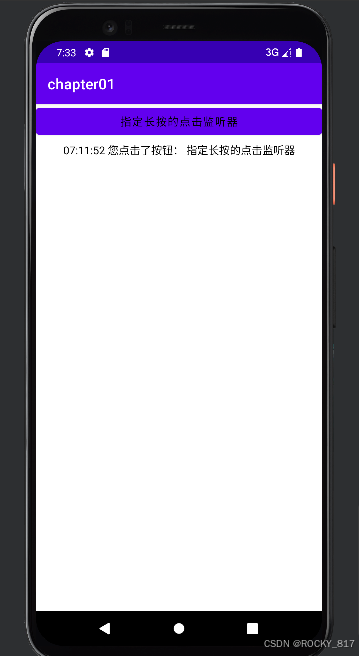
btn_long_click.setOnLongClickListener(v -> {
String desc = String.format("%s 您点击了按钮: %s", DateUtil.getNowTime(),((Button) v).getText());
tv_result.setText(desc);
return true;
});
}
}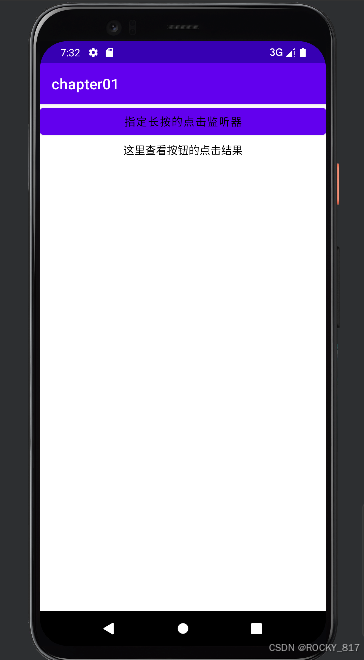
长按按钮:
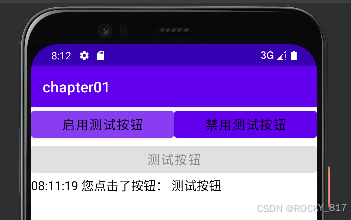
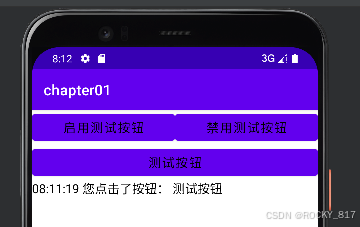
三、禁用与恢复按钮
在实际业务中,按钮通常拥有两种状态,即不可用状态与可用状态,它们在外观和功能上
的区别如下:
1.不可用按钮:按钮不允许点击,即使点击也没反应,同时按钮文字为灰色;
2.可用按钮:按钮允许点击,点击按钮会触发点击事件,同时按钮文字为正常的黑色;
是否允许点击由enabled属性控制,属性值为true时表示允许点击,为false时表示不允许点击。
例如:
<?xml version="1.0" encoding="utf-8"?>
<LinearLayout xmlns:android="http://schemas.android.com/apk/res/android"
    android:layout_width="match_parent"
    android:layout_height="match_parent"
    android:orientation="vertical">

    <LinearLayout
        android:layout_width="match_parent"
        android:layout_height="wrap_content"
        android:orientation="horizontal">

        <Button
            android:id="@+id/btn_enable"
            android:layout_width="0dp"
            android:layout_weight="1"
            android:layout_height="wrap_content"
            android:text="启用测试按钮"
            android:textColor="#000000"
            android:textSize="17sp"/>

        <Button
            android:id="@+id/btn_disable"
            android:layout_width="0dp"
            android:layout_weight="1"
            android:layout_height="wrap_content"
            android:text="禁用测试按钮"
            android:textColor="#000000"
            android:textSize="17sp"/>
    </LinearLayout>


        <Button
            android:id="@+id/btn_test"
            android:layout_width="match_parent"
            android:layout_height="wrap_content"
            android:text="测试按钮"
            android:textColor="#000000"
            android:textSize="17sp"/>

        <TextView
            android:id="@+id/tv_result"
            android:layout_width="match_parent"
            android:layout_height="wrap_content"
            android:text="这里查看测试按钮的点击结果"
            android:textColor="#000000"
            android:textSize="17sp"/>

</LinearLayout>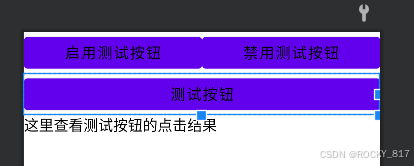
package com.example.chapter01;

import androidx.appcompat.app.AppCompatActivity;

import android.graphics.Color;
import android.os.Bundle;
import android.view.View;
import android.widget.Button;
import android.widget.TextView;

import com.example.chapter01.utils.DateUtil;

public class ButtonEnableActivity extends AppCompatActivity implements View.OnClickListener {

    private Button btn_test;
    private TextView tv_result;

    @Override
    protected void onCreate(Bundle savedInstanceState) {
        super.onCreate(savedInstanceState);
        setContentView(R.layout.activity_button_enable);
        Button btn_enable = findViewById(R.id.btn_enable);
        Button btn_disable = findViewById(R.id.btn_disable);
        btn_test = findViewById(R.id.btn_test);
        tv_result = findViewById(R.id.tv_result);

        btn_enable.setOnClickListener(this);
        btn_disable.setOnClickListener(this);
        btn_test.setOnClickListener(this);

    }

    @Override
    public void onClick(View v) {
        switch (v.getId()) {
            case R.id.btn_enable:
                //启用当前控件
                btn_test.setEnabled(true);
                //设置按钮的文字颜色
                btn_test.setTextColor(Color.BLACK);
                break;
            case R.id.btn_disable:
                //禁用当前控件
                btn_test.setEnabled(false);
                btn_test.setTextColor(Color.GRAY);
                break;
            case R.id.btn_test:
                String desc = String.format("%s 您点击了按钮: %s", DateUtil.getNowTime(),((Button) v).getText());
                tv_result.setText(desc);
                break;
        }
    }
}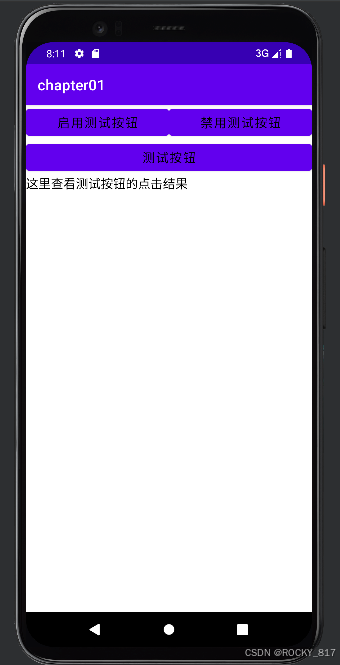
点击按钮进行测试:


 1625
1625

 被折叠的 条评论
为什么被折叠?
被折叠的 条评论
为什么被折叠?
 到【灌水乐园】发言


