


一、环境准备
这里前期准备默认已经安装并配置好px4等相关无人机依赖,不会的可以参照https://blog.csdn.net/weixin_55944949/article/details/130848009?spm=1001.2014.3001.5502这位博主的教程进行配置
环境介绍:ubuntu20.04, Px4 V1.14, mavros, ros1(noetic), gazebo11
二、配置mid360
在编译好px4之后可以使用make px4_sitl_default gazebo打开仿真环境,这里默认指定的是iris模型的无人机,接下来也在iris上添加mid360
添加mid360模型
首先px4里面的无人机和传感器的模型都在:
/PX4-Autopilot/Tools/simulation/gazebo-classic/sitl_gazebo-classic/models这个路径下面,这里可以复制一个无人机的模型。下面是iris的模型结构
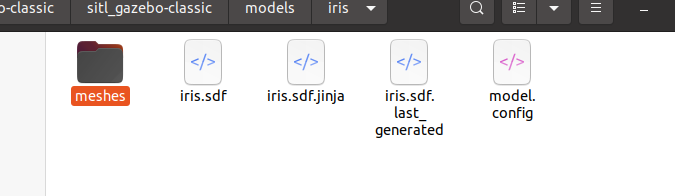
再修改这个iris.sdf文件,这个文件定义了四旋翼无人机的物理属性(质量、惯性矩阵)、动力系统及传感器(IMU、GPS)等,其中我们是要添加mid360所以看重传感器接口这一部分,在sdf中添加下面代码引入Mid360:
    <include>
      <uri>model://Mid360</uri>
      <pose>0 0 0.05 0 0 0</pose>
    </include>

    <joint name="lidar_joint" type="fixed">
      <child>Mid360::livox_base</child>
      <parent>base_link</parent>
      <axis>
        <xyz>0 0 1</xyz>
        <limit>
          <upper>0</upper>
          <lower>0</lower>
        </limit>
      </axis>
    </joint>
加入复制的模型里面有雷达传感器的话记得得注释掉。
这样无人机的模型里面就有雷达参数了,但是这样会报错应为只是include了。接下来把整个的模型文件放到这里面来让include能够正确的找到模型文件。
先在models文件夹下创建Mid360文件夹,在里面定义好下面几个文件: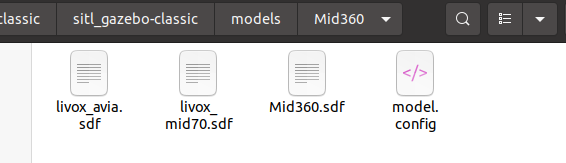
livox_avia.sdf:
<sdf version='1.6'>
  <model name='livox_avia'>
    <link name='livox_base'>
      <pose frame=''>0 0 0 0 -0 0</pose>
      <inertial>
        <pose frame=''>0 0 0 0 -0 0</pose>
        <mass>0.2</mass>
        <inertia>
          <ixx>0.02</ixx>
          <ixy>0</ixy>
          <ixz>0</ixz>
          <iyy>0.02</iyy>
          <iyz>0</iyz>
          <izz>0.02</izz>
        </inertia>
      </inertial>
      <collision name='livox_base_collision'>
        <pose frame=''>0 0 0 0 -0 0</pose>
        <geometry>
          <mesh>
            <scale>1 1 1</scale>
            <uri>model://livox_mid40/meshes/livox_mid40.dae</uri>
          </mesh>
        </geometry>
      </collision>
      <visual name='livox_base_visual'>
        <pose frame=''>0 0 0 0 -0 0</pose>
        <geometry>
          <mesh>
            <scale>1 1 1</scale>
            <uri>model://livox_mid40/meshes/livox_mid40.dae</uri>
          </mesh>
        </geometry>
      </visual>
      <gravity>1</gravity>
      <velocity_decay/>
      <sensor name='laser_livox' type='ray'>
        <visualize>1</visualize>
        <update_rate>10</update_rate>
        <plugin name='gazebo_ros_laser_controller' filename='liblivox_laser_simulation.so'>
          <ray>
            <scan>
              <horizontal>
                <samples>100</samples>
                <resolution>1</resolution>
                <min_angle>-0.614355377778</min_angle>
                <max_angle>0.614355377778</max_angle>
              </horizontal>
              <vertical>
                <samples>50</samples>
                <resolution>1</resolution>
                <min_angle>-0.673696522222</min_angle>
                <max_angle>0.673696522222</max_angle>
              </vertical>
            </scan>
            <range>
              <min>0.1</min>
              <max>200.0</max>
              <resolution>0.002</resolution>
            </range>
            <noise>
              <type>gaussian</type>
              <mean>0.0</mean>
              <stddev>0.01</stddev>
            </noise>
          </ray>
          <visualize>1</visualize>
          <samples>10000</samples>
          <downsample>1</downsample>
          <csv_file_name>package://livox_mid40/scan_mode/mid360.csv</csv_file_name>
          <ros_topic>scan</ros_topic>
        </plugin>
        <pose frame=''>0 0 0 0 -0 0</pose>
      </sensor>
    </link>
  </model>
</sdf>
livox_mid70.sdf:
<sdf version='1.6'>
  <model name='iris_livox70'>
    <link name='link'>
      <pose frame=''>0 0 0 0 -0 0</pose>
      <inertial>
        <pose frame=''>-0.066667 0 0.10095 0 -0 0</pose>
        <mass>1.2</mass>
        <inertia>
          <ixx>0.535575</ixx>
          <ixy>6.98779e-07</ixy>
          <ixz>0.02038</ixz>
          <iyy>1.06224</iyy>
          <iyz>-2.70401e-08</iyz>
          <izz>1.04667</izz>
        </inertia>
      </inertial>
      <collision name='link_fixed_joint_lump__oasis_300_collision'>
        <pose frame=''>0 0 0.1 0 -0 1.57079</pose>
        <geometry>
          <mesh>
            <scale>1 1 1</scale>
            <uri>model://livox_mid40/meshes/standardrobots.STL</uri>
          </mesh>
        </geometry>
        <surface>
          <contact>
            <ode/>
          </contact>
          <friction>
            <ode/>
          </friction>
        </surface>
      </collision>
      <collision name='link_fixed_joint_lump__livox_base_collision_1'>
        <pose frame=''>-0.4 1e-06 0.3557 0 -0 3.14149</pose>
        <geometry>
          <mesh>
            <scale>1 1 1</scale>
            <uri>model://livox_mid40/meshes/livox_mid40.dae</uri>
          </mesh>
        </geometry>
      </collision>
      <visual name='link_fixed_joint_lump__oasis_300_visual'>
        <pose frame=''>0 0 0.1 0 -0 1.57079</pose>
        <geometry>
          <mesh>
            <scale>1 1 1</scale>
            <uri>model://livox_mid40/meshes/standardrobots.STL</uri>
          </mesh>
        </geometry>
        <material>
          <script>
            <name>Gazebo/White</name>
            <uri>file://media/materials/scripts/gazebo.material</uri>
          </script>
        </material>
      </visual>
      <visual name='link_fixed_joint_lump__livox_base_visual_1'>
        <pose frame=''>-0.4 1e-06 0.3557 0 -0 3.14149</pose>
        <geometry>
          <mesh>
            <scale>1 1 1</scale>
            <uri>model://livox_mid40/meshes/livox_mid40.dae</uri>
          </mesh>
        </geometry>
      </visual>
      <velocity_decay/>
      <gravity>1</gravity>
      <velocity_decay/>
      <sensor name='laser_livox' type='ray'>
        <visualize>1</visualize>
        <update_rate>10</update_rate>
        <plugin name='gazebo_ros_laser_controller' filename='liblivox_laser_simulation.so'>
          <ray>
            <scan>
              <horizontal>
                <samples>100</samples>
                <resolution>1</resolution>
                <min_angle>-0.614355377778</min_angle>
                <max_angle>0.614355377778</max_angle>
              </horizontal>
              <vertical>
                <samples>50</samples>
                <resolution>1</resolution>
                <min_angle>-0.614355377778</min_angle>
                <max_angle>0.614355377778</max_angle>
              </vertical>
            </scan>
            <range>
              <min>0.1</min>
              <max>200.0</max>
              <resolution>0.002</resolution>
            </range>
            <noise>
              <type>gaussian</type>
              <mean>0.0</mean>
              <stddev>0.01</stddev>
            </noise>
          </ray>
          <visualize>1</visualize>
          <samples>10000</samples>
          <downsample>1</downsample>
          <csv_file_name>model://livox_mid40/scan_mode/mid70.csv</csv_file_name>
           <robotNamespace></robotNamespace>
        <topicName>/livox</topicName>
        <frameName>laser_3d</frameName>
        </plugin>
        <pose frame=''>-0.4 1e-06 0.3557 0 -0 3.14149</pose>
      </sensor>
    </link>
  </model>
</sdf>
Mid360.sdf:
<sdf version='1.6'>
  <model name='Mid360'>
    <link name='livox_base'>
      <pose frame=''>0 0 0 0 -0 0</pose>
      <inertial>
        <pose frame=''>0 0 0 0 -0 0</pose>
        <mass>0.2</mass>
        <inertia>
          <ixx>0.02</ixx>
          <ixy>0</ixy>
          <ixz>0</ixz>
          <iyy>0.02</iyy>
          <iyz>0</iyz>
          <izz>0.02</izz>
        </inertia>
      </inertial>
      <collision name='livox_base_collision'>
        <pose frame=''>0 0 0 0 -0 0</pose>
        <geometry>
          <mesh>
            <scale>1 1 1</scale>
            <uri>model://livox_mid40/meshes/livox_mid40.dae</uri>
          </mesh>
        </geometry>
      </collision>
      <visual name='livox_base_visual'>
        <pose frame=''>0 0 0 0 -0 0</pose>
        <geometry>
          <mesh>
            <scale>1 1 1</scale>
            <uri>model://livox_mid40/meshes/mid360.dae</uri>
          </mesh>
        </geometry>
      </visual>
      <gravity>1</gravity>
      <velocity_decay/>
      <sensor name='laser_livox' type='ray'>
        <visualize>1</visualize>
        <update_rate>10</update_rate>
        <always_on>1</always_on>
        <plugin name='gazebo_ros_laser_controller' filename='/home/nuc/lib_livox_sim/devel/lib/liblivox_laser_simulation.so'>
          <ray>
			  <scan>
				  <horizontal>
				    <samples>100</samples>
				    <resolution>1</resolution>
				    <min_angle>0</min_angle>
            			    <max_angle>6.28</max_angle>
				  </horizontal>
				  <vertical>
				    <samples>360</samples>
				    <resolution>1</resolution>
				    <min_angle>-0.0561995544444</min_angle>
           			    <max_angle>0.981223276667</max_angle>
				  </vertical>
			  </scan>
			  <range>
				  <min>0.1</min>
				  <max>30</max>
				  <resolution>0.02</resolution>
			  </range>
			  <noise>
				  <type>gaussian</type>
				  <mean>0.0</mean>
				  <stddev>0.0</stddev>
			  </noise>
			  </ray>
          <visualize>1</visualize>
          <samples>24000</samples>
          <downsample>1</downsample>
          <csv_file_name>/home/nuc/PX4-Autopilot/Tools/simulation/gazebo-classic/sitl_gazebo-classic/models/livox_mid40/scan_mode/mid360.csv</csv_file_name>
          <ros_topic>/scan</ros_topic>
        </plugin>
        <pose frame=''>-0.005 0.005 0.047 0 -0 0</pose>
      </sensor>
    </link>
  </model>
</sdf>
model.config:
<?xml version="1.0"?>

<model>
  <name>Mid360</name>
  <version>1.0</version>
  <sdf version="1.6">Mid360.sdf</sdf>
  <author>
    <name>wangbaochuan</name>
    <email>3220145682@qq.com</email>
  </author>

  <description>
		 3D lidar 32
  </description>

</model>
这里注意了因为在Mid360.sdf中引入了别的文件夹下面的东西但是很明显现在我们是没有这两个东西的。
<uri>model://livox_mid40/meshes/livox_mid40.dae</uri>
<uri>model://livox_mid40/meshes/mid360.dae</uri>
所以先记住这个位置
随后修改一下<csv_fille_name>的路径信息:
<csv_file_name>/home/nuc/PX4-Autopilot/Tools/simulation/gazebo-classic/sitl_gazebo-classic/models/livox_mid40/scan_mode/mid360.csv</csv_file_name>这里如果你得注意相关路径是否正确。
最后把前面要用到的livox_mid40文件夹(这个文件夹包括mid360我已经上传到我的github上了可以去下载链接:https://github.com/October-Vision/uav_nav.git)整个放进来:
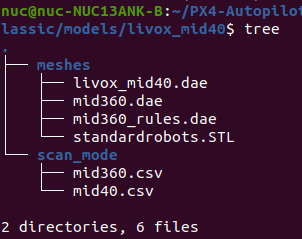
文件结构如图所示。
最后在launch文件夹下新建一个launch启动文件来启动我们改好的新模型,这里我的命名为:iris_mid360.launch ;复制mavros_posix_sitl.launch文件夹下的内容,修改模型指向位置指向我们的新模型位置,最后如下面所示:
<?xml version="1.0"?>
<launch>
    <!-- MAVROS posix SITL environment launch script -->
    <!-- launches MAVROS, PX4 SITL, Gazebo environment, and spawns vehicle -->
    <!-- vehicle pose -->
    <arg name="x" default="0"/>
    <arg name="y" default="0"/>
    <arg name="z" default="0"/>
    <arg name="R" default="0"/>
    <arg name="P" default="0"/>
    <arg name="Y" default="0"/>
    <!-- vehicle model and world -->
    <arg name="est" default="ekf2"/>
    <arg name="vehicle" default="iris"/>
    <arg name="world" default="$(find mavlink_sitl_gazebo)/worlds/empty.world"/>
    <!-- 这里指向模型 -->
    <arg name="sdf" default="$(find mavlink_sitl_gazebo)/models/iris_3d_lidar/iris.sdf"/>

    <!-- gazebo configs -->
    <arg name="gui" default="true"/>
    <arg name="debug" default="false"/>
    <arg name="verbose" default="false"/>
    <arg name="paused" default="false"/>
    <arg name="respawn_gazebo" default="false"/>
    <!-- MAVROS configs -->
    <arg name="fcu_url" default="udp://:14540@localhost:14557"/>
    <arg name="respawn_mavros" default="false"/>
    <!-- PX4 configs -->
    <arg name="interactive" default="true"/>
    <!-- PX4 SITL and Gazebo -->
    <include file="$(find px4)/launch/posix_sitl.launch">
        <arg name="x" value="$(arg x)"/>
        <arg name="y" value="$(arg y)"/>
        <arg name="z" value="$(arg z)"/>
        <arg name="R" value="$(arg R)"/>
        <arg name="P" value="$(arg P)"/>
        <arg name="Y" value="$(arg Y)"/>
        <arg name="world" value="$(arg world)"/>
        <arg name="vehicle" value="$(arg vehicle)"/>
        <arg name="sdf" value="$(arg sdf)"/>
        <arg name="gui" value="$(arg gui)"/>
        <arg name="interactive" value="$(arg interactive)"/>
        <arg name="debug" value="$(arg debug)"/>
        <arg name="verbose" value="$(arg verbose)"/>
        <arg name="paused" value="$(arg paused)"/>
        <arg name="respawn_gazebo" value="$(arg respawn_gazebo)"/>
    </include>
    <!-- MAVROS -->
    <include file="$(find mavros)/launch/px4.launch">
        <!-- GCS link is provided by SITL -->
        <arg name="gcs_url" value=""/>
        <arg name="fcu_url" value="$(arg fcu_url)"/>
        <arg name="respawn_mavros" value="$(arg respawn_mavros)"/>
    </include>
</launch>
写完之后启动launch文件:
roslaunch px4 iris_mid360.launch可以看到如图: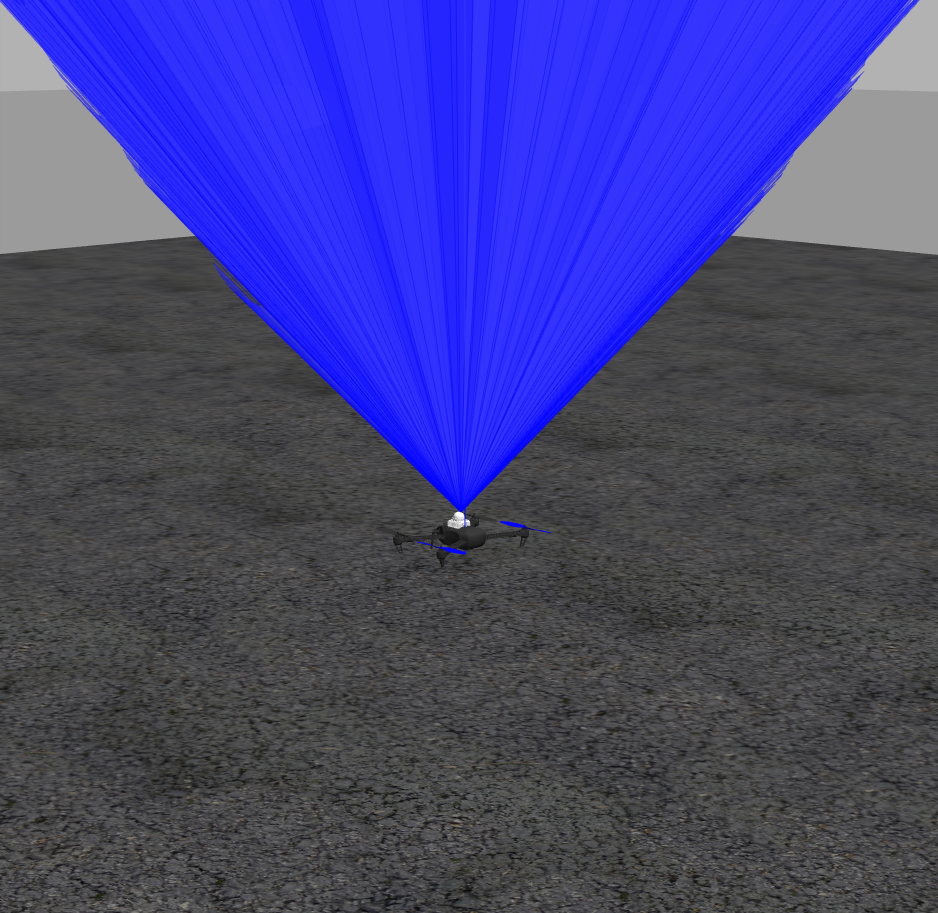
正常来说是没有这个蓝色的线条的,不过如果你之前有配置过liblivox_laser_simulation和livox的驱动的话是会有这个蓝色的线条的。假如已经有蓝色的线条了就可以先到查看话题信息的部分看是否有数据,假如有数据可以跳过下面安装驱动的步骤。
Livox Mid360传感器配置
注意:记住如果雷达话题有数据了话真的可以跳过这个步骤,除非到时候fastlio建图时需要CustomMsg消息格式的时候再直接看安装livox_laser_simulation的部分就行不用删除之前的库,不过删除了也没有关系。
安装雷达驱动:
cd ~/工作空间/src/
git clone https://github.com/Livox-SDK/livox_ros_driver2.git
git clone https://github.com/Livox-SDK/Livox-SDK2.git

cd ./Livox-SDK2/
mkdir build
cd build
cmake .. && make -j
sudo make install

cd ../livox_ros_driver2
source /opt/ros/noetic/setup.sh
./build.sh ROS1
如果出现了这个报错,那就先给livox_laser_simulation删了,或者移到其他地方。
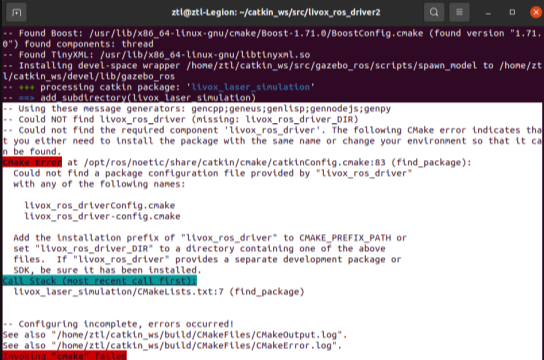
安装livox_laser_simulation雷达仿真库
cd ~/工作空间/src
git clone https://github.com/Luchuanzhao/Livox_simulation_customMsg
mv Livox_simulation_customMsg livox_laser_simulation
#修改激光雷达文件路径
cd ~/工作空间/src/livox_laser_simulation/src
code livox_points_plugin.cpp
#将第54行的内容改为自己电脑实际的csv文件路径
#例如:std::string file_name = "/home/nuc/PX4-Autopilot/Tools/simulation/gazebo-classic/sitl_gazebo-classic/models/livox_mid40/scan_mode/mid360.csv";

#将101行改为自己需要的点云格式:0->PointCloud;1/2->PointCloud2;3->CustomMsg
#如果后续要使用Faster-LIO,需使用CustomMsg

还需注释掉340、341行的坐标变换代码,要不然rviz中得不到图像
//tfBroadcaster->sendTransform(
//   tf::StampedTransform(tf, ros::Time::now(), raySensor->ParentName(), raySensor->Name()));

#编译
cd ~/catkin_ws
catkin_make
到这里编译大概率是会报错的,说livox_ros_driver找不到,这里需要开始修改文件了把livox_laser_simulation中src里面所有的livox_ros_driver全部改称livox_ros_driver2比如:
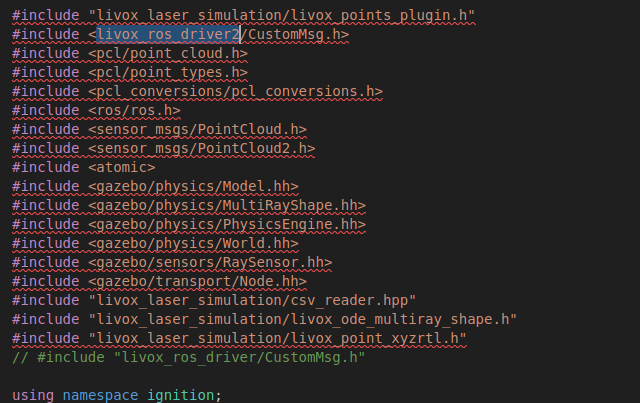
等包括cmakelist等地方。
这里安装好了之后给电脑内有多个livox_laser_simulation库的朋友讲一下,不管是不经意间安装的多个livox_laser_simulation库还是工程需要,多个库时可能会出现打不开雷达的问题,如果有请修改mid360.sdf中的41行:
<plugin name='gazebo_ros_laser_controller' filename='/home/nuc/lib_livox_sim/devel/lib/liblivox_laser_simulation.so'>把路径改为上面这个雷达仿真库.so的位置。
测试
查看是否成功:
启动仿真环境
roslaunch px4 iris_mid360.launch使用rostopic list看一下有没有上面定义的雷达话题。雷达话题定义在mid360.sdf中的
<csv_file_name>/home/nuc/PX4-Autopilot/Tools/simulation/gazebo-classic/sitl_gazebo-classic/models/livox_mid40/scan_mode/mid360.csv</csv_file_name>
<ros_topic>/scan</ros_topic>
rostopic这里,看是否话题对应的上,然后rostopic echo /scan看一下有没有数据。如果有就是安装成功了。
三、导航仿真
前面已经配置好了gazebo的仿真环境,现在可以开始导航了
我的github仓库:https://github.com/October-Vision/uav_nav.git可以直接git下来,最近会补充相关的环境配置内容详情请看readme.md
下载好了之后重点需要关注下面几个地方:
src/FAST_LIO_SLAM/FAST-LIO/config/mid360.config这里面的
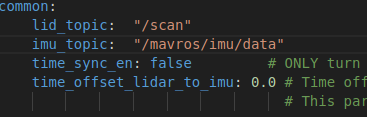
lid_topic换成自己的雷达话题,imu_topic如果有实机的mid360可以改为livox/imu如果没有就用这个就行。
启动测试:
// 先启动仿真
roslaunch px4 iris_mid360.launch

//启动建图节点
roslaunch fast_lio mapping_mid360.launch

//启动消息转换节点
roslaunch livox2pointcloud livox2pointcloud.launch

//启动ego_planner
roslaunch ego_planner single_run_in_exp.launch

//启动控制器这里可以用px4crtl不过我觉得不好用用的别的控制器
//px4crtl启动
roslaunch px4ctrl run_ctrl.launch

//启动rviz发送点位
roslaunch ego_planner rviz.launch
打开rviz后在上面发送目标点位即可。


 2550
2550

 被折叠的 条评论
为什么被折叠?
被折叠的 条评论
为什么被折叠?
 到【灌水乐园】发言


