


一、环境准备
1. 必需的软件包:
- Python 3.7+
- TensorFlow 2.x
- STM32CubeMX 6.8.0+
- X-CUBE-AI 8.0.0+ 扩展包
- Keil MDK 5.x 或 STM32CubeIDE
2.Python依赖库:
pip install tensorflow==2.10.0
pip install numpy
pip install scikit-learn
pip install matplotlib
二、模型训练与转换流程
-
训练模型
从代码可以看到模型结构(参考aitest.py):
    model = tf.keras.Sequential([
        # 使用最简单的输入定义方式
        tf.keras.layers.Dense(64, activation='relu', input_shape=(6,)),
        tf.keras.layers.Dense(32, activation='relu'),
        tf.keras.layers.Dense(4, activation='softmax')
    ])
-
模型转换
转换为TFLite格式(参考aitest.py):
        input_shape = (1, 6)
        concrete_func = tf.function(model).get_concrete_function(
            tf.TensorSpec(input_shape, tf.float32)
        )

        converter = tf.lite.TFLiteConverter.from_concrete_functions([concrete_func])
        converter.optimizations = [tf.lite.Optimize.DEFAULT]
        converter.target_spec.supported_types = [tf.float32]

        print("正在执行转换...")
        tflite_model = converter.convert()
这篇文章是对stm32部署边缘AI的教程,不对模型创建做具体教程,我是用cursor生成的模型代码
以下是完整代码
import numpy as np
import tensorflow as tf
from sklearn.model_selection import train_test_split
from sklearn.preprocessing import StandardScaler
import matplotlib.pyplot as plt
import os
import tempfile
# 1. 生成模拟数据
def generate_mock_data(n_samples=1000):
"""
生成模拟的MPU6050数据
n_samples: 每种状态的样本数量
"""
# 创建空数组存储数据
X = []
y = []
# 为四种不同状态生成数据
for state in range(4):
if state == 0: # 正常状态
# 加速度数据范围
ax = np.random.normal(0, 0.1, n_samples)
ay = np.random.normal(0, 0.1, n_samples)
az = np.random.normal(9.8, 0.1, n_samples) # 重力加速度
# 角速度数据范围
gx = np.random.normal(0, 0.1, n_samples)
gy = np.random.normal(0, 0.1, n_samples)
gz = np.random.normal(0, 0.1, n_samples)
elif state == 1: # 轻微倾斜
ax = np.random.normal(1, 0.2, n_samples)
ay = np.random.normal(1, 0.2, n_samples)
az = np.random.normal(9.5, 0.2, n_samples)
gx = np.random.normal(0.5, 0.2, n_samples)
gy = np.random.normal(0.5, 0.2, n_samples)
gz = np.random.normal(0.2, 0.1, n_samples)
elif state == 2: # 危险倾斜
ax = np.random.normal(2, 0.3, n_samples)
ay = np.random.normal(2, 0.3, n_samples)
az = np.random.normal(9.0, 0.3, n_samples)
gx = np.random.normal(1.0, 0.3, n_samples)
gy = np.random.normal(1.0, 0.3, n_samples)
gz = np.random.normal(0.5, 0.2, n_samples)
else: # 跌倒状态
ax = np.random.normal(5, 0.5, n_samples)
ay = np.random.normal(5, 0.5, n_samples)
az = np.random.normal(3.0, 0.5, n_samples)
gx = np.random.normal(2.0, 0.5, n_samples)
gy = np.random.normal(2.0, 0.5, n_samples)
gz = np.random.normal(1.0, 0.3, n_samples)
# 组合数据
for i in range(n_samples):
X.append([ax[i], ay[i], az[i], gx[i], gy[i], gz[i]])
y.append(state)
return np.array(X), np.array(y)
# 2. 数据预处理
def preprocess_data(X, y):
"""
对数据进行预处理
"""
# 标准化数据
scaler = StandardScaler()
X_scaled = scaler.fit_transform(X)
# 保存标准化参数(后面部署要用)
np.save('scaler_params.npy', {
'mean': scaler.mean_,
'scale': scaler.scale_
})
# 分割训练集和测试集
X_train, X_test, y_train, y_test = train_test_split(
X_scaled, y, test_size=0.2, random_state=42
)
return X_train, X_test, y_train, y_test
# 3. 创建模型
def create_model():
"""
创建姿态识别模型
"""
model = tf.keras.Sequential([
# 使用最简单的输入定义方式
tf.keras.layers.Dense(64, activation='relu', input_shape=(6,)),
tf.keras.layers.Dense(32, activation='relu'),
tf.keras.layers.Dense(4, activation='softmax')
])
return model
# 4. 训练模型
def train_model(X_train, y_train):
"""
训练模型
"""
# 创建模型
model = create_model()
# 编译模型
model.compile(
optimizer='adam',
loss='sparse_categorical_crossentropy',
metrics=['accuracy']
)
# 训练模型
history = model.fit(
X_train, y_train,
epochs=20,
batch_size=32,
validation_split=0.2,
verbose=1
)
return model, history
# 5. 评估模型
def evaluate_model(model, X_test, y_test, history):
"""
评估模型性能
"""
# 测试集评估
test_loss, test_acc = model.evaluate(X_test, y_test)
print(f'\nTest accuracy: {test_acc:.4f}')
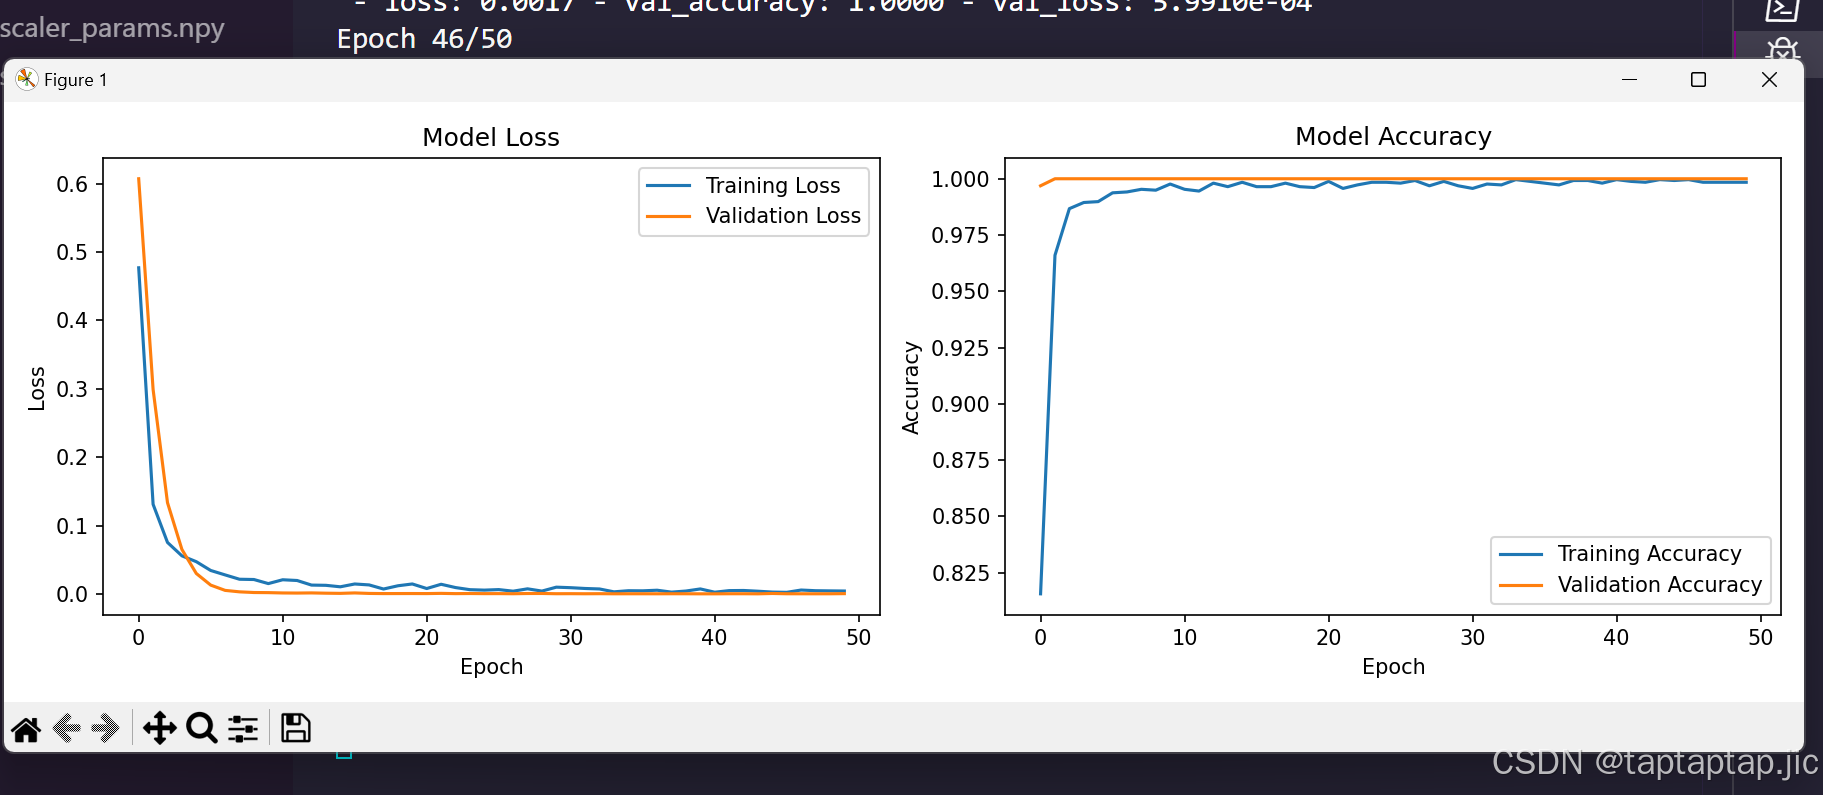
# 绘制训练历史
plt.figure(figsize=(12, 4))
# 损失曲线
plt.subplot(1, 2, 1)
plt.plot(history.history['loss'], label='Training Loss')
plt.plot(history.history['val_loss'], label='Validation Loss')
plt.title('Model Loss')
plt.xlabel('Epoch')
plt.ylabel('Loss')
plt.legend()
# 准确率曲线
plt.subplot(1, 2, 2)
plt.plot(history.history['accuracy'], label='Training Accuracy')
plt.plot(history.history['val_accuracy'], label='Validation Accuracy')
plt.title('Model Accuracy')
plt.xlabel('Epoch')
plt.ylabel('Accuracy')
plt.legend()
plt.tight_layout()
plt.show()
# 6. 主函数
def main():
# 生成模拟数据
print("生成模拟数据...")
X, y = generate_mock_data(n_samples=1000)
# 数据预处理
print("数据预处理...")
X_train, X_test, y_train, y_test = preprocess_data(X, y)
# 训练模型
print("开始训练模型...")
model, history = train_model(X_train, y_train)
# 评估模型
print("评估模型性能...")
evaluate_model(model, X_test, y_test, history)
print("开始保存和转换模型...")
try:
# 1. 设置路径并创建目录
import os
base_dir = "D:/STM32_AI"
model_dir = f"{base_dir}/model"
model_path = f"{model_dir}/model.tflite"
print(f"\n正在创建目录...")
print(f"基础目录: {base_dir}")
print(f"模型目录: {model_dir}")
# 确保目录存在
try:
os.makedirs(base_dir, exist_ok=True)
print("√ 基础目录创建成功")
os.makedirs(model_dir, exist_ok=True)
print("√ 模型目录创建成功")
except Exception as e:
print(f"创建目录时出错: {str(e)}")
raise
# 2. 转换模型
print("\n正在转换模型...")
input_shape = (1, 6)
concrete_func = tf.function(model).get_concrete_function(
tf.TensorSpec(input_shape, tf.float32)
)
converter = tf.lite.TFLiteConverter.from_concrete_functions([concrete_func])
converter.optimizations = [tf.lite.Optimize.DEFAULT]
converter.target_spec.supported_types = [tf.float32]
print("正在执行转换...")
tflite_model = converter.convert()
print("√ 模型转换成功")
# 3. 保存模型
print(f"\n正在保存模型到: {model_path}")
with open(model_path, 'wb') as f:
f.write(tflite_model)
# 4. 验证文件
if os.path.exists(model_path):
file_size = os.path.getsize(model_path)
print(f"√ 模型保存成功!")
print(f" - 位置:{model_path}")
print(f" - 大小:{file_size/1024:.2f} KB")
# 显示完整的文件信息
import time
file_stat = os.stat(model_path)
print(f" - 创建时间:{time.ctime(file_stat.st_ctime)}")
print(f" - 修改时间:{time.ctime(file_stat.st_mtime)}")
else:
print(f"错误:文件未能保存到 {model_path}")
print("\n=== 使用说明 ===")
print("1. 请确认文件是否存在于以下位置:")
print(f" {model_path}")
print("2. 在 STM32CubeMX 中使用此路径导入模型")
except Exception as e:
print(f"\n发生错误:")
print(f"错误类型: {type(e).__name__}")
print(f"错误信息: {str(e)}")
import traceback
traceback.print_exc()
if __name__ == "__main__":
main()程序运行
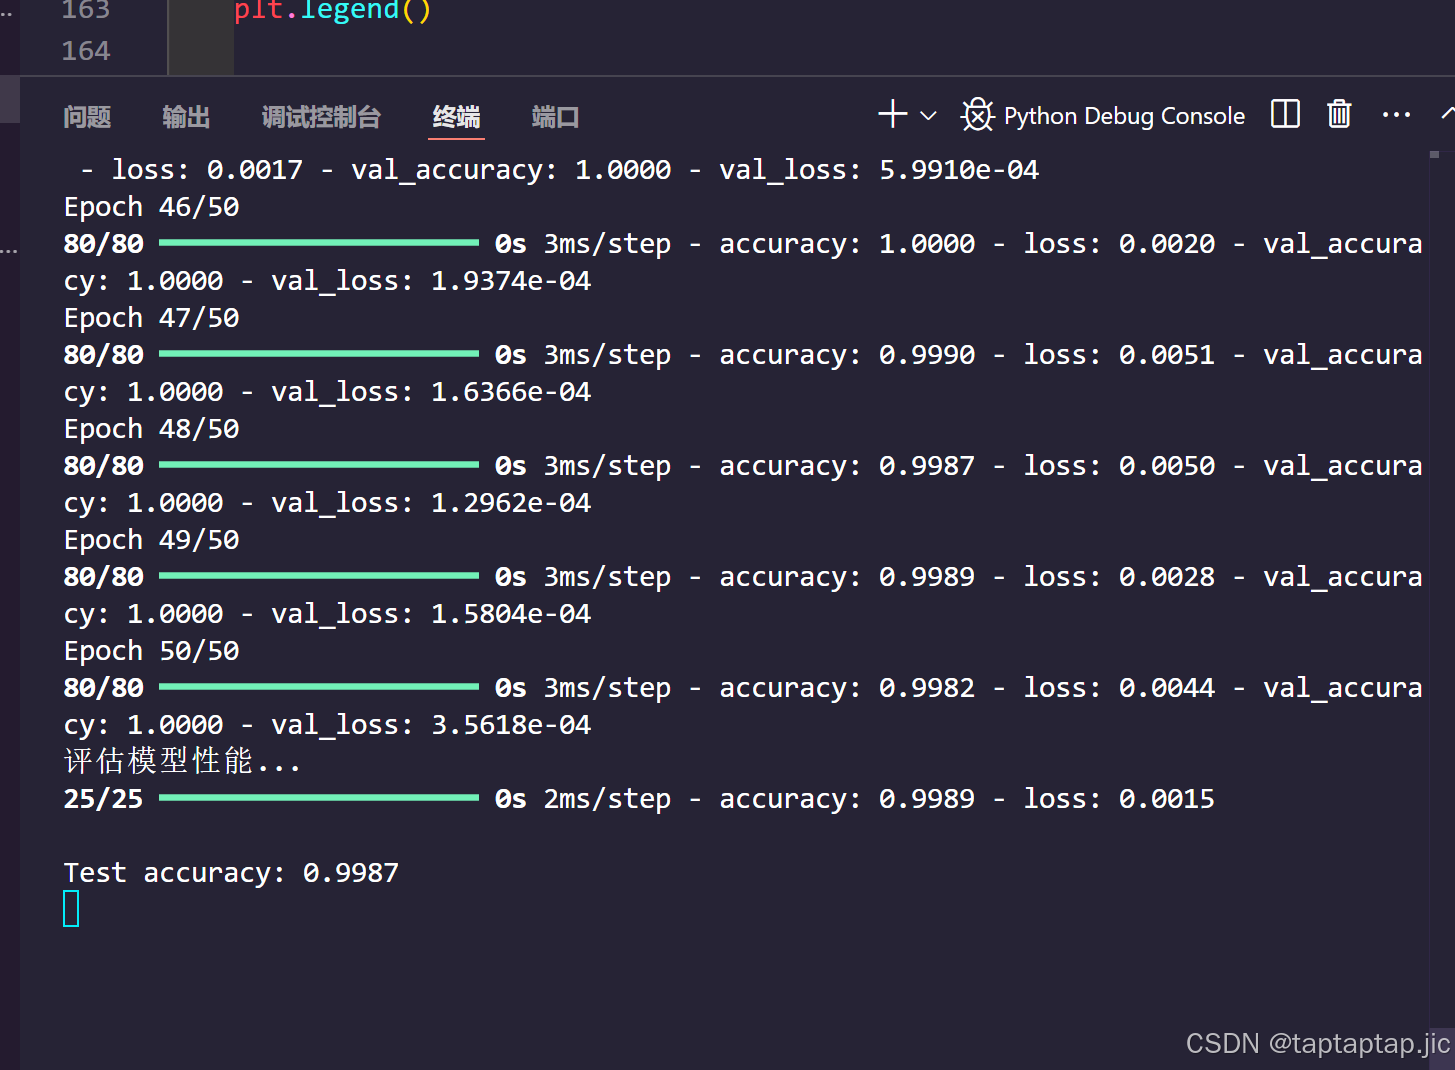
(这里的数据是使用python脚本生成的数据)
生成的文件
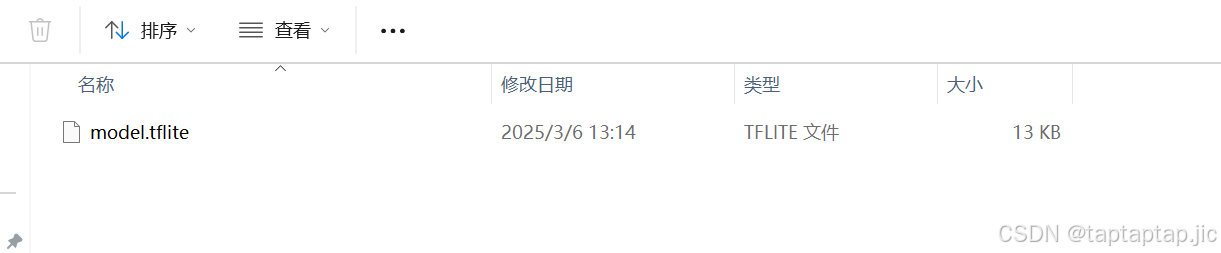
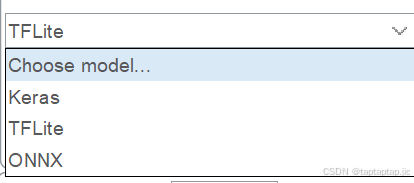
三、在STM32上部署边缘AI - X-CUBE-AI支持的模型格式
X-CUBE-AI支持导入以下几种主流深度学习框架的模型格式:
- TensorFlow Lite (.tflite)
- Keras (.h5, .keras)
- ONNX (.onnx)
这里我导入的TFLIte格式的文件,脚本是先生成.h5文件在转换为TFLite的,直接导入.h5格式的文件也可以
四、STM32CubeMX配置
-
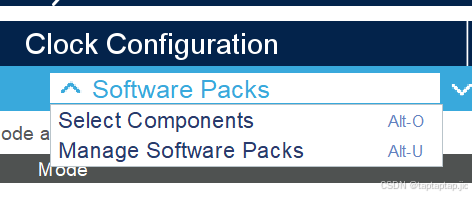
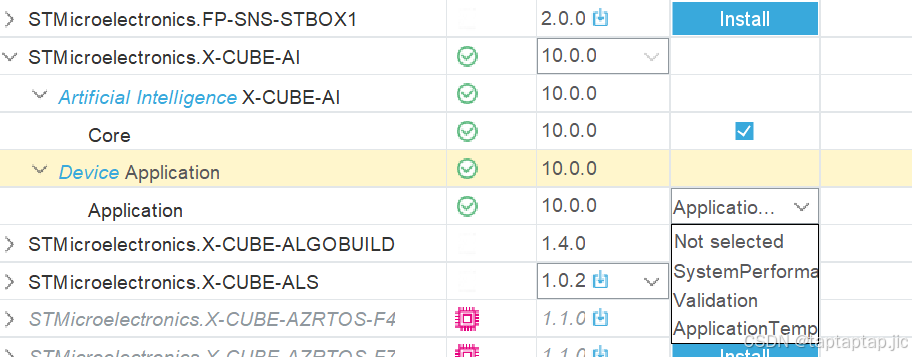
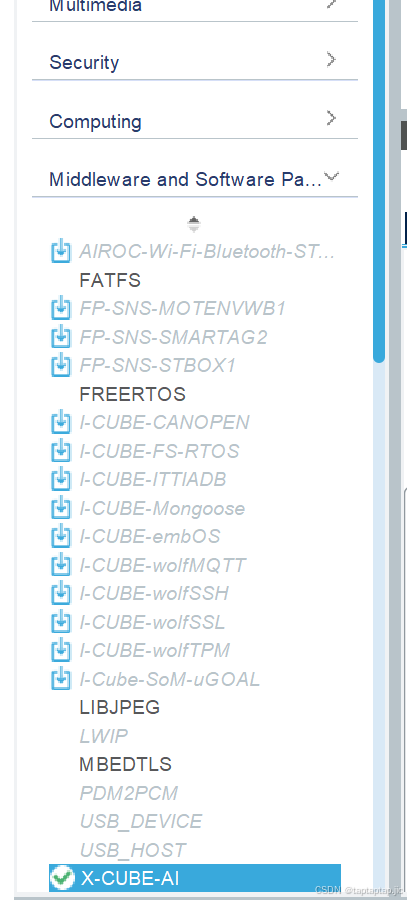
安装X-CUBE-AI:
打开cubemx,选择select components 下载x_CUBE_AI
找到如图AI插件点击install
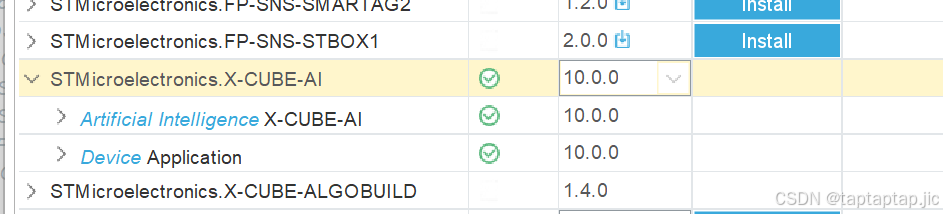
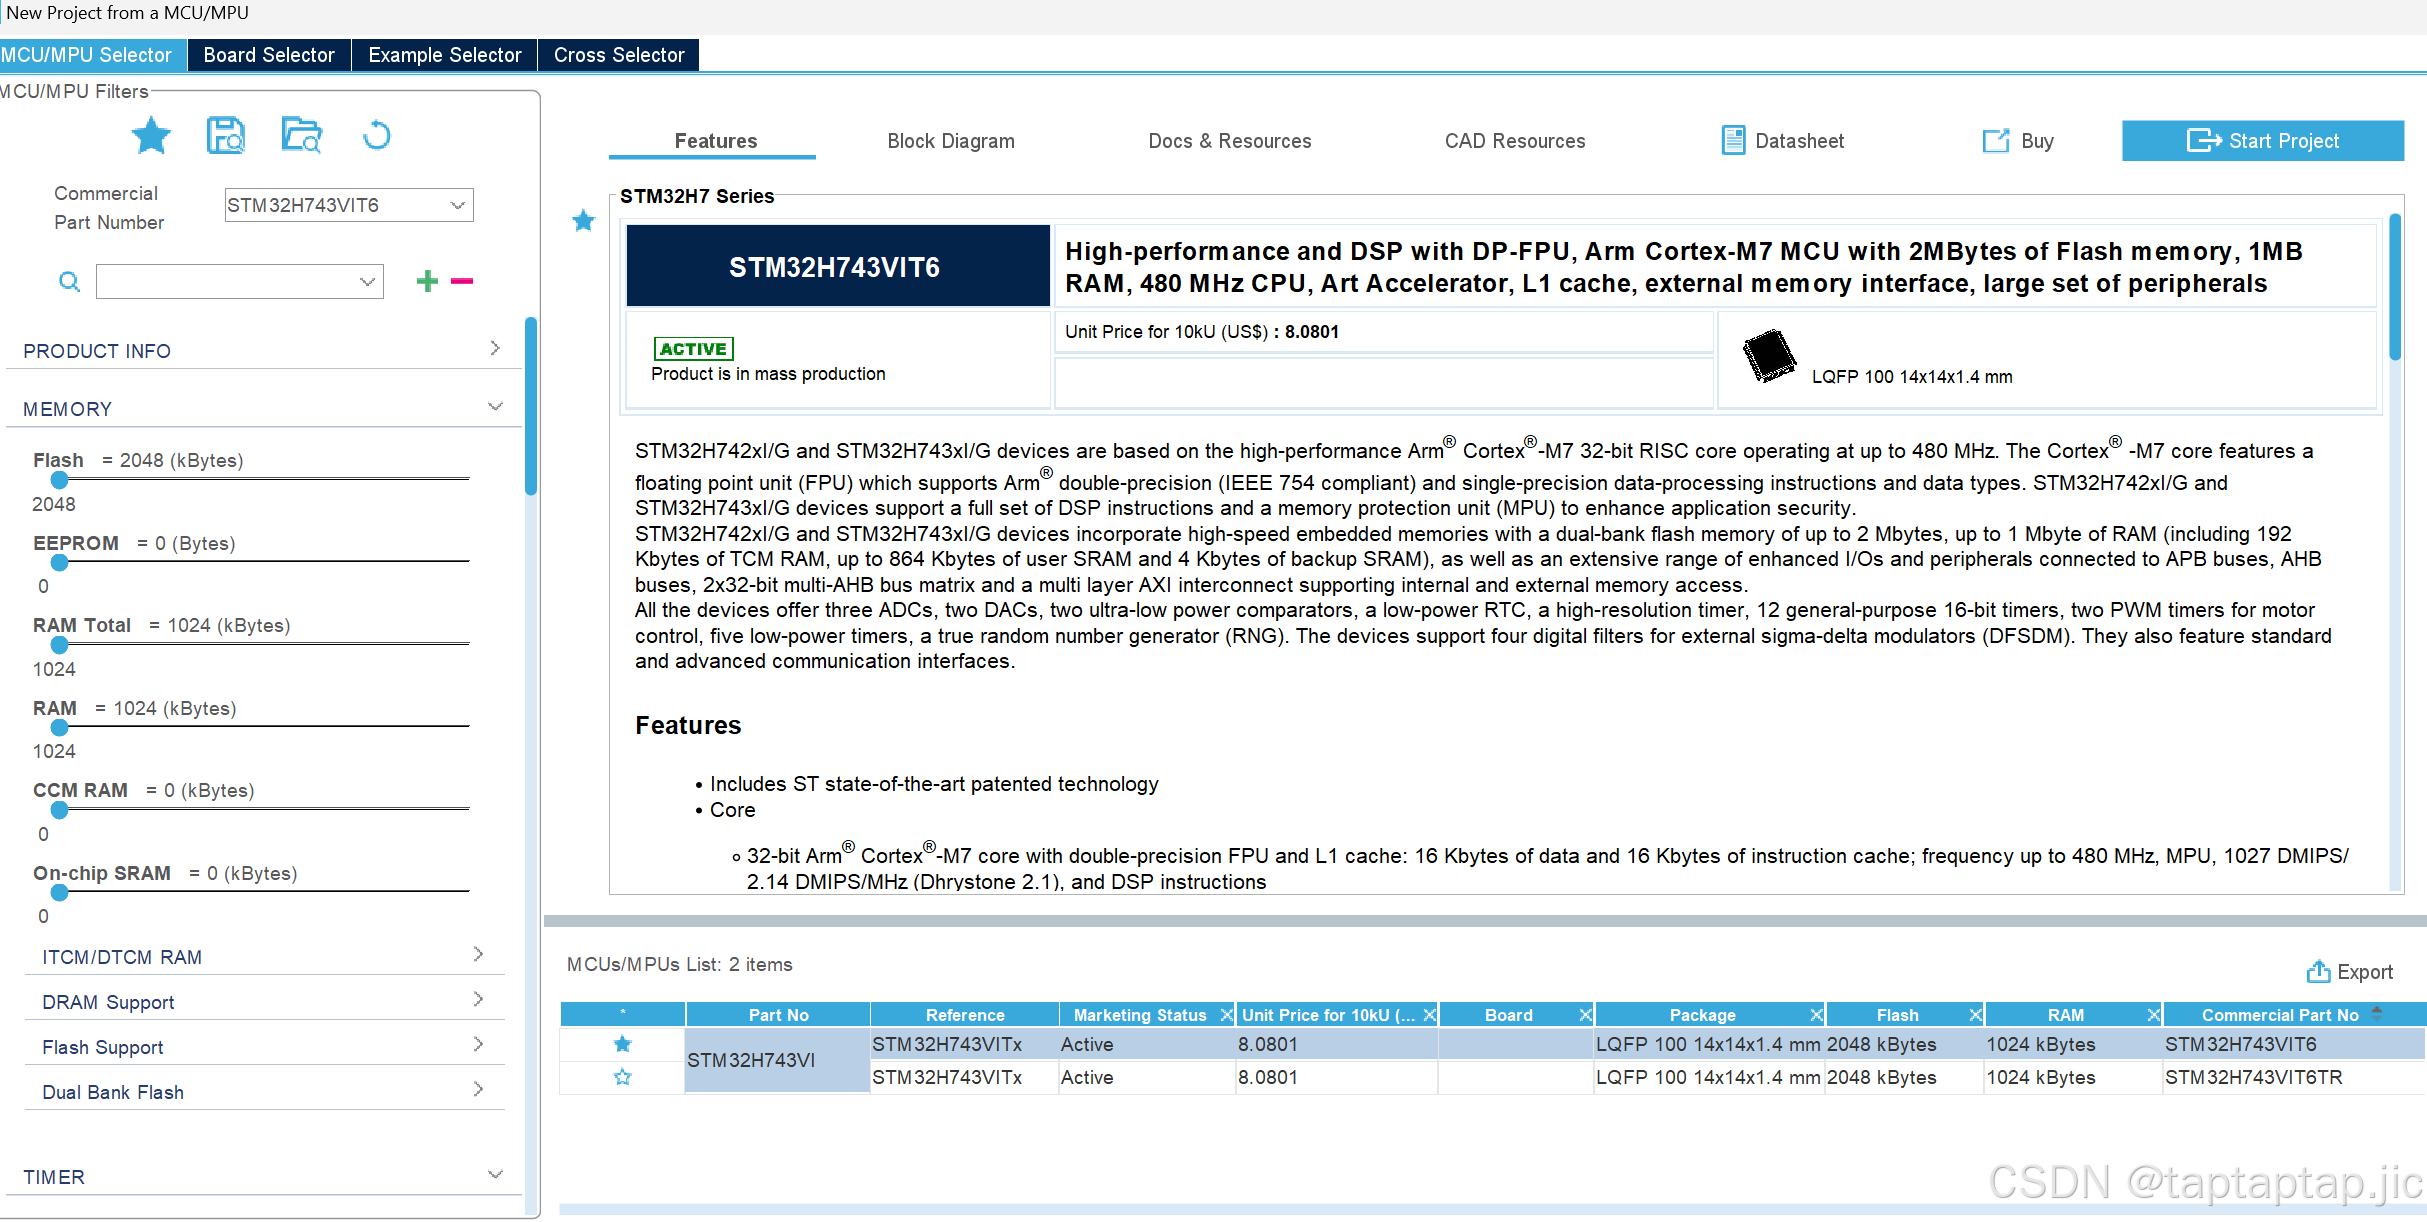
下载之后就可以选择芯片导入模型了
这里我选择的芯片是stm32H743VIT6(尽量选择内存大一些的芯片部署)
然后还是在select components中选择X_CUBE_AI
此处选择最后一项生成应用模板
导入模型:
配置时钟串口等外设(略)
点开middleware 。。。
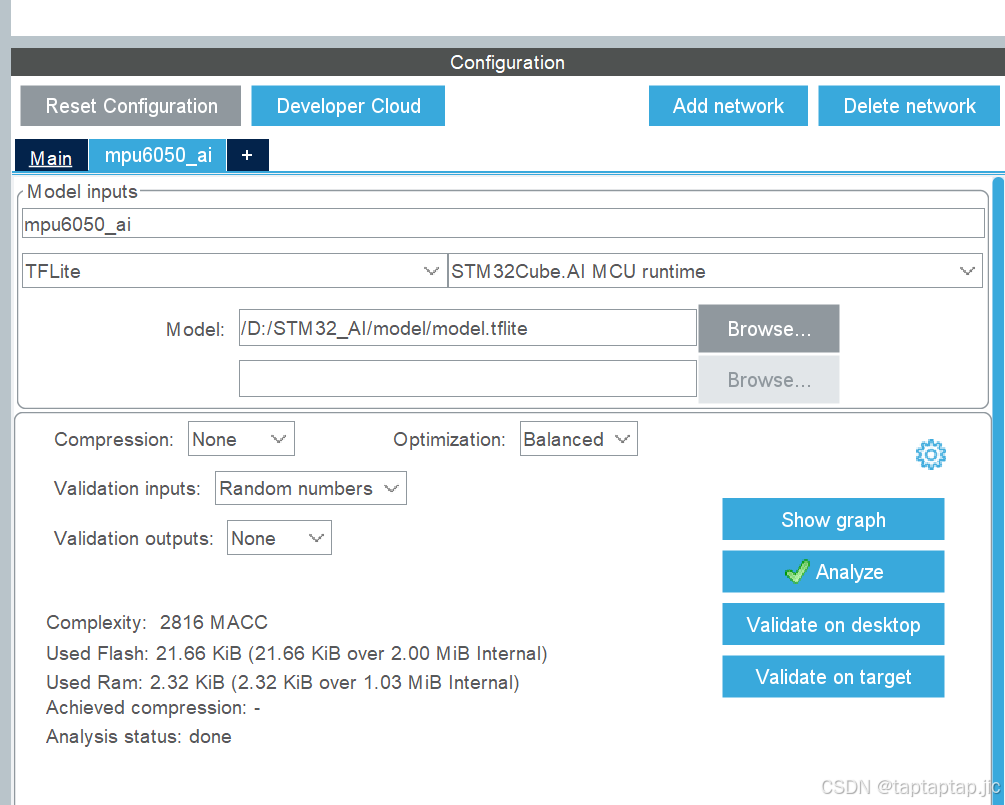
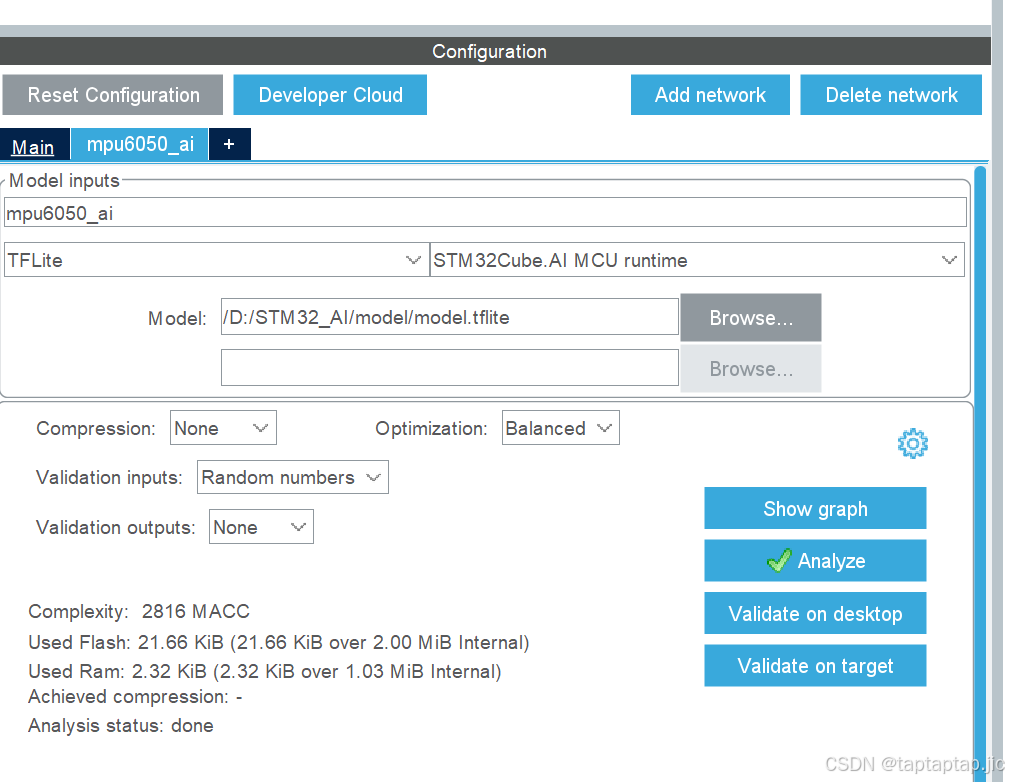
点击addnetwork
点击browse导入刚刚那个生成的文件(.h5或者。tflite)
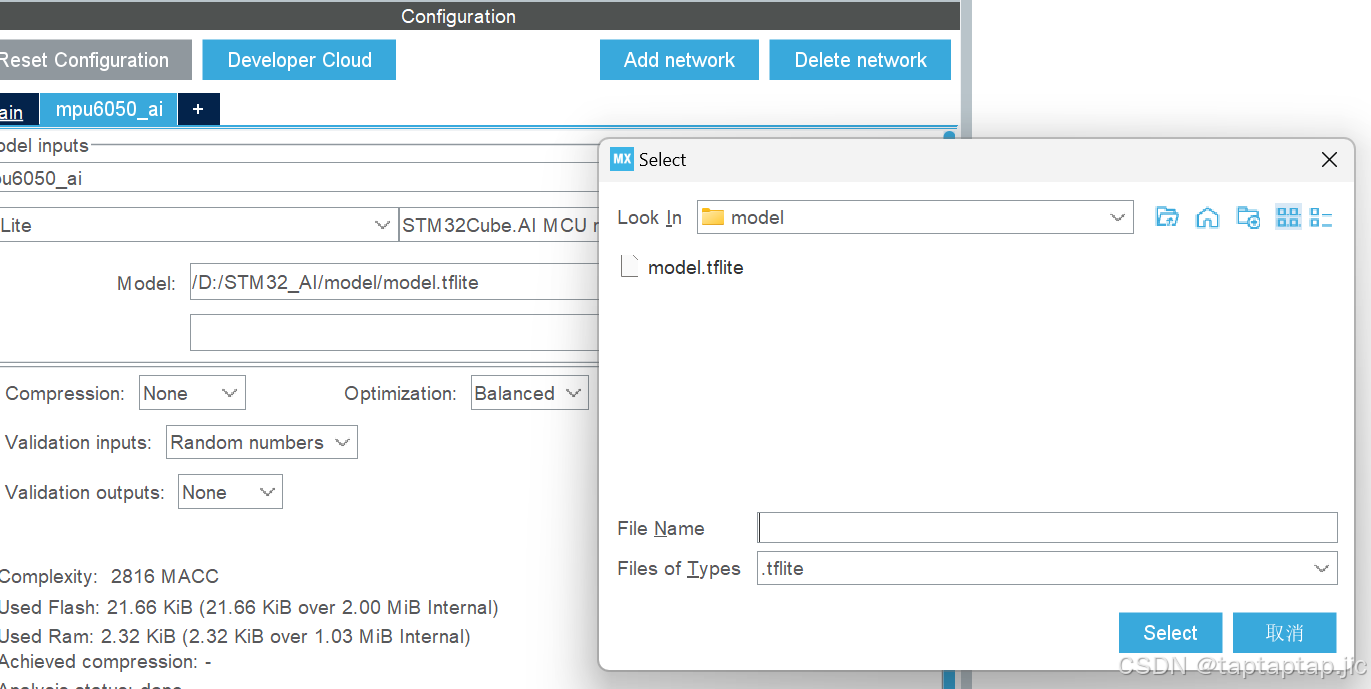
注意这里导入文件的路径不能太长否则会报错
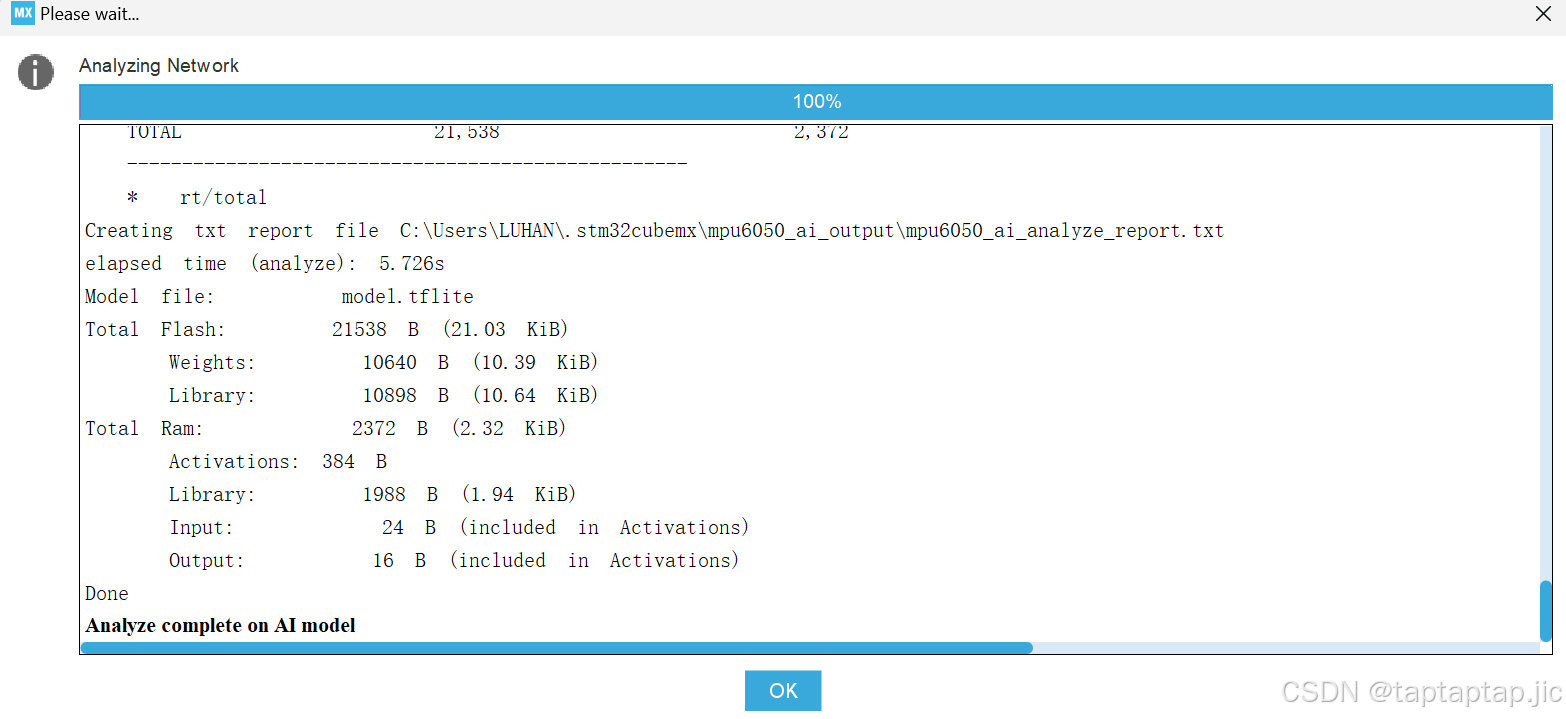
完成后点击下面地analyze
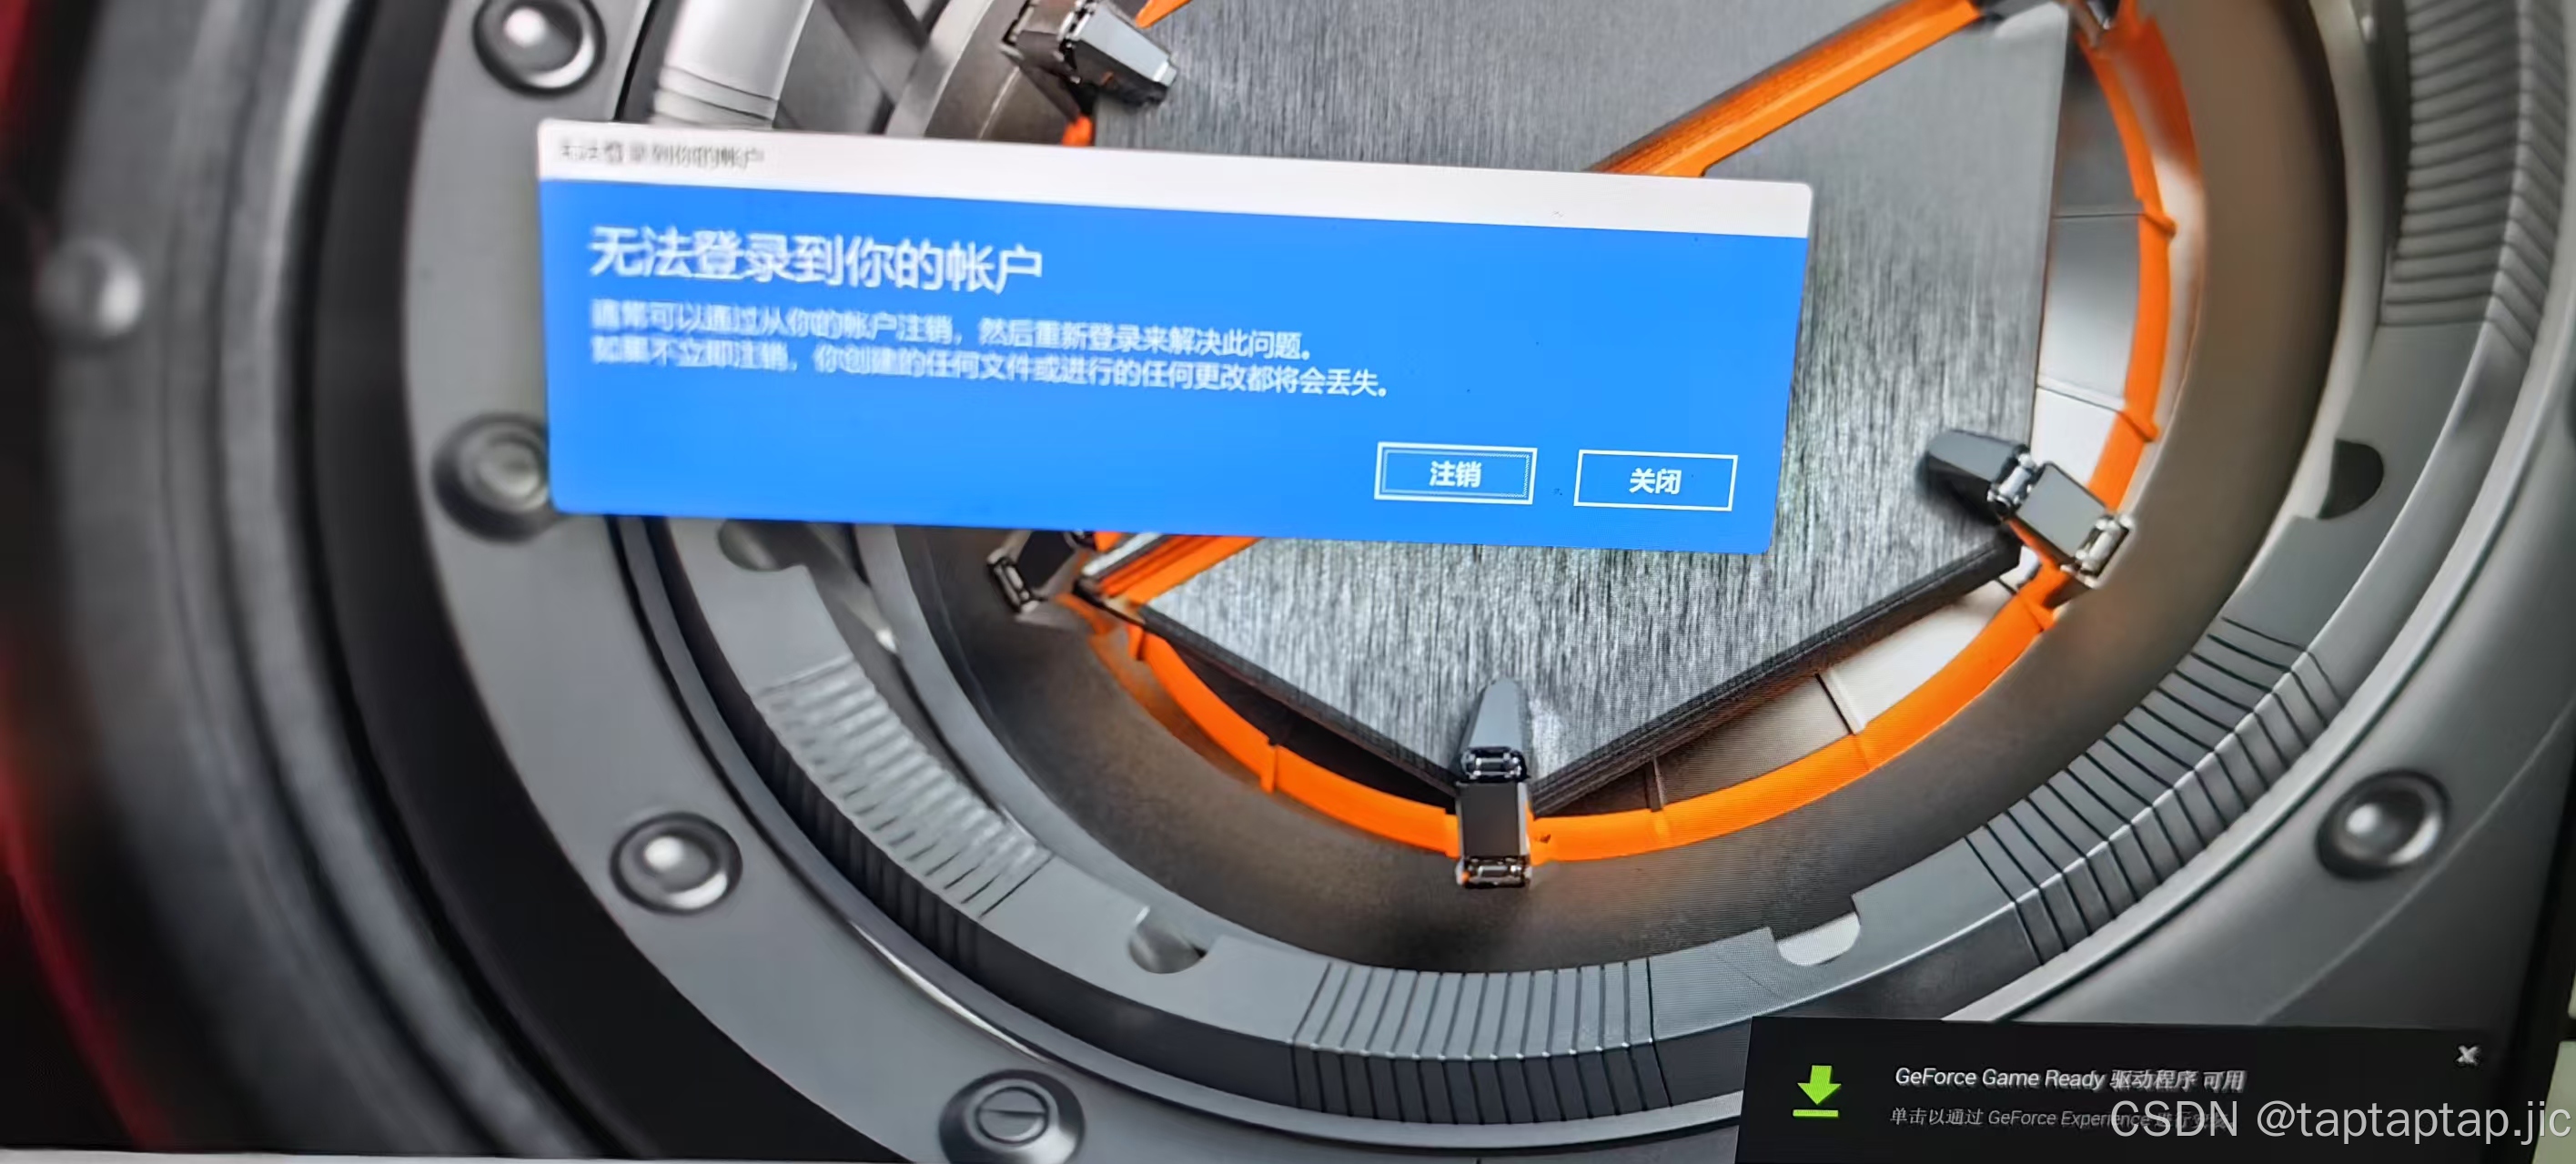
注意电脑用户名不能有中文,否则会报错就会这样
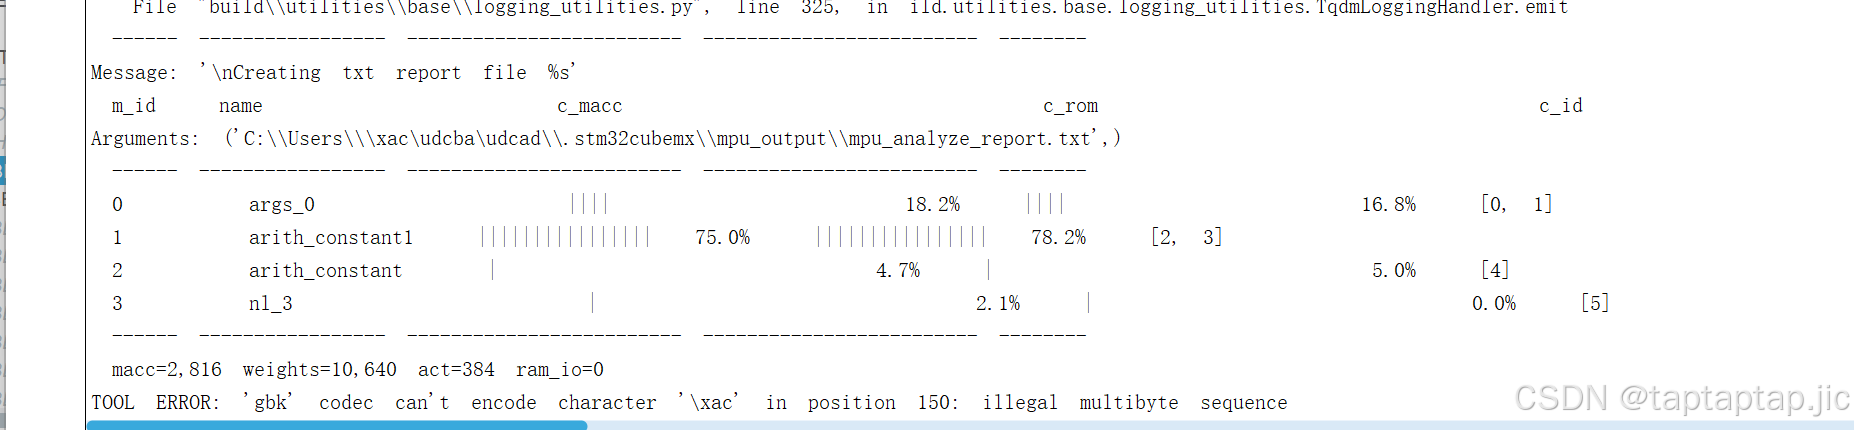
提醒一句如果,如果你的电脑用户名是中文且你自己不会改,就尽量去淘宝上找人给你改一下否则(专业的事情还是交给专业的人):
改为中文名后就可以正常导入了
analyze勾上就表示成功了
导入之后就可以了
然后正常生成工程即可
具体地工程示例我会稍后更新,此文章仅演示如何导入


 127
127

 被折叠的 条评论
为什么被折叠?
被折叠的 条评论
为什么被折叠?
 到【灌水乐园】发言


