


 本文介绍了如何在Ubuntu、macOS和Windows上安装Tesseract4,以及如何使用OpenCV的EAST文本检测器配合Tesseract进行文本识别,包括关键步骤和参数设置。
为了执行 OpenCV OCR 文本识别,我们首先需要安装 Tesseract v4,它包括一个高度准确的基于深度学习的文本识别模型。
本篇文章的步骤:
-
使用 OpenCV 的 EAST 文本检测器执行文本检测,这是一种高度准确的深度学习文本检测器,用于检测自然场景图像中的文本。
-
一旦我们使用 OpenCV 检测到文本区域,我们将提取每个文本 ROI 并将它们传递到 Tesseract,使我们能够构建完整的 OpenCV OCR 管道!
-
最后,我将通过向您展示使用 OpenCV 应用文本识别的一些示例结果来结束今天的教程,并讨论该方法的一些局限性和缺点。
让我们继续开始使用 OpenCV OCR!
==========================================================================
根据您使用的是 Ubuntu 18.04 还是 Ubuntu 17.04 及更早版本,用于在 Ubuntu 上安装 Tesseract 4 的确切命令会有所不同。
要检查您的 Ubuntu 版本,您可以使用 lsb_release 命令:
lsb_release -a
如您所见,我正在运行 Ubuntu 18.04,但您应该在继续之前检查您的 Ubuntu 版本。
对于 Ubuntu 18.04 用户,Tesseract 4 是主 apt-get 存储库的一部分,通过以下命令安装 Tesseract 变得非常容易:
sudo apt install tesseract-ocr
如果您的系统上安装了 Homebrew,macOS 的“非官方”软件包管理器,那么在 macOS 上安装 Tesseract 很简单。 只需运行以下命令,Tesseract v4 就会安装在您的 Mac 上:
brew install tesseract
如果您已经在 Mac 上安装了 Tesseract(例如,如果您遵循了我之前的 Tesseract 安装教程),您首先要取消原始安装的链接:
brew unlink tesseract
初识OCR,Tesseract的安装与使用_AI浩-CSDN博客
然后你可以运行安装命令。

一旦你在你的机器上安装了 Tesseract,你应该执行以下命令来验证你的 Tesseract 版本:
tesseract -v
只要您在输出中的某处看到 tesseract 4,您就知道您的系统上安装了最新版本的 Tesseract。
然后,我们将使用 pip 安装 Pillow,这是一个对 Python 更友好的 PIL 版本,然后是 pytesseract 和 imutils:
$ pip install pillow
$ pip install pytesseract
$ pip install imutils
了解 OpenCV OCR 和 Tesseract 文本识别
=========================================================================================

现在我们已经在我们的系统上成功安装了 OpenCV 和 Tesseract,我们需要简要回顾一下我们的管道和相关命令。
首先,我们将应用 OpenCV 的 EAST 文本检测器来检测图像中文本的存在。
EAST 文本检测器将为我们提供文本 ROI 的边界框 (x, y) 坐标。
我们将提取这些 ROI 中的每一个,然后将它们传递给 Tesseract v4 的 LSTM 深度学习文本识别算法。 LSTM 的输出将为我们提供实际的 OCR 结果。
最后,我们将在输出图像上绘制 OpenCV OCR 结果。 但在我们真正开始我们的项目之前,让我们简要回顾一下 Tesseract 命令(它将被 pytesseract 库在后台调用)。
在调用 tessarct 二进制文件时,我们需要提供许多标志。三个最重要的是 -l 、 --oem 和 --psm 。
-l 标志控制输入文本的语言。我们将在此示例中使用 eng(英语),但您可以在此处查看 Tesseract 支持的所有语言。
–oem 参数或 OCR 引擎模式控制 Tesseract 使用的算法类型。 您可以通过执行以下命令查看可用的 OCR 引擎模式:
$ tesseract --help-oem
OCR Engine modes:
0 Legacy engine only.
1 Neural nets LSTM engine only.
2 Legacy + LSTM engines.
3 Default, based on what is available.
我们将使用 --oem 1 表示我们希望仅使用深度学习 LSTM 引擎。
最后一个重要标志 --psm 控制 Tesseract 使用的自动页面分割模式:
tesseract --help-psm
Page segmentation modes:
0 Orientation and script detection (OSD) only.
1 Automatic page segmentation with OSD.
2 Automatic page segmentation, but no OSD, or OCR.
3 Fully automatic page segmentation, but no OSD. (Default)
4 Assume a single column of text of variable sizes.
5 Assume a single uniform block of vertically aligned text.
6 Assume a single uniform block of text.
7 Treat the image as a single text line.
8 Treat the image as a single word.
9 Treat the image as a single word in a circle.
10 Treat the image as a single character.
11 Sparse text. Find as much text as possible in no particular order.
12 Sparse text with OSD.
13 Raw line. Treat the image as a single text line,
bypassing hacks that are Tesseract-specific.
对于 OCR 文本 ROI,我发现模式 6 和 7 运行良好,但如果您正在 OCR 处理大块文本,那么您可能想尝试 3,默认模式。 每当您发现自己获得不正确的 OCR 结果时,我强烈建议您调整 --psm,因为它会对您的输出 OCR 结果产生巨大影响。
===============================================================
tree --dirsfirst
.
├── images
│ ├── example_01.jpg
│ ├── example_02.jpg
│ ├── example_03.jpg
│ ├── example_04.jpg
│ └── example_05.jpg
├── frozen_east_text_detection.pb
└── text_recognition.py
我们的项目包含一个目录和两个值得注意的文件:
-
images/ :包含六个包含场景文本的测试图像的目录。 我们将对这些图像中的每一个尝试 OpenCV OCR。
-
frozen_east_text_detection.pb:EAST 文本检测器。 该 CNN 已针对文本检测进行了预训练,可以立即使用。
-
text_recognition.py :我们的 OCR 脚本——我们将逐行查看这个脚本。 该脚本利用 EAST 文本检测器来查找图像中的文本区域,然后利用 Tesseract v4 进行识别。
===========================================================================
我们现在准备好使用 OpenCV 执行文本识别了! 打开 text_recognition.py 文件并插入以下代码:
import the necessary packages
from imutils.object_detection import non_max_suppression
import numpy as np
import pytesseract
import argparse
import cv2
今天的 OCR 脚本需要五个导入,其中之一内置于 OpenCV 中。 最值得注意的是,我们将使用 pytesseract 和 OpenCV。
我的 imutils 包将用于非最大值抑制,因为 OpenCV 的 NMSBoxes 函数似乎不适用于 Python API。
我还将注意到 NumPy 是 OpenCV 的依赖项。 argparse 包包含在 Python 中并处理命令行参数——无需安装任何东西。 现在我们的导入已经处理完毕,让我们实现 decode_predictions 函数:
def decode_predictions(scores, geometry):
grab the number of rows and columns from the scores volume, then
initialize our set of bounding box rectangles and corresponding
confidence scores
(numRows, numCols) = scores.shape[2:4]
rects = []
confidences = []
loop over the number of rows
for y in range(0, numRows):
extract the scores (probabilities), followed by the
geometrical data used to derive potential bounding box
coordinates that surround text
scoresData = scores[0, 0, y]
xData0 = geometry[0, 0, y]
xData1 = geometry[0, 1, y]
xData2 = geometry[0, 2, y]
xData3 = geometry[0, 3, y]
anglesData = geometry[0, 4, y]
loop over the number of columns
for x in range(0, numCols):
if our score does not have sufficient probability,
ignore it
if scoresData[x] < args[“min_confidence”]:
continue
compute the offset factor as our resulting feature
maps will be 4x smaller than the input image
(offsetX, offsetY) = (x * 4.0, y * 4.0)
extract the rotation angle for the prediction and
then compute the sin and cosine
angle = anglesData[x]
cos = np.cos(angle)
sin = np.sin(angle)
use the geometry volume to derive the width and height
of the bounding box
h = xData0[x] + xData2[x]
w = xData1[x] + xData3[x]
compute both the starting and ending (x, y)-coordinates
for the text prediction bounding box
endX = int(offsetX + (cos * xData1[x]) + (sin * xData2[x]))
endY = int(offsetY - (sin * xData1[x]) + (cos * xData2[x]))
startX = int(endX - w)
startY = int(endY - h)
add the bounding box coordinates and probability score
to our respective lists
rects.append((startX, startY, endX, endY))
confidences.append(scoresData[x])
return a tuple of the bounding boxes and associated confidences
return (rects, confidences)
decode_predictions 函数,在 EAST 文本检测帖子中有详细解释。
然后,解析我们的命令行参数:
construct the argument parser and parse the arguments
ap = argparse.ArgumentParser()
ap.add_argument(“-i”, “–image”, type=str,
help=“path to input image”)
ap.add_argument(“-east”, “–east”, type=str,
help=“path to input EAST text detector”)
ap.add_argument(“-c”, “–min-confidence”, type=float, default=0.5,
help=“minimum probability required to inspect a region”)
ap.add_argument(“-w”, “–width”, type=int, default=320,
help=“nearest multiple of 32 for resized width”)
ap.add_argument(“-e”, “–height”, type=int, default=320,
help=“nearest multiple of 32 for resized height”)
ap.add_argument(“-p”, “–padding”, type=float, default=0.0,
help=“amount of padding to add to each border of ROI”)
args = vars(ap.parse_args())
我们的脚本需要两个命令行参数:
–image :输入图像的路径。
–east :预训练 EAST 文本检测器的路径。
或者,可以提供以下命令行参数:
-
–min-confidence :检测到的文本区域的最小概率。
-
–width :我们的图像在通过 EAST 文本检测器之前将调整到的宽度。 我们的检测器需要 32 的倍数。
-
–height :与宽度相同,但用于高度。 同样,我们的检测器需要 32 的倍数来调整高度。
-
–padding :添加到每个 ROI 边框的(可选)填充量。 如果您发现 OCR 结果不正确,您可以尝试使用 0.05 表示 5% 或 0.10 表示 10%(依此类推)。
从那里,我们将加载+预处理我们的图像并初始化关键变量:
load the input image and grab the image dimensions
image = cv2.imread(args[“image”])
orig = image.copy()
(origH, origW) = image.shape[:2]
set the new width and height and then determine the ratio in change
for both the width and height
(newW, newH) = (args[“width”], args[“height”])
rW = origW / float(newW)
rH = origH / float(newH)
resize the image and grab the new image dimensions
image = cv2.resize(image, (newW, newH))
(H, W) = image.shape[:2]
图像被加载到内存中并被复制(以便我们稍后可以在其上绘制我们的输出结果)。
我们获取原始宽度和高度,然后从 args 字典中提取新的宽度和高度。 使用原始尺寸和新尺寸,我们计算用于稍后在脚本中缩放边界框坐标的比率。 然后我们的图像被调整大小,忽略纵横比。 接下来,让我们使用 EAST 文本检测器:
define the two output layer names for the EAST detector model that
we are interested in – the first is the output probabilities and the
second can be used to derive the bounding box coordinates of text
layerNames = [
“feature_fusion/Conv_7/Sigmoid”,
“feature_fusion/concat_3”]
load the pre-trained EAST text detector
print(“[INFO] loading EAST text detector…”)
net = cv2.dnn.readNet(args[“east”])
我们的两个输出层名称以列表形式列出。 要了解为什么这两个输出名称很重要,您需要参考我的原始 EAST 文本检测教程。
然后,我们预训练的 EAST 神经网络被加载到内存中。 我再怎么强调都不为过:您至少需要 OpenCV 3.4.2 才能拥有 cv2.dnn.readNet 实现。接下来:
construct a blob from the image and then perform a forward pass of
the model to obtain the two output layer sets
blob = cv2.dnn.blobFromImage(image, 1.0, (W, H),
(123.68, 116.78, 103.94), swapRB=True, crop=False)
net.setInput(blob)
(scores, geometry) = net.forward(layerNames)
decode the predictions, then apply non-maxima suppression to
suppress weak, overlapping bounding boxes
(rects, confidences) = decode_predictions(scores, geometry)
boxes = non_max_suppression(np.array(rects), probs=confidences)
自我介绍一下,小编13年上海交大毕业,曾经在小公司待过,也去过华为、OPPO等大厂,18年进入阿里一直到现在。
深知大多数Python工程师,想要提升技能,往往是自己摸索成长或者是报班学习,但对于培训机构动则几千的学费,着实压力不小。自己不成体系的自学效果低效又漫长,而且极易碰到天花板技术停滞不前!
因此收集整理了一份《2024年Python开发全套学习资料》,初衷也很简单,就是希望能够帮助到想自学提升又不知道该从何学起的朋友,同时减轻大家的负担。


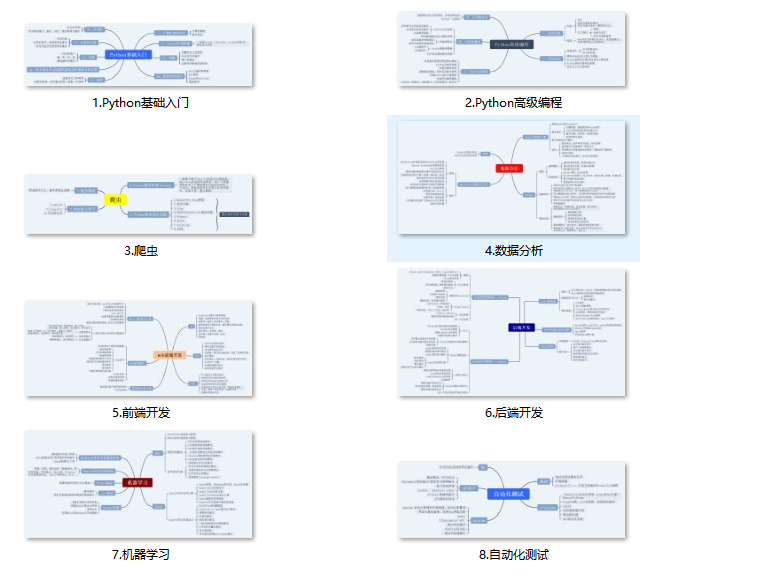
既有适合小白学习的零基础资料,也有适合3年以上经验的小伙伴深入学习提升的进阶课程,基本涵盖了95%以上前端开发知识点,真正体系化!
由于文件比较大,这里只是将部分目录大纲截图出来,每个节点里面都包含大厂面经、学习笔记、源码讲义、实战项目、讲解视频,并且后续会持续更新
如果你觉得这些内容对你有帮助,可以扫码获取!!!(备注:Python)
,着实压力不小。自己不成体系的自学效果低效又漫长,而且极易碰到天花板技术停滞不前!**
因此收集整理了一份《2024年Python开发全套学习资料》,初衷也很简单,就是希望能够帮助到想自学提升又不知道该从何学起的朋友,同时减轻大家的负担。
[外链图片转存中…(img-Tmpn8aTB-1713792987326)]
[外链图片转存中…(img-KxF0DWCp-1713792987327)]
[外链图片转存中…(img-rfcrfzY6-1713792987327)]
[外链图片转存中…(img-76NZxFPA-1713792987328)]
既有适合小白学习的零基础资料,也有适合3年以上经验的小伙伴深入学习提升的进阶课程,基本涵盖了95%以上前端开发知识点,真正体系化!
由于文件比较大,这里只是将部分目录大纲截图出来,每个节点里面都包含大厂面经、学习笔记、源码讲义、实战项目、讲解视频,并且后续会持续更新
如果你觉得这些内容对你有帮助,可以扫码获取!!!(备注:Python)


 4206
4206

 被折叠的 条评论
为什么被折叠?
被折叠的 条评论
为什么被折叠?
 到【灌水乐园】发言


