


前言
记录一下小白生涯
1. type()函数:获取变量的数据类型
2. np.dtype()函数:获取数组的数据类型
3. np.astype()函数:转换numpy数组的数据类型
4. isinstance()函数:判断 变量(数组)的类型
isinstance()函数有两个参数:第一个是待确定类型的数据;第二个是指定一个数据类型。
根据两个参数返回一个为布尔类型的值,True表示类型一致,False表示类型不一致。
5. np.shape()函数:一般用于读取数组的行、列、通道数
np.shape[0]:为第一维度的长度(行)
np.shape[1]:为第二维度的长度(列)
np.shape[1]:为第二维度的长度(通道数)
6. 代码和现实结果
6.1 代码
import cv2

import numpy as np

img = cv2.imread('E:/Desktop/lenna.png')  # 读取图片路径(不能有中文!)

print('img的数据类型:', type(img))

print('img的大小:', img.shape)

print('img数组的数据类型:', img.dtype)

print("cv2? ", isinstance(img, np.ndarray))

print('img:\n', img)

gray = img.mean(axis=-1)  # 平均值灰度化

print('gray的数据类型:', type(img))

print('gray的大小:', gray.shape)

print('gray数组的数据类型:', gray.dtype)

print("cv2? ", isinstance(gray, np.ndarray))

print('gray:\n', gray)

gray = gray.astype(np.uint8)  # 转换数据类型为unint(0-255)显示图像

print('gray(转化为uint8):\n', gray)

cv2.imshow('img', img)

cv2.imshow('gray', gray)

cv2.waitKey(0)

cv2.destroyAllWindows()
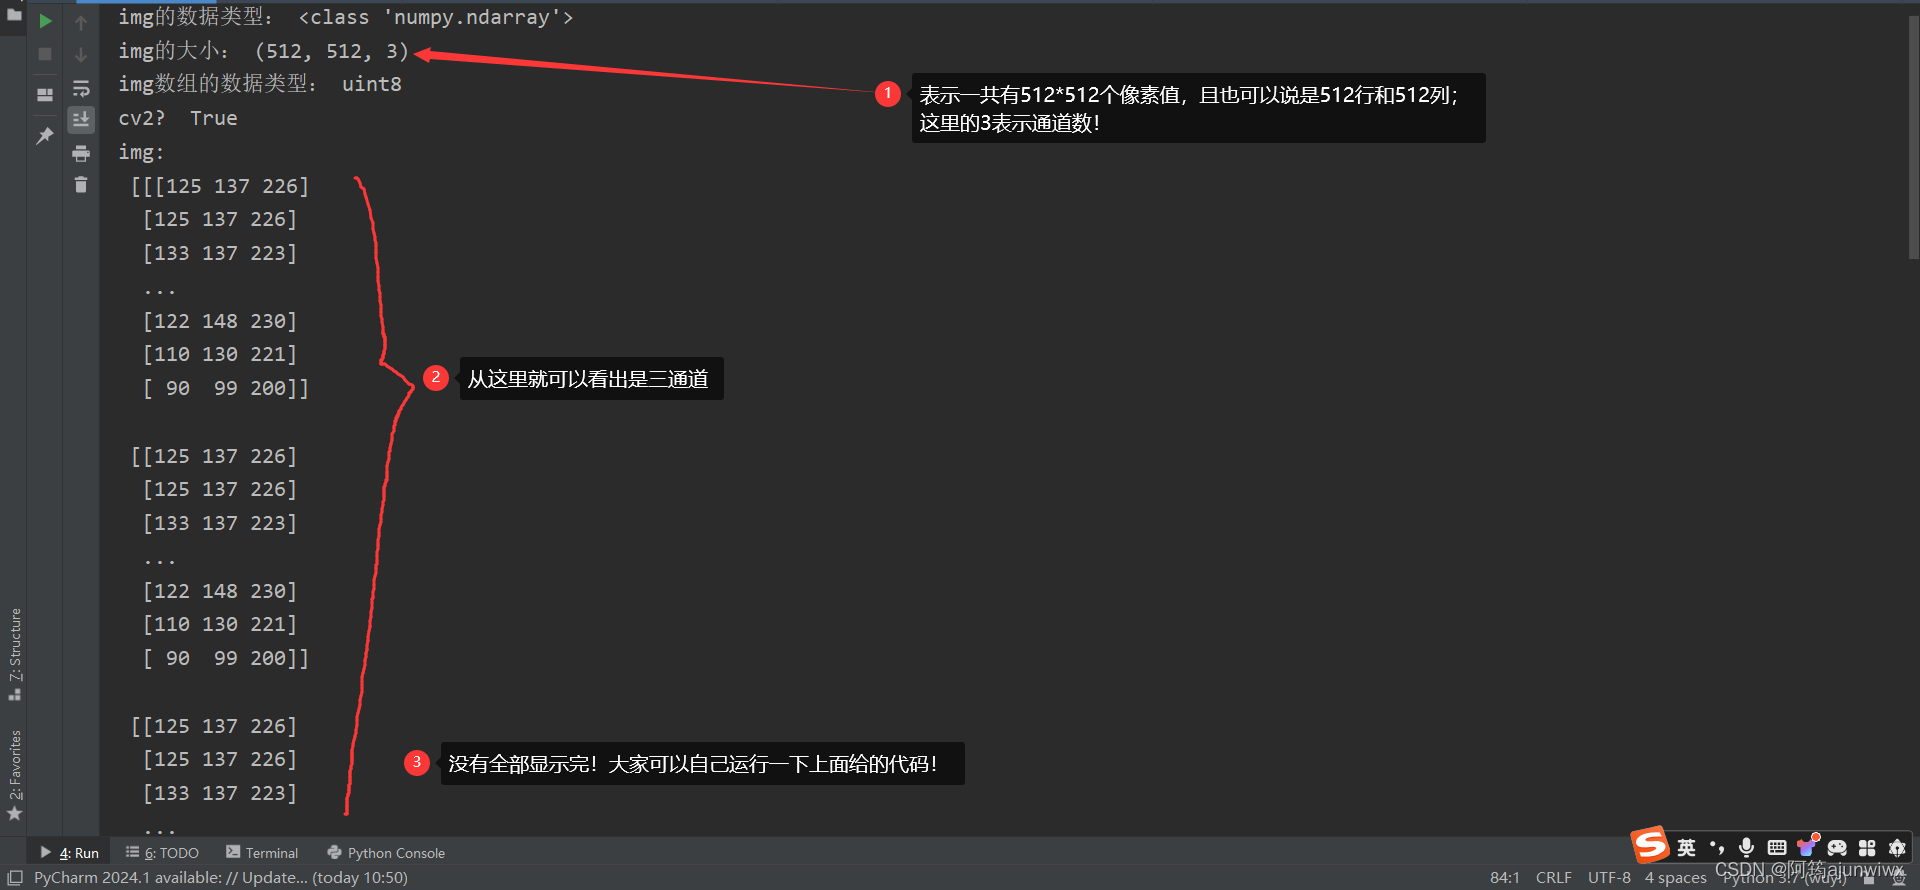
6.2 cv2.imshow打印出来的结果

6.3 print打印出来的结果分析

7. Numpy数组的数据类型范围


 2293
2293


 被折叠的 条评论
为什么被折叠?
被折叠的 条评论
为什么被折叠?
 到【灌水乐园】发言


