


 本文介绍了MyBatis中使用XML方式进行映射配置,包括连接设置、接口定义、XML文件编写、SQL执行、多表查询、参数绑定和数据库连接池等内容,以及注意事项如预编译SQL和企业规范。
MyBatis的开发有两种方式:注解和XML,上一期我们学习了使用注解的方式,这期我们学习XML的方式。
使用注解主要是用来完成一些简单的增删改查功能,如果需要实现复杂的SQL功能,建议使用XML来配置映射语句。
1. 使用步骤
1.1 配置连接字符串和MyBatis
在配置文件中填写以下配置信息:
spring:
application:
name: J20240402-MyBatis
#数据库连接配置
datasource:
url: jdbc:mysql://127.0.0.1:3306/mybatis_test?characterEncoding=utf8&useSSL=false
username: root
password: 123456
driver-class-name: com.mysql.cj.jdbc.Driver
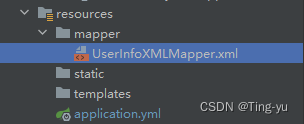
# 配置 mybatis xml 的⽂件路径,在 resources/mapper 创建所有表的 xml ⽂件
mybatis:
mapper-locations: classpath:mapper/**Mapper.xmlmapper-locations: classpath:mapper/**Mapper.xml
mapper-locations: 用于指定Mapper XML文件的位置。
classpath:mapper/**Mapper.xml:classpath表示resources文件夹,表示把xm文件夹放在resource文件夹下的mapper文件夹中,并且xml文件必须是Mapper.xml结尾,**表示通配符。
1.2 接口定义
和使用注解相同我们同样需要先定义接口和方法:
package com.example.mybatis.mapper;

import com.example.mybatis.model.UserInfo;
import org.apache.ibatis.annotations.Mapper;

@Mapper
public interface UserInfoXMLMapper {
    Integer insert(UserInfo userInfo);
}
1.3 接口实现
我们需要在1.1中指定的路径中创建一个符合要求的xml文件:
然后在xml文件中实现接口中的方法:
在此之前我们需要先在xml文件中填写固定的xml格式:
<?xml version="1.0" encoding="UTF-8"?> <!--xml版本和编码格式-->

<!--用于指定XML文档类型及其DTD(文档类型定义)的位置-->
<!DOCTYPE mapper PUBLIC "-//mybatis.org//DTD Mapper 3.0//EN"
        "http://mybatis.org/dtd/mybatis-3-mapper.dtd">

<!--指定了该Mapper XML文件所属的命名空间,即com.example.demo.mapper.UserInfoXMLMapper,我们定义的接口的路径-->
<mapper namespace="com.example.mybatis.mapper.UserInfoXMLMapper">

</mapper>
接下来我们只需在mapper标签中实现对应的方法:
<mapper namespace="com.example.mybatis.mapper.UserInfoXMLMapper">
    <insert id="insert">
        insert into userinfo (username, password, age, gender)
        values (#{username}, #{password}, #{age}, #{gender})
    </insert>
</mapper>
SQL语句的构造和使用注解的方式相同
单元测试:
@SpringBootTest
class UserInfoXMLMapperTest {
    @Autowired
    UserInfoXMLMapper userInfoXMLMapper;
    @Test
    void insert() {
        UserInfo userInfo = new UserInfo();
        userInfo.setUsername("liHua");
        userInfo.setPassword("liHua");
        userInfo.setAge(20);
        userInfo.setGender(2);
        System.out.println(userInfoXMLMapper.insert(userInfo));
    }
}
运行代码:

2. 基本操作
前面已经演示了xml如何使用,接下来的增删改查操作我们就简单看一下代码:
@Mapper
public interface UserInfoXMLMapper {
    Integer insert(UserInfo userInfo);

    Integer delete(Integer id);

    Integer update(UserInfo userInfo);

    List<UserInfo> select();
}
<mapper namespace="com.example.mybatis.mapper.UserInfoXMLMapper">
<insert id="insert">
insert into userinfo (username, password, age, gender)
values (#{username}, #{password}, #{age}, #{gender})
</insert>
<delete id="delete">
delete from userinfo where id = #{id}
</delete>
<update id="update">
update userinfo set username = #{username}, password = #{password}, age = #{age}, gender = #{gender} where id = #{id}
</update>
<select id="select" resultType="com.example.mybatis.model.UserInfo">
select * from userinfo
</select>
</mapper>由于select的返回类型不唯一,所以需要指定返回类型
@SpringBootTest
class UserInfoXMLMapperTest {
    @Autowired
    UserInfoXMLMapper userInfoXMLMapper;
    @Test
    void insert() {
        UserInfo userInfo = new UserInfo();
        userInfo.setUsername("liHua");
        userInfo.setPassword("liHua");
        userInfo.setAge(20);
        userInfo.setGender(2);
        System.out.println(userInfoXMLMapper.insert(userInfo));
    }

    @Test
    void delete() {
        System.out.println(userInfoXMLMapper.delete(10));
    }

    @Test
    void update() {
        UserInfo userInfo = new UserInfo();
        userInfo.setId(11);
        userInfo.setUsername("Hua");
        userInfo.setPassword("Hua");
        userInfo.setAge(25);
        userInfo.setGender(1);
        System.out.println(userInfoXMLMapper.update(userInfo));
    }

    @Test
    void select() {
        System.out.println(userInfoXMLMapper.select());
    }
}
注意:使用xml的方式查询时依然存在字段名不相同无法赋值的情况,解决方法仍然有三种:
1. 起别名(和使用注解相同)
2.结果映射
3.驼峰自动转换(和使用注解相同)
结果映射:
<mapper namespace="com.example.mybatis.mapper.UserInfoXMLMapper">
    <resultMap id="resultMap" type="com.example.mybatis.model.UserInfo">
        <id column="id" property="id"></id>
        <result column="delete_flag" property="deleteFlag"></result>
        <result column="create_time" property="createTime"></result>
        <result column="update_time" property="updateTime"></result>
    </resultMap>
    <select id="select" resultMap="resultMap">
        select * from userinfo
    </select>
</mapper>
主键映射一般使用 id ,其他使用result
3. 其他查询操作
3.1 多表查询
数据准备:
我们已经有了一张工作表,我们再来建一张文章表:
-- 创建⽂章表
DROP TABLE IF EXISTS articleinfo;
CREATE TABLE articleinfo (
id INT PRIMARY KEY auto_increment,
title VARCHAR ( 100 ) NOT NULL,
content TEXT NOT NULL,
uid INT NOT NULL,
delete_flag TINYINT ( 4 ) DEFAULT 0 COMMENT '0-正常, 1-删除',
create_time DATETIME DEFAULT now(),
update_time DATETIME DEFAULT now()
) DEFAULT charset 'utf8mb4';
-- 插⼊测试数据
INSERT INTO articleinfo ( title, content, uid ) VALUES ( 'Java', 'Java正⽂', 1
);
准备对应的类:
package com.example.mybatis.model;

import lombok.Data;
import java.util.Date;
    @Data
    public class ArticleInfo {
    private Integer id;
    private String title;
    private String content;
    private Integer uid;
    private Integer deleteFlag;
    private Date createTime;
    private Date updateTime;
}
需求:查询文章信息和对应的作者信息:
创建接口:
package com.example.mybatis.mapper;

import com.example.mybatis.model.ArticleInfo;
import org.apache.ibatis.annotations.Mapper;

import java.util.List;

@Mapper
public interface ArticleInfoMapper {
    List<ArticleInfo> getArticleAndUser(Integer id);
}
我们发现,如果我们使用 ArticleInfo 接收结果的话是行不通的,因为查询结果还包含了UserInfo的数据,所以我们可以创建一个新类来接收,或者在ArticleInfo中添加UserInfo中的属性:
package com.example.mybatis.model;

import lombok.Data;
import java.util.Date;
@Data
public class ArticleInfo {
    private Integer id;
    private String title;
    private String content;
    private Integer uid;
    private Integer deleteFlag;
    private Date createTime;
    private Date updateTime;

    //UserInfo
    private String username;
    private Integer age;
    private Integer gender;
}
xml:
<?xml version="1.0" encoding="UTF-8"?>
<!DOCTYPE mapper PUBLIC "-//mybatis.org//DTD Mapper 3.0//EN"
        "http://mybatis.org/dtd/mybatis-3-mapper.dtd">
<mapper namespace="com.example.mybatis.mapper.ArticleInfoMapper">
    <select id="getArticleAndUser" resultType="com.example.mybatis.model.ArticleInfo">
        select a.* b.username, b.age, b.gender
        from articleinfo a left join userinfo b on a.uid = b.id where a.id = #{id};
    </select>
</mapper>
单元测试:

3.2 #{} 和 ${}
MyBatis 参数赋值有两种方式,前面我们使用了 #{},接下来我们介绍 ${},以及它们的区别
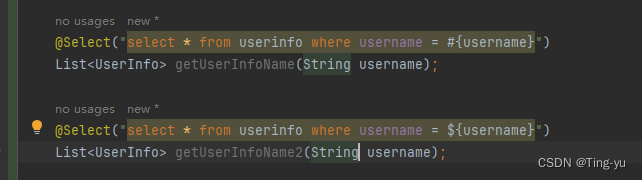
3.2.1 ${}使用
${}的使用方式和 #{}相同,都是用来框选参数。

我们分别运行这两个方法:


我们对比发现: 前者的SQL语句是使用的 ?进行占位,这种SQL我们称为预编译SQL,后者则是直接把 参数拼接上去,我们称为即时SQL。如果我们把参数类型换为 String类型会出现一个问题:

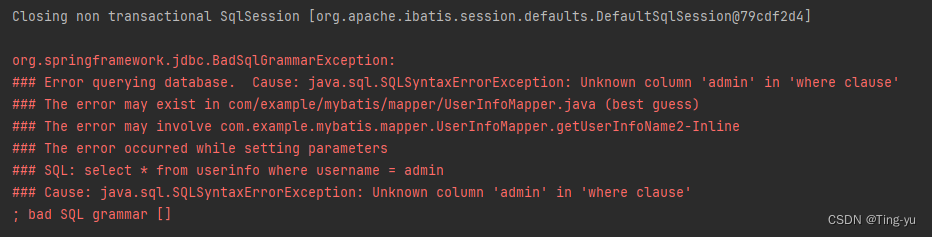
我们发现使用 #{}能运行成功,使用${}发生了报错信息,我们观察报错语句中的SQL,发现 SQL中没有给admin加引号,所以导致了错误,现在我们在${}外面加上引号再次运行:

 正常运行。
正常运行。
3.1.2 #{} 和 ${} 的区别
#{}和${}的区别就是预编译SQL和即时SQL的区别
1.性能
当服务器接收到一条SQL之后会发生以下流程:
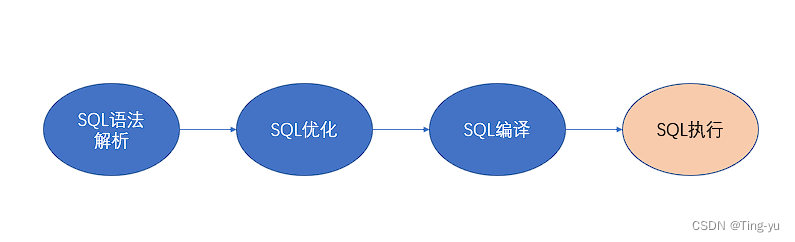
大多数情况下,一条SQL语句会被反复执行,只是每次的参数有个别不同,如果每次都要完整的经历上述步骤,那么会大大降低效率,预编译SQL编译一次之后会将编译后的SQL语句缓存起来,后面执行时再次执行到这条语句时不会再次编译,直接把参数替换后直接执行。即时SQL则每次都是一条全新的SQL会完整经历每个步骤。
2. 安全
使用${}有被SQL注入攻击的风险:
用刚才的代码举例:由于${}是拼接的方式来构造SQL,如果输入时输入:' or 1='1,这时我们的SQL语句就变成了:select * from userinfo where username = '' or 1='1' 那么此时会把我们所有的内容都查出来,因为 1 一定等于 1,所以我们能使用 #{}的场景都尽量使用 #{}
3.3 ${} 使用场景
有时候我们可能需要输入 SQL语句的非参数部分来作为参数,此时就不需要加引号也就要用到 ${},例如排序场景:

此时我们传入 desc 或者 asc 来决定升序或降序是不能加引号的
3.4 like查询

分别运行两个方法:

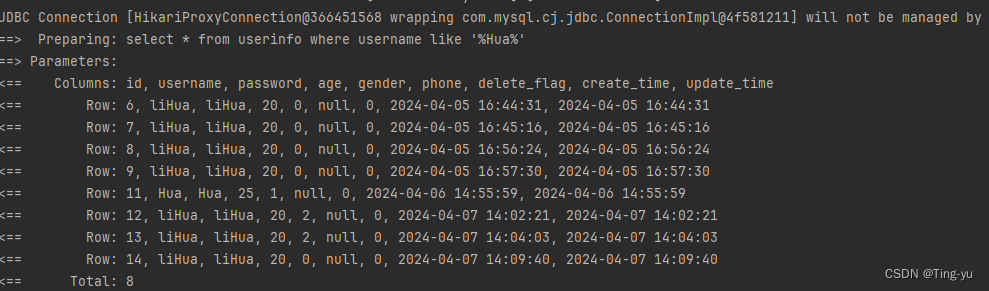
这里的参数是不能加引号的所以#{}运行失败,不过我们可以使用SQL中的字符串拼接函数:

4. 数据库连接池
SprintBoot使用了数据库连接池技术避免了频繁的创建连接,销毁连接。
数据库连接池负责分配,管理和释放数据库连接,它允许应用程序重复使用一个现有的数据库连接(类似于线程池),程序启动时,会在数据库连接池中创建一定数量的Connection对象,当客户请求数据库连接时,会从数据库连接池中获取Connection对象,然后执行SQL,SQL语句执行完,再把Connection归还给连接池。
常见的数据库连接池有:
- C3P0
- DBCP
- Druid
- Hikari
目前比较流行的是:Hikari,Druid,SpringBoot默认使用的是Hikari
我们如果想更换数据库连接池只需引入相关依赖即可。
5. MySQL 开发企业规范
- 表名,字段名使用小写字母或数字,单词之间以下划线分割,尽量避免数字开头或者两个下划线中间只出现数字,数据库字段名的修改代价很大,所以字段名需要慎重考虑。
- 表必备三个字段:id(主键),create_time,update_time
- 在表查询中,避免使用 * ,标明哪些字段需要查询


 387
387


 被折叠的 条评论
为什么被折叠?
被折叠的 条评论
为什么被折叠?
 到【灌水乐园】发言


