


本文演示如何用HarmonyOS的ArkUI来开发一个购物应用程序。
首选是打开DevEco Studio 3,可以看到如下界面。
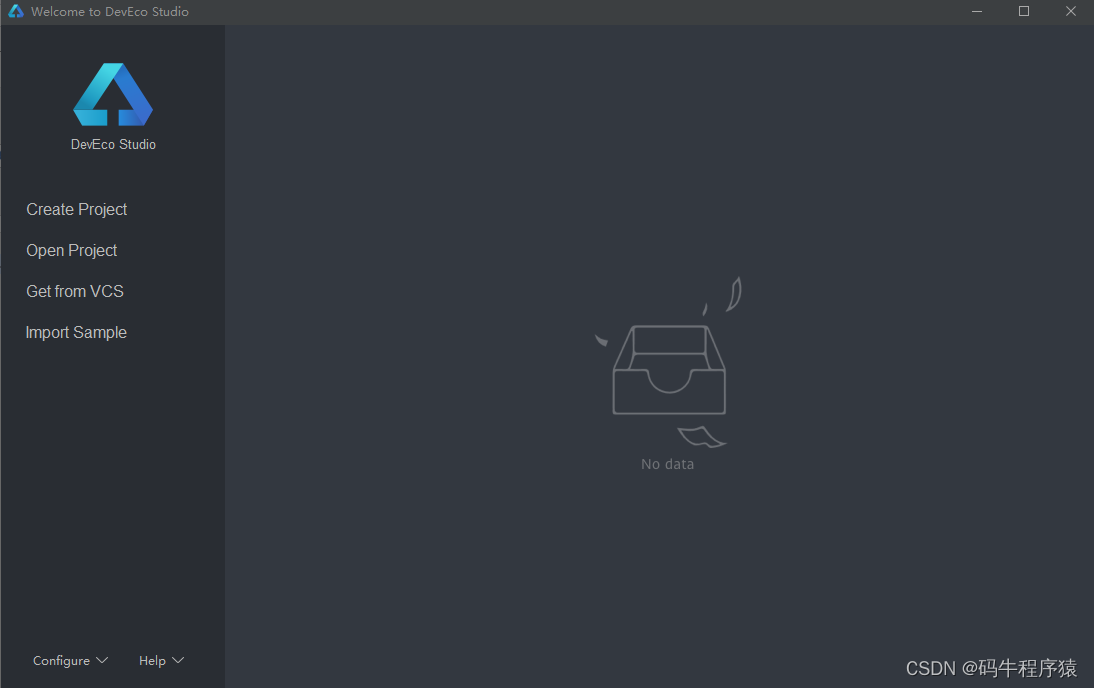
点击“Create Project”来创建ArkUI程序“ArkUIShopping”。
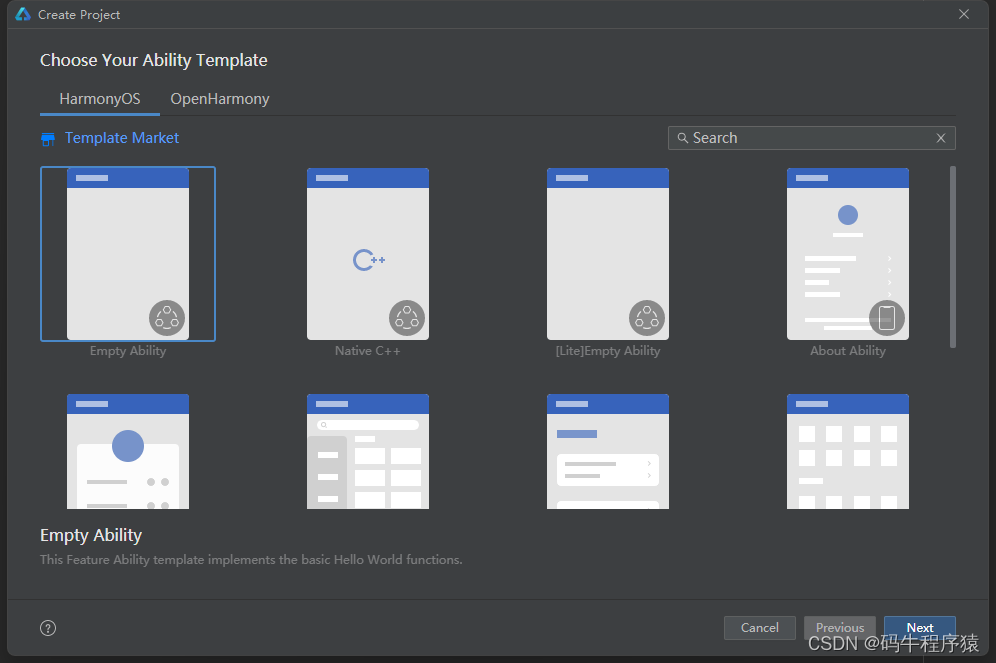
选择模板
选择空模板Empty Ability,点击“Next”执行下一步。
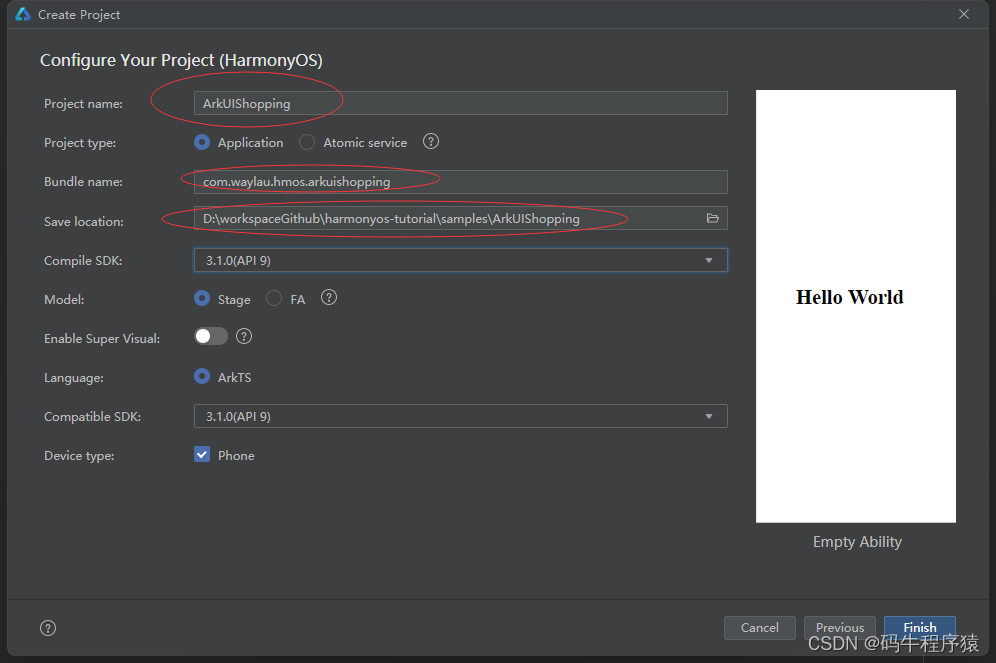
配置项目
配置项目信息,重要是以下圈中部分。其他配置按照默认配置即可。点击“Finish”执行下一步。
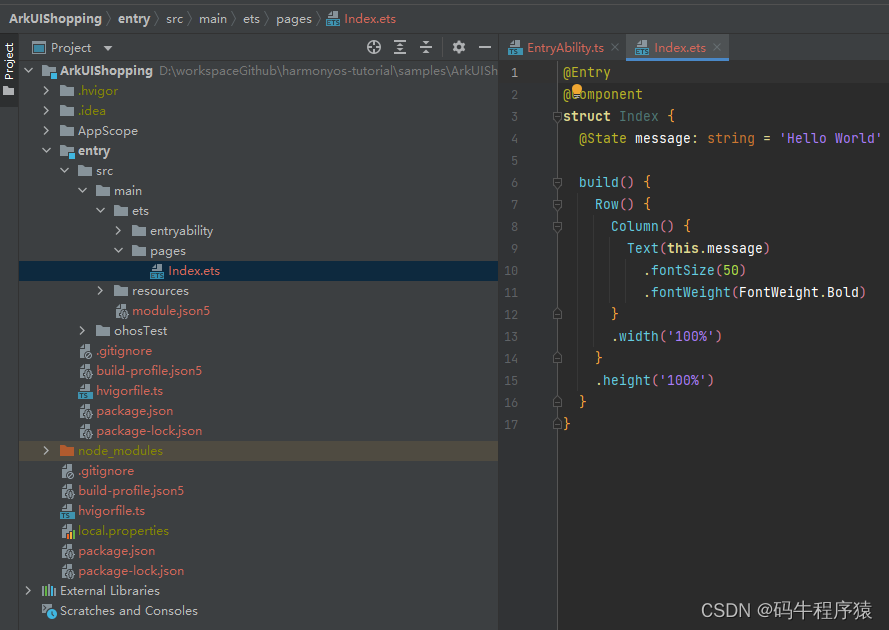
程序初始化完成之后,就能在该程序基础上进行代码开发、运行。
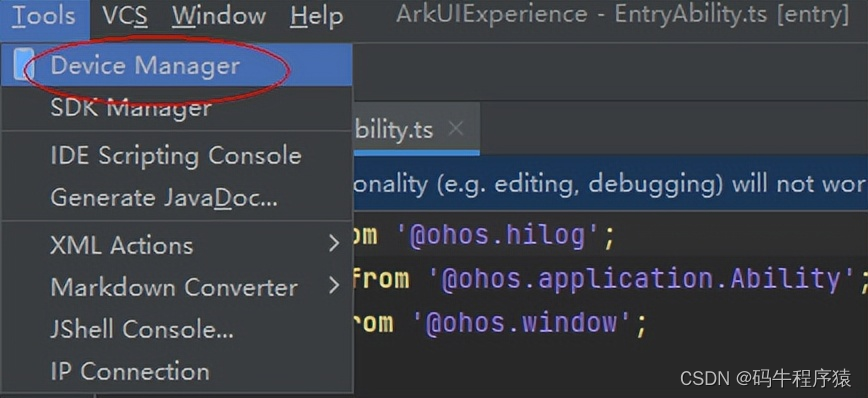
运行HarmonyOS应用,打开Device Manager
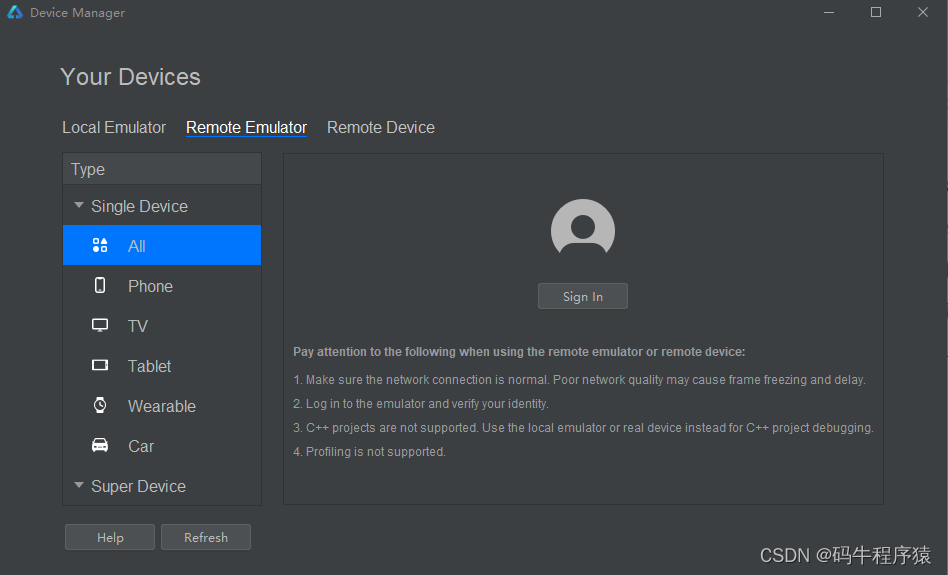
登入华为账号
点击“Sign In”登入个人注册的华为账号。如果没有,则参考本文最后的链接进行注册。

启动远程模拟器
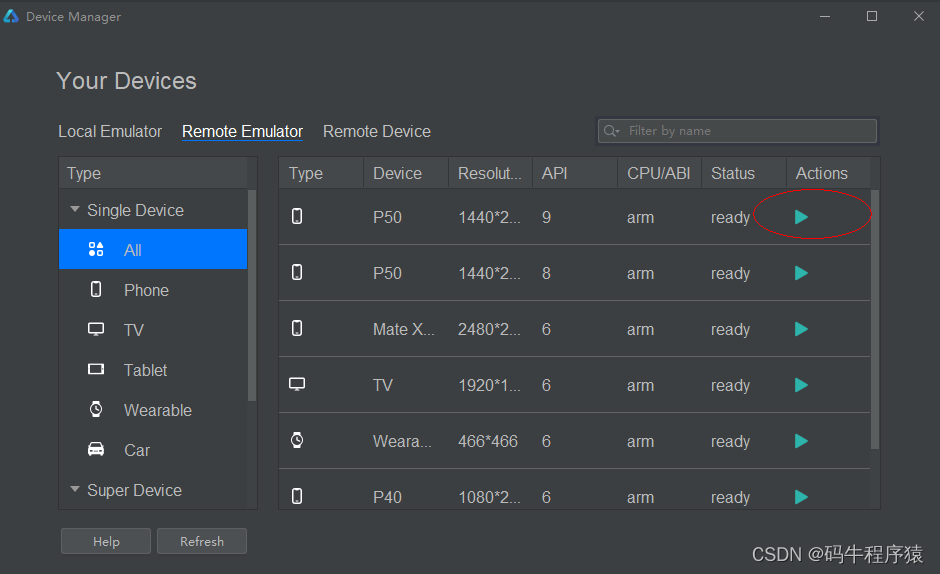
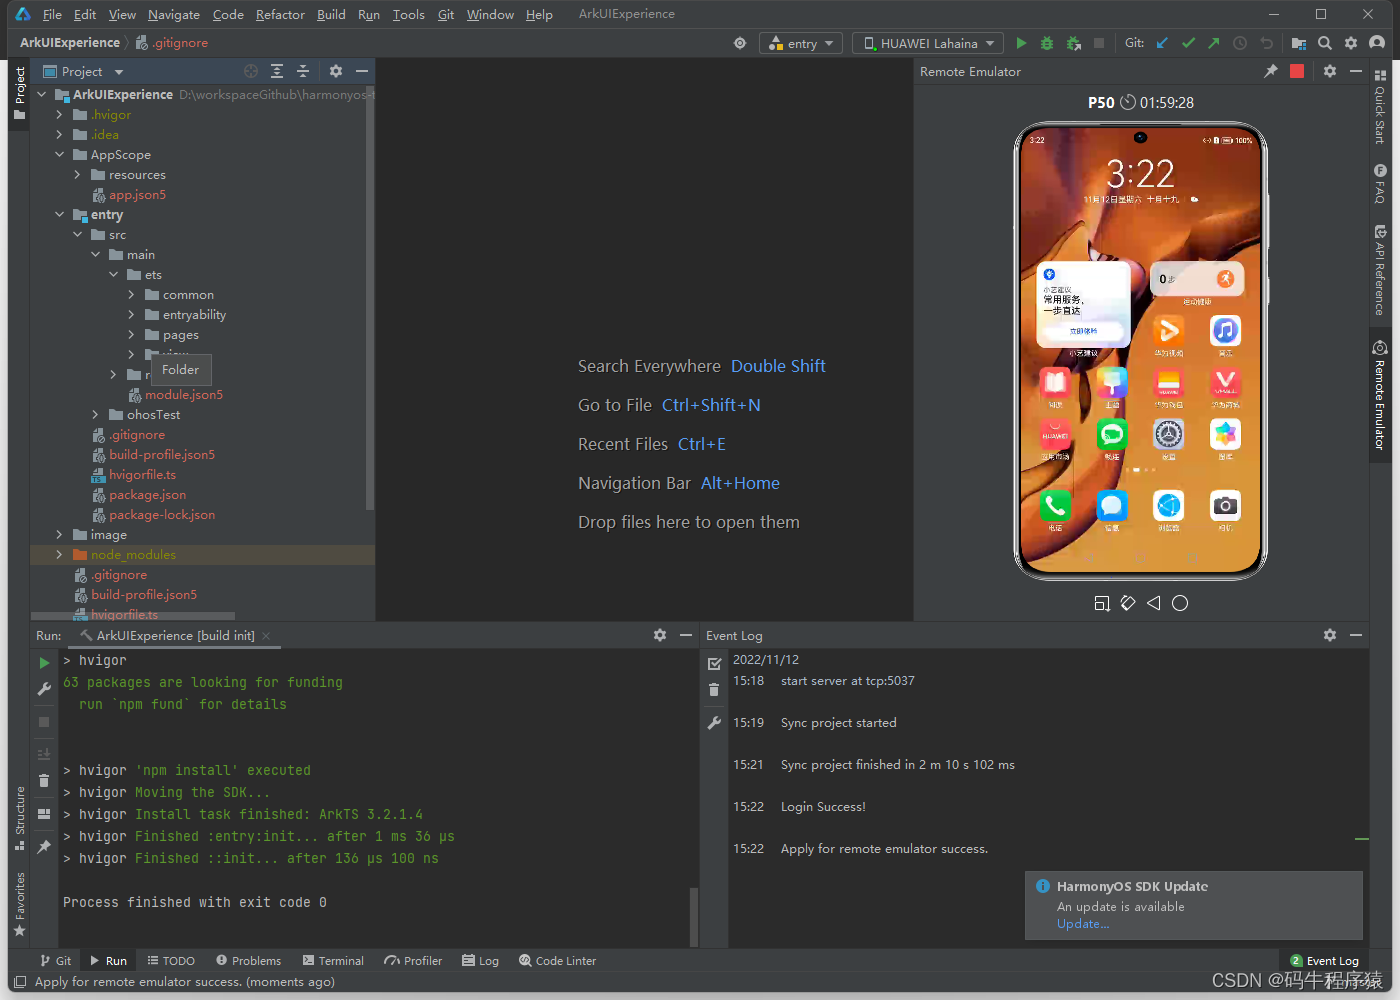
运行应用,点击下命的三角形按钮以启动应用

应用运行效果图如下。

完善代码
在空模板的基础上,我们初步添加业务代码,来最终实现购物应用。
实现商品列表页签
主界面商品列表页签主要由下面三个部分组成:
- 顶部的Tabs组件。
- 中间TabContent组件内包含List组件。其中List组件的item是一个水平布局,由一个垂直布局和一个Image组件组成;item中的垂直布局由3个Text组件组成。
- 底部的页签导航。
下面来一起创建第一个页面。
在pages目录下面新建一个Page.。
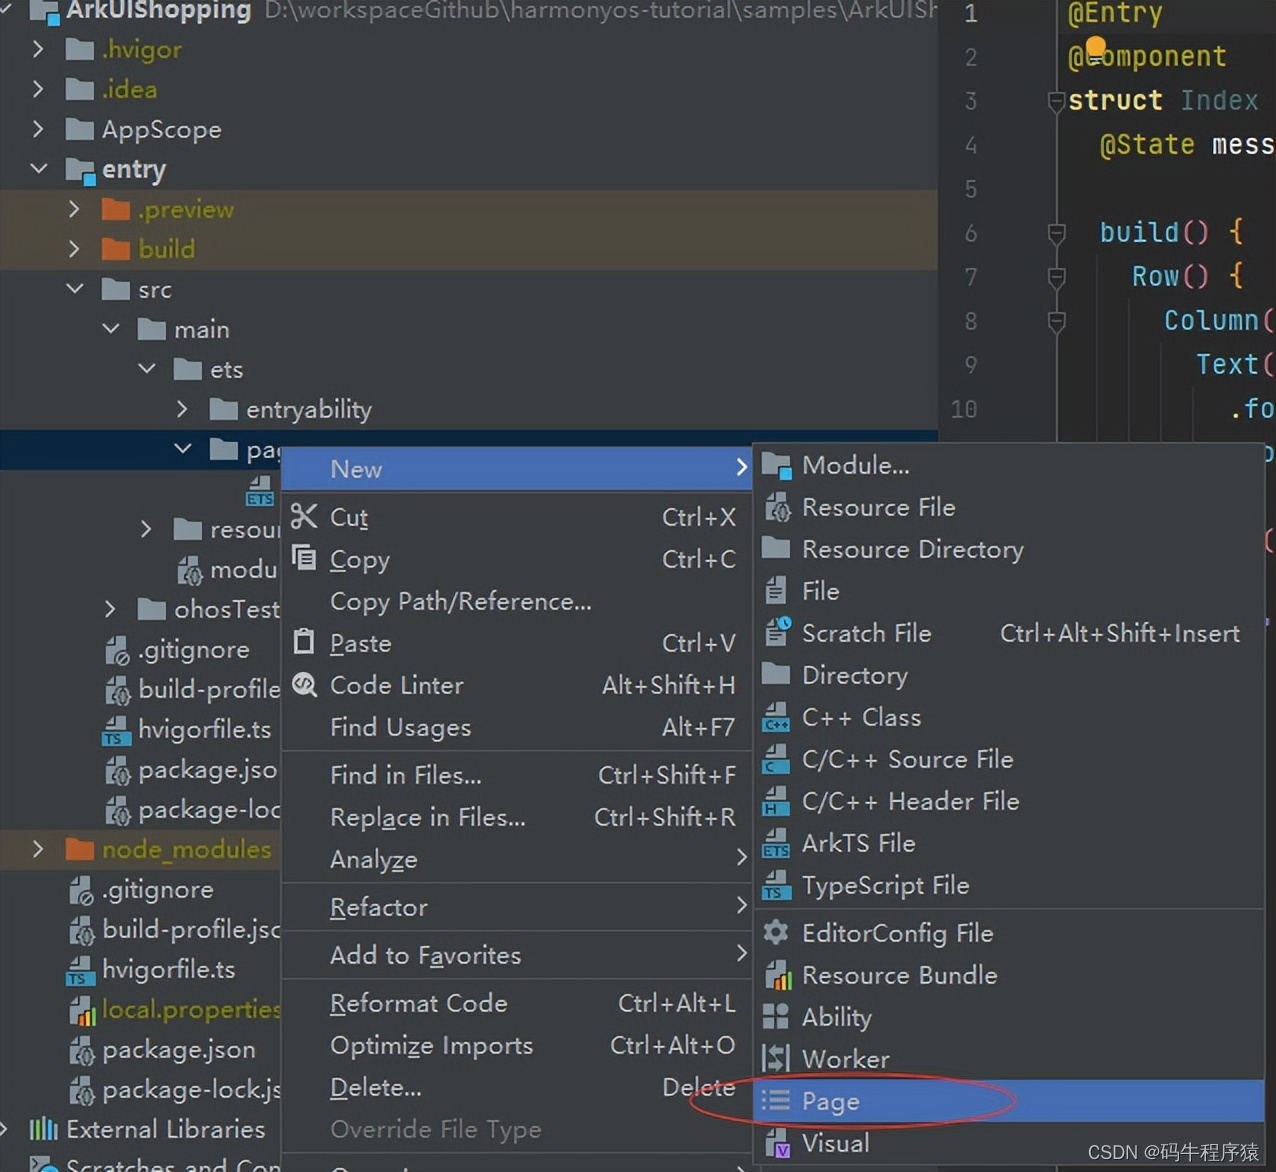
该Page命名为HomePage。
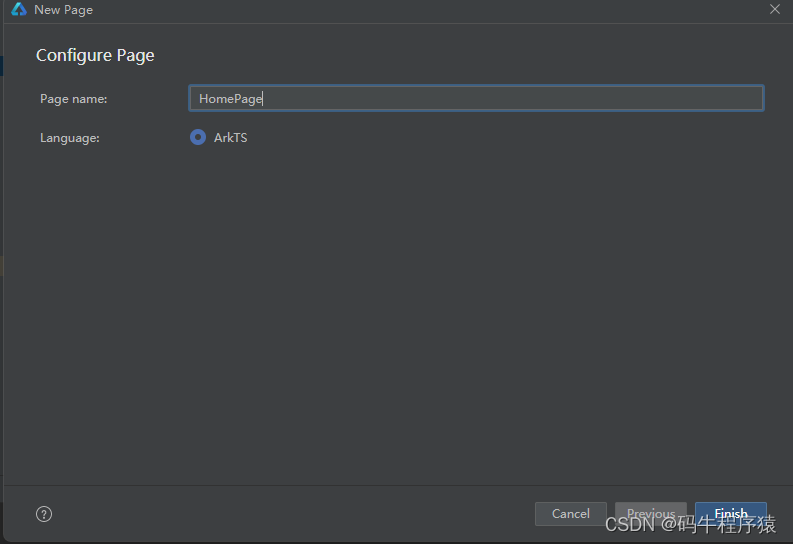
创建完成之后,会在pages目录下面生产一个HomePage.ets文件,HomePage.ets文件默认的代码如下。
@Entry
@Component
struct HomePage {
  @State message: string = 'Hello World'

  build() {
    Row() {
      Column() {
        Text(this.message)
          .fontSize(50)
          .fontWeight(FontWeight.Bold)
      }
      .width('100%')
    }
    .height('100%')
  }
}
新建与pages文件夹同级的model文件夹,并在model目录下新建ArsData.ets、GoodsData.ets、Menu.ets和GoodsDataModels.ets文件,其中ArsData.ets、GoodsData.ets、Menu.ets是数据实体类,GoodsDataModels.ets是存放这三种实体数据集合,并定义了获取各种数据集合的方法。数据实体包含实体的属性和构造方法,可通过new ArsData(string,string) 来获取ArsData对象。
ArsData.ets内容如下:
let NextId = 0;
export class ArsData {
  id: string;
  title: string;
  content: string;
  constructor(title: string, content: string) {
    this.id = `${NextId++}`;
    this.title = title;
    this.content = content;
  }
}
GoodsData.ets内容如下:
let NextId = 0;
export class GoodsData {
  id: string;
  title: string;
  content: string;
  price: number;
  imgSrc: Resource;
  constructor(title: string, content: string, price: number, imgSrc: Resource) {
    this.id = `${NextId++}`;
    this.title = title;
    this.content = content;
    this.price = price;
    this.imgSrc = imgSrc;
  }
}
Menu.ets内容如下:
let NextId = 0;
export class Menu {
  id: string;
  title: string;
  num: number;
  constructor(title: string, num: number) {
    this.id = `${NextId++}`;
    this.title = title;
    this.num = num;
  }
}
export class ImageItem {
  id: string;
  title: string;
  imageSrc: Resource;
  constructor(title: string, imageSrc: Resource) {
    this.id = `${NextId++}`;
    this.title = title;
    this.imageSrc = imageSrc;
  }
}
GoodsDataModels.ets内容如下:
import {  GoodsData} from './GoodsData'

import {Menu, ImageItem} from './Menu'
import {ArsData} from './ArsData'

export function initializeOnStartup(): Array<GoodsData> {
  let GoodsDataArray: Array<GoodsData> = []
  GoodsComposition.forEach(item => {
    console.log(item.title);
    GoodsDataArray.push(new GoodsData(item.title, item.content, item.price, item.imgSrc));
  })
  return GoodsDataArray;
}

export function getIconPath(): Array<string> {
  let IconPath: Array<string> = ['nav/icon-buy.png','nav/icon-shopping-cart.png','nav/icon-my.png']

  return IconPath;
}

export function getIconPathSelect(): Array<string> {
  let IconPathSelect: Array<string> = ['nav/icon-home.png','nav/icon-shopping-cart-select.png','nav/icon-my-select.png']

  return IconPathSelect;
}

export function getDetailImages(): Array<string> {
  let detailImages: Array<string> = ['computer/computer1.png','computer/computer2.png','computer/computer3.png','computer/computer4.png','computer/computer5.png','computer/computer6.png']

  return detailImages;
}


export function getMenu(): Array<Menu> {
  let MenuArray: Array<Menu> = []
  MyMenu.forEach(item => {
    MenuArray.push(new Menu(item.title,item.num));
  })
  return MenuArray;
}

export function getTrans(): Array<ImageItem> {
  let ImageItemArray: Array<ImageItem> = []
  MyTrans.forEach(item => {
    ImageItemArray.push(new ImageItem(item.title,item.imageSrc));
  })
  return ImageItemArray;
}

export function getMore(): Array<ImageItem> {
  let ImageItemArray: Array<ImageItem> = []
  MyMore.forEach(item => {
    ImageItemArray.push(new ImageItem(item.title,item.imageSrc));
  })
  return ImageItemArray;
}

export function getArs(): Array<ArsData> {
  let ArsItemArray: Array<ArsData> = []
  ArsList.forEach(item => {
    ArsItemArray.push(new ArsData(item.title,item.content));
  })
  return ArsItemArray;
}

const GoodsComposition: any[] = [
  {
    "title": 'HUAWEI nova 8 Pro ',
    "content": 'Goes on sale: 10:08',
    "price": '3999',
    "imgSrc": $rawfile('picture/HW (1).png')
  },
  {
    "title": 'HUAWEI Mate 30E Pro 5G',
    "content": '3 interest-free payments ',
    "price": '5299',
    "imgSrc": $rawfile('picture/HW (2).png')
  },
  {
    "title": 'HUAWEI MatePad Pro',
    "content": 'Flagship ',
    "price": '3799',
    "imgSrc": $rawfile('picture/HW (3).png')
  },
  {
    "title": 'HUAWEI Nova 8 Pro',
    "content": 'New arrival ',
    "price": '3999',
    "imgSrc": $rawfile('picture/HW (4).png')
  },
  {
    "title": 'HUAWEI WATCH FIT',
    "content": 'Versatile',
    "price": '769',
    "imgSrc": $rawfile('picture/HW (5).png')
  },
  {
    "title": 'HUAWEI nova 8 Pro ',
    "content": 'Goes on sale: 10:08',
    "price": '3999',
    "imgSrc": $rawfile('picture/HW (6).png')
  },
  {
    "title": 'HUAWEI Mate 30E Pro 5G',
    "content": '3 interest-free payments ',
    "price": '5299',
    "imgSrc": $rawfile('picture/HW (7).png')
  },
  {
    "title": 'HUAWEI MatePad Pro',
    "content": 'Flagship ',
    "price": '3799',
    "imgSrc": $rawfile('picture/HW (8).png')
  },
  {
    "title": 'HUAWEI Nova 8 Pro',
    "content": 'New arrival ',
    "price": '3999',
    "imgSrc": $rawfile('picture/HW (9).png')
  },
  {
    "title": 'HUAWEI WATCH FIT',
    "content": 'Versatile',
    "price": '769',
    "imgSrc": $rawfile('picture/HW (10).png')
  },
]

const MyMenu: any[] = [
  {
    'title': 'Favorites',
    'num': '10'
  },
  {
    'title': 'Searched',
    'num': '1000'
  },
  {
    'title': 'Following',
    'num': '100'
  },
  {
    'title': 'Followers',
    'num': '10000'
  }
]


const MyTrans: any[] = [
  {
    'title': 'Post: 520',
    'imageSrc': $rawfile('nav/icon-menu-release.png')
  },
  {
    'title': 'Sold: 520',
    'imageSrc': $rawfile('nav/icon-menu-sell.png')
  },
  {
    'title': 'Bought: 10',
    'imageSrc': $rawfile('nav/icon-menu-buy.png')
  }
]

const MyMore: any[] = [
  {
    'title': 'Guide',
    'imageSrc': $rawfile('nav/icon-menu-buy.png')
  },
  {
    'title': 'Create',
    'imageSrc': $rawfile('nav/icon-menu-buy.png')
  },
  {
    'title': 'Poster',
    'imageSrc': $rawfile('nav/icon-menu-buy.png')
  },
  {
    'title': 'Games',
    'imageSrc': $rawfile('nav/icon-menu-buy.png')
  },
  {
    'title': 'Jobber',
    'imageSrc': $rawfile('nav/icon-menu-buy.png')
  },
  {
    'title': 'Myself',
    'imageSrc': $rawfile('nav/icon-menu-buy.png')
  },
  {
    'title': 'About',
    'imageSrc': $rawfile('nav/icon-menu-buy.png')
  },
  {
    'title': 'Rental',
    'imageSrc': $rawfile('nav/icon-menu-buy.png')
  },
  {
    'title': 'Author',
    'imageSrc': $rawfile('nav/icon-menu-buy.png')
  },

]

const ArsList: any[] =[
  {
    'title': 'Display Size',
    'content': '13.9 inches',
  },
  {
    'title': 'Memory',
    'content': '16 GB',
  },
  {
    'title': 'Marketing Name',
    'content': 'HUAWEI MateBook X Pro',
  },
  {
    'title': 'Color Gamut',
    'content': '100% sRGB color gamut (Typical)',
  },
  {
    'title': 'Battery',
    'content': '56 Wh (rated capacity)',
  },
  {
    'title': 'Storage',
    'content': '512 GB',
  },
  {
    'title': 'Resolution',
    'content': '3000x2000',
  },
  {
    'title': 'Processor',
    'content': '11th Gen Intel® Core™ i7-1165G7 Processor',
  },
  {
    'title': 'CPU Cores',
    'content': '4',
  },
  {
    'title': 'Launch Time',
    'content': 'January 2021',
  }
]
在HomePage.ets文件中创建商品列表页签相关的组件,添加GoodsHome代码如下:
@Component
struct GoodsHome {
  private goodsItems: GoodsData[]

  build() {
    Column() {
      Tabs() {
        TabContent() {
          GoodsList({ goodsItems: this.goodsItems });
        }
        .tabBar("Top Sellers")
        .backgroundColor(Color.White)
        TabContent() {
          GoodsList({ goodsItems: this.goodsItems });
        }
        .tabBar("Recommended")
        .backgroundColor(Color.White)
        TabContent() {
          GoodsList({ goodsItems: this.goodsItems });
        }
        .tabBar("Lifestyle")
        .backgroundColor(Color.White)
        TabContent() {
          GoodsList({ goodsItems: this.goodsItems });
        }
        .tabBar("Deals")
        .backgroundColor(Color.White)
      }
      .barWidth(500)
      .barHeight(25)
      .scrollable(true)
      .barMode(BarMode.Scrollable)
      .backgroundColor('#007DFF')
      .height(700)

    }
    .alignItems(HorizontalAlign.Start)
    .width('100%')
  }
}
在GoodsHome中使用Tabs组件,在Tabs组件中设置4个TabContent,给每个TabContent设置tabBar属性,并设置TabContent容器中的内容GoodsList组件,GoodsList组件代码如下:
@Component
struct GoodsList {
  private goodsItems: GoodsData[]
  build() {
    Column() {
      List() {
        ForEach(this.goodsItems, item => {
          ListItem() {
            GoodsListItem({ goodsItem: item })
          }
        }, item => item.id.toString())
      }
      .height('100%')
      .width('100%')
      .align(Alignment.Top)
      .margin({top: 5})
    }
  }
}
在GoodsList组件中遍历商品数据集合,ListItem组件中设置组件内容,并使用Navigator组件给每个Item设置顶级跳转路由,GoodsListItem组件代码如下:
@Component
struct GoodsListItem {
  private goodsItem: GoodsData
  build() {
    Navigator({ target: 'pages/ShoppingDetail' }) {
      Row() {
        Column(){
          Text(this.goodsItem.title)
            .fontSize(14)
          Text(this.goodsItem.content )
            .fontSize(10)
          Text('¥' + this.goodsItem.price)
            .fontSize(14)
            .fontColor(Color.Red)
        }
        .height(100)
        .width('50%')
        .margin({left: 20})
        .alignItems(HorizontalAlign.Start)
        Image(this.goodsItem.imgSrc)
          .objectFit(ImageFit.ScaleDown)
          .height(100)
          .width('40%')
          .renderMode(ImageRenderMode.Original)
          .margin({right: 10,left:10})
      }
      .backgroundColor(Color.White)
    }
    .params({ goodsData: this.goodsItem })
    .margin({ right: 5})
  }
在HomePage.ets中创建文件入口组件(Index)以及底部页签导航组件(HomeBottom),导入需要使用到的数据实体类以及需要使用的方法和组件,每个page文件都必须包含一个入口组件,使用@Entry修饰,HomePage文件中的入口组件(Index)代码如下:
import {GoodsData} from '../model/GoodsData'
import {initializeOnStartup,getIconPath,getIconPathSelect} from '../model/GoodsDataModels'
import {ShoppingCart} from './ShoppingCart'
import {MyInfo} from './MyPage'
@Entry
@Component
struct Index {
  @Provide currentPage: number = 1
  private goodsItems: GoodsData[] = initializeOnStartup()
  build() {
    Column() {
      Scroll() {
        Column() {
          if (this.currentPage == 1) {
            GoodsHome({ goodsItems: this.goodsItems })
          } else if (this.currentPage == 2) {
            //购物车列表
            ShoppingCart()
          } else {
            //我的
            MyInfo()
          }
        }
        .height(700)
      }
      .flexGrow(1)
      HomeBottom()
    }
    .backgroundColor("white")
  }
}
从入口组件的代码中可以看出,我们定义了一个全局变量currentPage ,并且使用@provide修饰,在其子组件(HomeBottom)中使用@Consume修饰。当子组件currentPage发生变化的时候,父组件currentPage也会发生变化,会重新加载页面,显示不同的页签。在入口组件中,通过initializeOnStartup获取商品列表数据(goodsItems)并传入GoodsHome组件中,HomeBottom组件代码如下
@Component
struct HomeBottom {
  @Consume currentPage: number
  private iconPathTmp: string[] =  getIconPath()
  private iconPathSelectsTmp: string[] =  getIconPathSelect()
  @State iconPath: string[] =  getIconPath()
  build() {
    Row(){
      List() {
        ForEach(this.iconPath, item => {
          ListItem() {
            Image($rawfile(item))
              .objectFit(ImageFit.Cover)
              .height(30)
              .width(30)
              .renderMode(ImageRenderMode.Original)
              .onClick(()=>{
                if(item==this.iconPath[0]){
                  this.iconPath[0]=this.iconPathTmp[0]
                  this.iconPath[1]=this.iconPathTmp[1]
                  this.iconPath[2]=this.iconPathTmp[2]
                  this.currentPage=1
                }
                if(item==this.iconPath[1]){
                  this.iconPath[0]=this.iconPathSelectsTmp[0]
                  this.iconPath[1]=this.iconPathSelectsTmp[1]
                  this.iconPath[2]=this.iconPathTmp[2]
                  this.currentPage=2
                }
                if(item==this.iconPath[2]){
                  this.iconPath[0]=this.iconPathSelectsTmp[0]
                  this.iconPath[1]=this.iconPathTmp[1]
                  this.iconPath[2]=this.iconPathSelectsTmp[2]
                  this.currentPage=3
                }
              })
          }
          .width(120)
          .height(40)
        }, item => item)
      }
      .margin({left:10})
      .align(Alignment.BottomStart)
      .listDirection(Axis.Horizontal)
    }
    .alignItems(VerticalAlign.Bottom)
    .height(30)
    .margin({top:10 ,bottom:10})
  }
}
以上内容是介绍了如何用ArkUI来开发一个购物应用程序(上半部分),关注我学习更多鸿蒙开发相关知识,接下来我将更新(ArkUI开发购物应用程序)下半部分
为了帮助大家更深入有效的学习到鸿蒙开发知识点,小编特意给大家准备了几套最新版的HarmonyOS NEXT学习资源
获取完整版高清学习路线,请点击→《HarmonyOS教学视频》
HarmonyOS教学视频

鸿蒙语法ArkTS、TypeScript、ArkUI等…视频教程

鸿蒙生态应用开发白皮书V2.0PDF:
获取白皮书:请点击→《鸿蒙生态应用开发白皮书V2.0PDF》
鸿蒙 (Harmony OS)开发学习手册
一、入门必看
- 应用开发导读(ArkTS)
- .……

二、HarmonyOS 概念
- 系统定义
- 技术架构
- 技术特性
- 系统安全
- …
三、如何快速入门?《鸿蒙基础入门学习指南》
- 基本概念
- 构建第一个ArkTS应用
- .……

四、开发基础知识
- 应用基础知识
- 配置文件
- 应用数据管理
- 应用安全管理
- 应用隐私保护
- 三方应用调用管控机制
- 资源分类与访问
- 学习ArkTS语言
- .……
五、基于ArkTS 开发
- Ability开发
- UI开发
- 公共事件与通知
- 窗口管理
- 媒体
- 安全
- 7.网络与链接
- 电话服务
- 数据管理
- 后台任务(Background Task)管理
- 设备管理
- 设备使用信息统计
- DFX
- 国际化开发
- 折叠屏系列
- .……
更多了解更多鸿蒙开发的相关知识可以参考:《鸿蒙 (Harmony OS)开发学习手册》


 2100
2100


 被折叠的 条评论
为什么被折叠?
被折叠的 条评论
为什么被折叠?
 到【灌水乐园】发言


