


//子线程中执行
Log.i(“MyIntentService”, “onHandleIntent”);
String extra = intent.getStringExtra(“msg”);
new Thread(new Runnable() {
@Override
public void run() {
LocationUtil.getInstance().startLocation(LocationUtil.NULL, new LocationUtil.OnLocationBack() {
@Override
public void back(AMapLocation aMapLocation, String backString) {
Log.e(“定位結果”, aMapLocation.getAddress()+“”);
定位结果操作,我这边是把定位的时候保存到数据库里面。
}
});
}
}).start();
Log.i(“MyIntentService”, “onHandleIntent:”+extra);
//调用completeWakefulIntent来释放唤醒锁。
// WLWakefulReceiver.completeWakefulIntent(intent);
}
}
注册
LocationUtil.getInstance().startLocation是我封装的高德的定位。保证完整性,我把高德定位的封装也贴上。
public class LocationUtil implements AMapLocationListener {
private static LocationUtil locationUtil;
private AMapLocationClient mLocationClient = null;
private AMapLocationClientOption mLocationOption = null;
private OnLocationBack onLocationBack;
private OnLocationTrain onLocationTrain;
public static final String NULL = “null”;
private String differenceFlag = “”;
private String latitude, longitude, cityNameString, HotelCityCode;
private LocationUtil() {
}
public static LocationUtil getInstance() {
if (locationUtil == null) {
synchronized (LocationUtil.class) {
if (locationUtil == null) {
locationUtil = new LocationUtil();
}
}
}
return locationUtil;
}
private void init() {
mLocationClient = new AMapLocationClient(HMMyApplication.context);
mLocationOption = new AMapLocationClientOption();
//设置定位模式为AMapLocationMode.Hight_Accuracy,高精度模式。
mLocationOption.setLocationMode(AMapLocationMode.Hight_Accuracy);
//设置定位间隔,单位毫秒,默认为2000ms
mLocationOption.setInterval(5000);
//设置是否只定位一次,默认为false
mLocationOption.setOnceLocation(false);
//返回最近3s内精度最高的一次定位结果。
mLocationOption.setOnceLocationLatest(false);
//设置是否返回地址信息(默认返回地址信息)
mLocationOption.setNeedAddress(true);
//单位是毫秒,默认30000毫秒,建议超时时间不要低于8000毫秒。
mLocationOption.setHttpTimeOut(20000);
//关闭缓存机制
mLocationOption.setLocationCacheEnable(false);
//给定位客户端对象设置定位参数
mLocationClient.setLocationOption(mLocationOption);
mLocationClient.setLocationListener(this);
}
public void startLocation(String differenceFlag, OnLocationBack onLocationBack) {
init();
mLocationClient.startLocation();//开始
this.onLocationBack = onLocationBack;
this.differenceFlag = differenceFlag;
Log.e(“开始定位”,“开始定位”);
}
public void startLocationTrain(String differenceFlag, OnLocationTrain onLocationTrain) {
init();
mLocationClient.startLocation();//开始
this.onLocationTrain = onLocationTrain;
this.differenceFlag = differenceFlag;
Log.e(“开始定位”,“开始定位”);
}
public void stopLocation() {
if (null == mLocationClient) {
return;
}
mLocationClient.unRegisterLocationListener(this);
mLocationClient.stopLocation();//关闭
mLocationClient.onDestroy();//销毁
mLocationClient = null;
Log.e(“开始定位”,“开始定位”);
}
@Override
public void onLocationChanged(AMapLocation aMapLocation) {
Log.e("定位到当前位置: " , aMapLocation.getAddress());
if (aMapLocation == null) {
onLocationTrain.LocationFail(“定位失败”);
return;
}
if (null != aMapLocation.getCity()
&& !“null”.equals(aMapLocation.getCity())
&& !“”.equals(aMapLocation.getCity())
&& 0 != aMapLocation.getLatitude()) {
cityNameString = aMapLocation.getCity();
latitude = “” + aMapLocation.getLatitude();
longitude = “” + aMapLocation.getLongitude();
saveLocation(aMapLocation);
} else {
onLocationTrain.LocationFail(“定位失败”);
return;
}
}
public interface OnLocationBack {
void back(AMapLocation aMapLocation, String backString);
}
public interface OnLocationTrain {
void back(AMapLocation aMapLocation, String backString);
void LocationFail(String error);
}
private void saveLocation(AMapLocation aMapLocation) {
switch (differenceFlag) {
case NULL:
onLocationBack.back(aMapLocation, “返回的是定位到的所有信息”);
break;
}
}
}
使用 记得把权限加上。
Intent intent = new Intent(“startlocation”); intent.putExtra(“msg”, “定位定位定位”); sendBroadcast(intent);
就这个写法而言,我拿demo测试的时候,小米,oppo,高精度gps都可以,gps需要室外定位,室内没有信号。在适配华为手机的时候,有点坑。华为并不行,只支持亮屏,之后我用的双服务唤醒通讯方式实现的华为手机,适配8.0,但其实我觉得就是因为一个电量管理中保持锁屏后继续运行权限导致的, 但这个我没有测试过开了权限这个方式行不行,小伙伴测试的时候,可以给我反馈一下,谢谢。
二、AlarmManager
这个我一开始看的时候,觉得不错,设置重复的闹钟唤醒服务,让服务持续。闹钟设置重复定时的方法变化还是蛮大的,阅读官方api的时候,不同的版本基本都有不同的设置方式。
使用的服务:
public class PollingService extends Service { public static final String ACTION = “com.hdsx.service.PollingService”; @Override public IBinder onBind(Intent intent) { return null; } @Override public void onCreate() { Log.e(TAG, "onCreate:onCreate "); } @Override public int onStartCommand(Intent intent, int flags, int startId) { Log.e(TAG, “Service:onStartCommand “); return super.onStartCommand(intent, flags, startId); } @Override public void onStart(Intent intent, int startId) { new PollingThread().start(); } int count = 0; class PollingThread extends Thread { @Override public void run() { count ++; Log.e(“polling”, count+”” ); } } @Override public void onDestroy() { super.onDestroy(); startService(new Intent(PollingService.this,PollingService.class)); Log.e(TAG, "Service:onDestroy "); }}注册
服务里面起个线程,就是为了测试是否能持续的log输出日志。这块提醒一下,调试状态的时候手机是处于充电状态的,cpu不会休眠,所以会一直log,不过经过我后面添加代码测试,是可行的。我这块只是提供了原始的demo,后面的加的代码找不到了。
闹钟:
public static void startPollingService(Context context, int seconds, Class<?> cls,String action) { long triggerAtTime = SystemClock.elapsedRealtime(); AlarmManager manager = (AlarmManager) context .getSystemService(Context.ALARM_SERVICE); Intent intent = new Intent(context, cls); intent.setAction(action); PendingIntent pendingIntent = PendingIntent.getService(context, 0, intent, PendingIntent.FLAG_UPDATE_CURRENT); manager.setRepeating(AlarmManager.ELAPSED_REALTIME_WAKEUP, triggerAtTime, seconds, pendingIntent); }使用PollingUtils.startPollingService(MainActivity.this, 2000, PollingService.class, PollingService.ACTION);
这种方式,也可以实现, 但是测试的过程中有个问题,就是闹钟重复定时它的间隔有时候并不能完全按照我设置的时间来运行,周期感觉有点不太确定,而且大多时间返回间隔较长。最主要的是,这个我华为手机并不行。。。。。
三、JobScheduler执行任务调度保活

JobScheduler
它的宗旨是把一些不是特别紧急的任务放到更合适的时机批量处理,这样可以有效的节省电量。这个我自己也写了个demo啥的测试,应该是我写的有问题,也可能是别的,我觉得这个不太适合定位这个事,最终没有实现。有实现的小伙伴可以分享一下,谢谢。
四、WorkManager
一开始看这个的时候,我表示这个的描述有点牛X而且还是新特性
不管是断网,还是将进程杀死,他都会执行。有一些需求用这个来实现是相当的不错,比如 手机端向服务器请求数据,当没有网络时,不要请求,有网络时自动恢复请求。如果网络处于断开状态,则将请求保存在队列当中,监听网络状态,一旦网络连接上,则将队列当中的请求一个一个的执行。很强,主要是这个可以设置重复的任务,我主要看这块。
简单介绍:WorkManager 可以轻松地让异步任务延迟执行以及何时运行它们,API需要我们创建个worker任务并将其交给WorkManager,用来控制在什么时间运行这个任务。
.setRequiredNetworkType(NetworkType.CONNECTED) // 网络状态
.setRequiresBatteryNotLow(true) // 不在电量不足时执行
.setRequiresCharging(true) // 在充电时执行
.setRequiresStorageNotLow(true) // 不在存储容量不足时执行
.setRequiresDeviceIdle(true) // 在待机状态下执行,需要 API 23
我就不做深究了, 有兴趣的朋友可以自己研究, 最终我没有用这个来实现我的需求,因为重复的任务执行时间间隔最少15分钟。
五、实现了的方式。双服务唤醒
经过测试,小米,oppo,华为等手机 6.0 - 8.0版本没问题,可完美实现。
先把AIDL写了:
interface ILocationHelperServiceAIDL {
/**
-
定位service绑定完毕后通知helperservice自己绑定的notiId
-
@param notiId 定位service的notiId
*/
void onFinishBind(int notiId);
}
interface ILocationServiceAIDL {
/** 当其他服务已经绑定时调起 */
void onFinishBind();
}
一共两个。定义的回调接口,也先写了。
/**
- 代理类,用于处理息屏造成wifi被关掉时再重新点亮屏幕的逻辑
*/
public interface IWifiAutoCloseDelegate {
/**
-
判断在该机型下此逻辑是否有效。目前已知的系统是小米系统存在(用户自助设置的)息屏断掉wifi的功能。
-
@param context
-
@return
*/
boolean isUseful(Context context);
/**
-
点亮屏幕的服务有可能被重启。此处进行初始化
-
@param context
-
@return
*/
void initOnServiceStarted(Context context);
/**
- 定位成功时,如果移动网络无法访问,而且屏幕是点亮状态,则对状态进行保存
*/
void onLocateSuccess(Context context, boolean isScreenOn, boolean isMobileable);
/**
- 对定位失败情况的处理
*/
void onLocateFail(Context context, int errorCode, boolean isScreenOn, boolean isWifiable);
}
- 定位服务
/**
-
后台服务定位
-
- 只有在由息屏造成的网络断开造成的定位失败时才点亮屏幕
-
- 利用notification机制增加进程优先级
*/
public class LocationService extends NotificationService {
private AMapLocationClient mLocationClient;
private AMapLocationClientOption mLocationOption;
/**
- 处理息屏关掉wifi的delegate类
*/
private IWifiAutoCloseDelegate mWifiAutoCloseDelegate = new WifiAutoCloseDelegate();
/**
- 记录是否需要对息屏关掉wifi的情况进行处理
*/
private boolean mIsWifiCloseable = false;
@Override
public int onStartCommand(Intent intent, int flags, int startId) {
super.onStartCommand(intent, flags, startId);
applyNotiKeepMech(); //开启利用notification提高进程优先级的机制
if (mWifiAutoCloseDelegate.isUseful(getApplicationContext())) {
mIsWifiCloseable = true;
mWifiAutoCloseDelegate.initOnServiceStarted(getApplicationContext());
}
startLocation();
return START_STICKY;
}
@Override
public void onDestroy() {
unApplyNotiKeepMech();
stopLocation();
super.onDestroy();
}
/**
- 启动定位
*/
void startLocation() {
stopLocation();
if (null == mLocationClient) {
mLocationClient = new AMapLocationClient(this.getApplicationContext());
}
mLocationOption = new AMapLocationClientOption();
// 使用连续
mLocationOption.setOnceLocation(false);
mLocationOption.setLocationCacheEnable(false);
// 每5秒定位一次
mLocationOption.setInterval(5 * 1000);
// 地址信息
mLocationOption.setNeedAddress(true);
mLocationClient.setLocationOption(mLocationOption);
mLocationClient.setLocationListener(locationListener);
mLocationClient.startLocation();
}
/**
- 停止定位
*/
void stopLocation() {
if (null != mLocationClient) {
mLocationClient.stopLocation();
}
}
AMapLocationListener locationListener = new AMapLocationListener() {
@Override
public void onLocationChanged(AMapLocation aMapLocation) {
//发送结果的通知
sendLocationBroadcast(aMapLocation);
if (!mIsWifiCloseable) {
return;
}
if (aMapLocation.getErrorCode() == AMapLocation.LOCATION_SUCCESS) {
mWifiAutoCloseDelegate.onLocateSuccess(getApplicationContext(), PowerManagerUtil.getInstance().isScreenOn(getApplicationContext()), NetUtil.getInstance().isMobileAva(getApplicationContext()));
} else {
mWifiAutoCloseDelegate.onLocateFail(getApplicationContext() , aMapLocation.getErrorCode() , PowerManagerUtil.getInstance().isScreenOn(getApplicationContext()), NetUtil.getInstance().isWifiCon(getApplicationContext()));
}
}
private void sendLocationBroadcast(AMapLocation aMapLocation) {
if (null != aMapLocation) {
Intent mIntent = new Intent(LocationChangBroadcastReceiver.RECEIVER_ACTION);
mIntent.putExtra(LocationChangBroadcastReceiver.RECEIVER_DATA, aMapLocation);
sendBroadcast(mIntent);
ToastUtils.show(“获取到定位信息”);
String string = System.currentTimeMillis() + “,”+aMapLocation.getLatitude() + “,” + aMapLocation.getLongitude();
Utils.saveFile(string, “backlocation.txt”, true);
}
}
};
}
定位服务的基类
/**
-
利用双service进行notification绑定,进而将Service的OOM_ADJ提高到1
-
同时利用LocationHelperService充当守护进程,在NotificationService被关闭后,重启他。
-
如果LocationHelperService被停止,NotificationService不负责唤醒
*/
public class NotificationService extends Service {
/**
- startForeground的 noti_id
*/
private static int NOTI_ID = 123321;
private Utils.CloseServiceReceiver mCloseReceiver;
@Override
public int onStartCommand(Intent intent, int flags, int startId) {
Log.e(“background location”, “远程服务调用成功”);
mCloseReceiver = new Utils.CloseServiceReceiver(this);
registerReceiver(mCloseReceiver, Utils.getCloseServiceFilter());
return START_STICKY;
}
@Override
public void onDestroy() {
if (mCloseReceiver != null) {
unregisterReceiver(mCloseReceiver);
mCloseReceiver = null;
}
super.onDestroy();
}
private final String mHelperServiceName = “com.hdsx.background.locationservice.LocationHelperService”;
/**
- 触发利用notification增加进程优先级
*/
protected void applyNotiKeepMech() {
startForeground(NOTI_ID, Utils.buildNotification(getBaseContext()));
startBindHelperService();
}
public void unApplyNotiKeepMech() {
stopForeground(true);
}
public Binder mBinder;
public class LocationServiceBinder extends ILocationServiceAIDL.Stub {
@Override
public void onFinishBind(){
}
}
private ILocationHelperServiceAIDL mHelperAIDL;
private void startBindHelperService() {
connection = new ServiceConnection() {
@Override
public void onServiceDisconnected(ComponentName name) {
//doing nothing
}
@Override
public void onServiceConnected(ComponentName name, IBinder service) {
ILocationHelperServiceAIDL l = ILocationHelperServiceAIDL.Stub.asInterface(service);
mHelperAIDL = l;
try {
l.onFinishBind(NOTI_ID);
} catch (RemoteException e) {
e.printStackTrace();
}
}
};
Intent intent = new Intent();
intent.setAction(mHelperServiceName);
bindService(Utils.getExplicitIntent(getApplicationContext(), intent), connection, Service.BIND_AUTO_CREATE);
}
private ServiceConnection connection;
@Nullable
@Override
public IBinder onBind(Intent intent) {
if (mBinder == null) {
mBinder = new LocationServiceBinder();
}
return mBinder;
}
}
另外一个服务:
public class LocationHelperService extends Service {
private Utils.CloseServiceReceiver mCloseReceiver;
@Override
public void onCreate() {
super.onCreate();
startBind();
mCloseReceiver = new Utils.CloseServiceReceiver(this);
registerReceiver(mCloseReceiver, Utils.getCloseServiceFilter());
}
@Override
public void onDestroy() {
if (mInnerConnection != null) {
unbindService(mInnerConnection);
mInnerConnection = null;
}
if (mCloseReceiver != null) {
unregisterReceiver(mCloseReceiver);
mCloseReceiver = null;
}
super.onDestroy();
}
private ServiceConnection mInnerConnection;
private void startBind() {
final String locationServiceName = “com.hdsx.background.locationservice.LocationService”;
mInnerConnection = new ServiceConnection() {
@Override
public void onServiceDisconnected(ComponentName name) {
Intent intent = new Intent();
intent.setAction(locationServiceName);
startService(Utils.getExplicitIntent(getApplicationContext(), intent));
}
@Override
public void onServiceConnected(ComponentName name, IBinder service) {
ILocationServiceAIDL l = ILocationServiceAIDL.Stub.asInterface(service);
try {
l.onFinishBind();
} catch (RemoteException e) {
e.printStackTrace();
}
}
};
Intent intent = new Intent();
intent.setAction(locationServiceName);
bindService(Utils.getExplicitIntent(getApplicationContext(), intent), mInnerConnection, Service.BIND_AUTO_CREATE);
}
private HelperBinder mBinder;
private class HelperBinder extends ILocationHelperServiceAIDL.Stub {
@Override
public void onFinishBind(int notiId) throws RemoteException {
startForeground(notiId, Utils.buildNotification(LocationHelperService.this.getApplicationContext()));
stopForeground(true);
}
}
@Nullable
@Override
public IBinder onBind(Intent intent) {
if (mBinder == null) {
mBinder = new HelperBinder();
}
return mBinder;
}
}
双服务进行捆绑, 之前测试的过程中,发现这个powermanager配合服务他是可实现部分手机的,这边也做一个power的封装。
/**
- 获得PARTIAL_WAKE_LOCK , 保证在息屏状体下,CPU可以正常运行
*/
public class PowerManagerUtil {
private static class Holder {
public static PowerManagerUtil instance = new PowerManagerUtil();
}
private PowerManager pm = null;
private PowerManager.WakeLock pmLock = null;
/**
- 上次唤醒屏幕的触发时间
*/
private long mLastWakupTime = System.currentTimeMillis();
/**
- 最小的唤醒时间间隔,防止频繁唤醒。默认5分钟
*/
private long mMinWakupInterval = 10 * 1000;
private InnerThreadFactory mInnerThreadFactory = null;
public static PowerManagerUtil getInstance() {
return Holder.instance;
}
/**
-
判断屏幕是否处于点亮状态
-
@param context
*/
public boolean isScreenOn(final Context context) {
try {
Method isScreenMethod = PowerManager.class.getMethod(“isScreenOn”,
new Class[]{});
if (pm == null) {
pm = (PowerManager) context.getSystemService(Context.POWER_SERVICE);
}
boolean screenState = (Boolean) isScreenMethod.invoke(pm);
return screenState;
} catch (Exception e) {
return true;
}
}
/**
- 唤醒屏幕
*/
public void wakeUpScreen(final Context context) {
try {
acquirePowerLock(context, PowerManager.ACQUIRE_CAUSES_WAKEUP | PowerManager.SCREEN_DIM_WAKE_LOCK);
String string = System.currentTimeMillis() +“唤醒”;
Utils.saveFile(string, “huanxinglocation.txt”, true);
} catch (Exception e) {
throw e;
}
}
/**
-
根据levelAndFlags,获得PowerManager的WaveLock
-
利用worker thread去获得锁,以免阻塞主线程
-
@param context
-
@param levelAndFlags
*/
private void acquirePowerLock(final Context context, final int levelAndFlags) {
if (context == null) {
throw new NullPointerException(“when invoke aquirePowerLock , context is null which is unacceptable”);
}
long currentMills = System.currentTimeMillis();
if (currentMills - mLastWakupTime < mMinWakupInterval) {
return;
}
mLastWakupTime = currentMills;
if (mInnerThreadFactory == null) {
mInnerThreadFactory = new InnerThreadFactory();
}
mInnerThreadFactory.newThread(new Runnable() {
@Override
public void run() {
if (pm == null) {
pm = (PowerManager) context.getSystemService(Context.POWER_SERVICE);
}
if (pmLock != null) {
// release
pmLock.release();
pmLock = null;
}
pmLock = pm.newWakeLock(levelAndFlags, “MyTag”);
pmLock.acquire();
pmLock.release();
}
}).start();
}
private class InnerThreadFactory implements ThreadFactory {
@Override
public Thread newThread(Runnable runnable) {
return new Thread(runnable);
}
}
}
整体的逻辑呢就是说, 启动LocationService开启定位,定位成功后在手机添加一个前台的通知,让通知的优先级尽可能的提高。在锁屏后,powermanager判断获取如果定位失败唤醒服务。
public void onLocateFail(Context context, int errorCode, boolean isScreenOn, boolean isWifiable) {
//如果屏幕点亮情况下,因为断网失败,则表示不是屏幕点亮造成的断网失败,并修改参照值
if (isScreenOn && errorCode == AMapLocation.ERROR_CODE_FAILURE_CONNECTION && !isWifiable) {
LocationStatusManager.getInstance().resetToInit(context);
return;
}
if (!LocationStatusManager.getInstance().isFailOnScreenOff(context, errorCode, isScreenOn, isWifiable)) {
return;
}
PowerManagerUtil.getInstance().wakeUpScreen(context);
}
代码有点多,就不一一介绍了,下面把我包含的工具类都发出来。
- LocationStatusManager
/**
-
在定位失败的情况下,用于判断当前定位错误是否是由于息屏导致的网络关闭引起的。
-
判断逻辑仅限于处理设备仅有wifi信号的情况下
*/
public class LocationStatusManager {
/**
- 上一次的定位是否成功
*/
private boolean mPriorSuccLocated = false;
/**
- 屏幕亮时可以定位
*/
private boolean mPirorLocatableOnScreen = false;
static class Holder {
public static LocationStatusManager instance = new LocationStatusManager();
}
public static LocationStatusManager getInstance() {
return Holder.instance;
}
/**
-
由于仅仅处理只有wifi连接的情况下,如果用户手机网络可连接,那么忽略。
-
定位成功时,重置为定位成功的状态
-
@param isScreenOn 当前屏幕是否为点亮状态
-
@param isMobileable 是否有手机信号
*/
public void onLocationSuccess(Context context, boolean isScreenOn, boolean isMobileable) {
if (isMobileable) {
return;
}
mPriorSuccLocated = true;
if (isScreenOn) {
mPirorLocatableOnScreen = true;
saveStateInner(context, true);
}
}
/**
-
reset到默认状态
-
@param context
*/
public void resetToInit(Context context) {
this.mPirorLocatableOnScreen = false;
this.mPriorSuccLocated = false;
saveStateInner(context, false);
}
/**
- 由preference初始化。特别是在定位服务重启的时候会进行初始化
*/
public void initStateFromPreference(Context context) {
if (!isLocableOnScreenOn(context)) {
return;
}
this.mPriorSuccLocated = true;
this.mPirorLocatableOnScreen = true;
}
/**
-
判断是否由屏幕关闭导致的定位失败。
-
只有在 网络可访问&&errorCode==4&&(priorLocated&&locatableOnScreen) && !isScreenOn 才认为是有息屏引起的定位失败
-
如果判断条件较为严格,请按需要适当修改
-
@param errorCode 定位错误码, 0=成功, 4=因为网络原因造成的失败
-
@param isScreenOn 当前屏幕是否为点亮状态
*/
public boolean isFailOnScreenOff(Context context, int errorCode, boolean isScreenOn, boolean isWifiable) {
return !isWifiable && errorCode == AMapLocation.ERROR_CODE_FAILURE_CONNECTION && (mPriorSuccLocated && mPirorLocatableOnScreen) && !isScreenOn;
}
/**
- 是否存在屏幕亮而且可以定位的情况的key
*/
private String IS_LOCABLE_KEY = “is_locable_key”;
/**
- IS_LOCABLE_KEY 的过期时间
*/
private String LOCALBLE_KEY_EXPIRE_TIME_KEY = “localble_key_expire_time_key”;
/**
- 过期时间为10分钟
*/
private static final long MINIMAL_EXPIRE_TIME = 30 * 60 * 1000;
private static final String PREFER_NAME = LocationStatusManager.class.getSimpleName();
private static final long DEF_PRIOR_TIME_VAL = -1;
/**
-
如果isLocable,则存入正确的过期时间,否则存默认值
-
@param context
-
@param isLocable
*/
public void saveStateInner(Context context, boolean isLocable) {
SharedPreferences sharedPreferences = context.getSharedPreferences(PREFER_NAME, MODE_PRIVATE);
SharedPreferences.Editor editor = sharedPreferences.edit();
editor.putBoolean(IS_LOCABLE_KEY, isLocable);
editor.putLong(LOCALBLE_KEY_EXPIRE_TIME_KEY, isLocable ? System.currentTimeMillis() : DEF_PRIOR_TIME_VAL);
editor.commit();
}
/**
- 从preference读取,判断是否存在网络状况ok,而且亮屏情况下,可以定位的情况
*/
public boolean isLocableOnScreenOn(Context context) {
SharedPreferences sharedPreferences = context.getSharedPreferences(PREFER_NAME, MODE_PRIVATE);
boolean res = sharedPreferences.getBoolean(IS_LOCABLE_KEY, false);
long priorTime = sharedPreferences.getLong(LOCALBLE_KEY_EXPIRE_TIME_KEY, DEF_PRIOR_TIME_VAL);
if (System.currentTimeMillis() - priorTime > MINIMAL_EXPIRE_TIME) {
saveStateInner(context, false);
return false;
}
return res;
}
}
- LocationChangBroadcastReceiver
做最后定位的结果,保存到数据库里
public class LocationChangBroadcastReceiver extends BroadcastReceiver {
public static final String RECEIVER_ACTION = “location_in_background”;
public static final String RECEIVER_DATA = “location_data”;
@Override
public void onReceive(Context context, Intent intent) {
String action = intent.getAction();
if (action.equals(RECEIVER_ACTION)) {
AMapLocation location = (AMapLocation) intent.getParcelableExtra(RECEIVER_DATA);
if (null != location) {
String string = System.currentTimeMillis() + “,”+location.getLatitude() + “,” + location.getLongitude();
Utils.saveFile(string, “broadcastlocation.txt”, true);
Log.v(“定位数据”, “经度:” + location.getLongitude() + " 纬度:" + location.getLatitude());
SimpleDateFormat sdf = new SimpleDateFormat(“yyyy-MM-dd HH:mm:ss”);
java.util.Date date = new Date(location.getTime());
String tracktime = sdf.format(date);
Map map = new HashMap();
String userid = SpUtils.getString(USER_ID);
map.put(“userid”, userid);
double[] loc = CoordinateTransformUtil.gcj02towgs84(location.getLongitude(),location.getLatitude());
map.put(“tracktime”, tracktime);
map.put(“latitude”, loc[1]);
map.put(“lontitude”, loc[0]);
Frame.getInstance().getDao().insert(“trackbean.insert_track”, map);
}
}
}
}
自我介绍一下,小编13年上海交大毕业,曾经在小公司待过,也去过华为、OPPO等大厂,18年进入阿里一直到现在。
深知大多数初中级Android工程师,想要提升技能,往往是自己摸索成长或者是报班学习,但对于培训机构动则近万的学费,着实压力不小。自己不成体系的自学效果低效又漫长,而且极易碰到天花板技术停滞不前!
因此收集整理了一份《2024年Android移动开发全套学习资料》,初衷也很简单,就是希望能够帮助到想自学提升又不知道该从何学起的朋友,同时减轻大家的负担。
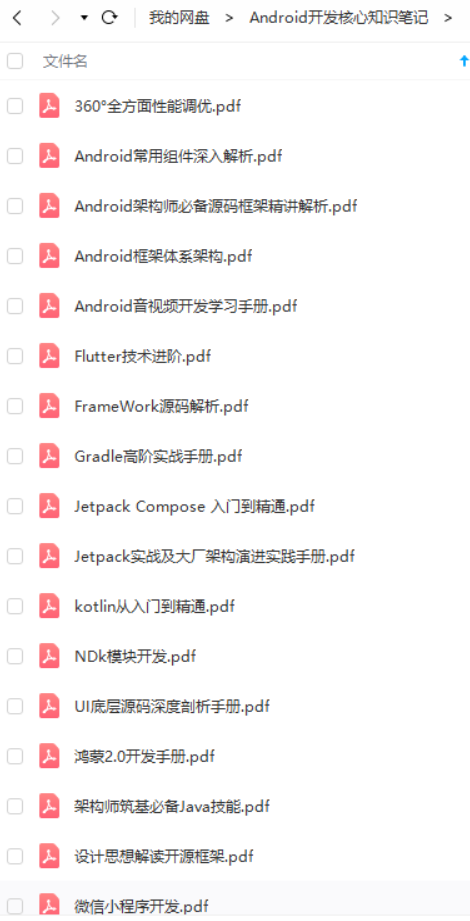
既有适合小白学习的零基础资料,也有适合3年以上经验的小伙伴深入学习提升的进阶课程,基本涵盖了95%以上Android开发知识点,真正体系化!
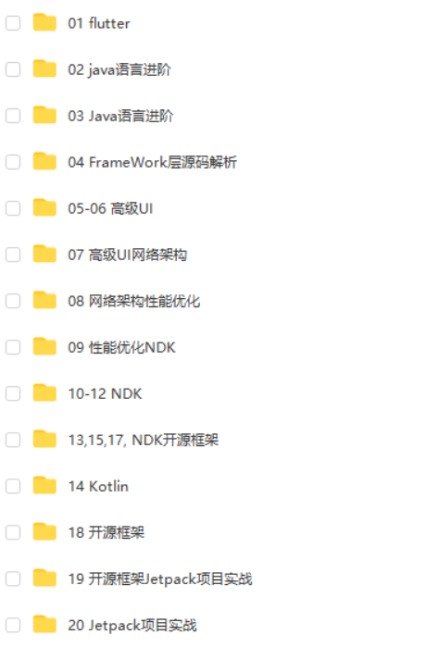
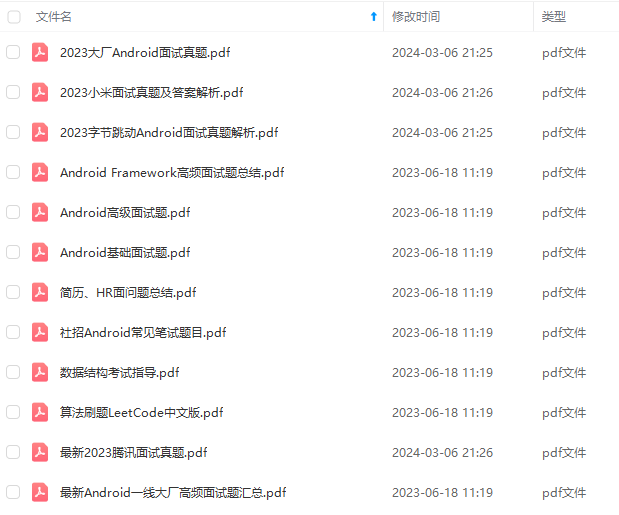
由于文件比较大,这里只是将部分目录截图出来,每个节点里面都包含大厂面经、学习笔记、源码讲义、实战项目、讲解视频,并且会持续更新!
如果你觉得这些内容对你有帮助,可以扫码获取!!(备注:Android)

结语
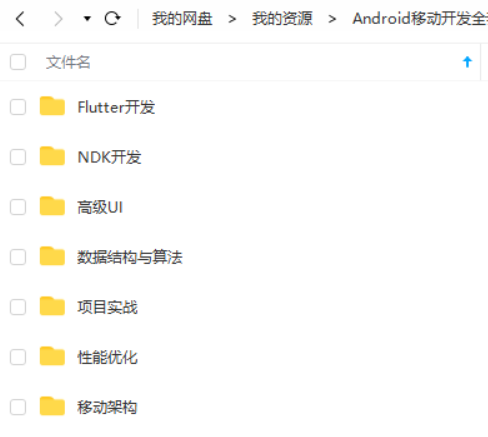
由于篇幅限制,文档的详解资料太全面,细节内容太多,所以只把部分知识点截图出来粗略的介绍,每个小节点里面都有更细化的内容!以下是目录截图:
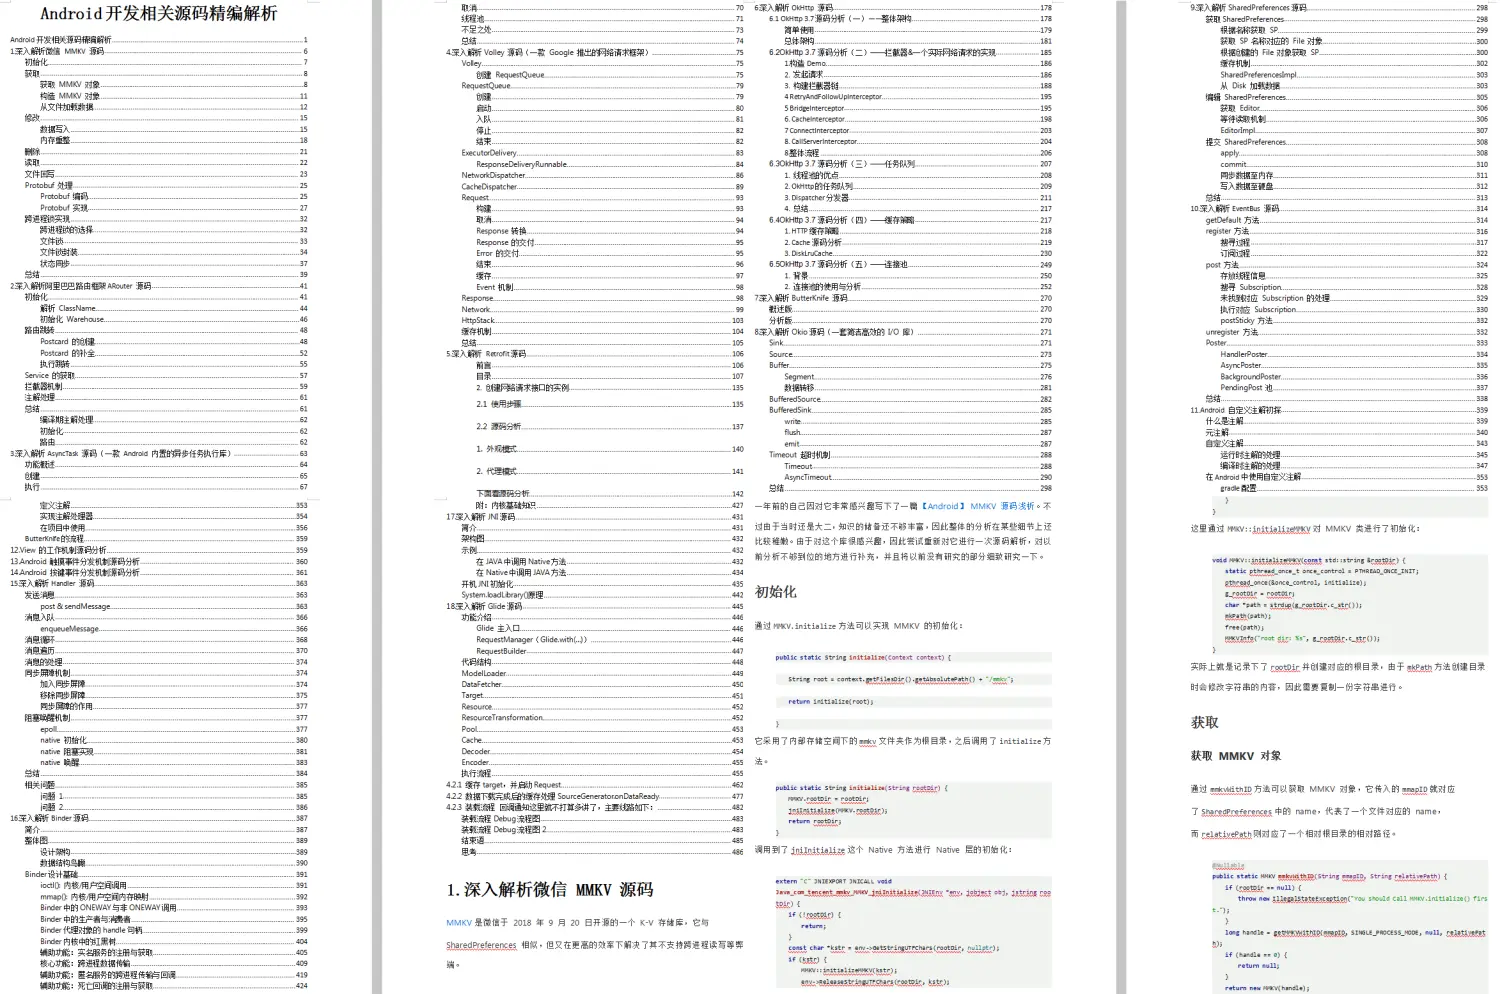
由于整个文档比较全面,内容比较多,篇幅不允许,下面以截图方式展示 。
再附一部分Android架构面试视频讲解:
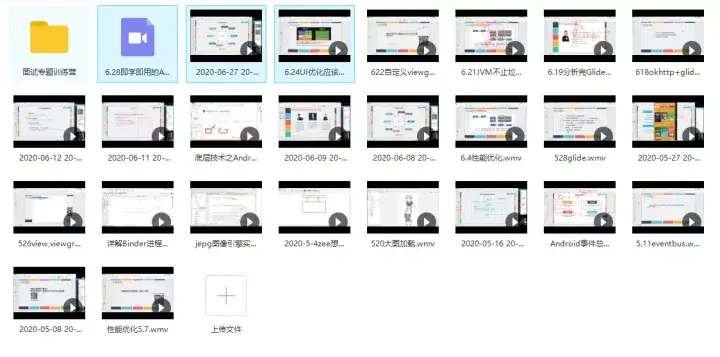
《互联网大厂面试真题解析、进阶开发核心学习笔记、全套讲解视频、实战项目源码讲义》点击传送门即可获取!
on.txt", true);
Log.v(“定位数据”, “经度:” + location.getLongitude() + " 纬度:" + location.getLatitude());
SimpleDateFormat sdf = new SimpleDateFormat(“yyyy-MM-dd HH:mm:ss”);
java.util.Date date = new Date(location.getTime());
String tracktime = sdf.format(date);
Map map = new HashMap();
String userid = SpUtils.getString(USER_ID);
map.put(“userid”, userid);
double[] loc = CoordinateTransformUtil.gcj02towgs84(location.getLongitude(),location.getLatitude());
map.put(“tracktime”, tracktime);
map.put(“latitude”, loc[1]);
map.put(“lontitude”, loc[0]);
Frame.getInstance().getDao().insert(“trackbean.insert_track”, map);
}
}
}
}
自我介绍一下,小编13年上海交大毕业,曾经在小公司待过,也去过华为、OPPO等大厂,18年进入阿里一直到现在。
深知大多数初中级Android工程师,想要提升技能,往往是自己摸索成长或者是报班学习,但对于培训机构动则近万的学费,着实压力不小。自己不成体系的自学效果低效又漫长,而且极易碰到天花板技术停滞不前!
因此收集整理了一份《2024年Android移动开发全套学习资料》,初衷也很简单,就是希望能够帮助到想自学提升又不知道该从何学起的朋友,同时减轻大家的负担。
[外链图片转存中…(img-L5sKtu9d-1713200366427)]
[外链图片转存中…(img-qksSQ90X-1713200366427)]
[外链图片转存中…(img-BDRMNG9m-1713200366428)]
[外链图片转存中…(img-OdDSTGrC-1713200366428)]
[外链图片转存中…(img-ZVH8S9wt-1713200366428)]
既有适合小白学习的零基础资料,也有适合3年以上经验的小伙伴深入学习提升的进阶课程,基本涵盖了95%以上Android开发知识点,真正体系化!
由于文件比较大,这里只是将部分目录截图出来,每个节点里面都包含大厂面经、学习笔记、源码讲义、实战项目、讲解视频,并且会持续更新!
如果你觉得这些内容对你有帮助,可以扫码获取!!(备注:Android)
结语
由于篇幅限制,文档的详解资料太全面,细节内容太多,所以只把部分知识点截图出来粗略的介绍,每个小节点里面都有更细化的内容!以下是目录截图:
[外链图片转存中…(img-TZe7fwJo-1713200366429)]
由于整个文档比较全面,内容比较多,篇幅不允许,下面以截图方式展示 。
再附一部分Android架构面试视频讲解:
[外链图片转存中…(img-NqiKQBgI-1713200366429)]
《互联网大厂面试真题解析、进阶开发核心学习笔记、全套讲解视频、实战项目源码讲义》点击传送门即可获取!


 940
940

 被折叠的 条评论
为什么被折叠?
被折叠的 条评论
为什么被折叠?
 到【灌水乐园】发言


