


先自我介绍一下,小编浙江大学毕业,去过华为、字节跳动等大厂,目前阿里P7
深知大多数程序员,想要提升技能,往往是自己摸索成长,但自己不成体系的自学效果低效又漫长,而且极易碰到天花板技术停滞不前!
因此收集整理了一份《2024年最新HarmonyOS鸿蒙全套学习资料》,初衷也很简单,就是希望能够帮助到想自学提升又不知道该从何学起的朋友。

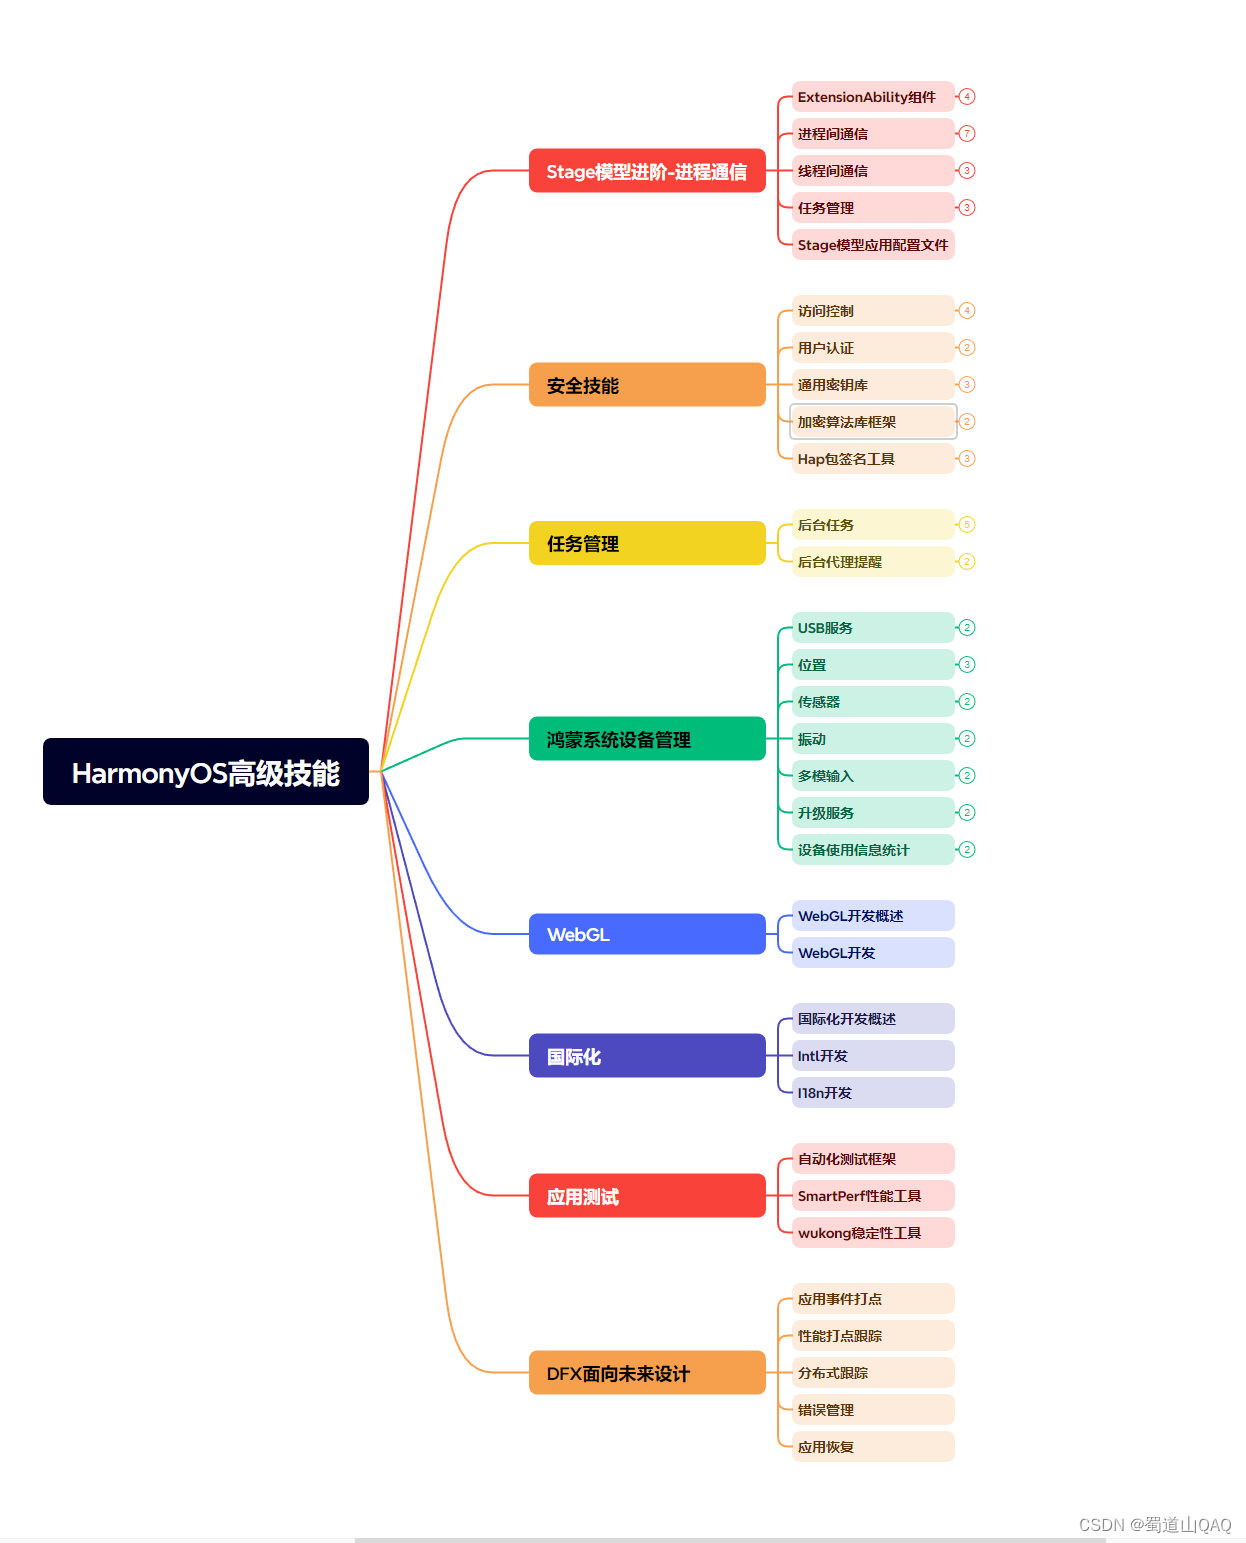

既有适合小白学习的零基础资料,也有适合3年以上经验的小伙伴深入学习提升的进阶课程,涵盖了95%以上鸿蒙开发知识点,真正体系化!
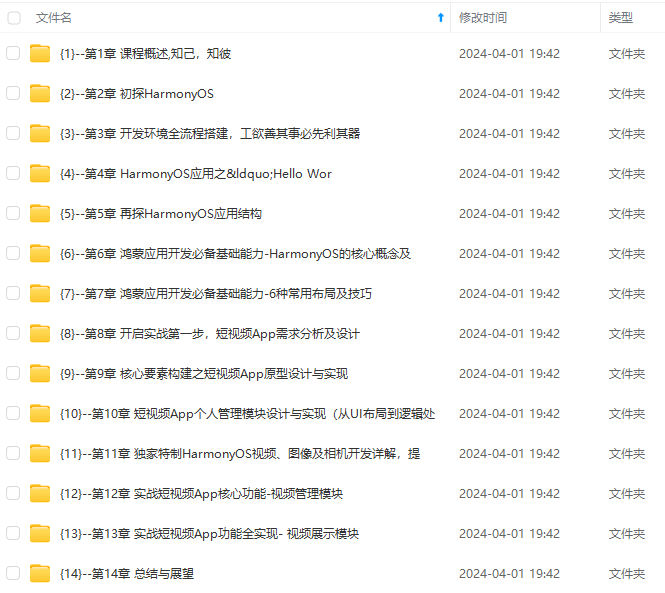
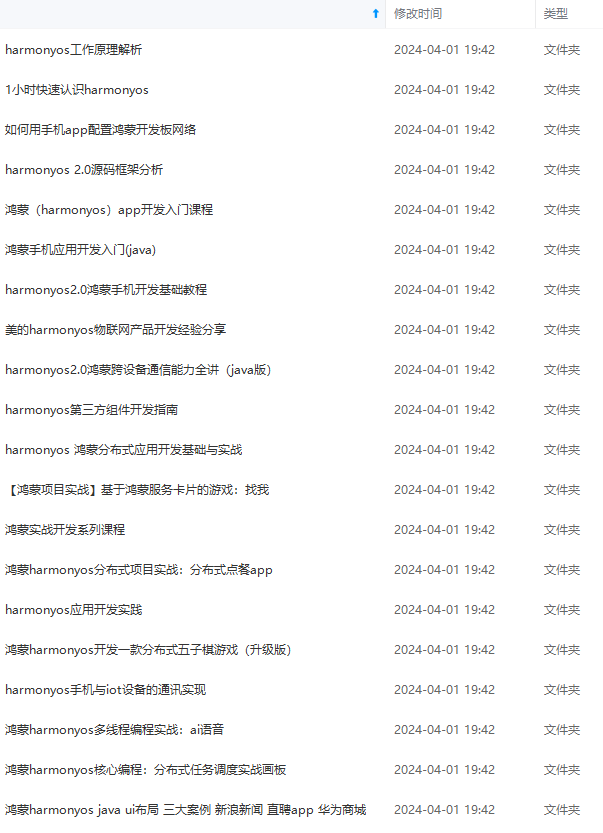
由于文件比较多,这里只是将部分目录截图出来,全套包含大厂面经、学习笔记、源码讲义、实战项目、大纲路线、讲解视频,并且后续会持续更新
如果你需要这些资料,可以添加V获取:vip204888 (备注鸿蒙)

正文
MyComponent({ count: 1, increaseBy: 2 })
MyComponent({ title: new Model(‘Hello, World 2’), count: 7 })
}
}
}
@Component
struct MyComponent {
@State title: Model = new Model(‘Hello World’);
@State count: number = 0;
private increaseBy: number = 1;
build() {
Column() {
Text(${this.title.value})
Button(Click to change title).onClick(() => {
// @State变量的更新将触发上面的Text组件内容更新
this.title.value = this.title.value === ‘Hello ArkUI’ ? ‘Hello World’ : ‘Hello ArkUI’;
})
Button(Click to increase count=${this.count}).onClick(() => {
// @State变量的更新将触发该Button组件的内容更新
this.count += this.increaseBy;
})
}
}
}
🌈1.2.1.2 @Prop 父子单向同步
| 特点 | 描述 |
|---|---|
| 同步关系 | 通过@Prop装饰的变量和父组件建立单向的同步关系 |
| 在本地修改 | @Prop变量允许在本地修改,但修改后的变化不会同步回父组件 |
| 自动更新 | 当父组件中的数据源更改时,与之相关的@Prop装饰的变量都会自动更新 |
| 覆盖 | 如果子组件已经在本地修改了@Prop装饰的相关变量值,而在父组件中对应的@State装饰的变量被修改后,子组件本地修改的@Prop装饰的相关变量值将被覆盖 |
| 限制条件 | @Prop修饰复杂类型时是深拷贝,在拷贝的过程中除了基本类型、Map、Set、Date、Array外,都会丢失类型。@Prop装饰器不能在@Entry装饰的自定义组件中使用。 |
@Prop变量装饰器只支持string、number、boolean、enum类型,以及这些类型的数组。不支持复杂类型(比如any类型)
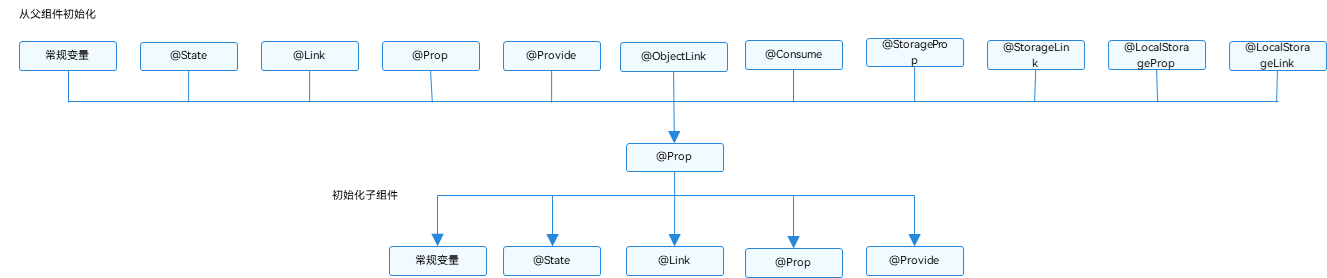
父子组件初始化和传递装饰图如下:
🍬1.2.1.2.1 变化规则
1、简单类型
// 简单类型
@Prop count: number;
// 赋值的变化可以被观察到
this.count = 1;
对于@State和@Prop的同步场景:
- 使用父组件中@State变量的值初始化子组件中的@Prop变量。当@State变量变化时,该变量值也会同步更新至@Prop变量。
- @Prop装饰的变量的修改不会影响其数据源@State装饰变量的值。
- 除了@State,数据源也可以用@Link或@Prop装饰,对@Prop的同步机制是相同的。
- 数据源和@Prop变量的类型需要相同。
🍬1.2.1.2.2 使用场景
1、父组件@State到子组件@Prop简单数据类型同步
@Component
struct CountDownComponent {
@Prop count: number;
costOfOneAttempt: number = 1;
build() {
Column() {
if (this.count > 0) {
Text(You have ${this.count} Nuggets left)
} else {
Text(‘Game over!’)
}
// @Prop装饰的变量不会同步给父组件
Button(Try again).onClick(() => {
this.count -= this.costOfOneAttempt;
})
}
}
}
@Entry
@Component
struct ParentComponent {
@State countDownStartValue: number = 10;
build() {
Column() {
Text(Grant ${this.countDownStartValue} nuggets to play.)
// 父组件的数据源的修改会同步给子组件
Button(+1 - Nuggets in New Game).onClick(() => {
this.countDownStartValue += 1;
})
// 父组件的修改会同步给子组件
Button(-1 - Nuggets in New Game).onClick(() => {
this.countDownStartValue -= 1;
})
CountDownComponent({ count: this.countDownStartValue, costOfOneAttempt: 2 })
}
}
}
2、父组件@State数组项到子组件@Prop简单数据类型同步
@Component
struct Child {
@Prop value: number;
build() {
Text(${this.value})
.fontSize(50)
.onClick(()=>{this.value++})
}
}
@Entry
@Component
struct Index {
@State arr: number[] = [1,2,3];
build() {
Row() {
Column() {
Child({value: this.arr[0]})
Child({value: this.arr[1]})
Child({value: this.arr[2]})
Divider().height(5)
ForEach(this.arr,
item => {
Child({value: item})
},
item => item.toString()
)
Text(‘replace entire arr’)
.fontSize(50)
.onClick(()=>{
// 两个数组都包含项“3”。
this.arr = this.arr[0] == 1 ? [3,4,5] : [1,2,3];
})
}
}
}
}
3、从父组件中的@State类对象属性到@Prop简单类型的同步
class Book {
public title: string;
public pages: number;
public readIt: boolean = false;
constructor(title: string, pages: number) {
this.title = title;
this.pages = pages;
}
}
@Component
struct ReaderComp {
@Prop title: string;
@Prop readIt: boolean;
build() {
Row() {
Text(this.title)
Text(... ${this.readIt ? 'I have read' : 'I have not read it'}
 最低0.47元/天 解锁文章


 603
603


 被折叠的 条评论
为什么被折叠?
被折叠的 条评论
为什么被折叠?
 到【灌水乐园】发言


