


            .authorizeRequests()
            /\*普通用户访问的url\*/
            .antMatchers("/user/\*\*").hasRole("USER")
            /\*管理员用户访问的url\*/
            .antMatchers("/admin/\*\*").hasRole("ADMIN")
            .anyRequest().authenticated() //其他多有路径都必须认证
            .and()
            .formLogin()
            .loginProcessingUrl("/login")
            .permitAll()  //访问“/login”接口不需要进行身份认证了,防止重定向死循环
            .and()
            .csrf().disable(); //关闭csrf
}
}
然后就可以发现,若要访问admin/hello,用户名和密码必须是admin才可以
若使用aoxiu这种用户的身份就会报错
### 三、基于数据库的认证
#### 1、SpringSecurity基于数据库认证
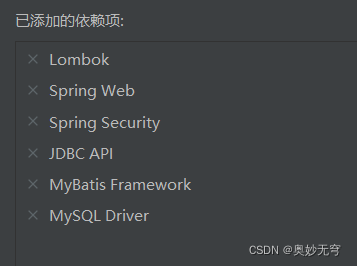
1. 创建项目,添加如下依赖
lombok用于使用注解替代getter、setter等方法
2. 在application.yml文件中配置
spring:
datasource:
url: jdbc:mysql://localhost:3306/test?useUnicode=true&characterEncoding=UTF-8&serverTimezone=UTC
username: root
password: root
driver-class-name: com.mysql.jdbc.Driver
logging:
level:
com.example.bdatabaserole.mapper: debug #打印SQL语句
mybatis:
mapper-locations: classpath:mappers/*.xml
type-aliases-package: com.example.securitydatebase.mapper
server:
port: 8082
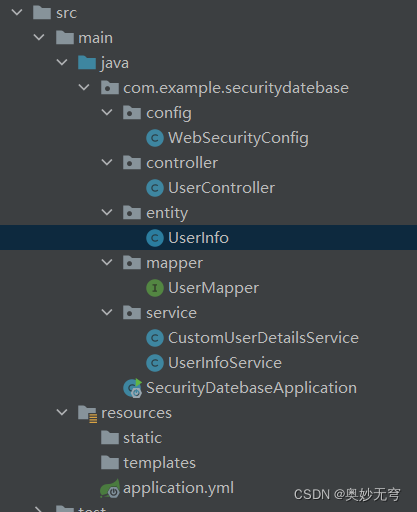
3. 创建实体类
 UserInfo
package com.beixi.entity;
import lombok.Data;
import org.springframework.security.core.GrantedAuthority;
import org.springframework.security.core.authority.SimpleGrantedAuthority;
import org.springframework.security.core.userdetails.UserDetails;
import java.io.Serializable;
import java.util.ArrayList;
import java.util.Collection;
import java.util.List;
@Data //lombok注解省略get/set等方法
public class UserInfo implements Serializable,UserDetails {
private int id;
private String username;
private String password;
private List<Role> roleList;

@Override
public Collection<? extends GrantedAuthority> getAuthorities() {
    Collection<GrantedAuthority> authorities = new ArrayList<>();
    for (Role role : roleList) {
        //数据库role表字段中是以ROLE\_开头的,所以此处不必再加ROLE\_
        authorities.add(new SimpleGrantedAuthority(role.getName()));
    }
    return authorities;
}

/\*\*
* 指示用户的账户是否已过期。无法验证过期的账户。
* 如果用户的账户有效(即未过期),则返回true,如果不在有效就返回false
*/
@Override
public boolean isAccountNonExpired() {
return true;
}
/\*\*
* 指示用户是锁定还是解锁。无法对锁定的用户进行身份验证。
* 如果用户未被锁定,则返回true,否则返回false
*/
@Override
public boolean isAccountNonLocked() {
return true;
}
/\*\*
* 指示用户的凭证(密码)是否已过期。过期的凭证阻止身份验证
* 如果用户的凭证有效(即未过期),则返回true
* 如果不在有效(即过期),则返回false
*/
@Override
public boolean isCredentialsNonExpired() {
return true;
}
/\*\*
* 指示用户是启用还是禁用。无法对禁用的用户进行身份验证
* 如果启用了用户,则返回true,否则返回false
*/
@Override
public boolean isEnabled() {
return true;
}
}
4. 创建Mapper接口和Service层
 UserMapper
package com.example.securitydatebase.mapper;
import com.example.securitydatebase.entity.UserInfo;
import org.apache.ibatis.annotations.Mapper;
import org.apache.ibatis.annotations.Select;
import org.springframework.stereotype.Repository;
@Mapper
@Repository
public interface UserMapper {
@Select(“select * from user where username = #{username}”)
UserInfo getUserByUsername(String username);
}
UserInfoService
package com.example.securitydatebase.service;
import com.example.securitydatebase.entity.UserInfo;
import com.example.securitydatebase.mapper.UserMapper;
import org.springframework.beans.factory.annotation.Autowired;
import org.springframework.stereotype.Service;
@Service
public class UserInfoService {
@Autowired
private UserMapper userMapper;
public UserInfo getUserInfo(String username){
    return userMapper.getUserByUsername(username);
}
}
5. 创建Controller层
package com.example.securitydatebase.controller;
import com.example.securitydatebase.entity.UserInfo;
import com.example.securitydatebase.service.UserInfoService;
import org.springframework.beans.factory.annotation.Autowired;
import org.springframework.web.bind.annotation.*;
@RestController
public class UserController {
@Autowired
private UserInfoService userInfoService;
@GetMapping("/getUser")
public UserInfo getUser(@RequestParam String username){
    return userInfoService.getUserInfo(username);
}
}
6. 身份认证
 CustomUserDetailsService
package com.example.securitydatebase.service;
import com.example.securitydatebase.entity.UserInfo;
import org.springframework.beans.factory.annotation.Autowired;
import org.springframework.security.core.GrantedAuthority;
import org.springframework.security.core.authority.SimpleGrantedAuthority;
import org.springframework.security.core.userdetails.User;
import org.springframework.security.core.userdetails.UserDetails;
import org.springframework.security.core.userdetails.UserDetailsService;
import org.springframework.security.core.userdetails.UsernameNotFoundException;
import org.springframework.security.crypto.password.PasswordEncoder;
import org.springframework.stereotype.Component;
import java.util.ArrayList;
import java.util.List;
@Component
public class CustomUserDetailsService implements UserDetailsService {
@Autowired
private UserInfoService userInfoService;
/\*\*
* 需新建配置类注册一个指定的加密方式Bean,或在下一步Security配置类中注册指定
*/
@Autowired
private PasswordEncoder passwordEncoder;
@Override
public UserDetails loadUserByUsername(String username) throws UsernameNotFoundException {
    // 通过用户名从数据库获取用户信息
    UserInfo userInfo = userInfoService.getUserInfo(username);
    if (userInfo == null) {
        throw new UsernameNotFoundException("用户不存在");
    }
    //得到用户角色
    String role=userInfo.getRole();
    //角色集合
    List<GrantedAuthority> authorities=new ArrayList<>();
    //角色必须以“ROLE\_”开头,如果数据中没有,则在这里添加
    authorities.add(new SimpleGrantedAuthority("ROLE\_"+role));
    return new User(
        userInfo.getUsername(),
        //因为数据库是明文,所以这里需要加密密码
        passwordEncoder.encode(userInfo.getPassword()),
        authorities
    );
}
}
7. SpringSecurity配置
 WebSecurityConfig
package com.example.securitydatebase.config;
import com.example.securitydatebase.service.CustomUserDetailsService;
import org.springframework.beans.factory.annotation.Autowired;
import org.springframework.context.annotation.Bean;
import org.springframework.context.annotation.Lazy;
import org.springframework.security.config.annotation.authentication.builders.AuthenticationManagerBuilder;
import org.springframework.security.config.annotation.web.configuration.EnableWebSecurity;
import org.springframework.security.config.annotation.web.configuration.WebSecurityConfigurerAdapter;
import org.springframework.security.crypto.bcrypt.BCryptPasswordEncoder;
import org.springframework.security.crypto.password.PasswordEncoder;
@EnableWebSecurity //是Spring Security用于启用Web安全的注解
public class WebSecurityConfig extends WebSecurityConfigurerAdapter {
@Autowired
@Lazy
private CustomUserDetailsService userDatailService;
/\*\*
* 指定加密方式
*/
@Bean
public PasswordEncoder passwordEncoder(){
// 使用BCrypt加密密码
return new BCryptPasswordEncoder();
}
@Override
protected void configure(AuthenticationManagerBuilder auth) throws Exception {
    auth
        // 从数据库读取的用户进行身份认证
        .userDetailsService(userDatailService)
        .passwordEncoder(passwordEncoder());
}
}
8. 建立test数据库,建立user表
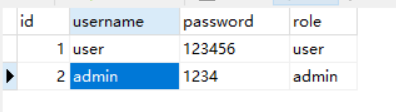
9. 测试

注意这一段只是用于认证,但是还没有限制角色的访问
#### 2、角色访问控制
1. 开启访问权限,在WebSecurityConfig中添加@EnableGlobalMethodSecurity

prePostEnabled=true会解锁@PreAuthorize和@PostAuthorize两个注解,@preAuthorize注解会在方法执行前进行验证,而@PostAuthorize注解在方法执行后进行验证
是不是有点懵,没关系,看后面就懂了
2. 在控制层添加访问接口
UserController类增加方法的访问权限
@PreAuthorize("hasAnyRole('user')") // 只能user角色才能访问该方法
@GetMapping("/user")
public String user(){
    return "hello,user";
}

@PreAuthorize("hasAnyRole('admin')") // 只能admin角色才能访问该方法
@GetMapping("/admin")
public String admin(){
    return "hello,admin";
}
PreAuthorize在执行前会首先验证是否user角色


3. 测试


使用user登录时无法访问/admin,
 使用admin界面时,无法访问/user


#### 3、密码加密保护


1. 修改Mapper接口
package com.example.securitydatebase.mapper;
import com.example.securitydatebase.entity.UserInfo;
import org.apache.ibatis.annotations.Insert;
import org.apache.ibatis.annotations.Mapper;
import org.apache.ibatis.annotations.Select;
import org.springframework.stereotype.Repository;
@Mapper
@Repository
public interface UserMapper {
@Select(“select * from user where username = #{username}”)
UserInfo getUserByUsername(String username);
// 添加用户
@Insert("insert into user(username, password) value(#{username}, #{password})")
int insertUserInfo(UserInfo userInfo);
}
2. 修改service类
package com.example.securitydatebase.service;
import com.example.securitydatebase.entity.UserInfo;
import com.example.securitydatebase.mapper.UserMapper;
import org.springframework.beans.factory.annotation.Autowired;
import org.springframework.security.crypto.password.PasswordEncoder;
import org.springframework.stereotype.Service;
@Service
public class UserInfoService {
@Autowired
private UserMapper userMapper;
@Autowired
private PasswordEncoder passwordEncoder;
public int insertUser(UserInfo userInfo){
// 加密密码
userInfo.setPassword(passwordEncoder.encode(userInfo.getPassword()));
return userMapper.insertUserInfo(userInfo);
}
public UserInfo getUserInfo(String username){
    return userMapper.getUserByUsername(username);
}
}
### 给大家的福利
**零基础入门**
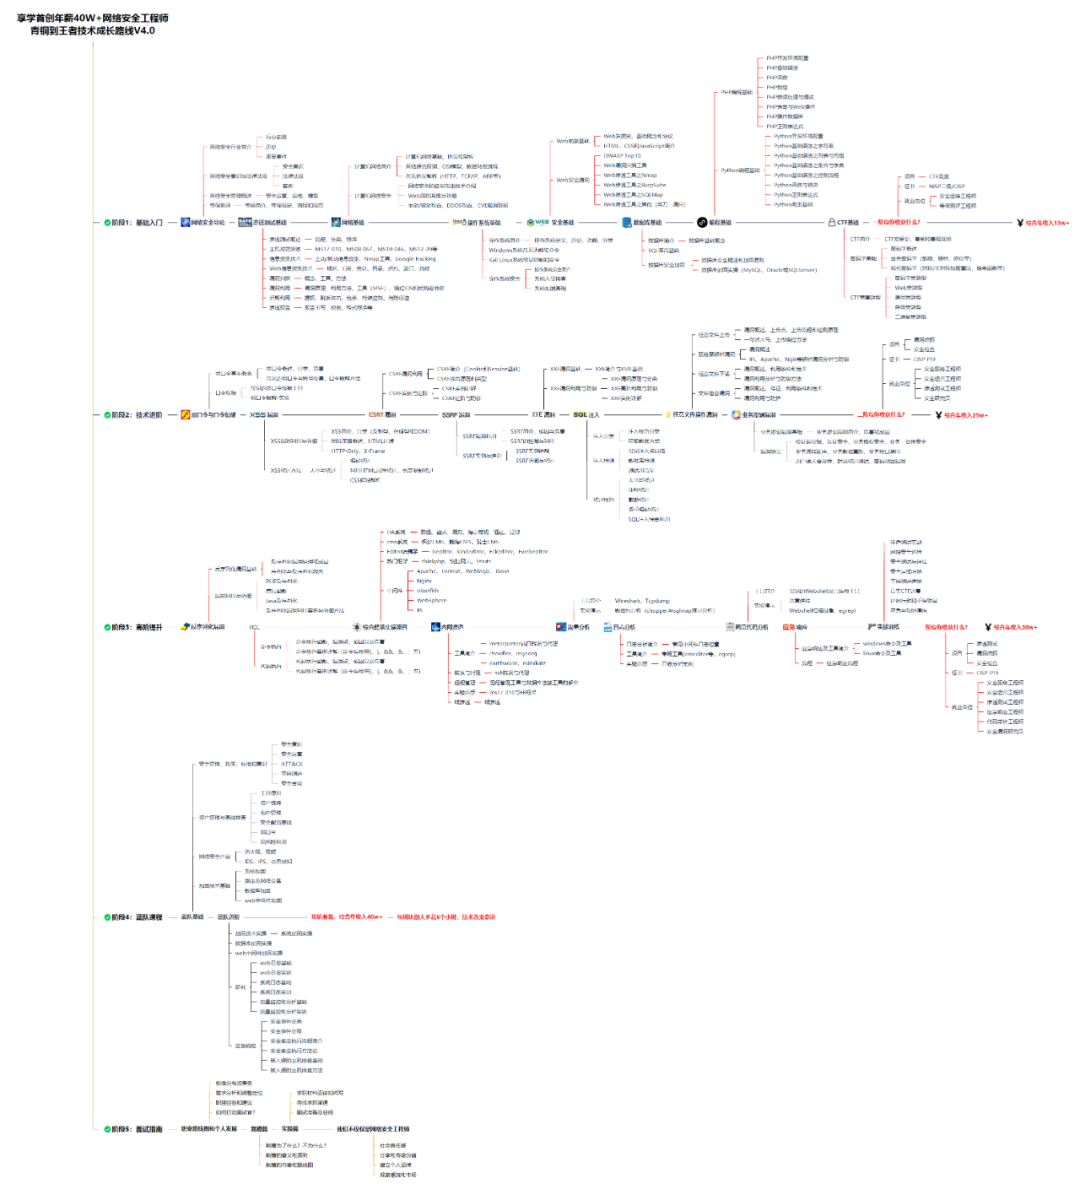
对于从来没有接触过网络安全的同学,我们帮你准备了详细的学习成长路线图。可以说是最科学最系统的学习路线,大家跟着这个大的方向学习准没问题。
同时每个成长路线对应的板块都有配套的视频提供:

因篇幅有限,仅展示部分资料
网络安全面试题
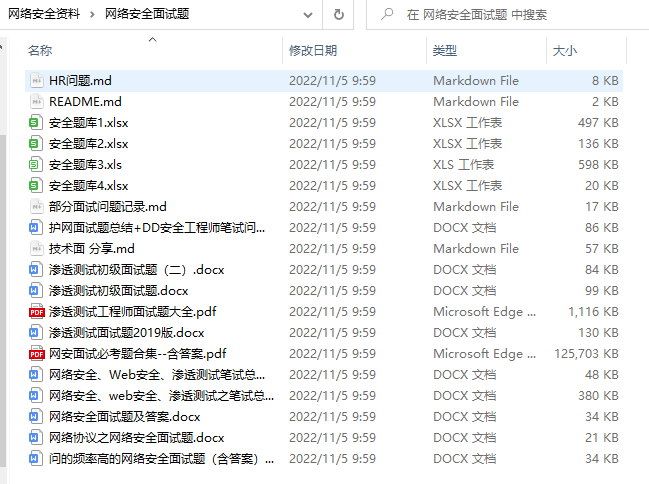
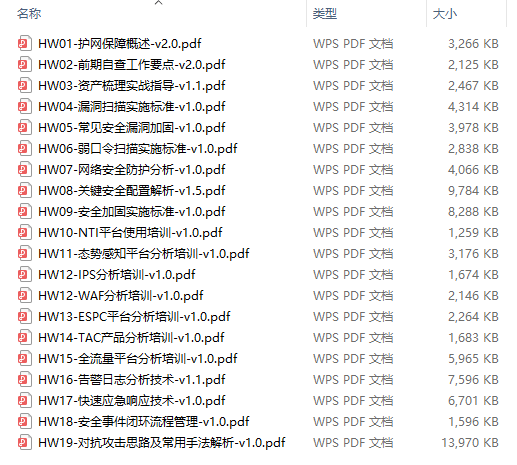
绿盟护网行动
还有大家最喜欢的黑客技术

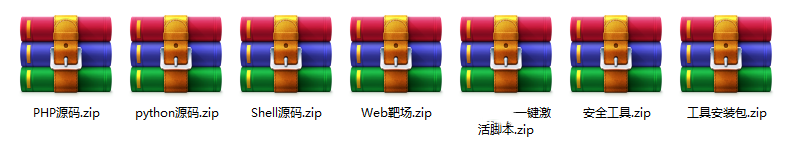
**网络安全源码合集+工具包**
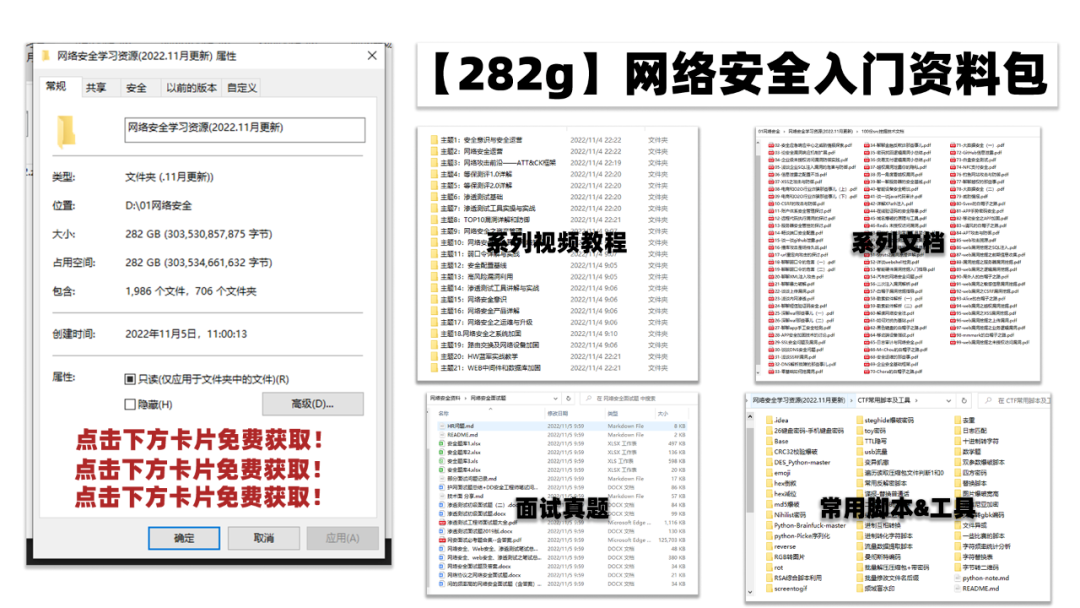
**所有资料共282G**,朋友们如果有需要全套《网络安全入门+黑客进阶学习资源包》,可以扫描下方二维码领取(如遇扫码问题,可以在评论区留言领取哦)~


 1万+
1万+


 被折叠的 条评论
为什么被折叠?
被折叠的 条评论
为什么被折叠?
 到【灌水乐园】发言


