


先自我介绍一下,小编浙江大学毕业,去过华为、字节跳动等大厂,目前阿里P7
深知大多数程序员,想要提升技能,往往是自己摸索成长,但自己不成体系的自学效果低效又漫长,而且极易碰到天花板技术停滞不前!
因此收集整理了一份《2024年最新Golang全套学习资料》,初衷也很简单,就是希望能够帮助到想自学提升又不知道该从何学起的朋友。

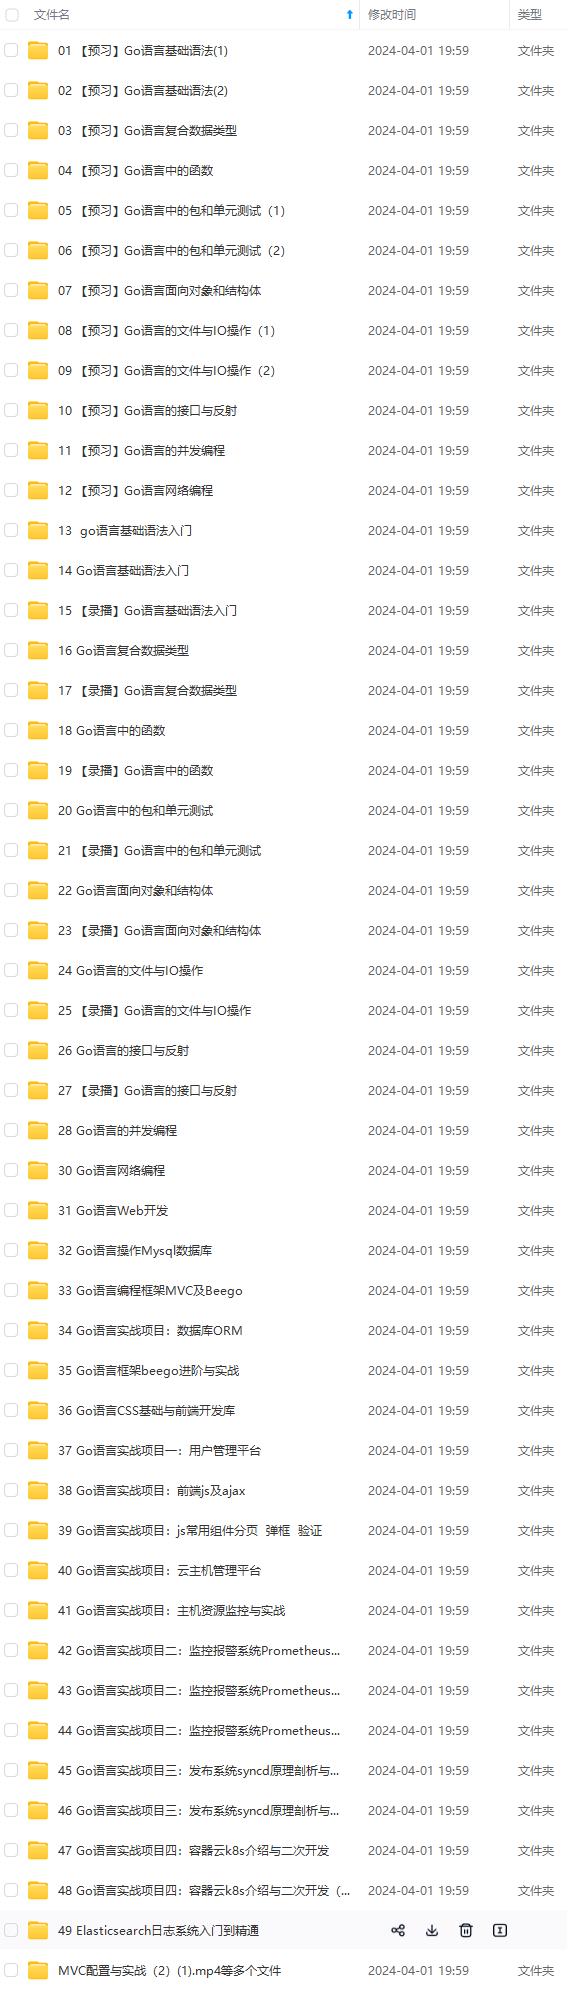
既有适合小白学习的零基础资料,也有适合3年以上经验的小伙伴深入学习提升的进阶课程,涵盖了95%以上Go语言开发知识点,真正体系化!
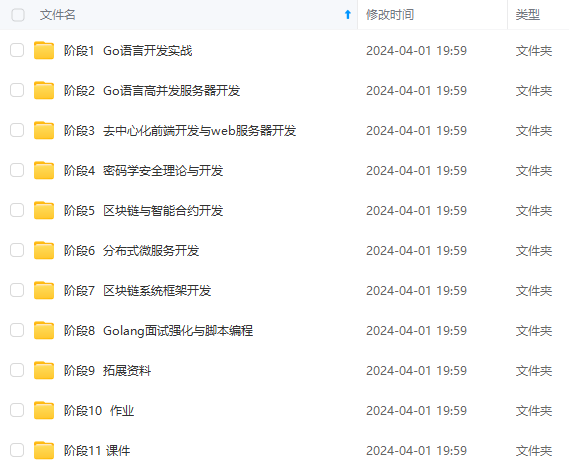
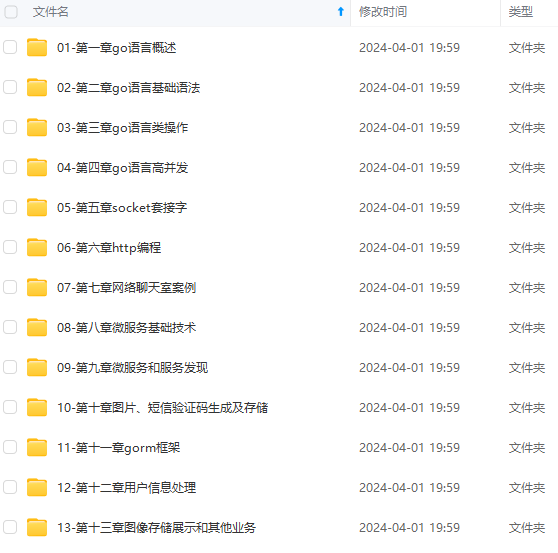
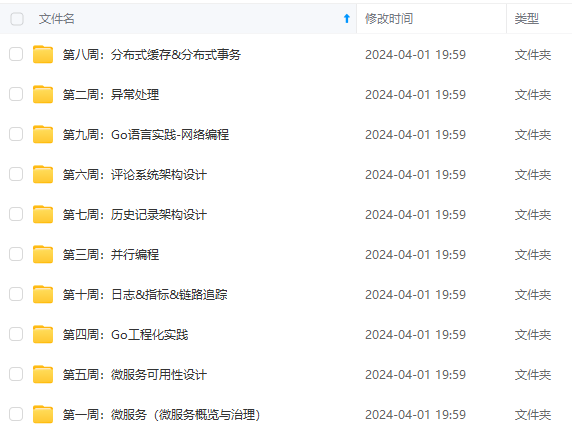
由于文件比较多,这里只是将部分目录截图出来,全套包含大厂面经、学习笔记、源码讲义、实战项目、大纲路线、讲解视频,并且后续会持续更新
如果你需要这些资料,可以添加V获取:vip1024b (备注go)

正文
*/
@Override
protected void doFilterInternal(HttpServletRequest request, HttpServletResponse response, FilterChain filterChain) throws ServletException, IOException {
//如果提交的请求url是/authentication/form,且是POST请求
if(StringUtils.equals(“/authentication/form”,request.getRequestURI())
&& StringUtils.equalsIgnoreCase(request.getMethod(),“post”)){
try {
//从Session中获取参数,需要以ServletWebRequest为参数
validate(new ServletWebRequest(request));
}catch (ValidateCodeException exception){
//如果捕获异常就使用authenticationFailureHandler把错误信息返回回去
authenticationFailureHandler.onAuthenticationFailure(request,response,exception);
return;//如果抛出异常了就不再继续走下面的过滤器了
}
}
//校验完图形验证码后调用下一个过滤器
filterChain.doFilter(request,response);
}
/**
- 图形验证码校验的具体方法
- @param request
*/
public void validate(ServletWebRequest request) throws ServletException{
//Session中取出,即后台存储的验证码
String sessionImageCode = (String)sessionStrategy.getAttribute(request,SESSION_IMAGE_CODE_KEY);
//从请求中取出
String requestImageCode = ServletRequestUtils.getStringParameter(request.getRequest(),“imageCode”);
if(StringUtils.isBlank(requestImageCode)){
throw new ValidateCodeException(“验证码不能为空”);
}
if(StringUtils.isBlank(sessionImageCode)){
throw new ValidateCodeException(“验证码不存在”);
}
if(!StringUtils.equalsIgnoreCase(sessionImageCode,requestImageCode)){
throw new ValidateCodeException(“验证码不匹配”);
}
//如果没有出现以上的异常则验证完后删除session中存储的验证码
sessionStrategy.removeAttribute(request,SESSION_IMAGE_CODE_KEY);
}
public AuthenticationFailureHandler getAuthenticationFailureHandler() {
return authenticationFailureHandler;
}
public void setAuthenticationFailureHandler(AuthenticationFailureHandler authenticationFailureHandler) {
this.authenticationFailureHandler = authenticationFailureHandler;
}
}
③验证码校验中异常的处理。
package security.core.validateCode;
import org.springframework.security.core.AuthenticationException;
import java.io.Serializable;
/**
- AuthenticationException:是security校验过程中出现异常的父类
*/
public class ValidateCodeException extends AuthenticationException implements Serializable {
private static final long serialVersionUID = -2799288346535627988L;
/**
- @param detail A possibly null string containing details of the exception.
- @see Throwable#getMessage
*/
public ValidateCodeException(String detail) {
super(detail);
}
}
④将验证码的过滤器加到过滤器链上。在 BrowserSecurityConfig 配置类的 configure(HttpSecurity http)方法中加入验证码的过滤器,放到 UsernamePasswordAuthenticationFilter 前。
以下为部分代码:
/**
- @param http
- @throws Exception
*/
@Override
protected void configure(HttpSecurity http) throws Exception {
//加入图片验证码的前置校验过滤器
ValidateCodeFilter validateCodeFilter = new ValidateCodeFilter();
validateCodeFilter.setAuthenticationFailureHandler(imoocAuthenticationFailureHandler);
http.addFilterBefore(validateCodeFilter, UsernamePasswordAuthenticationFilter.class)
.formLogin()//开启表单登录(即对表单登录进行身份认证)
// http.formLogin()//开启表单登录(即对表单登录进行身份认证)
.loginPage(“/authentication/require”)//指定登录页面
.loginProcessingUrl(“/authentication/form”)//让UsernamePasswordAuthenticationFilter能够处理提交的登录请求
.successHandler(imoocAuthenticationSuccessHandler)
.failureHandler(imoocAuthenticationFailureHandler)
完整代码:
package security.browser.config;
import org.springframework.beans.factory.annotation.Autowired;
import org.springframework.context.annotation.Bean;
import org.springframework.context.annotation.Configuration;
import org.springframework.security.config.annotation.web.builders.HttpSecurity;
import org.springframework.security.config.annotation.web.configuration.WebSecurityConfigurerAdapter;
import org.springframework.security.crypto.bcrypt.BCryptPasswordEncoder;
import org.springframework.security.crypto.password.PasswordEncoder;
import org.springframework.security.web.authentication.AuthenticationFailureHandler;
import org.springframework.security.web.authentication.AuthenticationSuccessHandler;
import org.springframework.security.web.authentication.UsernamePasswordAuthenticationFilter;
import security.core.properties.SecurityProperties;
import security.core.validateCode.ValidateCodeFilter;
/**
- WebSecurityConfigurerAdapter是SpringSecurity提供的安全适配器类
*/
@Configuration
public class BrowserSecurityConfig extends WebSecurityConfigurerAdapter {
/**
- 读取配置信息
*/
@Autowired
private SecurityProperties securityProperties;
/**
- 自定义的登陆成功的处理器
*/
@Autowired
private AuthenticationSuccessHandler imoocAuthenticationSuccessHandler;
/**
- 自定义的登陆失败的处理器
*/
@Autowired
private AuthenticationFailureHandler imoocAuthenticationFailureHandler;
/**
*
- @param http
- @throws Exception
*/
@Override
protected void configure(HttpSecurity http) throws Exception {
//加入图片验证码的前置校验过滤器
ValidateCodeFilter validateCodeFilter = new ValidateCodeFilter();
validateCodeFilter.setAuthenticationFailureHandler(imoocAuthenticationFailureHandler);
http.addFilterBefore(validateCodeFilter, UsernamePasswordAuthenticationFilter.class)
.formLogin()//开启表单登录(即对表单登录进行身份认证)
// http.formLogin()//开启表单登录(即对表单登录进行身份认证)
.loginPage(“/authentication/require”)//指定登录页面
.loginProcessingUrl(“/authentication/form”)//让UsernamePasswordAuthenticationFilter能够处理提交的登录请求
.successHandler(imoocAuthenticationSuccessHandler)
.failureHandler(imoocAuthenticationFailureHandler)
// http.httpBasic()//开启SpringSecurity原生的表单登录
.and()
.authorizeRequests()//对请求进行授权(即登录后需要授权)
.antMatchers(“/authentication/require”,securityProperties.getBrowser().getLoginPage(),“/code/image”).permitAll()//允许signIn.html请求进来,不进行拦截
.anyRequest()//对任何请求
.authenticated()//开启认证
.and()
.csrf() //跨域请求伪造
.disable();//关闭
// .anyRequest()
// .authenticated();
// 上面两个方法的意思:对任何请求都需要认证
}
@Bean
public PasswordEncoder passwordEncoder(){
return new BCryptPasswordEncoder();
}
}
完成验证码所有代码。
再次强调要注意application-browser.properties配置文件中 imooc.security.browser.loginType = JSON 还是 REDIRECT,它会影响返回的结果。
3、重构图形验证码接口(目的是为了可重用)
(1)验证码基本参数可配置
即验证码和验证码图片之间的宽度、高度,验证码的长度等可配置

这里只有两级,即应用级配置和默认配置,对于请求级 的配置暂时舍弃。
① 在core模块的 properties包中新建 ImageCodeProperties 类,里面的数值即为默认配置。
package security.core.properties;
/**
- 图形验证码的默认配置类
*/
public class ImageCodeProperties {
/**
- 验证码图片的宽度 115位默宽度
*/
private int width = 115;
/**
- 验证码图片的高度 34为默认高度
*/
private int height = 34;
/**
- 验证码的长度 6为默认长度
*/
private int DEFAULT_CODE_LENGTH = 6;
public int getWidth() {
return width;
}
public void setWidth(int width) {
this.width = width;
}
public int getHeight() {
return height;
}
public void setHeight(int height) {
this.height = height;
}
public int getDEFAULT_CODE_LENGTH() {
return DEFAULT_CODE_LENGTH;
}
public void setDEFAULT_CODE_LENGTH(int DEFAULT_CODE_LENGTH) {
this.DEFAULT_CODE_LENGTH = DEFAULT_CODE_LENGTH;
}
}
② 在core模块的 properties包中新建 ValidateCodeProperties 类 (专门负责验证码相关的配置)
package security.core.validateCode;
import security.core.properties.ImageCodeProperties;
/**
- 验证码相关的配置类(包含图片验证码、短信验证码等)
*/
public class ValidateCodeProperties {
private ImageCodeProperties image = new ImageCodeProperties();
public ImageCodeProperties getImage() {
return image;
}
public void setImage(ImageCodeProperties image) {
this.image = image;
}
}
③ 在 SecurityProperties 中加入 ValidateCodeProperties
package security.core.properties;
import org.springframework.boot.context.properties.ConfigurationProperties;
import org.springframework.context.annotation.PropertySource;
import org.springframework.stereotype.Component;
import security.core.validateCode.ValidateCodeProperties;
@Component
@PropertySource(“classpath:application-browser.properties”)
//@PropertySource(value= {“classpath:application-demo.properties”,“classpath:application-browser.properties”})
@ConfigurationProperties(“imooc.security”)
public class SecurityProperties {
/**
- 浏览器相关的配置
*/
private BrowserProperties browser = new BrowserProperties();
/**
- 验证码相关的配置
*/
private ValidateCodeProperties code = new ValidateCodeProperties();
public BrowserProperties getBrowser() {
return browser;
}
public void setBrowser(BrowserProperties browser) {
this.browser = browser;
}
public ValidateCodeProperties getCode() {
return code;
}
public void setCode(ValidateCodeProperties code) {
this.code = code;
}
}
④ 在application-browser.properties中加入应用级的配置,只要在 application-browser.properties 配置了验证码的参数信息,在使用时就会覆盖 ImageCodeProperties 默认的配置。
imooc.security.code.image.width = 120
imooc.security.code.image.height = 40
imooc.security.code.image.DEFAULT_CODE_LENGTH = 5
⑤修改 ImageCodeUtil 中的配置,让它通过读取参数信息来动态配置验证码
需要修改的地方
(1) 注释掉原有的 width、height、DEFAULT_CODE_LENGTH配置
(2) 将generateCodeAndPic() 改为 generateCodeAndPic(int width,int height,int DEFAULT_CODE_LENGTH) 来接收参数
(3) 将getRandomString() 改为getRandomString(int DEFAULT_CODE_LENGTH)
package security.core.validateCode;
import java.awt.*;
import java.awt.image.BufferedImage;
import java.util.HashMap;
import java.util.Map;
import java.util.Random;
/**
- 随机生成验证码
- @author chenliucheng
*/
public class ImageCodeUtil {
//CodeUtils mCodeUtils 属性 和 CodeUtils getInstance()方法可去除,若要去除,则generateCodeAndPic()应该声明成静态方,即用static修饰,调用的时候通过类名直接调用
private static ImageCodeUtil imageCodeUtils;
public static ImageCodeUtil getInstance() {
if(imageCodeUtils == null) {
imageCodeUtils = new ImageCodeUtil();
}
return imageCodeUtils;
}
/**
- 定义图片的width
/
// private static int width = 115;
/* - 定义图片的height
/
// private static int height = 34;
/* - 验证码的长度 这里是6位
*/
// private static final int DEFAULT_CODE_LENGTH = 6;
/**
- 生成的验证码
*/
private String randomString;
private Random random;
/**
- 随机字符字典 去掉了[0,1,I,O,o]这几个容易混淆的字符
*/
private static final char[] CHARS = { ‘2’, ‘3’, ‘4’, ‘5’, ‘6’, ‘7’, ‘8’, ‘9’, ‘A’, ‘B’, ‘C’, ‘D’, ‘E’, ‘F’, ‘G’,
‘H’, ‘J’, ‘K’, ‘L’, ‘M’, ‘N’, ‘P’, ‘Q’, ‘R’, ‘S’, ‘T’, ‘U’, ‘V’, ‘W’, ‘X’, ‘Y’, ‘Z’, ‘a’, ‘b’, ‘c’, ‘d’,
‘e’, ‘f’, ‘g’, ‘h’, ‘i’, ‘j’, ‘k’, ‘m’, ‘n’, ‘p’, ‘q’, ‘r’, ‘s’, ‘t’, ‘u’, ‘v’, ‘w’, ‘x’, ‘y’, ‘z’ };
/**
- 生成验证码
- @return
*/
public String getRandomString(int DEFAULT_CODE_LENGTH) {
StringBuilder mBuilder = new StringBuilder();
random = new Random();
//使用之前首先清空内容
mBuilder.delete(0, mBuilder.length());
for (int i = 0; i < DEFAULT_CODE_LENGTH; i++) {
mBuilder.append(CHARS[random.nextInt(CHARS.length)]);
}
return mBuilder.toString();
}
/**
- 获取随机数颜色
- @return
*/
private Color getRandomColor() {
return new Color(random.nextInt(255), random.nextInt(255), random.nextInt(255));
}
/**
- 返回某颜色的反色
- @param color
- @return
*/
private Color getReverseColor(Color color) {
return new Color(255 - color.getRed(), 255 - color.getGreen(), 255 - color.getBlue());
}
/**
- 生成一个map集合 code为生成的验证码 codePic为生成的验证码BufferedImage对象
- @return
*/
public Map<String, Object> generateCodeAndPic(int width,int height,int DEFAULT_CODE_LENGTH) {
// 定义图像buffer
BufferedImage bufferedImage = new BufferedImage(width, height, BufferedImage.TYPE_INT_RGB);
Graphics2D graphics = bufferedImage.createGraphics();
//生成验证码字符
randomString = getRandomString(DEFAULT_CODE_LENGTH);
for (int i = 0; i < randomString.length(); i++) {
Color color = getRandomColor();
Color reverse = getReverseColor(color);
// 设置字体颜色
graphics.setColor(color);
// 设置字体样式
graphics.setFont(new Font(Font.SANS_SERIF, Font.BOLD, 25));
//设置验证码图片原点以及验证码图片大小,来画矩形
graphics.fillRect(0, 0, width, height);
graphics.setColor(reverse);
//10:是验证码在验证码图片中左边第一个字符距左边框的距离 ,25:是所有验证码的底部距离验证码图片上边框的距离
graphics.drawString(randomString, 10, 25);
}
// 随机生成一些点
for (int i = 0, n = random.nextInt(100); i < n; i++) {
graphics.drawRect(random.nextInt(width), random.nextInt(height), 1, 1);
}
// 随机产生干扰线,使图象中的认证码不易被其它程序探测到
for (int i = 0; i < 10; i++) {
graphics.setColor(getRandomColor());
// 保证画在边框之内
final int x = random.nextInt(width - 1);
final int y = random.nextInt(height - 1);
final int xl = random.nextInt(width);
final int yl = random.nextInt(height);
graphics.drawLine(x, y, x + xl, y + yl);
}
// 图像生效
graphics.dispose();
Map<String, Object> map = new HashMap<String, Object>();
// 存放验证码
map.put(“imageCode”, randomString);
// 存放生成的验证码BufferedImage对象
map.put(“codePic”, bufferedImage);
return map;
}
}
ImageCodeUtil 类的完整代码:
package security.core.validateCode;
import java.awt.*;
import java.awt.image.BufferedImage;
import java.util.HashMap;
import java.util.Map;
import java.util.Random;
/**
- 随机生成验证码
- @author chenliucheng
*/
public class ImageCodeUtil {
//CodeUtils mCodeUtils 属性 和 CodeUtils getInstance()方法可去除,若要去除,则generateCodeAndPic()应该声明成静态方,即用static修饰,调用的时候通过类名直接调用
private static ImageCodeUtil imageCodeUtils;
public static ImageCodeUtil getInstance() {
if(imageCodeUtils == null) {
imageCodeUtils = new ImageCodeUtil();
}
return imageCodeUtils;
}
/**
- 定义图片的width
/
// private static int width = 115;
/* - 定义图片的height
/
// private static int height = 34;
/* - 验证码的长度 这里是6位
*/
// private static final int DEFAULT_CODE_LENGTH = 6;
/**
- 生成的验证码
*/
private String randomString;
private Random random;
/**
- 随机字符字典 去掉了[0,1,I,O,o]这几个容易混淆的字符
*/
private static final char[] CHARS = { ‘2’, ‘3’, ‘4’, ‘5’, ‘6’, ‘7’, ‘8’, ‘9’, ‘A’, ‘B’, ‘C’, ‘D’, ‘E’, ‘F’, ‘G’,
‘H’, ‘J’, ‘K’, ‘L’, ‘M’, ‘N’, ‘P’, ‘Q’, ‘R’, ‘S’, ‘T’, ‘U’, ‘V’, ‘W’, ‘X’, ‘Y’, ‘Z’, ‘a’, ‘b’, ‘c’, ‘d’,
‘e’, ‘f’, ‘g’, ‘h’, ‘i’, ‘j’, ‘k’, ‘m’, ‘n’, ‘p’, ‘q’, ‘r’, ‘s’, ‘t’, ‘u’, ‘v’, ‘w’, ‘x’, ‘y’, ‘z’ };
/**
- 生成验证码
- @return
*/
public String getRandomString(int DEFAULT_CODE_LENGTH) {
StringBuilder mBuilder = new StringBuilder();
random = new Random();
//使用之前首先清空内容
mBuilder.delete(0, mBuilder.length());
for (int i = 0; i < DEFAULT_CODE_LENGTH; i++) {
mBuilder.append(CHARS[random.nextInt(CHARS.length)]);
}
return mBuilder.toString();
}
/**
- 获取随机数颜色
- @return
*/
private Color getRandomColor() {
return new Color(random.nextInt(255), random.nextInt(255), random.nextInt(255));
}
/**
- 返回某颜色的反色
- @param color
- @return
*/
private Color getReverseColor(Color color) {
return new Color(255 - color.getRed(), 255 - color.getGreen(), 255 - color.getBlue());
}
/**
- 生成一个map集合 code为生成的验证码 codePic为生成的验证码BufferedImage对象
- @return
*/
public Map<String, Object> generateCodeAndPic(int width,int height,int DEFAULT_CODE_LENGTH) {
// 定义图像buffer
BufferedImage bufferedImage = new BufferedImage(width, height, BufferedImage.TYPE_INT_RGB);
Graphics2D graphics = bufferedImage.createGraphics();
//生成验证码字符
randomString = getRandomString(DEFAULT_CODE_LENGTH);
for (int i = 0; i < randomString.length(); i++) {
Color color = getRandomColor();
Color reverse = getReverseColor(color);
// 设置字体颜色
graphics.setColor(color);
// 设置字体样式
graphics.setFont(new Font(Font.SANS_SERIF, Font.BOLD, 25));
//设置验证码图片原点以及验证码图片大小,来画矩形
graphics.fillRect(0, 0, width, height);
graphics.setColor(reverse);
//10:是验证码在验证码图片中左边第一个字符距左边框的距离 ,25:是所有验证码的底部距离验证码图片上边框的距离
graphics.drawString(randomString, 10, 25);
}
// 随机生成一些点
for (int i = 0, n = random.nextInt(100); i < n; i++) {
graphics.drawRect(random.nextInt(width), random.nextInt(height), 1, 1);
}
// 随机产生干扰线,使图象中的认证码不易被其它程序探测到
for (int i = 0; i < 10; i++) {
graphics.setColor(getRandomColor());
// 保证画在边框之内
final int x = random.nextInt(width - 1);
final int y = random.nextInt(height - 1);
final int xl = random.nextInt(width);
final int yl = random.nextInt(height);
graphics.drawLine(x, y, x + xl, y + yl);
}
// 图像生效
graphics.dispose();
Map<String, Object> map = new HashMap<String, Object>();
// 存放验证码
map.put(“imageCode”, randomString);
// 存放生成的验证码BufferedImage对象
map.put(“codePic”, bufferedImage);
return map;
}
}
⑥ 改造ValidateCodeController
(1)加入SecurityProperties配置类
/**
- 使用配置文件里的验证码参数配置
*/
@Autowired
private SecurityProperties securityProperties;
(2)将读入的配置传到ImageCodeUtil的 generateCodeAndPic(int width,int height,int DEFAULT_CODE_LENGTH)中。
int width = securityProperties.getCode().getImage().getWidth();
int height = securityProperties.getCode().getImage().getHeight();
int codeLength = securityProperties.getCode().getImage().getDEFAULT_CODE_LENGTH();
//1、生成验证码
Map<String, Object> codeMap = ImageCodeUtil.getInstance().generateCodeAndPic(width,height,codeLength);
ValidateCodeController完整代码:
package security.browser.controller;
import lombok.extern.slf4j.Slf4j;
import org.springframework.beans.factory.annotation.Autowired;
import org.springframework.social.connect.web.HttpSessionSessionStrategy;
import org.springframework.social.connect.web.SessionStrategy;
import org.springframework.web.bind.annotation.GetMapping;
import org.springframework.web.bind.annotation.RestController;
import org.springframework.web.context.request.ServletWebRequest;
import security.core.properties.SecurityProperties;
import security.core.validateCode.ImageCodeUtil;
import javax.imageio.ImageIO;
import javax.servlet.http.HttpServletRequest;
import javax.servlet.http.HttpServletResponse;
import java.awt.image.RenderedImage;
import java.util.Map;
/**
- 生成校验码的请求处理器
- @author zhailiang
*/
@RestController
@Slf4j
public class ValidateCodeController {
/**
- 图形验证码的key
*/
private static final String SESSION_KEY = “SESSION_IMAGE_CODE_KEY”;
/**
- social工具,用于存储Session信息
*/
private SessionStrategy sessionStrategy = new HttpSessionSessionStrategy();
/**
- 使用配置文件里的验证码参数配置
*/
@Autowired
private SecurityProperties securityProperties;
/**
- 提供图片验证码
- @param request
- @param response
- @throws Exception
*/
@GetMapping(“/code/image”)
public void createImageCode(HttpServletRequest request, HttpServletResponse response) throws Exception{
int width = securityProperties.getCode().getImage().getWidth();
int height = securityProperties.getCode().getImage().getHeight();
int codeLength = securityProperties.getCode().getImage().getDEFAULT_CODE_LENGTH();
//1、生成验证码
Map<String, Object> codeMap = ImageCodeUtil.getInstance().generateCodeAndPic(width,height,codeLength);
log.info(“验证码:”+codeMap.get(“imageCode”));
//2、存入到Session中
sessionStrategy.setAttribute(new ServletWebRequest(request),SESSION_KEY,codeMap.get(“imageCode”));
//3、写入到响应中(response)
ImageIO.write((RenderedImage) codeMap.get(“codePic”),“JPEG”,response.getOutputStream());
}
}
(2)验证码拦截的接口可配置
即拦截图形验证码的过滤器中表单提交的url地址可配置
① 在 ImageCodeProperties 中加入 url 的参数
/**
- 验证码拦截的接口可配置,用于对逗号隔开的url进行拦截
*/
private String url;
public String getUrl() {
return url;
}
public void setUrl(String url) {
this.url = url;
}
② 在 application-browser.properties配置文件中加入配置 url 集合
#验证码拦截的接口可配置(用于对图形验证码的校验,即遇到该url才进行图形验证码校验)
imooc.security.code.image.url = /user,/user/*
③ 对 ValidateCodeFilter 进行改造
(1)再加上实现 InitializingBean 主要是使用 InitializingBean 类中的 afterPropertiesSet() 方法
这里对InitializingBean 增加一些个人的理解,实现 InitializingBean 的目的是使用 afterPropertiesSet()在 ValidateCodeFilter 类初始化的时候就进行 url 的添加此处使用并没有特别其他的含义。
(2)加入一些相关属性
/**
- 用于存储需要拦截的url地址集合
*/
private Set urls = new HashSet<>();
/**
- 使用配置文件里配置的拦截url地址
*/
private SecurityProperties securityProperties;
/**
- 用于对url地址进行匹配判断
*/
private AntPathMatcher antPathMatcher = new AntPathMatcher();
public SecurityProperties getSecurityProperties() {
return securityProperties;
}
public void setSecurityProperties(SecurityProperties securityProperties) {
this.securityProperties = securityProperties;
}
(3)afterPropertiesSet() 方法中的处理逻辑
/**
- 用户将配置文件中配置的url集合遍历后放到urls集合中
- @throws ServletException
*/
@Override
public void afterPropertiesSet() throws ServletException {
super.afterPropertiesSet();
String[] configUrls = StringUtils.split(securityProperties.getCode().getImage().getUrl(),“,”);
for(String configUrl : configUrls){
urls.add(configUrl);
}
//把提交表单的登录请求也加到url集合中
urls.add(“/authentication/form”);
}
(4)修改 doFilterInternal() 方法
/**
- 对图形验证码进行校验
- @param request
- @param response
- @param filterChain
- @throws ServletException
- @throws IOException
*/
@Override
protected void doFilterInternal(HttpServletRequest request, HttpServletResponse response, FilterChain filterChain) throws ServletException, IOException {
//如果提交的请求url是/authentication/form,且是POST请求
// if(StringUtils.equals(“/authentication/form”,request.getRequestURI())
// && StringUtils.equalsIgnoreCase(request.getMethod(),“post”)){
//用于对urls集合中所有的url进行遍历判断
boolean action = false;
for(String url : urls){
//如果请求中的url和我们配置拦截的url一致,action = true;
if(antPathMatcher.match(url,request.getRequestURI())){
action = true;
}
}
if(action){
try {
//从Session中获取参数,需要以ServletWebRequest为参数
validate(new ServletWebRequest(request));
}catch (ValidateCodeException exception){
//如果捕获异常就使用authenticationFailureHandler把错误信息返回回去
authenticationFailureHandler.onAuthenticationFailure(request,response,exception);
return;//如果抛出异常了就不再继续走下面的过滤器了
}
}
//校验完图形验证码后调用下一个过滤器
filterChain.doFilter(request,response);
}
完整代码:
package security.core.validateCode;
import org.apache.commons.lang.StringUtils;
import org.springframework.beans.factory.InitializingBean;
import org.springframework.beans.factory.annotation.Autowired;
import org.springframework.security.web.authentication.AuthenticationFailureHandler;
import org.springframework.social.connect.web.HttpSessionSessionStrategy;
import org.springframework.social.connect.web.SessionStrategy;
import org.springframework.util.AntPathMatcher;
import org.springframework.web.bind.ServletRequestUtils;
import org.springframework.web.context.request.ServletWebRequest;
import org.springframework.web.filter.OncePerRequestFilter;
import security.core.properties.SecurityProperties;
import javax.servlet.FilterChain;
import javax.servlet.ServletException;
import javax.servlet.http.HttpServletRequest;
import javax.servlet.http.HttpServletResponse;
import java.io.IOException;
import java.util.HashSet;
import java.util.Set;
/**
- 在处理请求之前过滤,且只过滤一次
- 实现InitializingBean的目的是为了在其他参数都组装完毕后,再初始化urls的值
*/
public class ValidateCodeFilter extends OncePerRequestFilter implements InitializingBean {
/**
- 登陆失败的处理器
*/
private AuthenticationFailureHandler authenticationFailureHandler;
/**
- 图形验证码的key
*/
private static final String SESSION_IMAGE_CODE_KEY = “SESSION_IMAGE_CODE_KEY”;
/**
- 存储了Session信息
*/
private SessionStrategy sessionStrategy = new HttpSessionSessionStrategy();
/**
- 用于存储需要拦截的url地址集合
*/
private Set urls = new HashSet<>();
/**
- 使用配置文件里配置的拦截url地址
*/
private SecurityProperties securityProperties;
/**
- 用于对url地址进行匹配判断
*/
private AntPathMatcher antPathMatcher = new AntPathMatcher();
/**
- 用户将配置文件中配置的url集合遍历后放到urls集合中
- @throws ServletException
*/
@Override
public void afterPropertiesSet() throws ServletException {
super.afterPropertiesSet();
String[] configUrls = StringUtils.split(securityProperties.getCode().getImage().getUrl(),“,”);
for(String configUrl : configUrls){
urls.add(configUrl);
}
//把提交表单的登录请求也加到url集合中
urls.add(“/authentication/form”);
}
/**
- 对图形验证码进行校验
- @param request
- @param response
- @param filterChain
- @throws ServletException
- @throws IOException
*/
@Override
protected void doFilterInternal(HttpServletRequest request, HttpServletResponse response, FilterChain filterChain) throws ServletException, IOException {
//如果提交的请求url是/authentication/form,且是POST请求
// if(StringUtils.equals(“/authentication/form”,request.getRequestURI())
// && StringUtils.equalsIgnoreCase(request.getMethod(),“post”)){
//用于对urls集合中所有的url进行遍历判断
boolean action = false;
for(String url : urls){
//如果请求中的url和我们配置拦截的url一致,action = true;
if(antPathMatcher.match(url,request.getRequestURI())){
action = true;
}
}
if(action){
try {
//从Session中获取参数,需要以ServletWebRequest为参数
validate(new ServletWebRequest(request));
}catch (ValidateCodeException exception){
//如果捕获异常就使用authenticationFailureHandler把错误信息返回回去
authenticationFailureHandler.onAuthenticationFailure(request,response,exception);
return;//如果抛出异常了就不再继续走下面的过滤器了
}
}
//校验完图形验证码后调用下一个过滤器
filterChain.doFilter(request,response);
}
/**
- 图形验证码校验的具体方法
- @param request
*/
public void validate(ServletWebRequest request) throws ServletException{
//Session中取出,即后台存储的验证码
String sessionImageCode = (String)sessionStrategy.getAttribute(request,SESSION_IMAGE_CODE_KEY);
//从请求中取出
String requestImageCode = ServletRequestUtils.getStringParameter(request.getRequest(),“imageCode”);
if(StringUtils.isBlank(requestImageCode)){
throw new ValidateCodeException(“验证码不能为空”);
}
if(StringUtils.isBlank(sessionImageCode)){
throw new ValidateCodeException(“验证码不存在”);
}
if(!StringUtils.equalsIgnoreCase(sessionImageCode,requestImageCode)){
throw new ValidateCodeException(“验证码不匹配”);
}
//如果没有出现以上的异常则验证完后删除session中存储的验证码
sessionStrategy.removeAttribute(request,SESSION_IMAGE_CODE_KEY);
}
public AuthenticationFailureHandler getAuthenticationFailureHandler() {
return authenticationFailureHandler;
}
public void setAuthenticationFailureHandler(AuthenticationFailureHandler authenticationFailureHandler) {
this.authenticationFailureHandler = authenticationFailureHandler;
}
public SecurityProperties getSecurityProperties() {
return securityProperties;
}
public void setSecurityProperties(SecurityProperties securityProperties) {
this.securityProperties = securityProperties;
}
}
(5)给 BrowserSecurityConfig 的 configure(HttpSecurity http) 方法中的 ValidateCodeFilter 对象增加设置
//加入图片验证码的前置校验过滤器
ValidateCodeFilter validateCodeFilter = new ValidateCodeFilter();
validateCodeFilter.setAuthenticationFailureHandler(imoocAuthenticationFailureHandler);
//设置可配置的拦截url
validateCodeFilter.setSecurityProperties(securityProperties);
validateCodeFilter.afterPropertiesSet();
(3)验证码的生成逻辑可配置
① 新建一个 ValidateCodeGenerator 接口类,里面添加生成验证码的抽象方法
package security.core.validateCode;
import java.util.Map;
/**
- 负责生成验证码的接口
*/
public interface ValidateCodeGenerator {
/**
- 生成图形验证码的接口方法
- @param width
- @param height
- @param DEFAULT_CODE_LENGTH
- @return
*/
Map<String, Object> generateCodeAndPic(int width,int height,int DEFAULT_CODE_LENGTH);
}
②新建一个 ImageCodeGenerator 来实现 ValidateCodeGenerator 接口里的生成图形验证码的方法
package security.core.validateCode;
import org.springframework.stereotype.Component;
import java.util.Map;
/**
- 负责生成图形验证码的实现类
*/
public class ImageCodeGenerator implements ValidateCodeGenerator{
/**
- 生成图形验证码的方法
- @param width
- @param height
- @param DEFAULT_CODE_LENGTH
- @return
*/
@Override
public Map<String, Object> generateCodeAndPic(int width, int height, int DEFAULT_CODE_LENGTH) {
Map<String, Object> codeMap = ImageCodeUtil.getInstance().generateCodeAndPic(width,height,DEFAULT_CODE_LENGTH);
return codeMap;
}
}
③ 在 BrowserSecurityConfig 加入ValidateCodeGenerator 接口的 Bean
@Bean
public ValidateCodeGenerator imageCodeGenerator(){
return new ImageCodeGenerator();
}
④ 修改 ValidateCodeController 中的代码
(1)加入ValidateCodeGenerator
@Autowired
private ValidateCodeGenerator imageCodeGenerator;
(2)修改生成验证码的接口方法
//1、生成验证码
// Map<String, Object> codeMap = ImageCodeUtil.getInstance().generateCodeAndPic(width,height,codeLength);
//动态配置的验证码生成逻辑
Map<String, Object> codeMap = imageCodeGenerator.generateCodeAndPic(width,height,codeLength);
完整的代码:
package security.browser.controller;
import lombok.extern.slf4j.Slf4j;
import org.springframework.beans.factory.annotation.Autowired;
import org.springframework.social.connect.web.HttpSessionSessionStrategy;
import org.springframework.social.connect.web.SessionStrategy;
import org.springframework.web.bind.annotation.GetMapping;
import org.springframework.web.bind.annotation.RestController;
import org.springframework.web.context.request.ServletWebRequest;
import security.core.properties.SecurityProperties;
import security.core.validateCode.ImageCodeUtil;
import security.core.validateCode.ValidateCodeGenerator;
import javax.imageio.ImageIO;
import javax.servlet.http.HttpServletRequest;
import javax.servlet.http.HttpServletResponse;
import java.awt.image.RenderedImage;
import java.util.Map;
/**
- 生成校验码的请求处理器
- @author zhailiang
*/
@RestController
@Slf4j
public class ValidateCodeController {
/**
- 图形验证码的key
*/
private static final String SESSION_KEY = “SESSION_IMAGE_CODE_KEY”;
/**
- social工具,用于存储Session信息
*/
private SessionStrategy sessionStrategy = new HttpSessionSessionStrategy();
/**
- 使用配置文件里的验证码参数配置
*/
@Autowired
private SecurityProperties securityProperties;
@Autowired
private ValidateCodeGenerator imageCodeGenerator;
/**
- 提供图片验证码
- @param request
- @param response
- @throws Exception
*/
@GetMapping(“/code/image”)
public void createImageCode(HttpServletRequest request, HttpServletResponse response) throws Exception{
int width = securityProperties.getCode().getImage().getWidth();
int height = securityProperties.getCode().getImage().getHeight();
int codeLength = securityProperties.getCode().getImage().getDEFAULT_CODE_LENGTH();
//1、生成验证码
// Map<String, Object> codeMap = ImageCodeUtil.getInstance().generateCodeAndPic(width,height,codeLength);
//动态配置的验证码生成逻辑
Map<String, Object> codeMap = imageCodeGenerator.generateCodeAndPic(width,height,codeLength);
log.info(“验证码:”+codeMap.get(“imageCode”));
//2、存入到Session中
sessionStrategy.setAttribute(new ServletWebRequest(request),SESSION_KEY,codeMap.get(“imageCode”));
//3、写入到响应中(response)
ImageIO.write((RenderedImage) codeMap.get(“codePic”),“JPEG”,response.getOutputStream());
}
}
七、SpringSecurity的记住我功能
1、记住我功能的基本原理

(1)、表单请求提交后经过UsernamePasswordAuthenticationFilter后,如果验证通过(即验证成功),会去调用RemeberMeService服务,在RemeberMeService类里面有一个TokenRepository()方法。TokenRepository()方法会生成一个token,将这个token存入到浏览器的Cookie中,同时TokenRepository()方法还会将这个Token写入到数据库中,因为记住我功能是在通过UsernamePasswordAuthenticationFilter认证成功之后调用的RemeberMeService服务,所以在存入数据库的时候会将用户名和token存入进去。
(2)、当下次同一个用户再次访问系统的时候,如果系统配置了记住我功能,访问请求会先经过RememberMeAuthenticationFilter过滤器,这个过滤器会去读取cookie中的token,然后交给RemeberMeService,RemeberMeService会用TokenRepository()方法到数据库中去查询这个token在数据库中有没有记录,如果有记录会将username取出来,取出来之后再调用UserDetailsService去获取用户信息,然后将用户信息存入到SecurityContext中去,这样就实现了记住我的功能。
(3)、RemeberMeService的过滤器所处的过滤器链位置

2、记住我功能的具体实现
(1)、signIn.html登录页面添加记住我复选框
注意:name只能设置为:remember-me
记住我signIn.html页面完整代码:
表单登录
| 用户名: | |
| 密码: | |
| 图形验证码: | |
(2)在配置文件中配置使用的数据库,我是配置在了application-browser.properties配置文件中
spring.datasource.type=com.alibaba.druid.pool.DruidDataSource
spring.datasource.driver-class-name=com.mysql.jdbc.Driver
spring.datasource.url=jdbc:mysql://localhost:3306/springsecurity?useUnicode=true&characterEncoding=utf8&useSSL=false&useTimezone=true&serverTimezone=GMT%2B8
spring.datasource.username=root
spring.datasource.password=root
(3)在BrowserSecurityConfig配置类中配置PersistentTokenRepository
@Autowired
private DataSource dataSource;
@Autowired
private UserDetailsService userDetailsService;
@Bean
public PersistentTokenRepository persistentTokenRepository(){
JdbcTokenRepositoryImpl tokenRepository = new JdbcTokenRepositoryImpl();
tokenRepository.setDataSource(dataSource);
// tokenRepository.setCreateTableOnStartup(true);
return tokenRepository;
}
①、在PersistentTokenRepository类的对象中注入dataSource配置(数据库配置);
②、开启自动新建存储token和用户名的数据表,**tokenRepository.setCreateTableOnStartup(true);**需要注意的是这个方法只负责创建数据表,如果数据库里已经有相应的数据表了,再在项目中开启自动建表功能会报错。
或者手动在数据库建好相应的数据表,建表语句在JdbcTokenRepositoryImpl类中。
(4)在BrowserProperties类中设置一个默认的记住我的时间,单位是秒(s),这个也是可以在application-browser.properties配置文件中去配置的。默认我写了360秒(即一小时)
/**
- 记住我
*/
private int rememberMeSecond = 3600;
public int getRememberMeSecond() {
return rememberMeSecond;
}
public void setRememberMeSecond(int rememberMeSecond) {
this.rememberMeSecond = rememberMeSecond;
}
(5)在BrowserSecurityConfig配置类中的configure(HttpSecurity http)中配置记住我
http.addFilterBefore(validateCodeFilter, UsernamePasswordAuthenticationFilter.class)
.formLogin()
.loginPage(“/authentication/require”)
.loginProcessingUrl(“/authentication/form”)
.successHandler(tinnerAuthentivationSuccessHandler)
.failureHandler(tinnerAuthentivationFailureHandler)
//记住我功能
.and()
.rememberMe()
.tokenRepository(persistentTokenRepository())
.tokenValiditySeconds(securityProperties.getBrowser().getRememberMeSecond())
.userDetailsService(userDetailsService)
3、记住我功能SpringSecurity源码解析(略)
八、实现短信验证码登录
1、开发短信验证码接口
8.1.1本次是将短信以及邮件发送服务抽出为一个单独的子模块,使用的是阿里云的短信服务
(1)、新建短信及邮件发送的配置文件msn.properties
###################################### 短信服务 ##################################################
#短信服务 accessKeyId
message.msn.accessKeyId=
#短信服务 accessKeySecret
message.msn.accessKeySecret=
#短信服务 产品名称:云通信短信API产品,开发者无需替换
message.msn.product=Dysmsapi
#短信服务 发送短信的域名
message.msn.domain=dysmsapi.aliyuncs.com
#短信服务 区域Id
message.msn.regionId=
#短信服务 签名
message.msn.signName=
#短信服务 模板
message.msn.templateCode=
#短信服务 模板参数
message.msn.templateParam=code
#短信服务 发送日期 支持30天内记录查询,格式yyyyMMdd
message.msn.dateFormat=yyyyMMdd
#短信服务 服务节点
message.msn.endpointName=
#阿里云短信服务
#用户登录名称
#AccessKey ID :
#AccessKeySecret:
###################################### 邮件服务 ##################################################
#邮件服务 accessKeyId
message.mail.accessKeyId=
#邮件服务 accessKeySecret
message.mail.accessKeySecret=
#邮件服务 发信地址
message.mail.accountName=
#邮件服务 区域Id
message.mail.regionId=
#邮件服务 发信人昵称
message.mail.sendPersonName=
#邮件服务 取值范围 0~1: 0 为随机账号;1 为发信地址
message.mail.addressType=
#邮件服务 控制台创建的标签
message.mail.tagName=
#邮件服务 回信地址
message.mail.replyToAddress=
#邮件服务 目标地址
message.mail.toAddress=
(2)新建读取配置的类MsnProperties.properties
package imooc.security.msn.properties;
public class MsnProperties {
/**
- accessKeyId
*/
private String accessKeyId;
/**
- accessKeySecret
*/
private String accessKeySecret;
/**
*产品名称:云通信短信API产品,开发者无需替换
*/
private String product;
/**
*发送短信的域名
*/
private String domain;
/**
*区域Id
*/
private String regionId;
/**
*签名
*/
private String signName;
/**
*模板
*/
private String templateCode;
/**
*模板参数
*/
private String templateParam;
/**
*发送日期 支持30天内记录查询,格式yyyyMMdd
*/
private String dateFormat;
/**
*服务节点
*/
private String endpointName;
public String getAccessKeyId() {
return accessKeyId;
}
public void setAccessKeyId(String accessKeyId) {
this.accessKeyId = accessKeyId;
}
public String getAccessKeySecret() {
return accessKeySecret;
}
public void setAccessKeySecret(String accessKeySecret) {
this.accessKeySecret = accessKeySecret;
}
public String getProduct() {
return product;
}
public void setProduct(String product) {
this.product = product;
}
public String getDomain() {
return domain;
}
public void setDomain(String domain) {
this.domain = domain;
}
public String getRegionId() {
return regionId;
}
public void setRegionId(String regionId) {
this.regionId = regionId;
}
public String getSignName() {
return signName;
}
public void setSignName(String signName) {
this.signName = signName;
}
public String getTemplateCode() {
return templateCode;
}
public void setTemplateCode(String templateCode) {
this.templateCode = templateCode;
}
public String getTemplateParam() {
return templateParam;
}
public void setTemplateParam(String templateParam) {
this.templateParam = templateParam;
}
public String getDateFormat() {
return dateFormat;
}
public void setDateFormat(String dateFormat) {
this.dateFormat = dateFormat;
}
public String getEndpointName() {
return endpointName;
}
public void setEndpointName(String endpointName) {
this.endpointName = endpointName;
}
}
(3)、新建信息发送服务的配置属性类MessageProperties.java
package imooc.security.msn.properties;
import org.springframework.boot.context.properties.ConfigurationProperties;
import org.springframework.context.annotation.PropertySource;
import org.springframework.stereotype.Component;
@Component
@PropertySource(“classpath:msn.properties”)
@ConfigurationProperties(“message”)
public class MessageProperties {
private MsnProperties msn = new MsnProperties();
private MailProperties mail = new MailProperties();
public MsnProperties getMsn() {
return msn;
}
public void setMsn(MsnProperties msn) {
this.msn = msn;
}
public MailProperties getMail() {
return mail;
}
public void setMail(MailProperties mail) {
this.mail = mail;
}
}
(4)、新建消息发送的服务MessageService.java ,代码仅供参考
package imooc.security.msn.service;
import com.alibaba.fastjson.JSON;
import com.aliyuncs.CommonRequest;
import com.aliyuncs.CommonResponse;
import com.aliyuncs.DefaultAcsClient;
import com.aliyuncs.IAcsClient;
import com.aliyuncs.dm.model.v20151123.SingleSendMailRequest;
import com.aliyuncs.dm.model.v20151123.SingleSendMailResponse;
import com.aliyuncs.exceptions.ClientException;
import com.aliyuncs.exceptions.ServerException;
import com.aliyuncs.http.MethodType;
import com.aliyuncs.profile.DefaultProfile;
import com.aliyuncs.profile.IClientProfile;
import imooc.security.msn.properties.MessageProperties;
import org.springframework.beans.factory.annotation.Autowired;
import org.springframework.stereotype.Component;
import org.springframework.web.bind.annotation.GetMapping;
import java.util.HashMap;
import java.util.Map;
@Component
public class MessageService {
/**
- 消息的配置
*/
@Autowired
private MessageProperties messageProperties;
/**
- 短信
- @return
*/
@GetMapping(“/msn”)
public String sendMsn(int length,String phone) {
//短信发送结果
String regionId = messageProperties.getMsn().getRegionId();
String accessKeyId = messageProperties.getMsn().getAccessKeyId();
String accessSecret = messageProperties.getMsn().getAccessKeySecret();
// String signName = messageProperties.getMsn().getSignName();
// System.out.println(“显示signName:”+signName);
String templateCode = messageProperties.getMsn().getTemplateCode();
String templateParam = messageProperties.getMsn().getTemplateParam();
Map<String,String> map = new HashMap<>();
//随机生成六位验证码
String verifyCode = String.valueOf((Math.random()*9+1)*100000).substring(0,length);
map.put(templateParam,verifyCode);
String code = JSON.toJSONString(map);
DefaultProfile profile = DefaultProfile.getProfile(regionId,accessKeyId,accessSecret);
IAcsClient client = new DefaultAcsClient(profile);
CommonRequest request = new CommonRequest();
request.setMethod(MethodType.POST);
request.setDomain(“dysmsapi.aliyuncs.com”);
request.setVersion(“2017-05-25”);
request.setAction(“SendSms”);
request.putQueryParameter(“RegionId”, regionId);
request.putQueryParameter(“PhoneNumbers”, phone);
request.putQueryParameter(“SignName”, );
request.putQueryParameter(“TemplateCode”, templateCode);
request.putQueryParameter(“TemplateParam”,code);
try {
CommonResponse response = client.getCommonResponse(request);
} catch (ServerException e) {
e.printStackTrace();
} catch (ClientException e) {
e.printStackTrace();
}
return verifyCode;
}
/**
- 邮件
- @return
*/
@GetMapping(“/mail”)
public String sample() {
//邮件发送结果
String result = “”;
// 如果是除杭州region外的其它region(如新加坡、澳洲Region),需要将下面的"cn-hangzhou"替换为"ap-southeast-1"、或"ap-southeast-2"。
IClientProfile profile = DefaultProfile.getProfile(messageProperties.getMail().getRegionId(), messageProperties.getMail().getAccessKeyId(), messageProperties.getMail().getAccessKeySecret());
// 如果是除杭州region外的其它region(如新加坡region), 需要做如下处理
//try {
//DefaultProfile.addEndpoint(“dm.ap-southeast-1.aliyuncs.com”, “ap-southeast-1”, “Dm”, “dm.ap-southeast-1.aliyuncs.com”);
//} catch (ClientException e) {
//e.printStackTrace();
//}
IAcsClient client = new DefaultAcsClient(profile);
SingleSendMailRequest request = new SingleSendMailRequest();
try {
//request.setVersion(“2017-06-22”);// 如果是除杭州region外的其它region(如新加坡region),必须指定为2017-06-22
request.setAccountName(messageProperties.getMail().getAccountName());
request.setFromAlias();
request.setAddressType(messageProperties.getMail().getAddressType());
request.setTagName(messageProperties.getMail().getTagName());
request.setReplyToAddress(true);
request.setToAddress(messageProperties.getMail().getToAddress());
//可以给多个收件人发送邮件,收件人之间用逗号分开,批量发信建议使用BatchSendMailRequest方式
//request.setToAddress(“邮箱1,邮箱2”);
request.setSubject(“尊敬的用户您好:”);
//随机生成六位验证码
String verifyCode = String.valueOf((Math.random()*9+1)*100000).substring(0,6);
request.setHtmlBody(“此邮件为开发邮件功能的测试邮件,验证码为:”+verifyCode);
//开启需要备案,0关闭,1开启
//request.setClickTrace(“0”);
//如果调用成功,正常返回httpResponse;如果调用失败则抛出异常,需要在异常中捕获错误异常码;错误异常码请参考对应的API文档;
SingleSendMailResponse httpResponse = client.getAcsResponse(request);
result = httpResponse.getEnvId() + " "+httpResponse.getRequestId();
} catch (ServerException e) {
//捕获错误异常码
System.out.println("ErrCode : " + e.getErrCode());
e.printStackTrace();
}
catch (ClientException e) {
//捕获错误异常码
System.out.println("ErrCode : " + e.getErrCode());
e.printStackTrace();
}
return result;
}
}
(5)、使用
①如果是在信息发送服务模块使用,需要在启动类上加**@EnableConfigurationProperties(MessageProperties.class)** 来让读取属性配置生效;
②如果是在别的模块使用短信服务发送功能,也需要在使用的模块的启动类上加**@EnableConfigurationProperties(MessageProperties.class)** 来让读取属性配置生效;同时还要在配置类中新建一个@Bean
/**
- 消息服务的Bean
- @return
*/
@Bean
public MessageService messageService(){
return new MessageService();
}
(6)、关于springsecurity拦截静态资源的问题
同样需要在继承了 WebSecurityConfigurerAdapter 的子类中,加入配置来屏蔽springsecurity对静态资源的拦截。
@Override
public void configure(WebSecurity web) throws Exception {
//解决静态资源被SpringSecurity拦截的问题
// “/static/“的意思是任何以 static地址开头的资源都能被访问
web.ignoring().antMatchers(”/static/”,“/jquery/“,”/layui/”);
}
2、校验短信验证码并登录
强烈推荐先看看参考的文章:SpringBoot 集成 Spring Security(8)——短信验证码登录

8.2.1 新建一个token的类(MsnCodeAuthenticationToken)
package security.core.authentication.mobile;
import org.springframework.security.authentication.AbstractAuthenticationToken;
import org.springframework.security.core.GrantedAuthority;
import java.util.Collection;
/**
- 短信登录 AuthenticationToken,模仿 UsernamePasswordAuthenticationToken 实现
- 封装认证信息
*/
public class MsnCodeAuthenticationToken extends AbstractAuthenticationToken {
private static final long serialVersionUID = 8499397320892255781L;
/**
- principal:用于存放认证信息,登陆前放手机号,登录成功后放入登录的用户信息
- 在 UsernamePasswordAuthenticationToken 中该字段代表登录的用户名,
- 在这里就代表登录的手机号码
*/
private final Object principal;
/**
- 构建一个没有鉴权的 MsnAuthenticationToken,这时候principal中存放的是用户的手机号
*/
public MsnCodeAuthenticationToken(Object mobile) {
super(null);
this.principal = mobile;
//没登陆的时候设为false,即认证不通过
setAuthenticated(false);
}
/**
- 构建拥有鉴权的 MsnAuthenticationToken,这时候principal中存放的是用户信息
*/
public MsnCodeAuthenticationToken(Object user, Collection<? extends GrantedAuthority> authorities) {
super(authorities);
this.principal = user;
//验证登陆成功后设为true,即认证通过
super.setAuthenticated(true);
}
@Override
public Object getCredentials() {
return null;
}
@Override
public Object getPrincipal() {
return this.principal;
}
@Override
public void setAuthenticated(boolean isAuthenticated) throws IllegalArgumentException {
if (isAuthenticated) {
throw new IllegalArgumentException(
“Cannot set this token to trusted - use constructor which takes a GrantedAuthority list instead”);
}
super.setAuthenticated(false);
}
@Override
public void eraseCredentials() {
super.eraseCredentials();
}
}
8.2.2 新建一个校验短信验证码的过滤器(MsnCodeAuthenticationFilter)
package security.core.authentication.mobile;
import org.springframework.security.authentication.AuthenticationServiceException;
import org.springframework.security.core.Authentication;
import org.springframework.security.core.AuthenticationException;
import org.springframework.security.web.authentication.AbstractAuthenticationProcessingFilter;
import org.springframework.security.web.util.matcher.AntPathRequestMatcher;
import org.springframework.util.Assert;
import javax.servlet.http.HttpServletRequest;
import javax.servlet.http.HttpServletResponse;
/**
- 短信登录的鉴权过滤器,模仿 UsernamePasswordAuthenticationFilter 实现
/
public class MsnCodeAuthenticationFilter extends AbstractAuthenticationProcessingFilter {
/* - form表单中手机号码的字段name
*/
public static final String SPRING_SECURITY_FORM_MOBILE_KEY = “mobile”;
private String mobileParameter = SPRING_SECURITY_FORM_MOBILE_KEY;
/**
- 是否仅处理 POST 方式请求
*/
private boolean postOnly = true;
public MsnCodeAuthenticationFilter() {
// 处理请求地址为: /authentication/mobile,方式为: POST的短信登录的请求
super(new AntPathRequestMatcher(“/authentication/mobile”, “POST”));
}
/**
- 真正的认证处理流程
- @param request
- @param response
- @return
- @throws AuthenticationException
*/
@Override
public Authentication attemptAuthentication(HttpServletRequest request, HttpServletResponse response) throws AuthenticationException {
// 1、判断是不是 POST 请求
if (postOnly && !request.getMethod().equals(“POST”)) {
throw new AuthenticationServiceException(
"Authentication method not supported: " + request.getMethod());
}
//从request中获取请求参数,即手机号mobile
String mobile = obtainMobile(request);
if (mobile == null) {
mobile = “”;
}
mobile = mobile.trim();
//传入手机号实例化一个token
MsnCodeAuthenticationToken authRequest = new MsnCodeAuthenticationToken(mobile);
//把请求request信息设置到token中(authRequest)
setDetails(request, authRequest);
//把用mobile作为参数实例化的token传给 AuthenticationManager
return this.getAuthenticationManager().authenticate(authRequest);
}
/**
- 从 request 中获取手机号的方法
- @param request
- @return
*/
protected String obtainMobile(HttpServletRequest request) {
return request.getParameter(mobileParameter);
}
protected void setDetails(HttpServletRequest request, MsnCodeAuthenticationToken authRequest) {
authRequest.setDetails(authenticationDetailsSource.buildDetails(request));
}
public String getMobileParameter() {
return mobileParameter;
}
public void setMobileParameter(String mobileParameter) {
Assert.hasText(mobileParameter, “Mobile parameter must not be empty or null”);
this.mobileParameter = mobileParameter;
}
public void setPostOnly(boolean postOnly) {
this.postOnly = postOnly;
}
}
8.2.3 新建一个短信验证码的Provider(MsnCodeAuthenticationProvider)
package security.core.authentication.mobile;
import org.springframework.security.authentication.AuthenticationProvider;
import org.springframework.security.authentication.BadCredentialsException;
import org.springframework.security.authentication.InternalAuthenticationServiceException;
import org.springframework.security.core.Authentication;
import org.springframework.security.core.AuthenticationException;
import org.springframework.security.core.userdetails.UserDetails;
import org.springframework.security.core.userdetails.UserDetailsService;
import org.springframework.social.connect.web.HttpSessionSessionStrategy;
import org.springframework.social.connect.web.SessionStrategy;
import org.springframework.web.context.request.RequestContextHolder;
import org.springframework.web.context.request.ServletRequestAttributes;
import org.springframework.web.context.request.ServletWebRequest;
import javax.servlet.http.HttpServletRequest;
import java.util.Map;
/**
- 短信登陆鉴权 Provider,要求实现 AuthenticationProvider 接口
/
public class MsnCodeAuthenticationProvider implements AuthenticationProvider {
/* - 短信验证码的key
*/
private static final String MSN_SESSION_KEY = “MSN_SESSION_KEY”;
/**
- 存储了Session信息
*/
private SessionStrategy sessionStrategy = new HttpSessionSessionStrategy();
/**
- 用于获取用户的信息
/
private UserDetailsService userDetailsService;
/* - 进行身份认证的方法
- @param authentication
- @return
- @throws AuthenticationException
*/
@Override
public Authentication authenticate(Authentication authentication) throws AuthenticationException {
//将传入的token(authentication)强制转换为MsnCodeAuthenticationToken类的对象
MsnCodeAuthenticationToken authenticationToken = (MsnCodeAuthenticationToken) authentication;
String mobile = (String) authenticationToken.getPrincipal();
//在使用手机号查询后台用户信息前,先去判断一下请求里的手机号和短信验证码是否和服务器发送出去的短信验证码及手机号是否一致
checkSmsCode(mobile);
//使用手机号查询用户信息
UserDetails userDetails = userDetailsService.loadUserByUsername(mobile);
if(userDetails == null){
throw new InternalAuthenticationServiceException(“无法获取用户信息”);
}
// 查询到用户信息后,应当重新 new 一个拥有鉴权的 authenticationResult 返回
MsnCodeAuthenticationToken authenticationResult = new MsnCodeAuthenticationToken(userDetails, userDetails.getAuthorities());
//把 未认证token (authenticationToken) 里的请求request信息设置到新的token中(authenticationResult)
authenticationResult.setDetails(authenticationToken.getDetails());
return authenticationResult;
}
private void checkSmsCode(String mobile) {
HttpServletRequest request = ((ServletRequestAttributes) RequestContextHolder.getRequestAttributes()).getRequest();
//从前台请求中获取的验证码
String inputCode = request.getParameter(“smsCode”);
ServletWebRequest servletWebRequest = new ServletWebRequest(request);
//从后台session中获取手机号和发送出去的验证码
Map<String,String> msnCode = (Map<String,String>)sessionStrategy.getAttribute(servletWebRequest,MSN_SESSION_KEY);
if(msnCode == null) {
throw new BadCredentialsException(“没有输入验证码”);
}
String applyMobile = msnCode.get(“mobile”);
int code = Integer.parseInt(msnCode.get(“smsCode”));
if(!applyMobile.equals(mobile)) {
throw new BadCredentialsException(“接收验证码的手机号码与登录手机号码不一致”);
}
if(code != Integer.parseInt(inputCode)) {
throw new BadCredentialsException(“验证码输入错误”);
}
}
/**
- AuthenticationManager就是根据supports来判断能不能对传入token的校验
- 即传给AuthenticationManager的是不是 MsnCodeAuthenticationToken 的子类或子接口
- @param authentication
- @return
*/
@Override
public boolean supports(Class<?> authentication) {
// 判断 authentication 是不是 MsnCodeAuthenticationToken 的子类或子接口
return MsnCodeAuthenticationToken.class.isAssignableFrom(authentication);
}
public UserDetailsService getUserDetailsService() {
return userDetailsService;
}
public void setUserDetailsService(UserDetailsService userDetailsService) {
this.userDetailsService = userDetailsService;
}
}
8.2.4 新建短信验证码登陆成功的处理器(MsnCodeAuthenticationSuccessHandler)
package security.core.authentication.handle;
import com.fasterxml.jackson.databind.ObjectMapper;
import lombok.extern.slf4j.Slf4j;
import org.springframework.beans.factory.annotation.Autowired;
import org.springframework.security.core.Authentication;
import org.springframework.security.web.authentication.AuthenticationSuccessHandler;
import org.springframework.security.web.authentication.SavedRequestAwareAuthenticationSuccessHandler;
import org.springframework.stereotype.Component;
import security.core.properties.LoginType;
import security.core.properties.SecurityProperties;
import javax.servlet.ServletException;
import javax.servlet.http.HttpServletRequest;
import javax.servlet.http.HttpServletResponse;
import java.io.IOException;
@Component
@Slf4j
//public class MsnCodeAuthenticationSuccessHandler extends SavedRequestAwareAuthenticationSuccessHandler {
// /**
// * 用于将对象转为json类型
// /
// @Autowired
// private ObjectMapper objectMapper;
//
// /*
// * 用户判断需要返回的类型
// /
// @Autowired
// private SecurityProperties securityProperties;
//
// /*
// * @param request
// * @param response
// * @param authentication 封装了认证信息,包括请求时的ip、session以及认证通过后UserDeatilsService放回的UserDetails
// * @throws IOException
// * @throws ServletException
// */
// @Override
// public void onAuthenticationSuccess(HttpServletRequest request, HttpServletResponse response, Authentication authentication) throws IOException, ServletException {
// log.info(“登陆成功!”);
//
// //如果配置的返回类型是JSON
// if(LoginType.JSON.equals(securityProperties.getBrowser().getLoginType())){
// response.setContentType(“application/json;charset=UTF-8”);
String type = authentication.getClass().getSimpleName();
// response.getWriter().write(objectMapper.writeValueAsString(authentication));
// }else{//调用父类的方法,跳转到index.html页面
// super.onAuthenticationSuccess(request,response,authentication);
// }
// }
//
//}
public class MsnCodeAuthenticationSuccessHandler implements AuthenticationSuccessHandler {
@Autowired
private ObjectMapper objectMapper;
@Override
public void onAuthenticationSuccess(HttpServletRequest request, HttpServletResponse response, Authentication authentication) throws IOException, ServletException {
log.info(“登录成功”);
response.setContentType(“application/json;charset=UTF-8”);
response.getWriter().write(objectMapper.writeValueAsString(authentication));
}
}
8.2.5 新建短信验证码登陆失败的处理器(MsnCodeAuthenticationFailureHandler)
package security.core.authentication.handle;
import com.fasterxml.jackson.databind.ObjectMapper;
import lombok.extern.slf4j.Slf4j;
import org.springframework.beans.factory.annotation.Autowired;
import org.springframework.http.HttpStatus;
import org.springframework.security.core.AuthenticationException;
import org.springframework.security.web.authentication.AuthenticationFailureHandler;
import org.springframework.security.web.authentication.SimpleUrlAuthenticationFailureHandler;
import org.springframework.stereotype.Component;
import security.core.properties.LoginType;
import security.core.properties.SecurityProperties;
import security.core.support.SimpleResponse;
import javax.servlet.ServletException;
import javax.servlet.http.HttpServletRequest;
import javax.servlet.http.HttpServletResponse;
import java.io.IOException;
@Component
@Slf4j
//public class MsnCodeAuthenticationFailureHandler extends SimpleUrlAuthenticationFailureHandler {
//
//
// /**
// * 用于将对象转为json类型
// /
// @Autowired
// private ObjectMapper objectMapper;
//
// /*
// * 用户判断需要返回的类型
// /
// @Autowired
// private SecurityProperties securityProperties;
//
// /*
// * @param request
// * @param response
// * @param exception 包含认证过程中出现的异常信息
// * @throws IOException
// * @throws ServletException
// */
// @Override
// public void onAuthenticationFailure(HttpServletRequest request, HttpServletResponse response, AuthenticationException exception) throws IOException, ServletException {
// log.info(“登陆失败!”);
//
// //如果配置的返回类型是JSON
// if(LoginType.JSON.equals(securityProperties.getBrowser().getLoginType())){
// //登陆失败时返回服务器内部异常
// response.setStatus(HttpStatus.INTERNAL_SERVER_ERROR.value());
// response.setContentType(“application/json;charset=UTF-8”);
// //改为只返回错误信息
// response.getWriter().write(objectMapper.writeValueAsString(new SimpleResponse(exception.getMessage())));
// }else{
// super.onAuthenticationFailure(request,response,exception);
// }
//
// }
//}
public class MsnCodeAuthenticationFailureHandler implements AuthenticationFailureHandler {
@Autowired
private ObjectMapper objectMapper;
@Override
public void onAuthenticationFailure(HttpServletRequest request, HttpServletResponse response, AuthenticationException exception) throws IOException, ServletException {
log.info(“登陆失败”);
response.setStatus(HttpStatus.INTERNAL_SERVER_ERROR.value());
response.setContentType(“application/json;charset=UTF-8”);
response.getWriter().write(objectMapper.writeValueAsString(exception.getMessage()));
}
}
8.2.6 新建一个短信验证码的配置类 ( MsnCodeAuthenticationSecurityConfig ),将前面的配置组装起来
package security.core.authentication.mobile;
import org.springframework.beans.factory.annotation.Autowired;
import org.springframework.context.annotation.Bean;
import org.springframework.security.authentication.AuthenticationManager;
import org.springframework.security.config.annotation.SecurityConfigurerAdapter;
import org.springframework.security.config.annotation.web.builders.HttpSecurity;
import org.springframework.security.core.userdetails.UserDetailsService;
import org.springframework.security.web.DefaultSecurityFilterChain;
import org.springframework.security.web.authentication.UsernamePasswordAuthenticationFilter;
import org.springframework.stereotype.Component;
import security.core.authentication.handle.MsnCodeAuthenticationFailureHandler;
import security.core.authentication.handle.MsnCodeAuthenticationSuccessHandler;
/**
- 短信验证码的配置类
*/
@Component
public class MsnCodeAuthenticationSecurityConfig extends SecurityConfigurerAdapter<DefaultSecurityFilterChain, HttpSecurity> {
@Autowired
private UserDetailsService userDetailsService;
@Autowired
private MsnCodeAuthenticationSuccessHandler msnCodeAuthenticationSuccessHandler;
@Autowired
private MsnCodeAuthenticationFailureHandler msnCodeAuthenticationFailureHandler;
@Override
public void configure(HttpSecurity http) throws Exception {
//1、过滤器配置 AuthenticationManager、MsnCodeAuthenticationSuccessHandler、MsnCodeAuthenticationFailureHandler
MsnCodeAuthenticationFilter msnCodeAuthenticationFilter = new MsnCodeAuthenticationFilter();
msnCodeAuthenticationFilter.setAuthenticationManager(http.getSharedObject(AuthenticationManager.class));
msnCodeAuthenticationFilter.setAuthenticationSuccessHandler(msnCodeAuthenticationSuccessHandler);
msnCodeAuthenticationFilter.setAuthenticationFailureHandler(msnCodeAuthenticationFailureHandler);
//2、Provider 配置 UserDetailsService
MsnCodeAuthenticationProvider smsCodeAuthenticationProvider = new MsnCodeAuthenticationProvider();
smsCodeAuthenticationProvider.setUserDetailsService(userDetailsService);
//3、将 过滤器、Provider配置到springsecurity的authentication认证链上
http.authenticationProvider(smsCodeAuthenticationProvider)
.addFilterAfter(msnCodeAuthenticationFilter, UsernamePasswordAuthenticationFilter.class);
}
}
8.2.7 在 继承了 WebSecurityConfigurerAdapter的配置类 BrowserSecurityConfig 将短信验证码的认证加入到spring security的认证链上
(1)加入MessageService、MsnCodeAuthenticationSecurityConfig、MsnCodeAuthenticationSuccessHandler、MsnCodeAuthenticationFailureHandler的配置
/**
- 消息服务的Bean
- @return
*/
@Bean
public MessageService messageService(){
return new MessageService();
}
@Bean
public MsnCodeAuthenticationSecurityConfig getMsnCodeAuthenticationSecurityConfig(){
return new MsnCodeAuthenticationSecurityConfig();
}
@Bean
public MsnCodeAuthenticationSuccessHandler getMsnCodeAuthenticationSuccessHandler(){
return new MsnCodeAuthenticationSuccessHandler();
}
@Bean
public MsnCodeAuthenticationFailureHandler getMsnCodeAuthenticationFailureHandler(){
return new MsnCodeAuthenticationFailureHandler();
}
(2) 加入到Filter链上
http.apply(msnCodeAuthenticationSecurityConfig).and()
.addFilterBefore(validateCodeFilter, UsernamePasswordAuthenticationFilter.class)
(3)放过对验证码登录请求的拦截
.antMatchers(“/authentication/require”,“/authentication/mobile”,
securityProperties.getBrowser().getLoginPage(),
“/code/*”).permitAll()//允许signIn.html请求进来,不进行拦截
完整代码:
package security.browser.config;
import imooc.security.msn.service.MessageService;
import org.springframework.beans.factory.annotation.Autowired;
import org.springframework.context.annotation.Bean;
import org.springframework.context.annotation.Configuration;
import org.springframework.security.config.annotation.web.builders.HttpSecurity;
import org.springframework.security.config.annotation.web.builders.WebSecurity;
import org.springframework.security.config.annotation.web.configuration.WebSecurityConfigurerAdapter;
import org.springframework.security.crypto.bcrypt.BCryptPasswordEncoder;
import org.springframework.security.crypto.password.PasswordEncoder;
import org.springframework.security.web.authentication.AuthenticationFailureHandler;
import org.springframework.security.web.authentication.AuthenticationSuccessHandler;
import org.springframework.security.web.authentication.UsernamePasswordAuthenticationFilter;
import security.core.authentication.handle.MsnCodeAuthenticationFailureHandler;
import security.core.authentication.handle.MsnCodeAuthenticationSuccessHandler;
import security.core.authentication.mobile.MsnCodeAuthenticationSecurityConfig;
import security.core.properties.SecurityProperties;
import security.core.validateCode.ImageCodeGenerator;
import security.core.validateCode.ValidateCodeFilter;
import security.core.validateCode.ValidateCodeGenerator;
import javax.sql.DataSource;
/**
- WebSecurityConfigurerAdapter是SpringSecurity提供的安全适配器类
*/
@Configuration
public class BrowserSecurityConfig extends WebSecurityConfigurerAdapter {
/**
- 读取配置信息
*/
@Autowired
private SecurityProperties securityProperties;
/**
- 自定义的登陆成功的处理器
*/
@Autowired
private AuthenticationSuccessHandler imoocAuthenticationSuccessHandler;
/**
- 自定义的登陆失败的处理器
*/
@Autowired
private AuthenticationFailureHandler imoocAuthenticationFailureHandler;
@Autowired
private MsnCodeAuthenticationSecurityConfig msnCodeAuthenticationSecurityConfig;
@Override
public void configure(WebSecurity web) throws Exception {
//解决静态资源被SpringSecurity拦截的问题
// “/static/“的意思是任何以 static地址开头的资源都能被访问
web.ignoring().antMatchers(”/static/”,“/jquery/“,”/layui/”);
}
/**
*
- @param http
- @throws Exception
*/
@Override
protected void configure(HttpSecurity http) throws Exception {
//加入图片验证码的前置校验过滤器
ValidateCodeFilter validateCodeFilter = new ValidateCodeFilter();
validateCodeFilter.setAuthenticationFailureHandler(imoocAuthenticationFailureHandler);
//设置可配置的拦截url
validateCodeFilter.setSecurityProperties(securityProperties);
validateCodeFilter.afterPropertiesSet();
http.apply(msnCodeAuthenticationSecurityConfig).and()
.addFilterBefore(validateCodeFilter, UsernamePasswordAuthenticationFilter.class)
.formLogin()//开启表单登录(即对表单登录进行身份认证)
// http.formLogin()//开启表单登录(即对表单登录进行身份认证)
.loginPage(“/authentication/require”)//指定登录页面
.loginProcessingUrl(“/authentication/form”)//让UsernamePasswordAuthenticationFilter能够处理提交的登录请求
.successHandler(imoocAuthenticationSuccessHandler)
.failureHandler(imoocAuthenticationFailureHandler)
// http.httpBasic()//开启SpringSecurity原生的表单登录
.and()
.authorizeRequests()//对请求进行授权(即登录后需要授权)
.antMatchers(“/authentication/require”,“/authentication/mobile”,
网上学习资料一大堆,但如果学到的知识不成体系,遇到问题时只是浅尝辄止,不再深入研究,那么很难做到真正的技术提升。
需要这份系统化的资料的朋友,可以添加V获取:vip1024b (备注Go)

一个人可以走的很快,但一群人才能走的更远!不论你是正从事IT行业的老鸟或是对IT行业感兴趣的新人,都欢迎加入我们的的圈子(技术交流、学习资源、职场吐槽、大厂内推、面试辅导),让我们一起学习成长!
AuthenticationFailureHandler;
import security.core.authentication.handle.MsnCodeAuthenticationSuccessHandler;
import security.core.authentication.mobile.MsnCodeAuthenticationSecurityConfig;
import security.core.properties.SecurityProperties;
import security.core.validateCode.ImageCodeGenerator;
import security.core.validateCode.ValidateCodeFilter;
import security.core.validateCode.ValidateCodeGenerator;
import javax.sql.DataSource;
/**
- WebSecurityConfigurerAdapter是SpringSecurity提供的安全适配器类
*/
@Configuration
public class BrowserSecurityConfig extends WebSecurityConfigurerAdapter {
/**
- 读取配置信息
*/
@Autowired
private SecurityProperties securityProperties;
/**
- 自定义的登陆成功的处理器
*/
@Autowired
private AuthenticationSuccessHandler imoocAuthenticationSuccessHandler;
/**
- 自定义的登陆失败的处理器
*/
@Autowired
private AuthenticationFailureHandler imoocAuthenticationFailureHandler;
@Autowired
private MsnCodeAuthenticationSecurityConfig msnCodeAuthenticationSecurityConfig;
@Override
public void configure(WebSecurity web) throws Exception {
//解决静态资源被SpringSecurity拦截的问题
// “/static/“的意思是任何以 static地址开头的资源都能被访问
web.ignoring().antMatchers(”/static/”,“/jquery/“,”/layui/”);
}
/**
*
- @param http
- @throws Exception
*/
@Override
protected void configure(HttpSecurity http) throws Exception {
//加入图片验证码的前置校验过滤器
ValidateCodeFilter validateCodeFilter = new ValidateCodeFilter();
validateCodeFilter.setAuthenticationFailureHandler(imoocAuthenticationFailureHandler);
//设置可配置的拦截url
validateCodeFilter.setSecurityProperties(securityProperties);
validateCodeFilter.afterPropertiesSet();
http.apply(msnCodeAuthenticationSecurityConfig).and()
.addFilterBefore(validateCodeFilter, UsernamePasswordAuthenticationFilter.class)
.formLogin()//开启表单登录(即对表单登录进行身份认证)
// http.formLogin()//开启表单登录(即对表单登录进行身份认证)
.loginPage(“/authentication/require”)//指定登录页面
.loginProcessingUrl(“/authentication/form”)//让UsernamePasswordAuthenticationFilter能够处理提交的登录请求
.successHandler(imoocAuthenticationSuccessHandler)
.failureHandler(imoocAuthenticationFailureHandler)
// http.httpBasic()//开启SpringSecurity原生的表单登录
.and()
.authorizeRequests()//对请求进行授权(即登录后需要授权)
.antMatchers(“/authentication/require”,“/authentication/mobile”,
网上学习资料一大堆,但如果学到的知识不成体系,遇到问题时只是浅尝辄止,不再深入研究,那么很难做到真正的技术提升。
需要这份系统化的资料的朋友,可以添加V获取:vip1024b (备注Go)
[外链图片转存中…(img-pkUNetkk-1713416676177)]
一个人可以走的很快,但一群人才能走的更远!不论你是正从事IT行业的老鸟或是对IT行业感兴趣的新人,都欢迎加入我们的的圈子(技术交流、学习资源、职场吐槽、大厂内推、面试辅导),让我们一起学习成长!


 1088
1088


 被折叠的 条评论
为什么被折叠?
被折叠的 条评论
为什么被折叠?
 到【灌水乐园】发言


