


 这篇博客详细介绍了Elasticsearch8的安装过程,涵盖单节点、多节点集群配置,包括在同一台服务器上建立集群、多服务器部署时的节点加入方法,以及冷热温节点的部署。还提到了IK分词器的安装和安全模式配置,以及在部署过程中可能遇到的报错和解决方法,提供了完整的配置文件示例和问题排查步骤。
官网文档:https://www.elastic.co/guide/en/kibana/8.1/introduction.html
解压:tar zxf /root/kibana-8.1.0-linux-x86_64.tar.gz -C /elasticsearch/elastic-cluster1
1、进入到解压目录

2、编辑配置文件:vim kibana-8.1.0/config/kibana.yml
设置kibana的访问端口:server.port: 5601
主机所在的IP:server.host: ""
指定连接Elasticsearch的连接地址:elasticsearch.hosts: ["http://IP:端口"]
我配置如下:

3、启动kibana
root用户启动:kibana-8.1.0/bin/kibana --allow-root
启动成功的截图如下,会生成一个url,复制下来把0.0.0.0换成IP地址,在访问

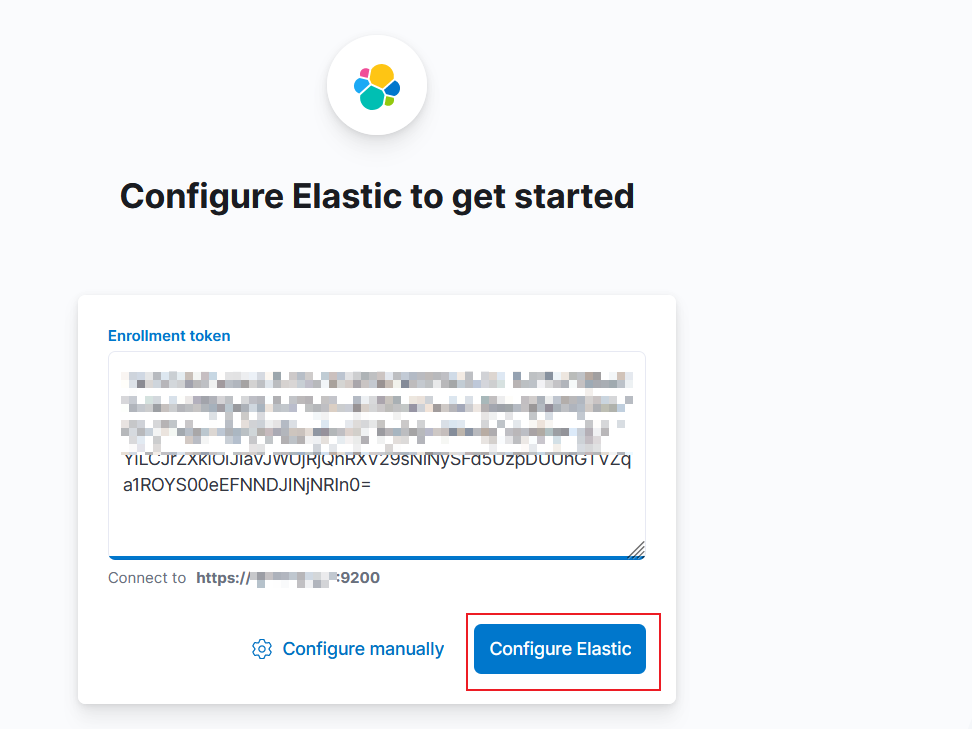
4、输入elasticsearch的kibana令牌登陆
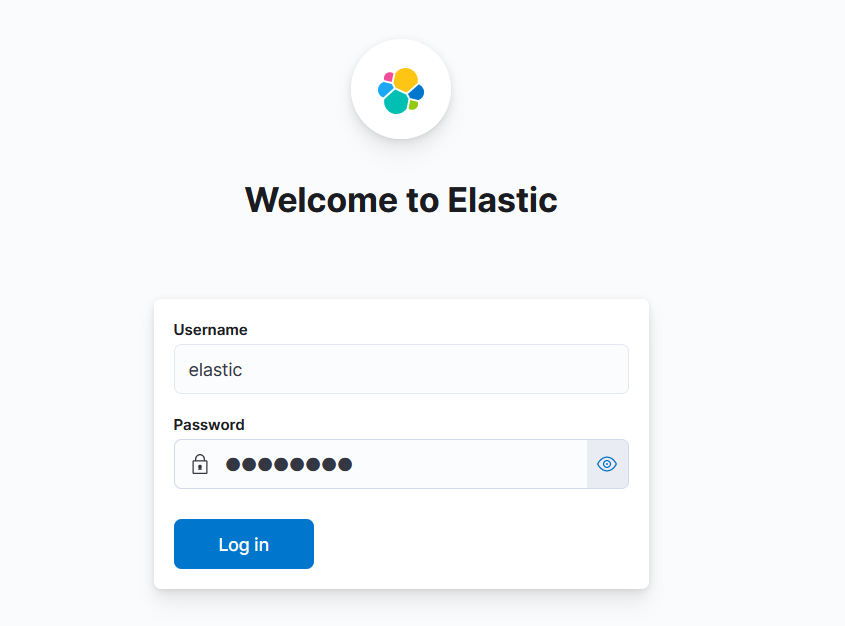
5、输入账号密码:内置超级用户elastic
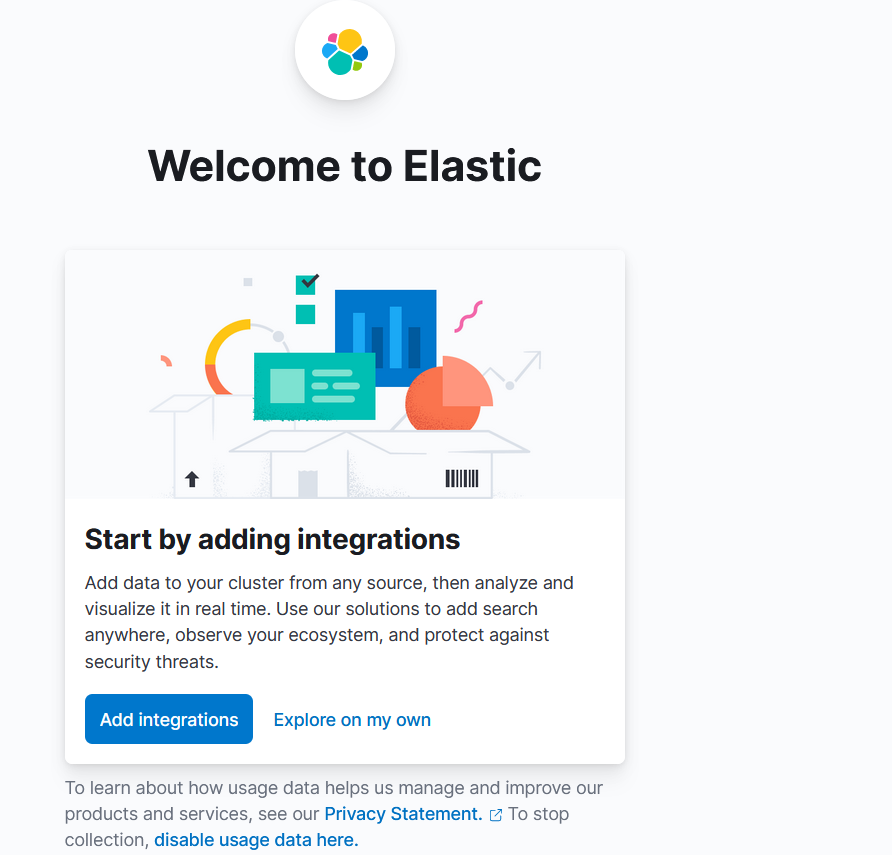
6、添加或不添加都行,add或explore点哪个都行
7、在kibana里验证一下,可以看到es的节点信息

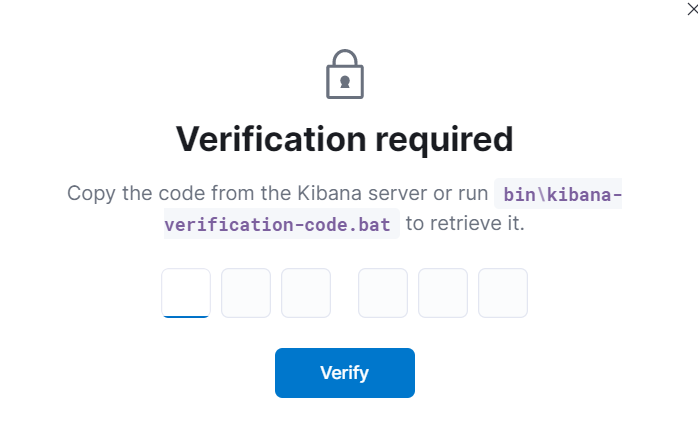
8、如果遇到这个信息,这个不是报错,可以看一下linux终端上的信息,kibana会输出6个数字,输入进去即可
4、同一台服务器的elastic集群配置
4.1、生成新的elastic
单点部署完毕后来生成一个新的elastic,把之前的单点部署先停掉
1、把原有的配置都复制过去:cp -R elastic-cluster1/* elastic-cluster2/

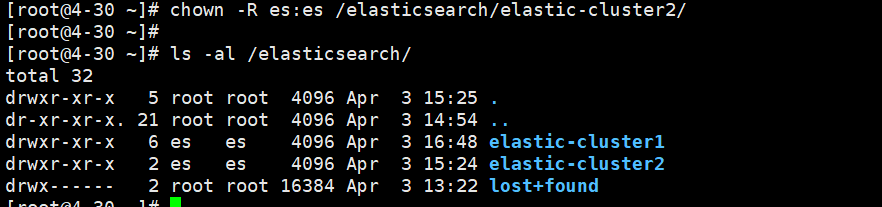
2、设置权限
3、删除原有集群生成的数据和logs日志,不删除会报错:rm -rf esdata/* eslogs/*

4、配置文件对比如下:
集群node-1
cluster.name: elasticsearch-cluster
node.name: node-1
path.data: /elasticsearch/elastic-cluster1/esdata
path.logs: /elasticsearch/elastic-cluster1/eslogs
network.host: 0.0.0.0
http.port: 9200
transport.port: 9300
discovery.seed_hosts: ["192.168.0.2:9300", "192.168.0.2:9301"]
cluster.initial_master_nodes: ["node-1", "node-2"]
xpack.security.enabled: true
xpack.security.enrollment.enabled: true
xpack.security.http.ssl:
  enabled: true
  keystore.path: certs/http.p12
xpack.security.transport.ssl:
  enabled: true
  verification_mode: certificate
  keystore.path: certs/transport.p12
  truststore.path: certs/transport.p12
集群node-2
cluster.name: elasticsearch-cluster
node.name: node-2
path.data: /elasticsearch/elastic-cluster2/esdata
path.logs: /elasticsearch/elastic-cluster2/eslogs
network.host: 0.0.0.0
http.port: 9201
transport.port: 9301
discovery.seed_hosts: ["192.168.0.2:9300", "192.168.0.2:9301"]
cluster.initial_master_nodes: ["node-1", "node-2"]
xpack.security.enabled: true
xpack.security.enrollment.enabled: true
xpack.security.http.ssl:
  enabled: true
  keystore.path: certs/http.p12
xpack.security.transport
最低0.47元/天 解锁文章


 2318
2318

 被折叠的 条评论
为什么被折叠?
被折叠的 条评论
为什么被折叠?
 到【灌水乐园】发言


