


最后
前端CSS面试题文档,JavaScript面试题文档,Vue面试题文档,大厂面试题文档
开源分享:【大厂前端面试题解析+核心总结学习笔记+真实项目实战+最新讲解视频】


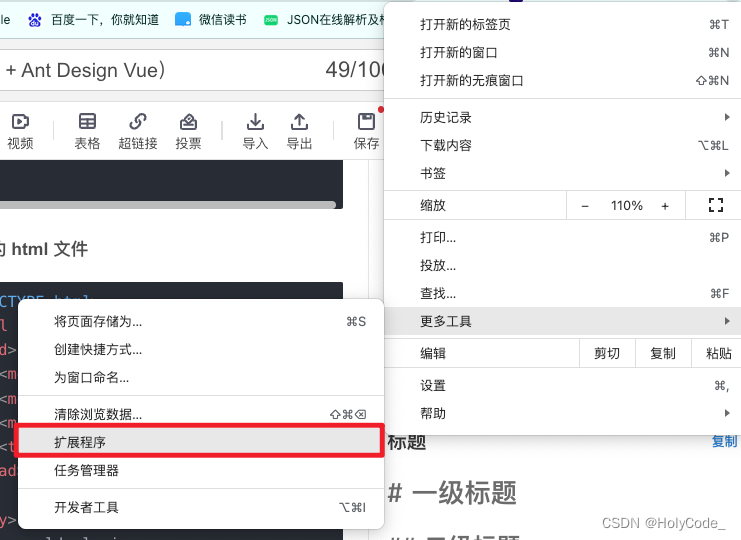
4.安装插件
找到我们的扩展程序,如下图所示
点击 加载以解压的扩展程序
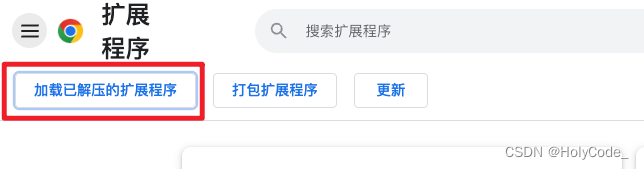
安装后,点击我们的扩展程序图标,我们就可以看到我们的 html 内容了
5.创建 Vue 项目
当前 Vue3 已经相对趋于稳定,很多公司和个人都开始尝鲜使用其进行开发,那么我们今天也以 Vue3 进行搭建学习。
使用 vue-cli 创建 vue3.x 版本的 vue 项目 vue create hello-world-plugin:
vue create hello-world-plugin
 Default ([Vue 2] babel, eslint)
> Default (Vue 3) ([Vue 3] babel, eslint)
 Manually select features
回车之后,我们选择 Default (Vue 3) ([Vue 3] babel, eslint),不过如何喜欢用自己配置的可以选择第三条。
cd hello-world-plugin
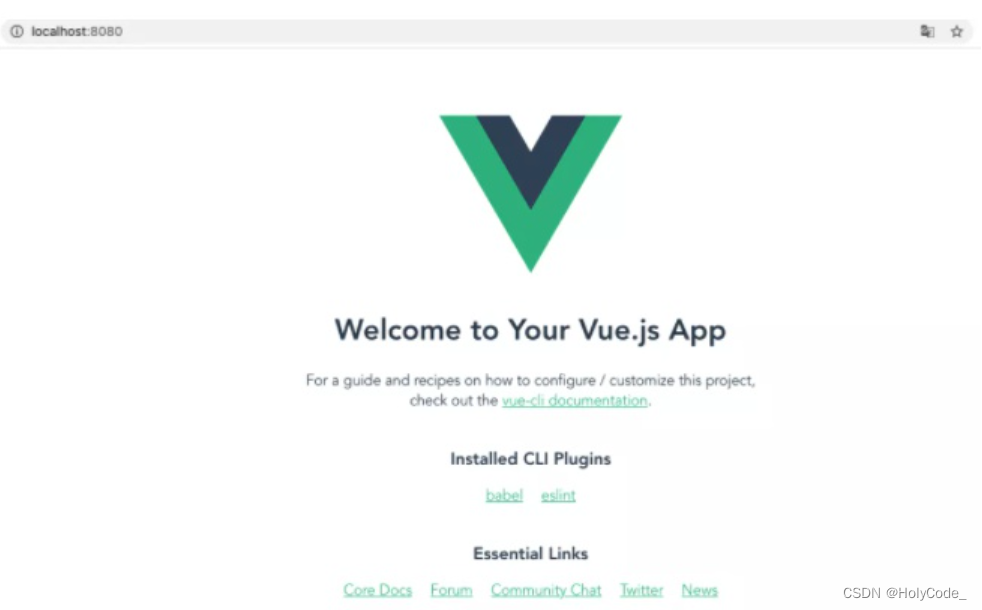
npm run serve
常规的项目跑起来之后可以在浏览器看到基本的页面
此时的项目结构目录大致为
├── README.md
├── babel.config.js
├── package.json
├── public
│   ├── favicon.ico
│   └── index.html
├── src
│   ├── App.vue
│   ├── assets
│   │   └── logo.png
│   ├── components
│   │   └── HelloWorld.vue
│   └── main.js
└── package-lock.json
5.1. 修改项目目录
删除 main.js、App.vue、components 以及文件夹下的 HelloWorld.vue、logo.png、public 文件
在根目录下创建 vue.config.js 的 vue 配置文件
从阿里巴巴矢量图标库 下载自己想要的图标文件,用了 16、48、128 这三种大小的图标,将下载的图标放到 src/assets 下面。
src 文件夹下面创建 background、plugins、popup、utils 文件
在 popup 文件夹下面创建 components、main.js 和 index.html,在 components 文件夹下创建 App.vue
在 plugins 文件夹下创建 inject.js 和 manifest.json
在 background 下面创建 main.js 文件
那么修改后的项目目录:
├── src
│   ├── assets
│   │   ├── icon128.png
│   │   ├── icon16.png
│   │   └── icon48.png
│   ├── background
│   │   └── main.js
│   ├── main.js
│   ├── plugins
│   │   ├── inject.js
│   │   └── manifest.json
│   ├── popup
│   │   ├── components
│   │   │   └── app.vue
│   │   ├── index.html
│   │   └── main.js
│   └── utils
├── vue.config.js
└── package-lock.json
├── README.md
├── babel.config.js
├── package.json
vue.config.js
vue.config.js 文件作为 vue 项目打包,运行等的基本配置,主要功能是打包成为我们 Chrome 插件所需要的项目目录。
添加 copy-webpack-plugin 模块,主要是用来拷贝文件
// 安装
npm install copy-webpack-plugin@6.0.2 -save-dev
配置 vue.config.js
const CopyWebpackPlugin = require("copy-webpack-plugin");
const path = require("path");

// 复制文件到指定目录
const copyFiles = [
 {
     from: path.resolve("src/plugins/manifest.json"),
     to: `${path.resolve("dist")}/manifest.json`
   },
   {
     from: path.resolve("src/assets"),
     to: path.resolve("dist/assets")
   },
   {
     from: path.resolve("src/plugins/inject.js"),
     to: path.resolve("dist/js")
   }
];

// 复制插件
const plugins = [
   new CopyWebpackPlugin({
     patterns: copyFiles
   })
];

// 页面文件
const pages = {};
// 配置 popup.html 页面
const chromeName = ["popup"];

chromeName.forEach(name => {
   pages[name] = {
     entry: `src/${name}/main.js`,
     template: `src/${name}/index.html`,
     filename: `${name}.html`
   };
});

module.exports = {
 pages,
 productionSourceMap: false,
 // 配置 content.js background.js
 configureWebpack: {
  entry: {
   background: "./src/background/main.js"
  },
  output: {
   filename: "js/[name].js"
  },
  plugins
 },
 // 配置 content.css
 css: {
  extract: {
   filename: "css/[name].css"
  }
 }
}
popup/index.html
index.html 我们只是将原来的 public 文件夹下的 index.html 文件内容拷贝过来。
<!DOCTYPE html>
<html lang="en">
  <head>
    <meta charset="utf-8">
    <meta http-equiv="X-UA-Compatible" content="IE=edge">
    <meta name="viewport" content="width=device-width,initial-scale=1.0">
    <title>my-vue-chrome-plugin</title>
  </head>
  <body>
    <noscript>
      <strong>We're sorry but <%= htmlWebpackPlugin.options.title %> doesn't work properly without JavaScript enabled. Please enable it to continue.</strong>
    </noscript>
    <div id="app"></div>
    <!-- built files will be auto injected -->
  </body>
</html>
popup/main.js
这个是 vue 项目的入口配置文件,将原来的 main.js 复制过来
import { createApp } from 'vue'
import App from './components/App.vue'
createApp(App).mount('#app')
popup/components/App.vue
正常的 vue 文件
<template>
  <div>hello world</div>
</template>

<script>
export default {

}
</script>

<style>

</style>
background/main.js
简单打印一下
console.log(‘hello world background’)
5.2 打包
npm run build
可以看到打印台已经完成打包

此时的项目目录
.
├── README.md
├── babel.config.js
├── dist
│   ├── assets
│   │   ├── icon128.png
│   │   ├── icon16.png
│   │   └── icon48.png
│   ├── js
│   │   ├── background.js
│   │   ├── chunk-vendors.fa86ccee.js
│   │   ├── inject.js
│   │   └── popup.js
│   ├── manifest.json
│   └── popup.html
├── package.json
├── src
│   ├── assets
│   │   ├── icon128.png
│   │   ├── icon16.png
│   │   └── icon48.png
│   ├── background
│   │   └── main.js
│   ├── plugins
│   │   ├── inject.js
│   │   └── manifest.json
│   ├── popup
│   │   ├── components
│   │   │   └── app.vue
│   │   ├── index.html
│   │   └── main.js
│   └── utils
├── vue.config.js
└── package-lock.json
5.3 加载插件
在 Chrome 插件中加载已解压的扩展程序 ,选择我们的 dist 文件,发现无法加载

是因为缺少了可以执行的 js 文件,因此将我们打包生成的 js/chunk-vendors.js 文件放到 manifest.json 文件里面
 "content\_scripts": [
  {
   "matches": ["http://\*/\*", "https://\*/\*"],
   "css": [],
      "js": ["js/chunk-vendors.js"], // 修改
   "run\_at": "document\_idle"
  }
 ],
再进行打包加载,即可发现我们的插件已经成功安装
6.引入Ant Design Vue
使用 npm 或 yarn 安装 #
我们推荐使用 npm 或 yarn 的方式进行开发,不仅可在开发环境轻松调试,也可放心地在生产环境打包部署使用,享受整个生态圈和工具链带来的诸多好处。
$ npm install ant-design-vue --save
$ yarn add ant-design-vue
修改popup下index.html
<!DOCTYPE html>
<html lang="en">
<head>
<meta charset="utf-8" />
<meta http-equiv="X-UA-Compatible" content="IE=edge" />
<meta name="viewport" content="width=device-width,initial-scale=1.0" />
<title>my-vue-chrome-plugin</title>
</head>
<body>
<noscript>
<strong>We're sorry but <%= htmlWebpackPlugin.options.title %> doesn't work
properly without JavaScript enabled. Please enable it to
continue.</strong>
</noscript>
<div id="app"></div>
<!-- built files will be auto injected -->
</body>
</html>
### 最后
**前端CSS面试题文档,JavaScript面试题文档,Vue面试题文档,大厂面试题文档**
**[开源分享:【大厂前端面试题解析+核心总结学习笔记+真实项目实战+最新讲解视频】](https://bbs.csdn.net/forums/4304bb5a486d4c3ab8389e65ecb71ac0)**
ntinue.</strong>
</noscript>
<div id="app"></div>
<!-- built files will be auto injected -->
</body>
</html>
### 最后
**前端CSS面试题文档,JavaScript面试题文档,Vue面试题文档,大厂面试题文档**
**[开源分享:【大厂前端面试题解析+核心总结学习笔记+真实项目实战+最新讲解视频】](https://bbs.csdn.net/forums/4304bb5a486d4c3ab8389e65ecb71ac0)**
[外链图片转存中...(img-sedn7dq8-1715852391504)]
[外链图片转存中...(img-FVy1jtd6-1715852391504)]


 4054
4054


 被折叠的 条评论
为什么被折叠?
被折叠的 条评论
为什么被折叠?
 到【灌水乐园】发言


