


网上学习资料一大堆,但如果学到的知识不成体系,遇到问题时只是浅尝辄止,不再深入研究,那么很难做到真正的技术提升。
一个人可以走的很快,但一群人才能走的更远!不论你是正从事IT行业的老鸟或是对IT行业感兴趣的新人,都欢迎加入我们的的圈子(技术交流、学习资源、职场吐槽、大厂内推、面试辅导),让我们一起学习成长!
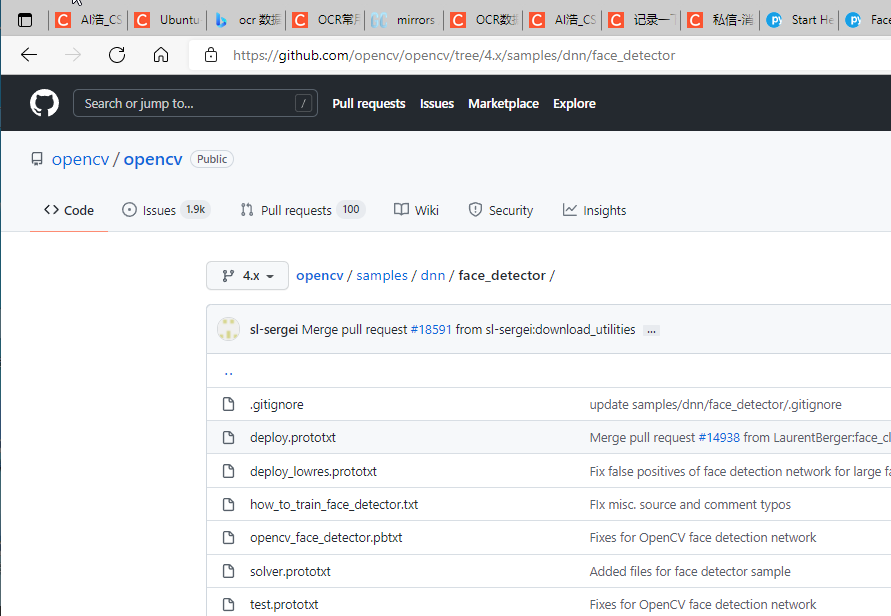
opencv/samples/dnn/face_detector at 4.x · opencv/opencv (github.com)
将 OpenCV 的深度神经网络模块与 Caffe 模型一起使用时,您需要两组文件:
- 定义模型架构(即层本身)的 .prototxt 文件
- 包含实际层权重的 .caffemodel 文件 链接:
https://raw.githubusercontent.com/opencv/opencv_3rdparty/dnn_samples_face_detector_20180205_fp16/res10_300x300_ssd_iter_140000_fp16.caffemodel
使用使用 Caffe 训练的模型进行深度学习时,需要这两个文件。 但是,您只能在 GitHub 存储库中找到 prototxt 文件。
权重文件不包含在 OpenCVsamples 目录中,需要更多的挖掘才能找到它们……
使用 OpenCV 和深度学习在图像中进行人脸检测
在第一个示例中,我们将学习如何将 OpenCV 的人脸检测应用于单个输入图像。 在下一节中,我们将学习如何修改此代码并将 OpenCV 的人脸检测应用于视频、视频流和网络摄像头。 打开一个新文件,将其命名为 detect_faces.py ,并插入以下代码:
# import the necessary packages
import numpy as np
import argparse
import cv2
# construct the argument parse and parse the arguments
ap = argparse.ArgumentParser()
ap.add_argument("-i", "--image", required=True,
	help="path to input image")
ap.add_argument("-p", "--prototxt", required=True,
	help="path to Caffe 'deploy' prototxt file")
ap.add_argument("-m", "--model", required=True,
	help="path to Caffe pre-trained model")
ap.add_argument("-c", "--confidence", type=float, default=0.5,
	help="minimum probability to filter weak detections")
args = vars(ap.parse_args())
导入所需的包并解析命令行参数。 我们有三个必需的参数:
–image :输入图像的路径。
–prototxt :Caffe prototxt 文件的路径。
–model :预训练 Caffe 模型的路径。
可选参数 --confidence 可以覆盖默认阈值 0.5。 从那里让我们加载我们的模型并从我们的图像创建一个 blob:
# load our serialized model from disk
print("[INFO] loading model...")
net = cv2.dnn.readNetFromCaffe(args["prototxt"], args["model"])
# load the input image and construct an input blob for the image
# by resizing to a fixed 300x300 pixels and then normalizing it
image = cv2.imread(args["image"])
(h, w) = image.shape[:2]
blob = cv2.dnn.blobFromImage(cv2.resize(image, (300, 300)), 1.0,
	(300, 300), (104.0, 177.0, 123.0))
首先,我们使用 --prototxt 和 --model 文件路径加载我们的模型。 我们将模型存储为 net(第 20 行)。
然后我们加载图像,提取尺寸,并创建一个 blob。 dnn.blobFromImage 负责预处理,包括设置 blob 尺寸和规范化。 如果您有兴趣了解有关 dnn.blobFromImage 函数的更多信息,我会在这篇博文中详细介绍。 接下来,我们将应用人脸检测:
# pass the blob through the network and obtain the detections and
# predictions
print("[INFO] computing object detections...")
net.setInput(blob)
detections = net.forward()
为了检测人脸,将 blob 通过网络。 然后我们将循环检测并在检测到的人脸周围绘制框:
# loop over the detections
for i in range(0, detections.shape[2]):
	# extract the confidence (i.e., probability) associated with the
	# prediction
	confidence = detections[0, 0, i, 2]
	# filter out weak detections by ensuring the `confidence` is
	# greater than the minimum confidence
	if confidence > args["confidence"]:
		# compute the (x, y)-coordinates of the bounding box for the
		# object
		box = detections[0, 0, i, 3:7] \* np.array([w, h, w, h])
		(startX, startY, endX, endY) = box.astype("int")

		# draw the bounding box of the face along with the associated
		# probability
		text = "{:.2f}%".format(confidence \* 100)
		y = startY - 10 if startY - 10 > 10 else startY + 10
		cv2.rectangle(image, (startX, startY), (endX, endY),
			(0, 0, 255), 2)
		cv2.putText(image, text, (startX, y),
			cv2.FONT_HERSHEY_SIMPLEX, 0.45, (0, 0, 255), 2)
# show the output image
cv2.imshow("Output", image)
cv2.waitKey(0)
遍历检测结果。
然后,我们提取置信度并将其与置信度阈值进行比较。 我们执行此检查以过滤掉弱检测。 如果置信度满足最小阈值,我们继续绘制一个矩形以及检测概率。
为此,我们首先计算边界框的 (x, y) 坐标。 然后我们构建包含检测概率的置信文本字符串。 如果我们的文本偏离图像(例如当面部检测发生在图像的最顶部时),我们将其向下移动 10 个像素。 我们的面部矩形和置信文本绘制在图像上。
然后,我们再次循环执行该过程后的其他检测。 如果没有检测到,我们准备在屏幕上显示我们的输出图像)。
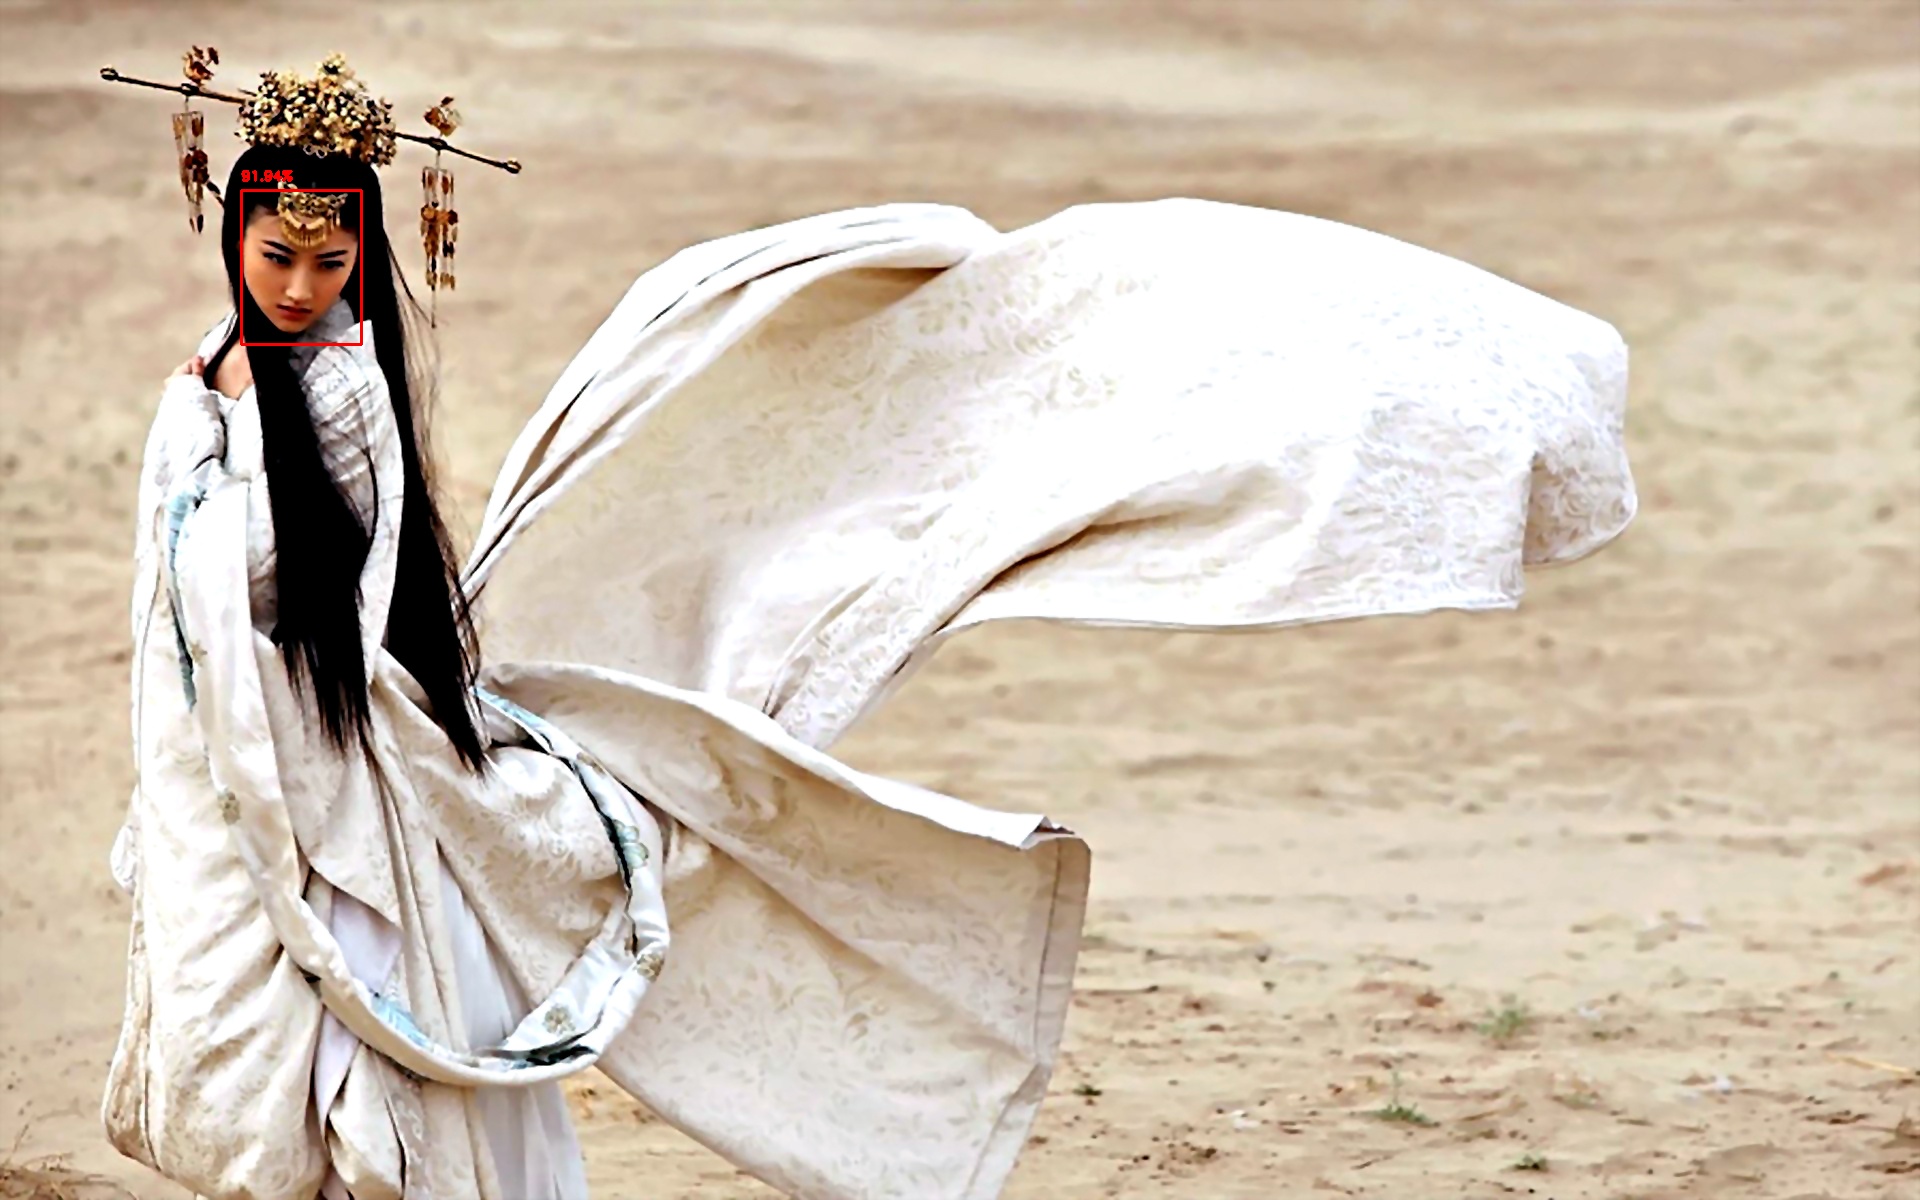
打开一个终端并执行以下命令:
python detect_faces.py --image 2.jpg --prototxt deploy.proto.txt --model res10_300x300_ssd_iter_140000_fp16.caffemodel
使用 OpenCV 和深度学习在视频和网络摄像头中进行人脸检测
既然我们已经学习了如何将 OpenCV 的人脸检测应用于单个图像,让我们还将人脸检测应用于视频、视频流和网络摄像头。 对我们来说幸运的是,我们在上一节中使用 OpenCV 在单个图像中进行人脸检测的大部分代码都可以在这里重用!
打开一个新文件,将其命名为 detect_faces_video.py ,并插入以下代码:
# import the necessary packages
from imutils.video import VideoStream
import numpy as np
import argparse
import imutils
import time
import cv2
# construct the argument parse and parse the arguments
ap = argparse.ArgumentParser()
ap.add_argument("-p", "--prototxt", required=True,
	help="path to Caffe 'deploy' prototxt file")
ap.add_argument("-m", "--model", required=True,
	help="path to Caffe pre-trained model")
ap.add_argument("-c", "--confidence", type=float, default=0.5,
	help="minimum probability to filter weak detections")
args = vars(ap.parse_args())
与上面相比,我们需要导入三个额外的包: VideoStream 、 imutils 和 time 。 如果您的虚拟环境中没有 imutils,您可以通过以下方式安装它:
pip install imutils
我们的命令行参数基本相同,只是这次我们没有 --image 路径参数。 我们将改用网络摄像头的视频源。 从那里我们将加载我们的模型并初始化视频流:
# load our serialized model from disk
print("[INFO] loading model...")
net = cv2.dnn.readNetFromCaffe(args["prototxt"], args["model"])
# initialize the video stream and allow the camera sensor to warm up
print("[INFO] starting video stream...")
vs = VideoStream(src=0).start()
time.sleep(2.0)
加载模型与上面相同。 我们初始化一个 VideoStream 对象,指定索引为零的相机作为源(通常这将是您笔记本电脑的内置相机或检测到的台式机的第一个相机)。 这里有一些快速说明:


网上学习资料一大堆,但如果学到的知识不成体系,遇到问题时只是浅尝辄止,不再深入研究,那么很难做到真正的技术提升。
一个人可以走的很快,但一群人才能走的更远!不论你是正从事IT行业的老鸟或是对IT行业感兴趣的新人,都欢迎加入我们的的圈子(技术交流、学习资源、职场吐槽、大厂内推、面试辅导),让我们一起学习成长!
,但如果学到的知识不成体系,遇到问题时只是浅尝辄止,不再深入研究,那么很难做到真正的技术提升。**
一个人可以走的很快,但一群人才能走的更远!不论你是正从事IT行业的老鸟或是对IT行业感兴趣的新人,都欢迎加入我们的的圈子(技术交流、学习资源、职场吐槽、大厂内推、面试辅导),让我们一起学习成长!


 666
666


 被折叠的 条评论
为什么被折叠?
被折叠的 条评论
为什么被折叠?
 到【灌水乐园】发言


