


了解如何使用 CloudFront 轻松部署和托管您的 Angular 应用程序作为 AWS S3 网站进行分发
欢迎来到雲闪世界。开发网站的挑战之一是决定在哪里托管它以及如何轻松部署它。
AWS 提供使用 S3 存储桶作为静态网站的选项,既能享受 S3 的所有可用性和可靠性,又能方便地托管您的 Web 应用程序。
除了 S3 网站托管之外,AWS 还提供了轻松将其连接到 CloudFront 的可能性,CloudFront 是一种快速内容分发网络 (CDN) 服务,可以在全球范围内安全地以低延迟和高速度交付您的网站。
在这个故事中,我将向您展示如何使用 Terraform 轻松地在 AWS 中创建基础设施,并使用 GitHub Actions 将 Angular 应用程序部署到 S3。
让我们开始吧
让我们首先使用以下命令生成 Angular 应用
ng new YOUR_APP_NAMEnew YOUR_APP_NAME替换YOUR_APP_NAME为您的应用程序的名称。
现在,将除.editorconfig和.gitignore文件之外的所有内容移动到名为 的新文件夹src(不是由 Angular CLI 生成的文件夹)。
然后你应该有一个类似于以下内容的文件夹结构:
.
└── src/
    ├── node_modules/
    ├── src/
    │   ├── app/
    │   │   ├── app.component.html
    │   │   ├── app.component.css
    │   │   ├── app.component.spec.ts
    │   │   ├── app.component.ts
    │   │   ├── app.config.ts
    │   │   └── app.routes.ts
    │   ├── assets/
    │   │   └── .gitkeep
    │   ├── favicon.ico
    │   ├── index.html
    │   ├── main.ts
    │   └── styles.css
    ├── angular.json
    ├── package-lock.json
    ├── package.json
    ├── README.md
    ├── tsconfig.app.json
    ├── tsconfig.json
└── tsconfig.spec.json现在,如果你进入该src文件夹并运行:
ng serve --open这将在 URL 中打开 Angular 应用localhost:4200
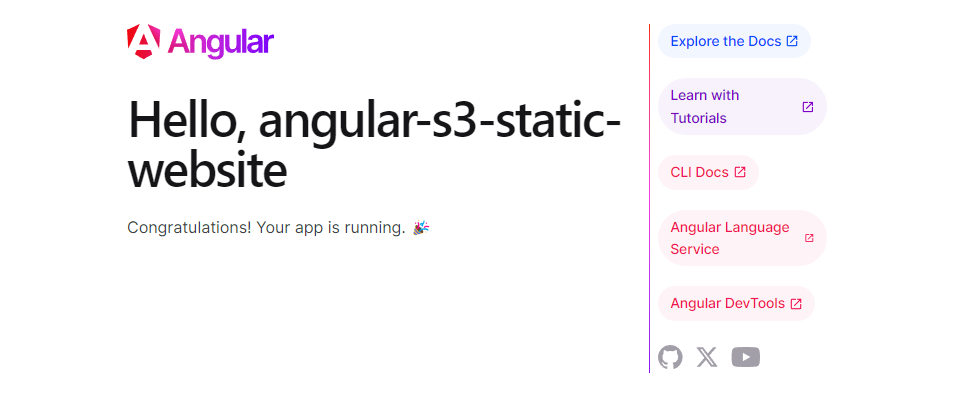
太棒了!我们有一个 Angular 应用程序正在运行。现在让我们转到基础架构并部署到 S3 静态网站。
建设我们的基础设施
让我们使用 Terraform 在 AWS 中创建我们的基础设施。
我们首先在iac根级别创建一个文件夹并添加一个providers.tf文件来定义我们的 Terraform 配置:
terraform {
  required_providers {
    aws = {
      source  = "hashicorp/aws"source  = "hashicorp/aws"
      version = "~> 5.0"
    }
  }

  backend "s3" {
    bucket = "YOUR_BUCKET"
    key    = "state.tfstate"
  }
}

# Configure the AWS Provider
provider "aws" {}请注意,backend如果您希望 Terraform 跟踪您的基础设施状态,则会话是可选的。它要求您在使用 Terraform 创建基础设施之前创建存储桶。如果您不提供该backend部分,那么 Terraform 将假定它需要在每次运行时从头开始创建基础设施。
现在,让我们创建一个website.tf文件来定义网站基础设施:
resource "aws_s3_bucket" "website" {"aws_s3_bucket" "website" {
  bucket = "YOUR_BUCKET_NAME"
}

resource "aws_s3_bucket_public_access_block" "website_bucket_public_access" {
  bucket                  = aws_s3_bucket.website.id
  block_public_acls       = false
  block_public_policy     = false
  ignore_public_acls      = false
  restrict_public_buckets = false
}

resource "aws_s3_bucket_policy" "public_bucket_policy" {
  bucket = aws_s3_bucket.website.id
  policy = data.aws_iam_policy_document.bucket_policy.json
}

resource "aws_s3_bucket_website_configuration" "website_configuration" {
  bucket = aws_s3_bucket.website.id

  index_document {
    suffix = "index.html"
  }

  error_document {
    key = "index.html"
  }
}

data "aws_iam_policy_document" "bucket_policy" {
  statement {
    principals {
      type        = "*"
      identifiers = ["*"]
    }

    actions = [
      "s3:GetObject"
    ]

    resources = [
      "arn:aws:s3:::${aws_s3_bucket.website.bucket}/*"
    ]
  }
}您需要将其替换YOUR_BUCKET_NAME为您想要的唯一存储桶名称。
在这里,我们定义我们的 S3 存储桶,启用公共访问,设置存储桶策略以允许所有资源中的 GET,并将存储桶设置为静态网站主机。
最后,为了进行部署,我们将使用 Gtihub Actions。因此,创建一个文件夹.github/workflows并添加一个deploy-infrastructure.yml文件:
name: Deploy Infrastructure
on:
  workflow_dispatch:
  push:
    branches:
      - main
    paths:
      - iac/**/*
      - .github/workflows/deploy-infrastructure.yml

defaults:
  run:
    working-directory: iac/

jobs:
  terraform:
    name: "Terraform"
    runs-on: ubuntu-latest
    steps:
      # Checkout the repository to the GitHub Actions runner
      - name: Checkout
        uses: actions/checkout@v3

      - name: Configure AWS Credentials Action For GitHub Actions
        uses: aws-actions/configure-aws-credentials@v1
        with:
          aws-access-key-id: ${{ secrets.AWS_ACCESS_KEY }}
          aws-secret-access-key: ${{ secrets.AWS_SECRET_ACCESS_KEY }}
          aws-region: YOUR_REGION

      # Install the latest version of Terraform CLI and configure the Terraform CLI configuration file with a Terraform Cloud user API token
      - name: Setup Terraform
        uses: hashicorp/setup-terraform@v3

      # Initialize a new or existing Terraform working directory by creating initial files, loading any remote state, downloading modules, etc.
      - name: Terraform Init
        run: terraform init

      # Checks that all Terraform configuration files adhere to a canonical format
      - name: Terraform Format
        run: terraform fmt -check

      # Generates an execution plan for Terraform
      - name: Terraform Plan
        run: |
          terraform plan -out=plan -input=false

        # On push to "main", build or change infrastructure according to Terraform configuration files
        # Note: It is recommended to set up a required "strict" status check in your repository for "Terraform Cloud". See the documentation on "strict" required status checks for more information: https://help.github.com/en/github/administering-a-repository/types-of-required-status-checks
      - name: Terraform Apply
run: terraform apply -auto-approve -input=false planAWS_ACCESS_KEY请注意,您需要在存储库中为和设置机密AWS_SECRET_ACCESS_KEY。并且您需要YOUR_REGION为您的区域替换 。
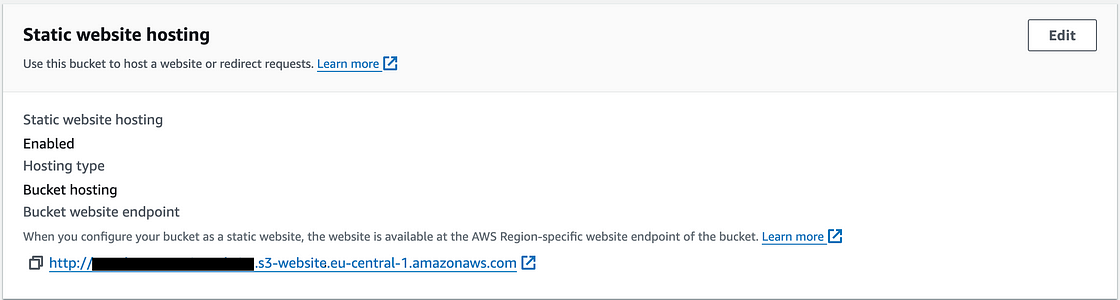
您的 URL 应为http://BUCKET_NAME.s3-website.REGION.amazonaws.com或 (具体取决于区域)http://BUCKET_NAME.s3-website-REGION.amazonaws.com。如果您想查看确切的 URL,可以Static website hosting在Properties存储桶的选项卡下找到它。
部署您的网站
现在我们只需要通过 GitHub Actions 构建并部署我们的网站到我们的 S3 存储桶。因此,让我们通过deploy-website.yml在以下位置创建一个文件来做到这一点.github/workflows:
name: Deploy Website
on:
  workflow_dispatch:
  push:
    branches:
      - main
    paths:
      - src/**/*
      - .github/workflows/deploy-website.yml

defaults:
  run:
    working-directory: src/

jobs:
  terraform:
    name: "Deploy"
    runs-on: ubuntu-latest
    steps:
      # Checkout the repository to the GitHub Actions runner
      - name: Checkout
        uses: actions/checkout@v3

      - name: Configure AWS Credentials Action For GitHub Actions
        uses: aws-actions/configure-aws-credentials@v1
        with:
          aws-access-key-id: ${{ secrets.AWS_ACCESS_KEY }}
          aws-secret-access-key: ${{ secrets.AWS_SECRET_ACCESS_KEY }}
          aws-region: YOUR_REGION

      - name: Setup NodeJS
        uses: actions/setup-node@v4
        with:
          node-version: 21

      - name: Install dependencies
        run: npm install

      - name: Build
        run: npm run build

      - name: Deploy to S3
run: aws s3 sync dist/YOUR_APP_NAME/browser/ s3://YOUR_WEBSITE_BUCKET_NAME您需要替换YOUR_REGION您所在的地区、YOUR_APP_NAMEAngular 应用程序名称(Angular CLI 在此目录中创建构建工件)以及YOUR_WEBSITE_BUCKET_NAME您定义为您的网站的存储桶。
推送到 GitHub 并等待工作流程完成后,您可以在 S3 存储桶提供的 URL 下测试您的应用程序。您应该看到与ng serve本地运行时相同的页面。
使用 CloudFront 启用分发
现在我们只需要将 CloudFront 分发链接到我们的 S3 网站即可实现全球内容分发。
在该iac文件夹中,创建一个cloudfront.tf包含以下内容的文件:
locals {
  website_origin_id = "WebsiteBucket""WebsiteBucket"
}

resource "aws_cloudfront_origin_access_control" "oac" {
  name                              = "AngularWebsite"
  description                       = "Example Policy"
  origin_access_control_origin_type = "s3"
  signing_behavior                  = "always"
  signing_protocol                  = "sigv4"
}

resource "aws_cloudfront_distribution" "s3_distribution" {
  origin {
    domain_name              = aws_s3_bucket.website.bucket_regional_domain_name
    origin_access_control_id = aws_cloudfront_origin_access_control.oac.id
    origin_id                = local.website_origin_id
  }

  enabled             = true
  is_ipv6_enabled     = true
  comment             = "My Angular Website Distribution"
  default_root_object = "index.html"

  custom_error_response {
    error_code         = 403
    response_code      = 200
    response_page_path = "/index.html"
  }

  custom_error_response {
    error_code         = 404
    response_code      = 200
    response_page_path = "/index.html"
  }

  default_cache_behavior {
    allowed_methods  = ["GET", "HEAD", "OPTIONS"]
    cached_methods   = ["GET", "HEAD"]
    target_origin_id = local.website_origin_id

    cache_policy_id = aws_cloudfront_cache_policy.website.id

    viewer_protocol_policy = "allow-all"
    min_ttl                = 0
    default_ttl            = 3600
    max_ttl                = 86400
  }

  price_class = "PriceClass_All"

  restrictions {
    geo_restriction {
      restriction_type = "none"
      locations        = []
    }
  }

  viewer_certificate {
    cloudfront_default_certificate = true
  }
}

resource "aws_cloudfront_cache_policy" "website" {
  name = "react_cache_policy"

  parameters_in_cache_key_and_forwarded_to_origin {
    headers_config {
      header_behavior = "none"
    }
    cookies_config {
      cookie_behavior = "all"
    }

    query_strings_config {
      query_string_behavior = "all"
    }
  }
}
我们在这里做了几件事:
- 创建源访问控制 (OAC),这是一项安全功能,允许 CloudFront 安全地访问 AWS 服务
- 创建 CloudFront 分发 — 在这里我们将 CloudFront 链接到我们的 S3 静态网站。
- 设置自定义错误响应 — 这非常重要,因为 CloudFront 需要知道如果出现错误该去哪里。例如,如果您尝试调用
/test,如果未设置这些设置,CloudFront 将显示默认错误消息。 - 我们还设置了缓存策略,让 CloudFront 知道需要缓存什么
现在我们需要更新存储桶策略,以仅允许我们的 CloudFront OAC 能够访问我们的资源。因此,在 中,使用以下内容website.tf更新并阻止存储桶公共访问:aws_iam_policy_document bucket_policy
resource "aws_s3_bucket" "website" {"aws_s3_bucket" "website" {
  bucket = "angular-s3-static-website"
}

resource "aws_s3_bucket_public_access_block" "website_bucket_public_access" {
  bucket                  = aws_s3_bucket.website.id
  block_public_acls       = true
  block_public_policy     = true
  ignore_public_acls      = true
  restrict_public_buckets = true
}

resource "aws_s3_bucket_policy" "public_bucket_policy" {
  bucket = aws_s3_bucket.website.id
  policy = data.aws_iam_policy_document.bucket_policy.json
}

resource "aws_s3_bucket_website_configuration" "website_configuration" {
  bucket = aws_s3_bucket.website.id

  index_document {
    suffix = "index.html"
  }

  error_document {
    key = "index.html"
  }
}

data "aws_iam_policy_document" "bucket_policy" {
  statement {
    principals {
      type        = "Service"
      identifiers = ["cloudfront.amazonaws.com"]
    }

    actions = [
      "s3:GetObject"
    ]

    resources = [
      "arn:aws:s3:::${aws_s3_bucket.website.bucket}/*"
    ]

    condition {
      test     = "StringEquals"
      variable = "AWS:SourceArn"
      values   = [aws_cloudfront_distribution.s3_distribution.arn]
    }
  }
}
这样,将您的代码推送到 GitHub,等待工作流程完成,然后转到 AWS 中的 CloudFront 控制台。
您应该会看到您的 CloudFront 分发版和域名,这就是您访问它的方式。

您可以将其粘贴到浏览器中以查看您的网站运行。
结论
在这个故事中,您可以看到将 Angular 应用程序部署到 S3 并将 CloudFront 分发链接为我们的全球 CDN 是多么容易。
通过利用 GitHub 操作和 S3 静态网站选项,可以轻松托管 Angular 应用程序,这使我们能够将 S3 存储桶转变为静态网站主机。S3 还提供 DNS CNAME,以便我们可以访问我们的网站。
除了托管之外,您还可以了解如何利用 AWS CDN、CloudFront,通过边缘位置缓存和快速性能让您的应用程序在全球范围内快速可用。
通过使用 OAC,您可以了解如何允许您的 S3 静态网站仅由 CloudFront 访问,从而增加额外的安全性。
借助 Terraform,我们可以轻松构建基础设施的各个部分,并借助 GitHub Actions 在 AWS 中将其链接在一起以运行我们的 IaC 代码。
感谢关注雲闪世界。(Aws解决方案架构师vs开发人员&GCP解决方案架构师vs开发人员)


 1369
1369

 被折叠的 条评论
为什么被折叠?
被折叠的 条评论
为什么被折叠?
 到【灌水乐园】发言


