


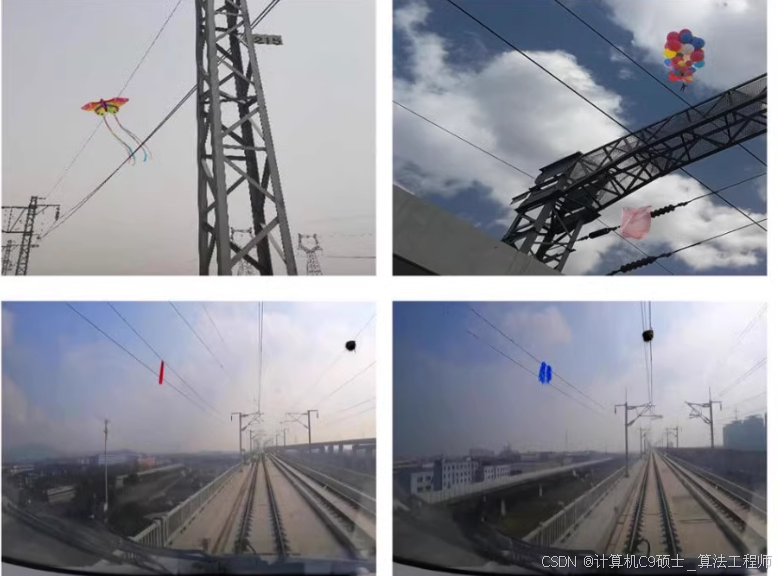
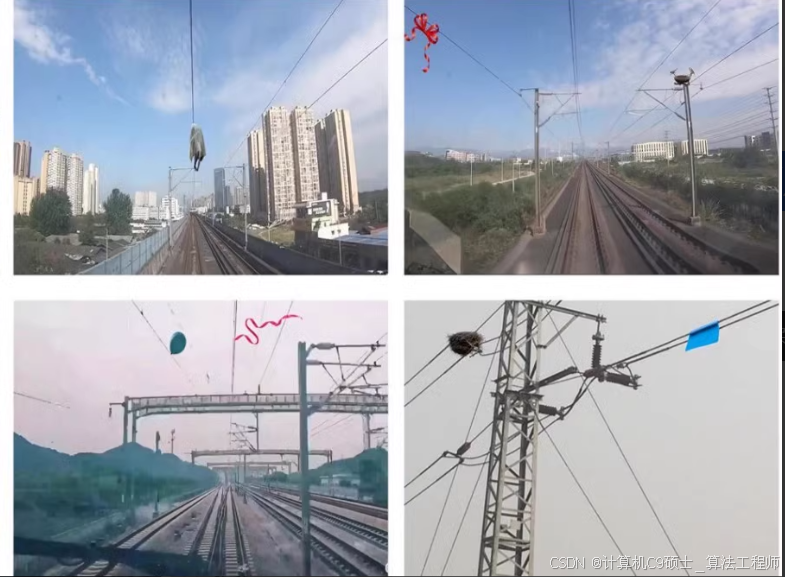
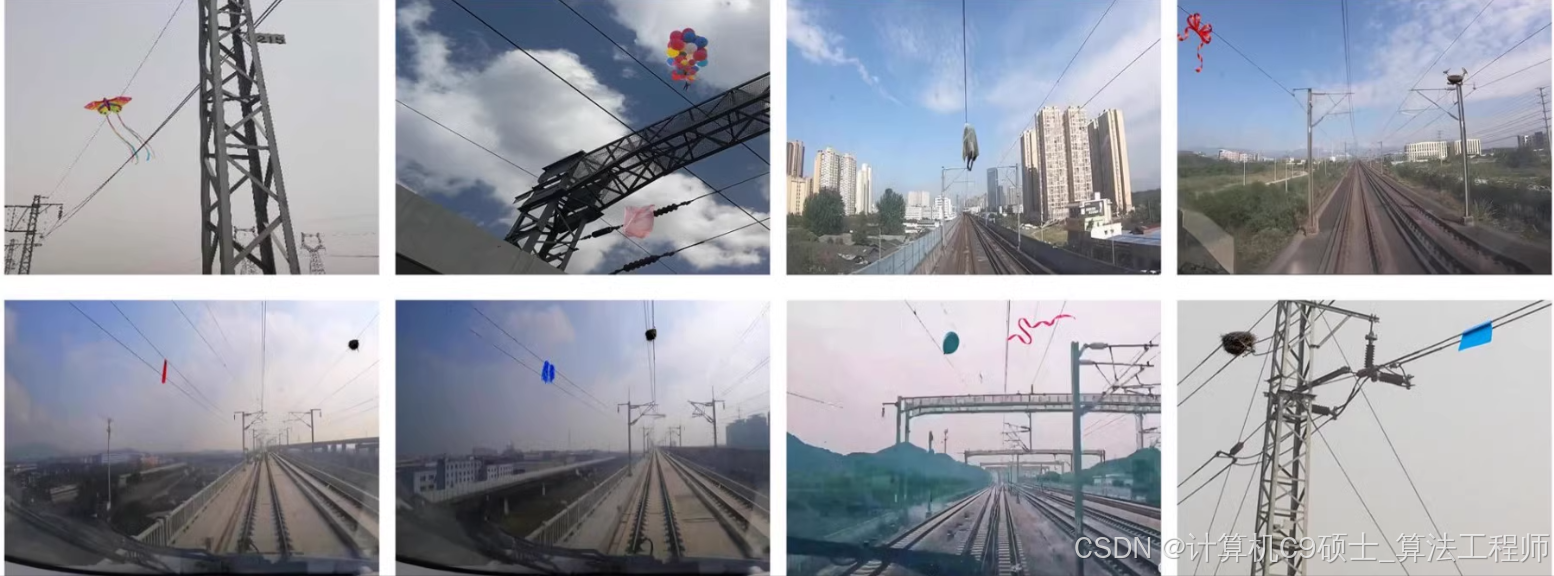
铁路输电线路异物检测数据集,共6GB,14000余图像,40000+标注,标注鸟巢,塑料袋,气球,漂浮物四大类。coco格式标注
共6GB,14000图像,40000+标注,标注鸟巢,塑料袋,气球,漂浮物四大类。coco格式标注 铁路异物数据集 输电线异物数据集 +铁路异物识别数据集 铁路异物数据集
- :铁路输电线路异物检测数据集
- 规模:共6GB,14,000余张图像,超过40,000个标注
- 检测要素:鸟巢、塑料袋、气球、漂浮物四大类
- 标注格式:COCO格式标注
数据集特点
- 高清影像:所有图像均为高清影像,适合用于精确的目标检测。
- 详细标注:每张图像都标注了鸟巢、塑料袋、气球、漂浮物的位置,可以用于训练模型来识别这些异物。
- 多样性:涵盖不同时间、天气条件下的真实铁路输电线路场景,适用于多种环境下的应用。
- 广泛适用性:支持多种深度学习框架,适用于目标检测及定位任务。
数据集统计
| 目标类别 | 图像张数 | 标注数量 |
|---|---|---|
| 鸟巢 | ||
| 塑料袋 | ||
| 气球 | ||
| 漂浮物 | ||
| 总计 | 14,000+ | 40,000+ |
数据集结构
RailwayPowerLineObstaclesDetectionDataset/
├── images/  # 图像文件
│   ├── train2017/  # COCO标准命名
│   │   ├── image_00001.jpg
│   │   ├── image_00002.jpg
│   │   └── ...
│   ├── val2017/  # COCO标准命名
│   │   ├── image_00001.jpg
│   │   ├── image_00002.jpg
│   │   └── ...
│   └── test2017/  # COCO标准命名
│       ├── image_00001.jpg
│       ├── image_00002.jpg
│       └── ...
├── annotations/  # COCO格式标注文件
│   ├── instances_train2017.json
│   ├── instances_val2017.json
│   └── instances_test2017.json
└── dataset_info.txt  # 数据集描述文件
COCO格式标注示例
每个JSON文件包含所有图像的标注信息:
{
    "info": {...},
    "licenses": [...],
    "images": [
        {
            "id": 1,
            "width": 640,
            "height": 480,
            "file_name": "train2017/image_00001.jpg",
            "license": 1,
            "flickr_url": "",
            "coco_url": "",
            "date_captured": "2020-01-01"
        },
        ...
    ],
    "annotations": [
        {
            "id": 1,
            "image_id": 1,
            "category_id": 1,
            "segmentation": [[100, 150, 150, 200, 200, 150, 150, 100]],  # 多边形分割
            "area": 2500,  # 区域面积
            "bbox": [100, 150, 100, 50],  # 边界框 [x, y, width, height]
            "iscrowd": 0
        },
        ...
    ],
    "categories": [
        {
            "id": 1,
            "name": "鸟巢",
            "supercategory": "障碍物"
        },
        {
            "id": 2,
            "name": "塑料袋",
            "supercategory": "障碍物"
        },
        {
            "id": 3,
            "name": "气球",
            "supercategory": "障碍物"
        },
        {
            "id": 4,
            "name": "漂浮物",
            "supercategory": "障碍物"
        }
    ]
}
使用该数据集进行模型训练
1. 数据预处理与加载
首先,我们需要加载数据并将其转换为适合常用目标检测框架(如MMDetection、Detectron2等)使用的格式。假设你已经安装了PyTorch和其他必要的库。
import os
import json
import numpy as np
from PIL import Image
import torch
from torch.utils.data import Dataset, DataLoader
from torchvision import transforms

class RailwayObstaclesDetectionDataset(Dataset):
    def __init__(self, image_dir, annotation_file, transform=None):
        self.image_dir = image_dir
        self.transform = transform
        with open(annotation_file, 'r') as f:
            self.annotations = json.load(f)
        self.images = self.annotations['images']

    def __len__(self):
        return len(self.images)

    def __getitem__(self, idx):
        img_info = self.images[idx]
        img_path = os.path.join(self.image_dir, img_info['file_name'])
        img_id = img_info['id']

        # 加载图像
        image = Image.open(img_path).convert('RGB')
        if self.transform:
            image = self.transform(image)

        # 加载标注
        annotations = [ann for ann in self.annotations['annotations'] if ann['image_id'] == img_id]
        boxes = []
        labels = []
        for ann in annotations:
            bbox = ann['bbox']
            boxes.append(bbox)
            labels.append(ann['category_id'])

        boxes = torch.as_tensor(boxes, dtype=torch.float32)
        labels = torch.as_tensor(labels, dtype=torch.int64)

        return image, boxes, labels

# 数据增强
transform = transforms.Compose([
    transforms.Resize((640, 480)),
    transforms.ToTensor(),
])

# 创建数据集
train_dataset = RailwayObstaclesDetectionDataset(image_dir='RailwayPowerLineObstaclesDetectionDataset/images/train2017/', annotation_file='RailwayPowerLineObstaclesDetectionDataset/annotations/instances_train2017.json', transform=transform)
val_dataset = RailwayObstaclesDetectionDataset(image_dir='RailwayPowerLineObstaclesDetectionDataset/images/val2017/', annotation_file='RailwayPowerLineObstaclesDetectionDataset/annotations/instances_val2017.json', transform=transform)
test_dataset = RailwayObstaclesDetectionDataset(image_dir='RailwayPowerLineObstaclesDetectionDataset/images/test2017/', annotation_file='RailwayPowerLineObstaclesDetectionDataset/annotations/instances_test2017.json', transform=transform)

train_loader = DataLoader(train_dataset, batch_size=4, shuffle=True, num_workers=4)
val_loader = DataLoader(val_dataset, batch_size=4, shuffle=False, num_workers=4)
test_loader = DataLoader(test_dataset, batch_size=4, shuffle=False, num_workers=4)
2. 构建模型
我们可以使用MMDetection框架进行目标检测任务。假设你已经安装了MMDetection和其他必要的库。
git clone https://github.com/open-mmlab/mmdetection.git
cd mmdetection
pip install -r requirements.txt
创建配置文件 configs/railway_obstacle_detection.py:
_base_ = [
    '../_base_/models/faster_rcnn_r50_fpn.py',
    '../_base_/datasets/coco_detection.py',
    '../_base_/schedules/schedule_1x.py',
    '../_base_/default_runtime.py'
]

# 修改类别数量
model = dict(
    roi_head=dict(
        bbox_head=dict(
            num_classes=4)))

# 修改数据集配置
dataset_type = 'CocoDataset'
data_root = 'path/to/RailwayPowerLineObstaclesDetectionDataset/'

data = dict(
    samples_per_gpu=4,
    workers_per_gpu=4,
    train=dict(
        type=dataset_type,
        ann_file=data_root + 'annotations/instances_train2017.json',
        img_prefix=data_root + 'images/train2017/'),
    val=dict(
        type=dataset_type,
        ann_file=data_root + 'annotations/instances_val2017.json',
        img_prefix=data_root + 'images/val2017/'),
    test=dict(
        type=dataset_type,
        ann_file=data_root + 'annotations/instances_test2017.json',
        img_prefix=data_root + 'images/test2017/'))
3. 训练模型
使用MMDetection进行训练。
python tools/train.py configs/railway_obstacle_detection.py4. 评估模型
在验证集上评估模型性能。
python tools/test.py configs/railway_obstacle_detection.py path/to/checkpoint.pth --out results.pkl --eval bbox5. 推理
使用训练好的模型进行推理。
python demo/image_demo.py demo/demo.jpg configs/railway_obstacle_detection.py checkpoint.pth实验报告
实验报告应包括以下内容:
- 项目简介:简要描述项目的背景、目标和意义。
- 数据集介绍:详细介绍数据集的来源、规模、标注格式等。
- 模型选择与配置:说明选择的模型及其配置参数。
- 训练过程:记录训练过程中的损失变化、学习率调整等。
- 评估结果:展示模型在验证集上的性能指标(如mAP、准确率)。
- 可视化结果:提供一些典型样本的检测结果可视化图。
- 结论与讨论:总结实验结果,讨论可能的改进方向。
- 附录:包含代码片段、图表等补充材料。
依赖库
确保安装了以下依赖库:
pip install torch torchvision
pip install mmcv-full  # MMDetection依赖
pip install -r mmdetection/requirements.txt
总结
这个铁路输电线路异物检测数据集提供了丰富的标注数据,非常适合用于训练和评估目标检测模型。通过MMDetection框架,可以方便地构建和训练高性能的目标检测模型。实验报告可以帮助你更好地理解和分析模型的表现,并为进一步的研究提供参考。


 被折叠的 条评论
为什么被折叠?
被折叠的 条评论
为什么被折叠?
 到【灌水乐园】发言


