


深度学习目标检测算法yolo训练火灾烟雾数据集 建立基于深度学习YOLOv5的火灾烟雾检测识别系统 pyqt5界面 gui
以下文字及代码仅供参考。
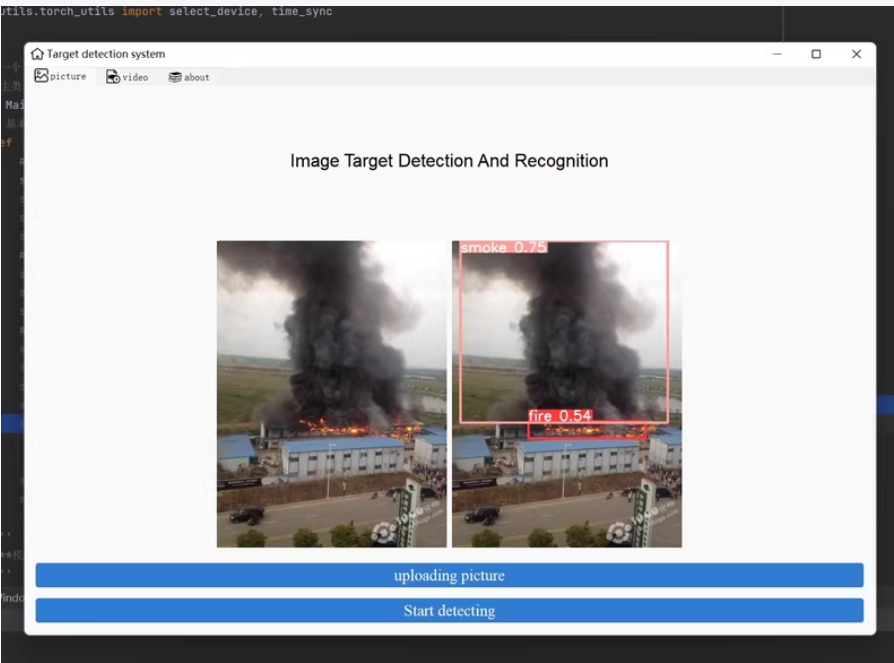
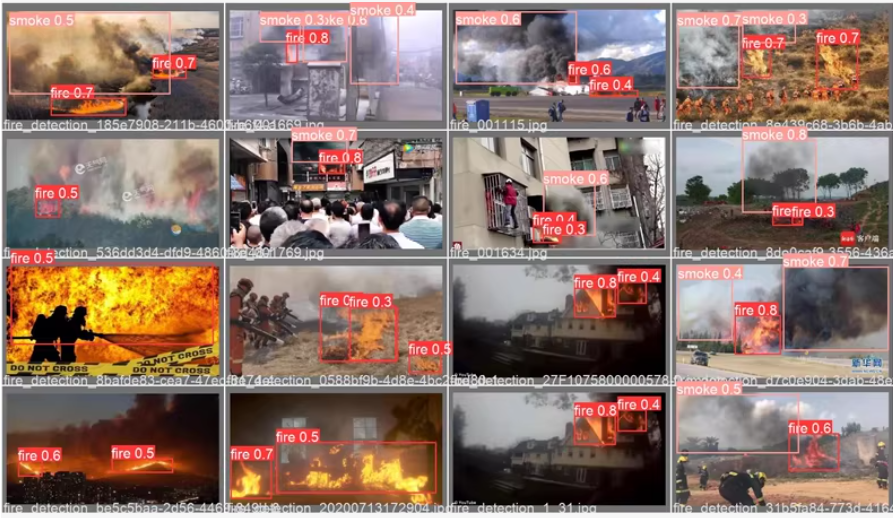
基于YOLOv5的火灾烟雾检测识别
1
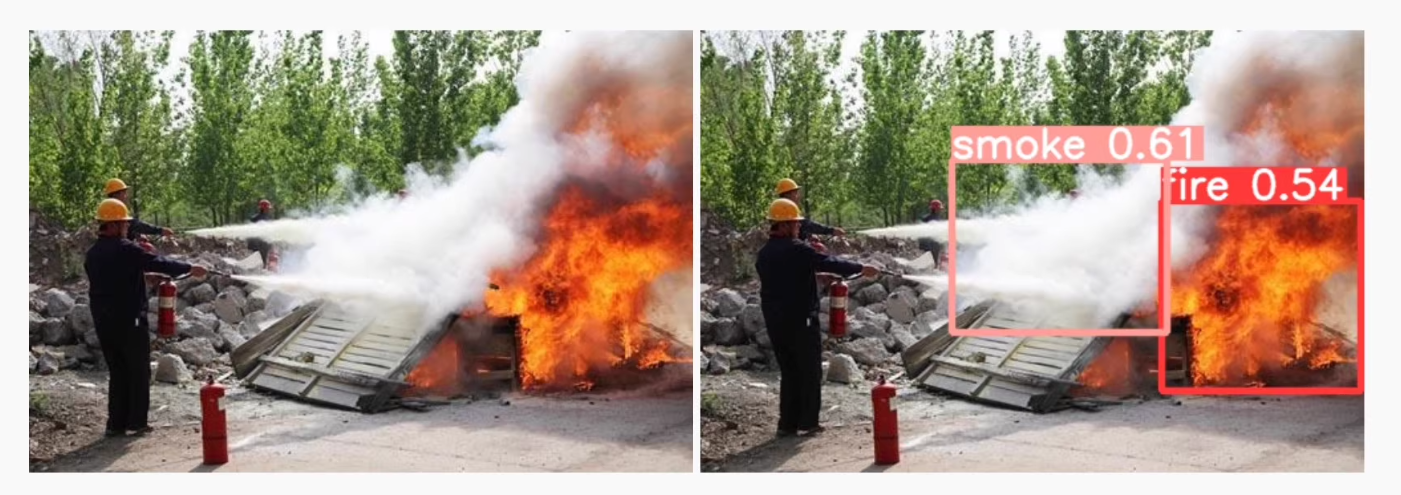
可以同时检测两个类别:火和烟雾
构建一个基于YOLOv5的火灾烟雾检测识别系统,并附带GUI界面,涉及多个步骤:数据准备、模型训练、模型推理和GUI开发。以下是详细的步骤和代码示例。
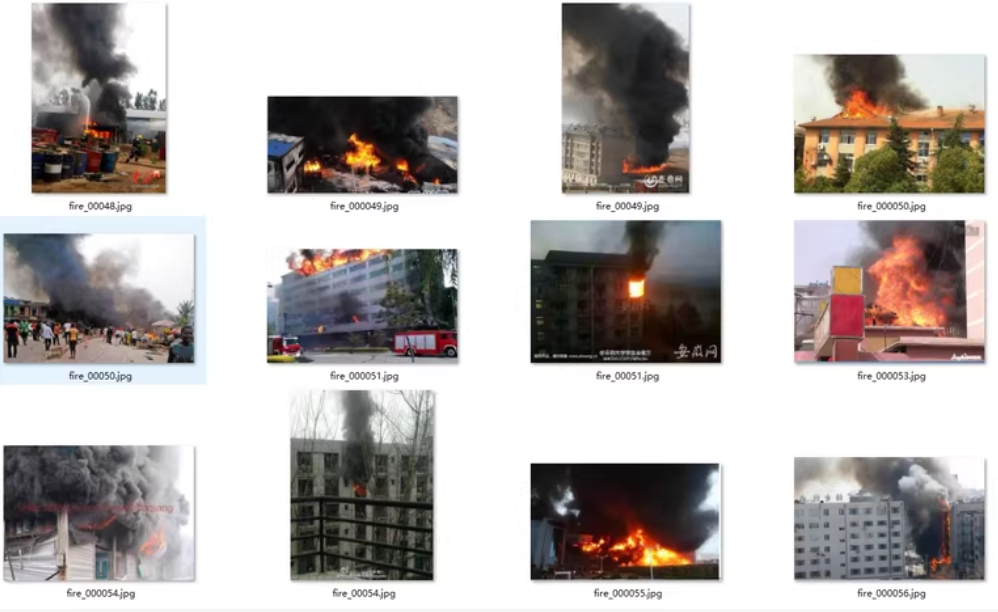
1. 数据准备
假设你已经有了2300张标注好的图片,格式为YOLO格式(.txt文件),并且分为两个类别:smoke和fire。
目录结构
dataset/
    images/
        train/
            image1.jpg
            image2.jpg
            ...
        val/
            image1.jpg
            image2.jpg
            ...
    labels/
        train/
            image1.txt
            image2.txt
            ...
        val/
            image1.txt
            image2.txt
            ...
    data.yaml
data.yaml 文件
train: ./dataset/images/train
val: ./dataset/images/val

nc: 2
names: ['smoke', 'fire']
2. 模型训练
使用YOLOv5进行训练,首先需要安装YOLOv5库。
git clone https://github.com/ultralytics/yolov5
cd yolov5
pip install -r requirements.txt
然后运行训练脚本:
python train.py --img 640 --batch 16 --epochs 100 --data ../dataset/data.yaml --weights yolov5s.pt --cache
3. 模型推理
训练完成后,可以使用训练好的模型进行推理。
import torch
from PIL import Image
from utils.general import non_max_suppression, scale_coords
from utils.torch_utils import select_device, time_sync
from models.experimental import attempt_load

def detect(image_path, weights='best.pt', img_size=640, conf_thres=0.25, iou_thres=0.45):
    device = select_device('')
    model = attempt_load(weights, map_location=device)
    stride = int(model.stride.max())
    names = model.module.names if hasattr(model, 'module') else model.names

    img = Image.open(image_path).convert('RGB')
    img = img.resize((img_size, img_size))
    img = np.array(img) / 255.0
    img = img.transpose(2, 0, 1)
    img = np.expand_dims(img, axis=0)
    img = torch.from_numpy(img).to(device)
    img = img.float()

    pred = model(img)[0]
    pred = non_max_suppression(pred, conf_thres, iou_thres)

    results = []
    for det in pred:
        if len(det):
            det[:, :4] = scale_coords(img.shape[2:], det[:, :4], img.shape[2:]).round()
            for *xyxy, conf, cls in reversed(det):
                label = f'{names[int(cls)]} {conf:.2f}'
                results.append((label, xyxy))

    return results
4. GUI开发
使用Tkinter库开发GUI界面。
import tkinter as tk
from tkinter import filedialog
from PIL import Image, ImageTk
import numpy as np

class TargetDetectionSystem:
    def __init__(self, root):
        self.root = root
        self.root.title("Target Detection System")

        self.image_label = tk.Label(root)
        self.image_label.pack(pady=10)

        self.upload_button = tk.Button(root, text="Upload Picture", command=self.upload_image)
        self.upload_button.pack(pady=5)

        self.detect_button = tk.Button(root, text="Start Detecting", command=self.start_detection)
        self.detect_button.pack(pady=5)

        self.image_path = None
        self.detection_results = []

    def upload_image(self):
        self.image_path = filedialog.askopenfilename()
        if self.image_path:
            img = Image.open(self.image_path)
            img.thumbnail((400, 400))
            img_tk = ImageTk.PhotoImage(img)
            self.image_label.config(image=img_tk)
            self.image_label.image = img_tk

    def start_detection(self):
        if self.image_path:
            self.detection_results = detect(self.image_path)
            self.display_results()

    def display_results(self):
        img = Image.open(self.image_path)
        draw = ImageDraw.Draw(img)
        for label, bbox in self.detection_results:
            x1, y1, x2, y2 = bbox
            draw.rectangle([x1, y1, x2, y2], outline="red", width=3)
            draw.text((x1, y1), label, fill="red")
        img_tk = ImageTk.PhotoImage(img)
        self.image_label.config(image=img_tk)
        self.image_label.image = img_tk

if __name__ == "__main__":
    root = tk.Tk()
    app = TargetDetectionSystem(root)
    root.mainloop()
总结
同学们,以上代码展示了如何构建一个基于YOLOv5的火灾烟雾检测识别系统,并附带GUI界面。可根据实际需求调整模型参数和GUI布局,


 597
597

 被折叠的 条评论
为什么被折叠?
被折叠的 条评论
为什么被折叠?
 到【灌水乐园】发言


