


基于vgg16和resnet50卷积神经网络的苹果等级分类系统(pytorch框架)
以下文字及代码仅供参考。
前端界面:flask+python, UI界面:pyqt5+python

卷积模型采用vgg16模型或resnet50,也可以用其他的卷积模型
基于VGG16和ResNet50的苹果等级分类系统,并使用Flask作为前端界面,PyQt5作为UI界面,
一、环境搭建
确保你的环境中已安装Python和pip。然后安装以下库和工具:
conda create -n apple_classification python=3.9
conda activate apple_classification
pip install torch torchvision flask PyQt5 matplotlib
二、数据集准备
你需要一个包含多种苹果等级的数据集,并标注好类别。假设你已经有了这样的数据集,结构如下:
dataset/
├── train/
│   ├── class1/
│   ├── class2/
│   └── ...
└── val/
    ├── class1/
    ├── class2/
    └── ...
三、模型训练
使用VGG16或ResNet50进行模型训练。
VGG16模型
import torch
import torch.nn as nn
import torch.optim as optim
from torchvision import datasets, models, transforms
from torch.utils.data import DataLoader

# 数据预处理
data_transforms = {
    'train': transforms.Compose([
        transforms.RandomResizedCrop(224),
        transforms.RandomHorizontalFlip(),
        transforms.ToTensor(),
        transforms.Normalize([0.485, 0.456, 0.406], [0.229, 0.224, 0.225])
    ]),
    'val': transforms.Compose([
        transforms.Resize(256),
        transforms.CenterCrop(224),
        transforms.ToTensor(),
        transforms.Normalize([0.485, 0.456, 0.406], [0.229, 0.224, 0.225])
    ]),
}

# 加载数据集
data_dir = 'dataset'
image_datasets = {x: datasets.ImageFolder(os.path.join(data_dir, x), data_transforms[x]) for x in ['train', 'val']}
dataloaders = {x: DataLoader(image_datasets[x], batch_size=4, shuffle=True, num_workers=4) for x in ['train', 'val']}
dataset_sizes = {x: len(image_datasets[x]) for x in ['train', 'val']}
class_names = image_datasets['train'].classes

# 使用VGG16模型
model_vgg = models.vgg16(pretrained=True)
num_ftrs = model_vgg.classifier[6].in_features
model_vgg.classifier[6] = nn.Linear(num_ftrs, len(class_names))

device = torch.device("cuda:0" if torch.cuda.is_available() else "cpu")
model_vgg = model_vgg.to(device)

criterion = nn.CrossEntropyLoss()
optimizer = optim.SGD(model_vgg.parameters(), lr=0.001, momentum=0.9)

# 训练模型
def train_model(model, criterion, optimizer, num_epochs=25):
    for epoch in range(num_epochs):
        print(f'Epoch {epoch}/{num_epochs - 1}')
        print('-' * 10)

        for phase in ['train', 'val']:
            if phase == 'train':
                model.train()
            else:
                model.eval()

            running_loss = 0.0
            running_corrects = 0

            for inputs, labels in dataloaders[phase]:
                inputs = inputs.to(device)
                labels = labels.to(device)

                optimizer.zero_grad()

                with torch.set_grad_enabled(phase == 'train'):
                    outputs = model(inputs)
                    _, preds = torch.max(outputs, 1)
                    loss = criterion(outputs, labels)

                    if phase == 'train':
                        loss.backward()
                        optimizer.step()

                running_loss += loss.item() * inputs.size(0)
                running_corrects += torch.sum(preds == labels.data)

            epoch_loss = running_loss / dataset_sizes[phase]
            epoch_acc = running_corrects.double() / dataset_sizes[phase]

            print(f'{phase} Loss: {epoch_loss:.4f} Acc: {epoch_acc:.4f}')

        print()

model_vgg = train_model(model_vgg, criterion, optimizer, num_epochs=25)
torch.save(model_vgg.state_dict(), 'vgg16_apple.pth')
ResNet50模型
model_resnet = models.resnet50(pretrained=True)
num_ftrs = model_resnet.fc.in_features
model_resnet.fc = nn.Linear(num_ftrs, len(class_names))
model_resnet = model_resnet.to(device)

criterion = nn.CrossEntropyLoss()
optimizer = optim.SGD(model_resnet.parameters(), lr=0.001, momentum=0.9)

model_resnet = train_model(model_resnet, criterion, optimizer, num_epochs=25)
torch.save(model_resnet.state_dict(), 'resnet50_apple.pth')
四、前端界面(Flask)
创建一个名为app.py的文件,内容如下:
from flask import Flask, render_template, request
import torch
from PIL import Image
import torchvision.transforms as transforms

app = Flask(__name__)

# 加载模型
model = models.vgg16(pretrained=False)
model.classifier[6] = nn.Linear(4096, len(class_names))
model.load_state_dict(torch.load('vgg16_apple.pth'))
model.eval()

@app.route('/')
def index():
    return render_template('index.html')

@app.route('/predict', methods=['POST'])
def predict():
    file = request.files['file']
    img = Image.open(file.stream)
    transform = transforms.Compose([
        transforms.Resize((224, 224)),
        transforms.ToTensor(),
        transforms.Normalize([0.485, 0.456, 0.406], [0.229, 0.224, 0.225])
    ])
    img_tensor = transform(img).unsqueeze(0)
    output = model(img_tensor)
    _, predicted = torch.max(output.data, 1)
    result = class_names[predicted.item()]
    return render_template('result.html', result=result)

if __name__ == '__main__':
    app.run(debug=True)
创建一个名为templates的文件夹,并在其中创建两个HTML文件index.html和result.html。
五、UI界面(PyQt5)
创建一个名为ui.py的文件,内容如下:
import sys
from PyQt5.QtWidgets import QApplication, QMainWindow, QPushButton, QLabel, QVBoxLayout, QWidget, QFileDialog
from PyQt5.QtGui import QPixmap
import cv2
class MainWindow(QMainWindow):
def __init__(self):
super().__init__()
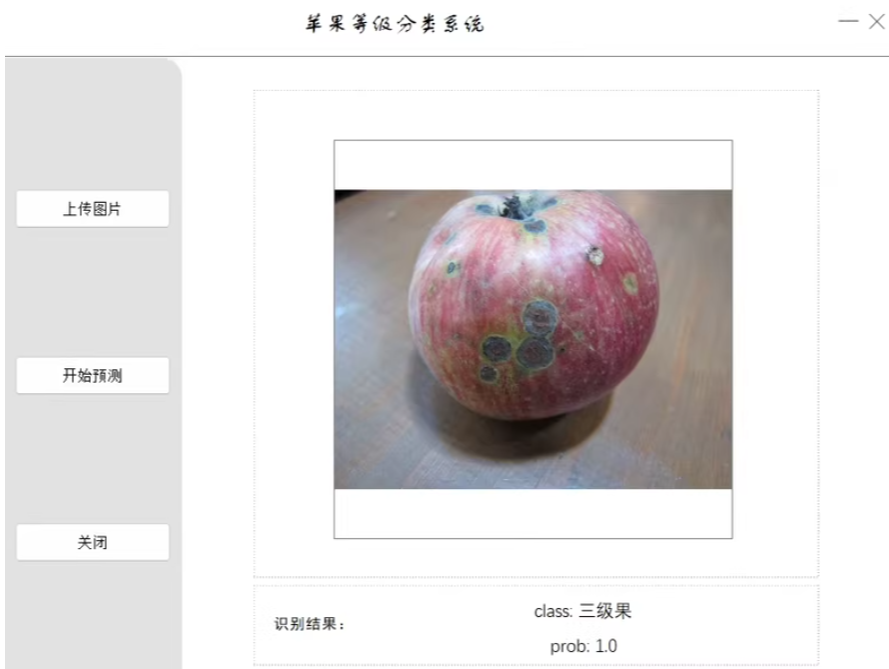
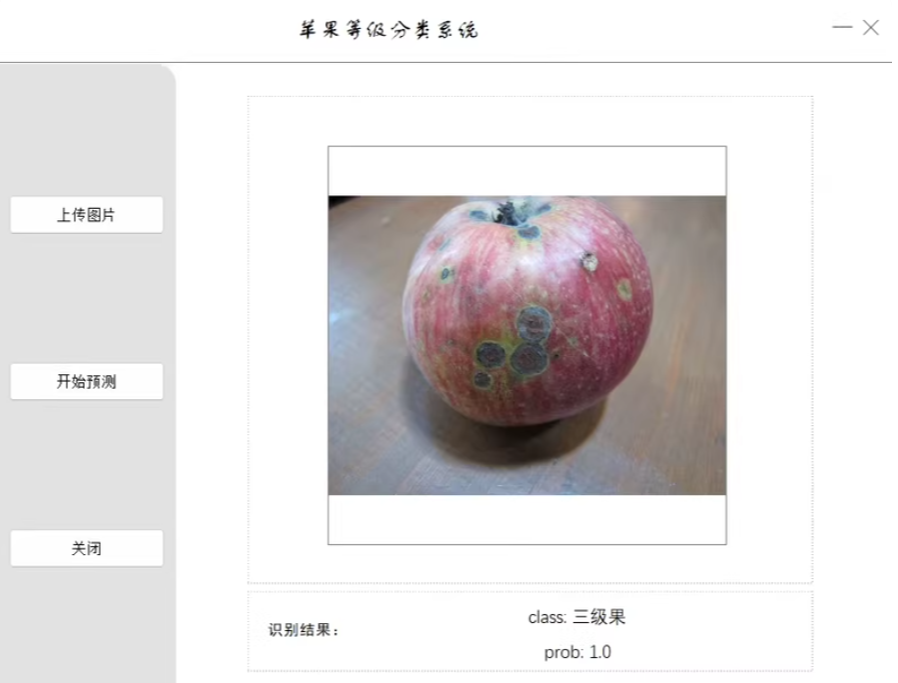
self.setWindowTitle("苹果等级分类系统")
self.upload_button = QPushButton("上传图片", self)
self.upload_button.clicked.connect(self.load_image)
self.predict_button = QPushButton("开始预测", self)
self.predict_button.clicked.connect(self.predict)
self.close_button = QPushButton("关闭", self)
self.close_button.clicked.connect(self.close)
self.image_label = QLabel(self)
layout = QVBoxLayout()
layout.addWidget(self.upload_button)
layout.addWidget(self.predict_button)
layout.addWidget(self.close_button)
layout.addWidget(self.image_label)
container = QWidget()
container.setLayout(layout)
self.setCentralWidget(container)
def load_image(self):
file_name, _ = QFileDialog.getOpenFileName(self, "选择图片", "", "Images (*.png *.xpm *.jpg)")
if file_name:
pixmap = QPixmap(file_name)
self.image_label.setPixmap(pixmap)
def predict(self):
# 在这里添加预测逻辑
pass
if __name__ == '__main__':
app = QApplication(sys.argv)
window = MainWindow()
window.show()
sys.exit(app.exec_())
六、指标图
使用Matplotlib绘制各种指标图,包括准确率、精确率、召回率、F1值、损失曲线、准确率曲线等。
import matplotlib.pyplot as plt

# 假设你有这些数据
accuracy = [0.8, 0.85, 0.9, 0.92, 0.95]
precision = [0.75, 0.8, 0.85, 0.9, 0.92]
recall = [0.7, 0.75, 0.8, 0.85, 0.9]
f1_score = [0.72, 0.77, 0.82, 0.86, 0.9]
loss = [0.5, 0.4, 0.3, 0.2, 0.1]

epochs = range(1, len(accuracy) + 1)

plt.figure(figsize=(12, 8))

plt.subplot(2, 2, 1)
plt.plot(epochs, accuracy, 'b', label='Accuracy')
plt.title('Accuracy')
plt.xlabel('Epochs')
plt.ylabel('Accuracy')
plt.legend()

plt.subplot(2, 2, 2)
plt.plot(epochs, precision, 'r', label='Precision')
plt.title('Precision')
plt.xlabel('Epochs')
plt.ylabel('Precision')
plt.legend()

plt.subplot(2, 2, 3)
plt.plot(epochs, recall, 'g', label='Recall')
plt.title('Recall')
plt.xlabel('Epochs')
plt.ylabel('Recall')
plt.legend()

plt.subplot(2, 2, 4)
plt.plot(epochs, f1_score, 'y', label='F1 Score')
plt.title('F1 Score')
plt.xlabel('Epochs')
plt.ylabel('F1 Score')
plt.legend()

plt.tight_layout()
plt.show()

plt.figure()
plt.plot(epochs, loss, 'm', label='Loss')
plt.title('Loss')
plt.xlabel('Epochs')
plt.ylabel('Loss')
plt.legend()
plt.show()
基于VGG16和ResNet50的苹果等级分类系统,可以识别图片,并支持动态调节模型置信度和选择模型权重。


 被折叠的 条评论
为什么被折叠?
被折叠的 条评论
为什么被折叠?
 到【灌水乐园】发言


