


1.Key的原理
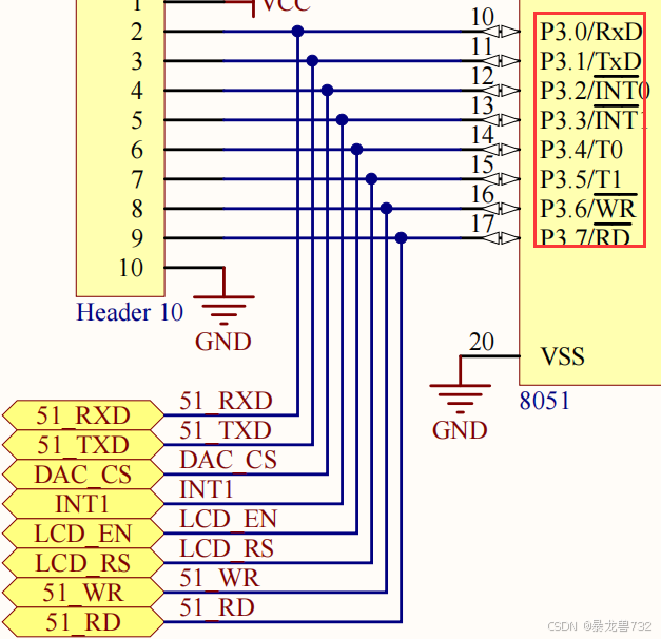
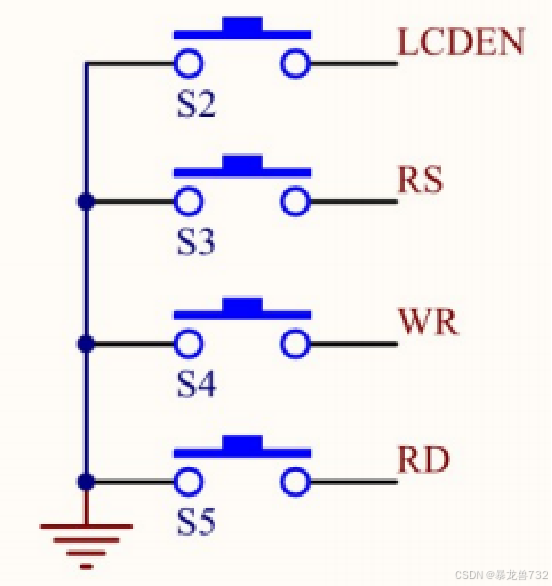
键盘的引脚是连接P3_4、P3_5、P3_6、P3_7.
接地的一段为低电频,当按键按下的时候,按键右端的电频也变成0。
如果没有初始化temp为0,那么temp的初始值是未定义的,这可能导致函数在没有按键被按下时返回不确定的值。初始化temp为0确保了函数在没有按键活动时返回0。
每个按键都会连接到一个特定的引脚上,并且这些连接在电路图中是明确标注的。例如,如果P3_4连接到按键1,P3_5连接到按键2,依此类推,那么我们就可以根据temp的值来确定哪个按键被按下 。
由于按键的抖动(即按键在按下和释放时产生的快速接触和断开),直接检测电平可能会导致误判。因此,在实际应用中,通常需要使用消抖算法来确保按键检测的准确性。
/*变量声明区域*/
unsigned char ucLed = 0xfe;
unsigned char Key_Val,Key_Down,Key_Up,Key_Old;


/*按键读取函数*/
unsigned char Key_Read()
{
  unsigned char temp = 0;
  if(P3_4 == 0) temp = 1;
  if(P3_5 == 0) temp = 2;
  if(P3_6 == 0) temp = 3;
  if(P3_7 == 0) temp = 4;

   return temp;
}

/*Main*/
void main()
{
  while(1)
  {
    Key_Val = Key_Read();//读取键码值
	Key_Down = Key_Val & (Key_Val ^ Key_Old);//检测下降沿
    Key_Up = ~Key_Val & (Key_Val ^ Key_Old);//检测上升沿
    Key_Old = Key_Val;//扫描辅助变量

    if(Key_Down == 1)
		P1_0 = 0;
	if(Key_Up == 2)
		P1_0 = 1;

	if(Key_Old == 3)
		P1_1 = 0;
	else
		P1_1 = 1;


  }
2.那我们如何通过按键来实现流水灯的开始与暂停呢?
我们定义一个bit型的标志位:System Flag用if语句和swicth语句来实现,具体代码如下:
/*头文件区域*/
#include<REGX52.H>
#include<intrins.h>
/*延时函数*/
void Delay(unsigned char xms)	//@12.000MHz
{
	while(xms--)
  {

	unsigned char data i, j;

	i = 2;
	j = 239;
	do
	{
		while (--j);
	} while (--i);
  }
}

/*变量声明区域*/
unsigned char ucLed = 0xfe;
unsigned char Key_Val,Key_Down,Key_Up,Key_Old;
bit System_Flag;


/*按键读取函数*/
unsigned char Key_Read()
{
  unsigned char temp = 0;
  if(P3_4 == 0) temp = 1;
  if(P3_5 == 0) temp = 2;
  if(P3_6 == 0) temp = 3;
  if(P3_7 == 0) temp = 4;

   return temp;
}

/*Main*/
void main()
{
  while(1)
  {
    Key_Val = Key_Read();//读取键码值
	Key_Down = Key_Val & (Key_Val ^ Key_Old);//检测下降沿
    Key_Up = ~Key_Val & (Key_Val ^ Key_Old);//检测上升沿
    Key_Old = Key_Val;//扫描辅助变量


    if(System_Flag == 1)
	{
	  ucLed=_crol_(ucLed,1);
      P1=ucLed;
     Delay(100);
    }
	 if(Key_Down == 1)
      System_Flag = 1;
     if(Key_Down == 2)
      System_Flag = 0;
  }
}
switch(Key_Down)
{
case1:
System_Flag=1;
break;
case2:
System_Flag=0;
break;
}
3.矩阵按键
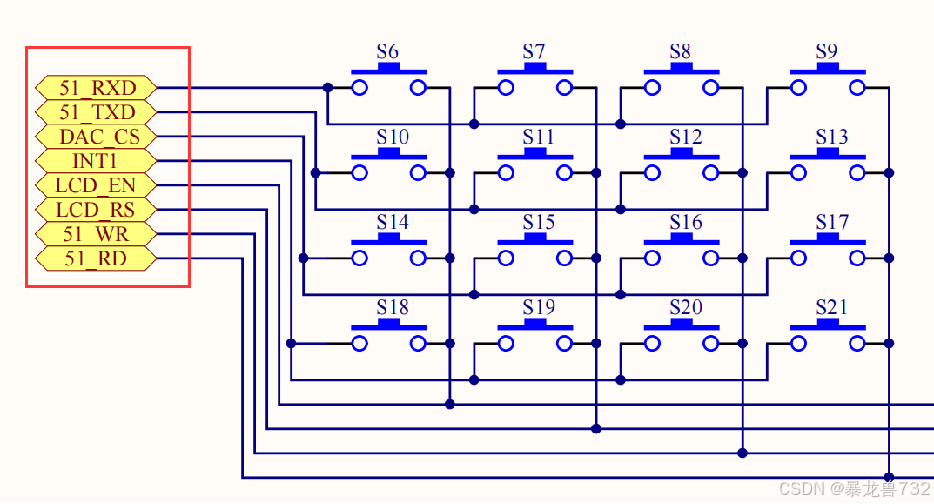
从上到下引脚依次为P3_0、P3_1、P3_2、P3_3.
代码实现如下:
/*头文件区域*/
#include<REGX52.H>
#include<intrins.h>
/*延时函数*/
void Delay(unsigned char xms)	//@12.000MHz
{
	while(xms--)
  {

	unsigned char data i, j;

	i = 2;
	j = 239;
	do
	{
		while (--j);
	} while (--i);
  }
}

/*变量声明区域*/
unsigned char ucLed = 0xfe;
unsigned char Key_Val,Key_Down,Key_Up,Key_Old;
bit System_Flag;
unsigned int Time=500;

/*按键读取函数*/
unsigned char Key_Read()//矩阵键盘
{
  unsigned char temp = 0;
P3_0 = 0;P3_1 = 1;P3_2 = 1;P3_3 = 1;
  if(P3_4 == 0) temp = 1;
  if(P3_5 == 0) temp = 2;
  if(P3_6 == 0) temp = 3;
  if(P3_7 == 0) temp = 4;
P3_0 = 1;P3_1 = 0;P3_2 = 1;P3_3 = 1;
  if(P3_4 == 0) temp = 5;
  if(P3_5 == 0) temp = 6;
  if(P3_6 == 0) temp = 7;
  if(P3_7 == 0) temp = 8;
P3_0 = 1;P3_1 = 1;P3_2 = 0;P3_3 = 1;
  if(P3_4 == 0) temp = 9;
  if(P3_5 == 0) temp = 10;
  if(P3_6 == 0) temp = 11;
  if(P3_7 == 0) temp = 12;
P3_0= 1 ;P3_1= 1 ;P3_2= 1 ;P3_3= 0 ;
  if(P3_4 == 0) temp = 13;
  if(P3_5 == 0) temp = 14;
  if(P3_6 == 0) temp = 15;
  if(P3_7 == 0) temp = 16;
   return temp;
}

/*Main*/
void main()
{
  while(1)
  {
    Key_Val = Key_Read();//读取键码值
	Key_Down = Key_Val & (Key_Val ^ Key_Old);//检测下降沿
    Key_Up = ~Key_Val & (Key_Val ^ Key_Old);//检测上升沿
    Key_Old = Key_Val;//扫描辅助变量

// if(key_down == 1)
//		p1_0 = 0;
//	if(key_up == 2)
//		p1_0 = 1;
//
//	if(key_old == 3)
//		p1_1 = 0;
//	else
//		p1_1 = 1;

    if(System_Flag == 1)
	{
	  ucLed=_crol_(ucLed,1);//流水灯
      P1=ucLed;
      Delay(Time);
    }
	 switch(Key_Down)
	 {
		 case 1:
		   System_Flag = 1;
		 break;
		 case 2:
		   System_Flag= 0 ;
		 break;
		 case 3:
		   Time += 100;
		 break;
		 case 4:
		   Time -= 500;
		 break;
	 }
  }
}


 1882
1882

 被折叠的 条评论
为什么被折叠?
被折叠的 条评论
为什么被折叠?
 到【灌水乐园】发言


