


引言
高德地图导航包还是浅显易懂,笔者在这里做点总结,实际操作一遍。
导航分为模拟导航和实时导航两种,两种导航都包括语音提示、停止导航、暂停或继续导航功能。通过模拟导航,用户可预先了解出行路线,直观掌握沿途每一个特别路口的交通状况,让出行更从容。
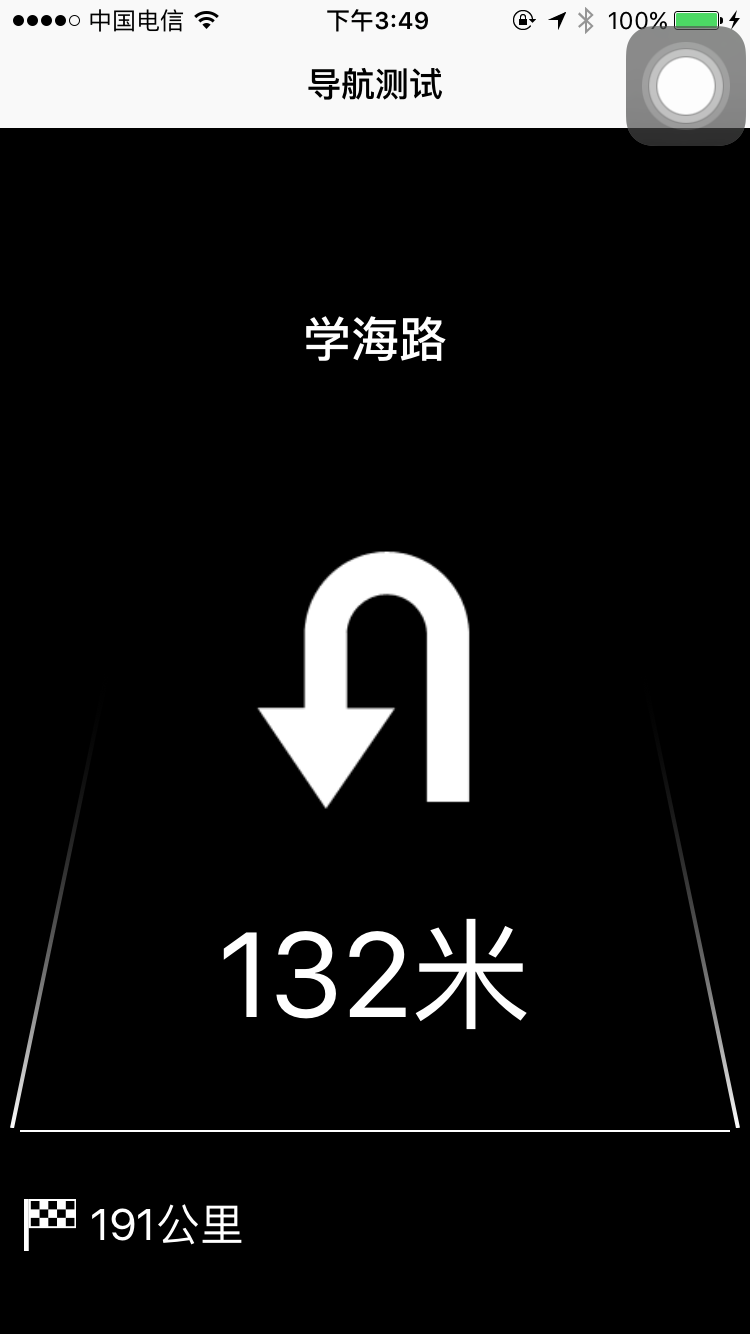
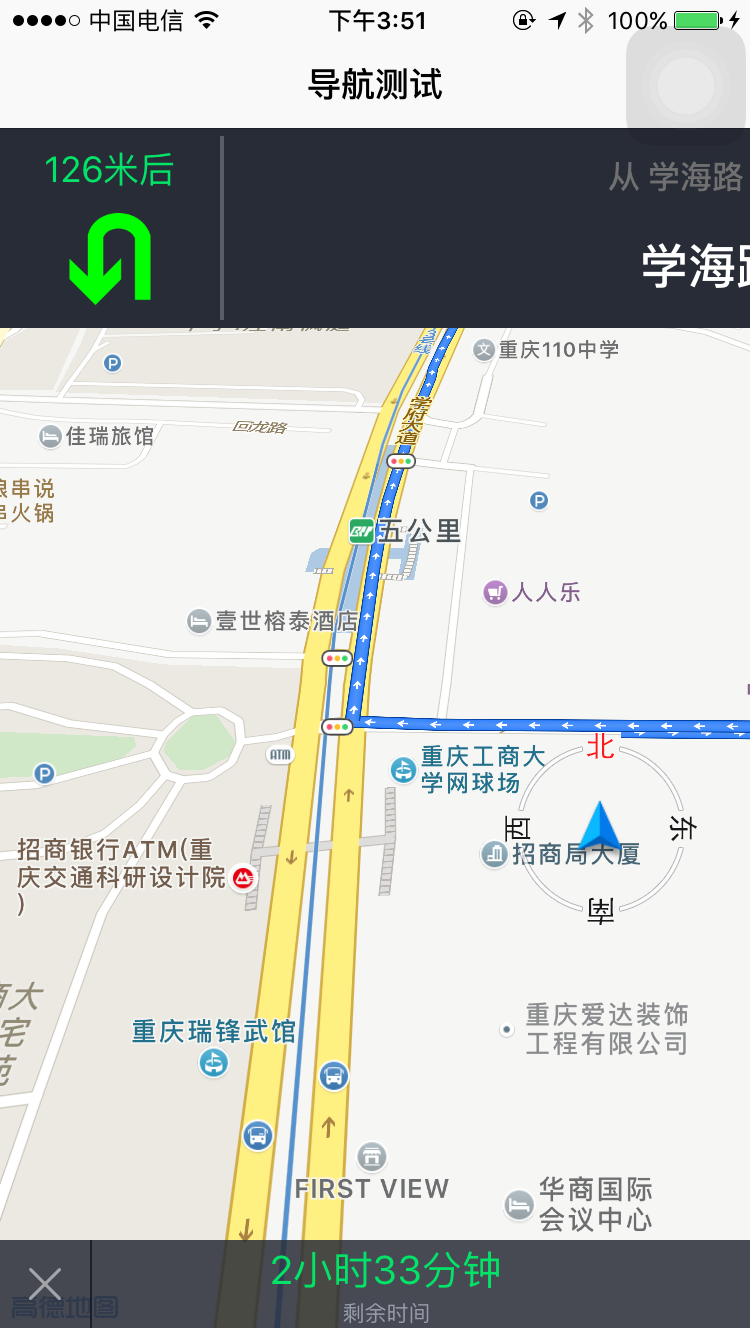
算路成功后就可在导航视图或HUD视图下开始导航了,如下图所示:
1.配置工程
笔者是使用cocoapods自动部署导航SDK,如果更新了cocoa pods,现在编写podfile文件有点不一样。以下实例:
platform :ios, ‘8.0’
use_frameworks!
target ‘约车’ do
pod ‘AMap3DMap’
pod ‘AMapSearch’
pod ‘AMapLocation’
pod ‘AMapNavi’
end
2.配置key
导入工程之后,我们需要在高德地图平台申请应用的key作为唯一标识,可参见官方文档,关于配置key笔者在此就不赘述。
3.实施
配置好之后,在viewController中导入
#import <AMapNaviKit/AMapNaviKit.h>
#import <AMapLocationKit/AMapLocationKit.h>
我们以标准导航视图为例:
(1)
//配置地图
- (void)configMap {

    locationManager = [[AMapLocationManager alloc] init];
    locationManager.delegate = self;
    [locationManager startUpdatingLocation];

}
//获取当前位置经纬度
- (void)amapLocationManager:(AMapLocationManager *)manager didUpdateLocation:(CLLocation *)location
{
if (!flag) {
myPosition = location.coordinate;
[self routeCal];
}
flag = YES;
}
//设置驾车路线
- (void)routeCal
{
    //导航起始坐标位置
    AMapNaviPoint *startPoint = [AMapNaviPoint locationWithLatitude:myPosition.latitude longitude:myPosition.longitude];
    //导航终点坐标位置
    AMapNaviPoint *endPoint = [AMapNaviPoint locationWithLatitude:myPosition.latitude+1 longitude:myPosition.longitude+1];

    NSArray *startPoints = @[startPoint];
    NSArray *endPoints   = @[endPoint];

    //驾车路径规划(未设置途经点、导航策略为速度优先)
    [self.driveManager calculateDriveRouteWithStartPoints:startPoints endPoints:endPoints wayPoints:nil drivingStrategy:0];
}
获取自身位置不是必须的,我们可以使用高德地图导航SDK中的另外一种方法规划驾车路径,不带起点的路径规划(以自身位置为七点)。
- (BOOL)calculateDriveRouteWithEndPoints:(NSArray<AMapNaviPoint *> *)endPoints
                               wayPoints:(nullable NSArray<AMapNaviPoint *> *)wayPoints
                         drivingStrategy:(AMapNaviDrivingStrategy)strategy;
//初始化标准导航视图
- (void)initNaviDriveView
{
if (self.naviDriveView == nil)
{
self.naviDriveView = [[AMapNaviDriveView alloc] initWithFrame:CGRectMake(0, 64, CGRectGetWidth(self.view.frame), CGRectGetHeight(self.view.frame))];
self.naviDriveView.delegate = self;
//导航界面模式
self.naviDriveView.showMode = AMapNaviDriveViewShowModeCarPositionLocked;
//导航界面跟随模式
self.naviDriveView.trackingMode = AMapNaviViewTrackingModeCarNorth;
}
}
/*标准导航视图回调方法*/
- (void)driveManagerOnCalculateRouteSuccess:(AMapNaviDriveManager *)driveManager
{
    //将naviDriveView添加到AMapNaviDriveManager中
    /**
     *  在这里可以修改用哪个模式 标准或者HUD
     */
    [self.driveManager addDataRepresentative:self.naviDriveView];

    //将导航视图添加到视图层级中
    [self.view addSubview:self.naviDriveView];

    //开始实时导航
    [self.driveManager startGPSNavi];
}

- (void)initDriveManager
{
    if (self.driveManager == nil) {
        self.driveManager = [[AMapNaviDriveManager alloc] init];
        [self.driveManager setDelegate:self];
        //开启智能播报,包括路面电子眼,路障等等。。。
        [self.driveManager setDetectedMode:AMapNaviDetectedModeCameraAndSpecialRoad];
    }
}

//语音播报
-(void)driveManager:(AMapNaviDriveManager *)driveManager playNaviSoundString:(NSString *)soundString soundStringType:(AMapNaviSoundType)soundStringType
{
    if (soundStringType == AMapNaviSoundTypePassedReminder)
    {
        AudioServicesPlaySystemSound(1009);//播放系统“叮叮”提示音
    }
    else
    {
        [[SpeechSynthesizer sharedSpeechSynthesizer] speakString:soundString];
    }
}
SpeechSynthesizer 语音播报文件可参考Demo
AudioServicesPlaySystemSound(1009);//播放系统“叮叮”提示音
需要导入头文件<AudioToolbox/AudioToolbox.h>
至此,标准导航视图创建成功。如果你想使用HUD导航视图,只需要
//初始化HUD导航视图
- (void)initHudView
{
    if (self.hudView == nil)
    {
        self.hudView = [[AMapNaviHUDView alloc] initWithFrame:CGRectMake(0, 64, 375, 667)];
        self.hudView.delegate = self;
        self.hudView.isMirror = NO;//是否开启镜像
    }
}
只需要在下面这个回调方法中将标准导航视图设置成HUD视图即可
- (void)driveManagerOnCalculateRouteSuccess:(AMapNaviDriveManager *)driveManager以上来源于高德地图导航SDK的一些归纳


 1785
1785

 被折叠的 条评论
为什么被折叠?
被折叠的 条评论
为什么被折叠?
 到【灌水乐园】发言


