说明:一共有两个文件-->itheima_mysql_project_mybatis和itheima_web_project
一.在itheima_mysql_project_mybatis文件下创建数据库:
代码:
-- auto-generated definition
create table user
(
    id     int auto_increment comment 'id'
        primary key,
    name   varchar(10)      not null comment '姓名',
    age    tinyint unsigned not null comment '年龄',
    gender tinyint unsigned not null comment '性别:1.男 , 2.女',
    phone  varchar(11)      not null comment '电话号码',
    constraint id
        unique (id),
    constraint phone
        unique (phone)
)
    comment '用户';
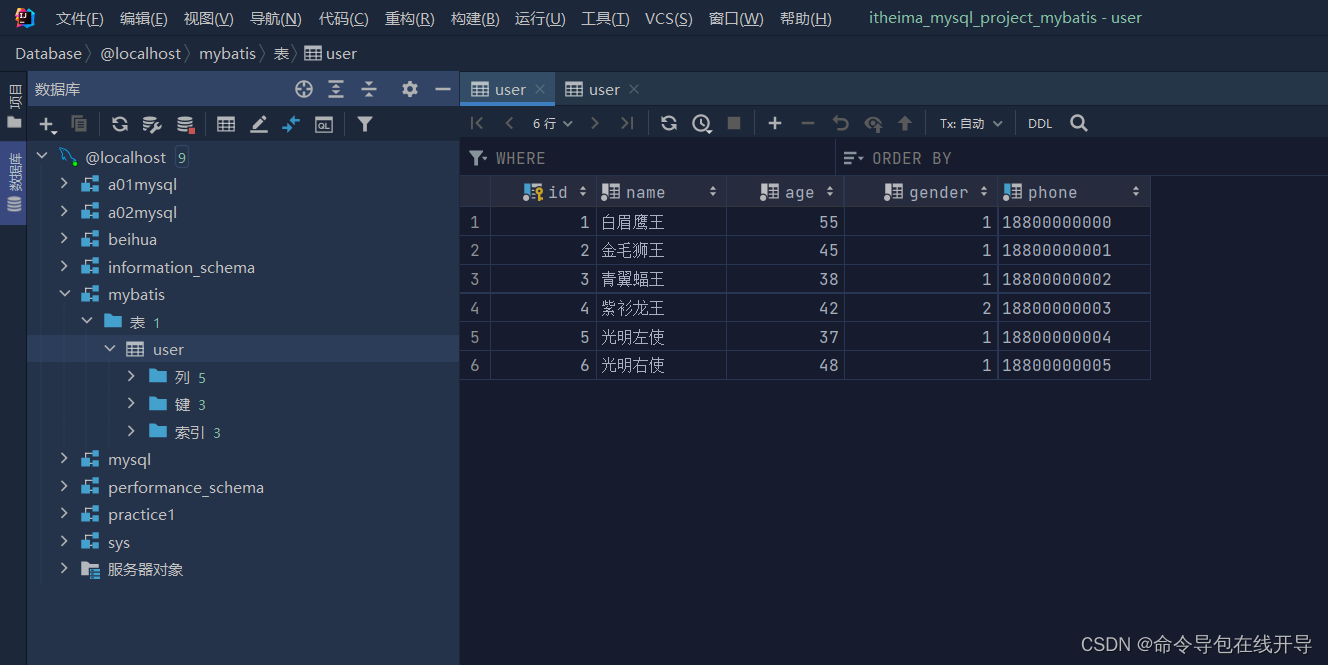
结果:
二.在itheima_web_project文件下:
1.实体类:一定要定义为public型
package com.itheima.pojo;
public class User {
//在实体类中,定义属性值的类型建议用包装类型
private Integer id;
/*id在数据库中为int型,java中可用包装类Integer*/
private String name;
private Short age;
private Short gender;//性别
/*数据库中gender为tinyint型,java中可用short型->包装类为Short*/
private String phone;//手机号
/*数据库中varchar型在java中用String型*/
//构造方法
public User() {
}
public User(Integer id, String name, Short age, Short gender, String phone) {
this.id = id;
this.name = name;
this.age = age;
this.gender = gender;
this.phone = phone;
}
//get/set
public Integer getId() {
return id;
}
public void setId(Integer id) {
this.id = id;
}
public String getName() {
return name;
}
public void setName(String name) {
this.name = name;
}
public Short getAge() {
return age;
}
public void setAge(Short age) {
this.age = age;
}
public Short getGender() {
return gender;
}
public void setGender(Short gender) {
this.gender = gender;
}
public String getPhone() {
return phone;
}
public void setPhone(String phone) {
this.phone = phone;
}
//重写顶级父类Object的toString方法
@Override
public String toString() {
return "User{id = " + id + ", name = " + name + ", age = " + age + ", gender = " + gender + ", phone = " + phone + "}";
}
}
2.数据库连接信息:
#丕镢迕井啕容敯为井让MyBatisæ• å°•
#敕宕Mybatis畕Mapper敕件
mybatis.mapper-locations=classpath:mappers/*xml
#敕宕Mybatis畕宕何畮录
mybatis.type-aliases-package=com.itheima.mybatis.entity
#上方的乱码不用管
#配置数据库的连接信息->四要素
#驱动类名称
spring.datasource.driver-class-name=com.mysql.cj.jdbc.Driver
#数据库连接的url
spring.datasource.url=jdbc:mysql://localhost:3306/mybatis
#jdbc:mysql:是mybatis连接mysql的配置,是固定格式
#//localhost代表所在数据库的位置;3306为要连接的数据库的端口号->创建数据库时会显示;mybatis为要连接的数据库的名称
#连接数据库的用户名
spring.datasource.username=root
#连接数据库的密码
spring.datasource.password=1234
3.编写SQL语句(注解/XML):
package com.itheima.mapper;
import org.apache.ibatis.annotations.Mapper;
import org.apache.ibatis.annotations.Select;
import com.itheima.pojo.User;
import java.util.List;
@Mapper
//加上@Mapper注解,之后在运行时会自动生成该接口的实现类对象(代理对象),并且将该对象交给IOC容器管理
public interface UserMapper {
//定义一个方法,用于查询全部用户信息
//由于一个用户信息可能有很多,而且一个用户就会封装成一个用户对象,此时有很多对象-->封装在List集合中即可
//由此,集合的泛型为User
@Select("select * from user") // @Select()注解代表查询操作
public List<User> list();
}
4.测试类:
package com.itheima;
import com.itheima.mapper.UserMapper;
import com.itheima.pojo.User;
import org.junit.jupiter.api.Test;
import org.springframework.beans.factory.annotation.Autowired;
import org.springframework.boot.test.context.SpringBootTest;
import java.util.List;
@SpringBootTest //@SpringBootTest注解代表springboot整合单元测试的注解
class SpringbootMybatisQuickstartApplicationTests {
/*@Test
void contextLoads() {
}*/
@Autowired //@Autowired注解用来完成依赖注入
private UserMapper userMapper;
@Test
public void testListUser(){
//调用UserMapper的list方法来查询全部用户信息
/* 但UserMapper为接口,不能实例化
但有了@Mapper注解,运行时会自动生成该接口的实现类对象(代理对象),并且将该对象交给IOC容器管理
已经成为IOC容器里的bean了
之后要在单元测试中用到这个bean对象,可以通过依赖注入的形式,将这个bean对象注入进来
因此,在测试方法上声明一个UserMapper类型的对象,
*/
//调用list方法
List<User> userList=userMapper.list();
for (User user : userList) {
System.out.println(user);//打印user,不是userList。因为此时赋给user
}
}
/* 注:由于该单元测试是SpringBoot整合的单元测试,上面有一个注解@SpringBootTest,一旦加了这个注解,
其中的单元测试方法(@Test注解下)在运行时会自动加载整个SpringBoot的环境,并且创建SpringBoot的IOC容器,
IOC容器创建好后,通过依赖注入(@Autowired注解下)的形式从IOC容器中获取UserMapper这个类型的bean对象,
之后即可调用bean对象的list方法来查询全部用户信息
*/
}
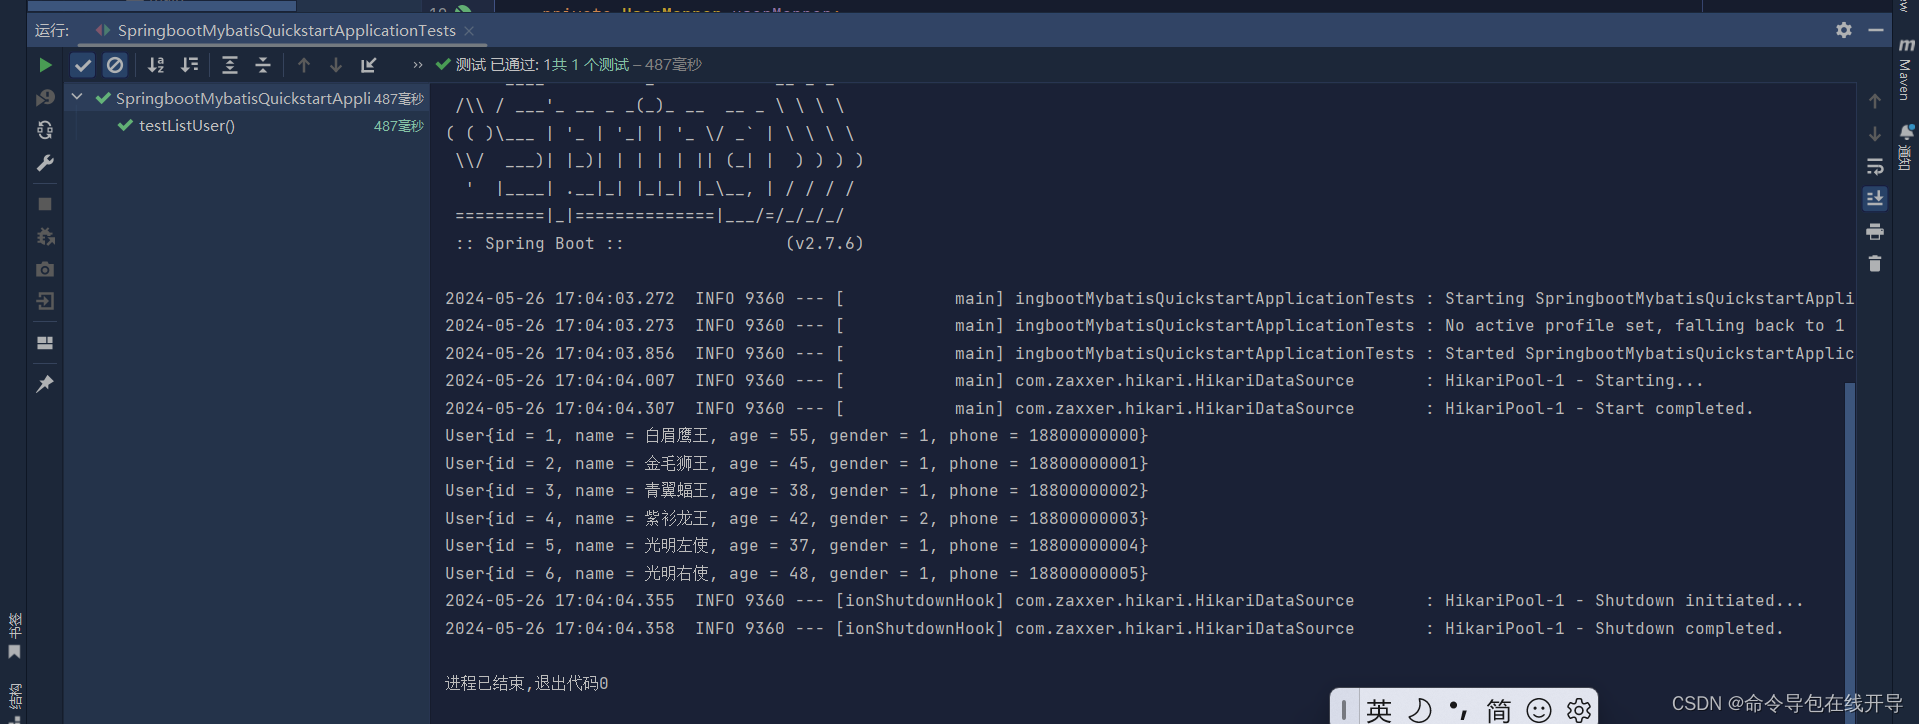
5.结果:
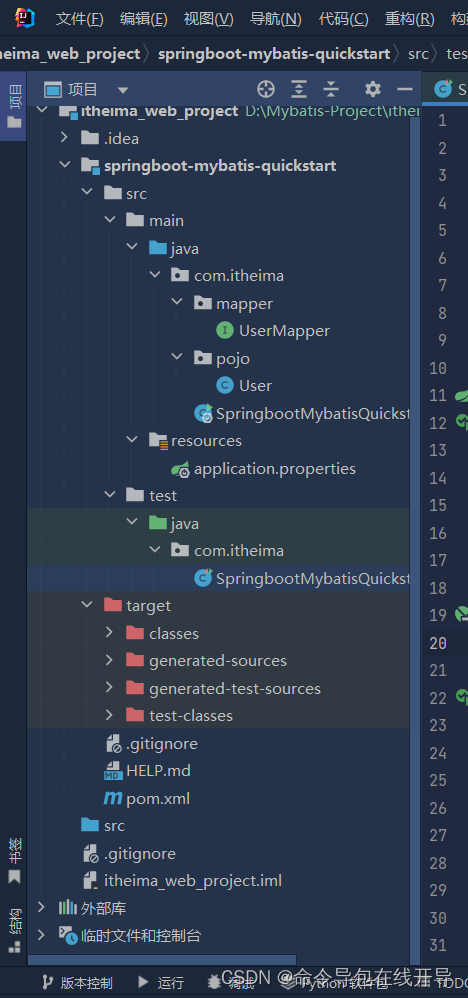
6.包的结构:


 146
146

 被折叠的 条评论
为什么被折叠?
被折叠的 条评论
为什么被折叠?
 到【灌水乐园】发言


