


一、前言
由于gdb调试caffe诸多不易,为节约时间,使用codeblock调试caffe,有助于理解caffe源码,这里记录配置过程,这要参考以下博文
二、配置前提
1.安装好caffe,并配置好环境,由于只是为了理解源码,故使用CPU模型,容易配置些,故在Makefile需将以下的注释去掉
CPU_ONLY := 1
OPENCV_VERSION := 3
之后make -j8 && make pycaffe ,再执行 make distribute
2.安装codeblock
三、创建codeblock工程
使用 codeblock 在caffe-master路径下创建empty工程,之后在工程中添加caffe-master/tools/caffe.cpp ;在训练中主要就是使用caffe.bin,caffe.bin是caffe.cpp编译得到的,对工程右键点击选择Build options... ,我只配置了debug的环境。
之后的配置就与这篇博文的一致了 http://blog.csdn.net/geekjzy/article/details/53907556
配置完之后,ctrl+F9 编译发现只是警告没错误
四、输入命令行训练 lenet模型
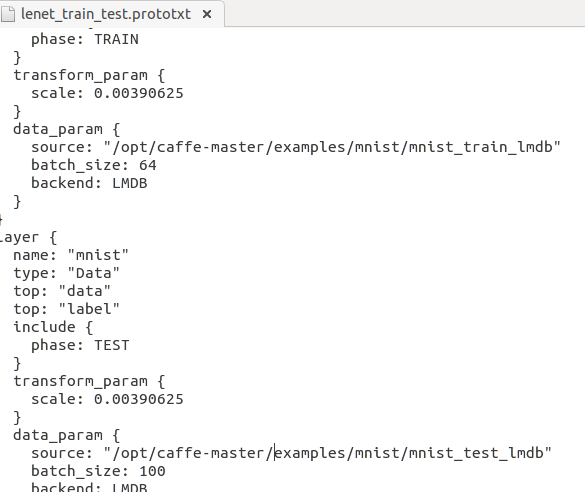
由于此时使用命令行参数训练lenet模型(还是它),使用的是CPU模式,而且lenet_train_test.prototxt等的位置必须使用绝对路径才能找到,更改lenet_solver.prototxt文件如下:
# The train/test net protocol buffer definition
net: "/opt/caffe-master/examples/mnist/lenet_train_test.prototxt"  //这是 模型文件的绝对路径
# test_iter specifies how many forward passes the test should carry out.
# In the case of MNIST, we have test batch size 100 and 100 test iterations,
# covering the full 10,000 testing images.
test_iter: 100
# Carry out testing every 500 training iterations.
test_interval: 500
# The base learning rate, momentum and the weight decay of the network.
base_lr: 0.01
momentum: 0.9
weight_decay: 0.0005
# The learning rate policy
lr_policy: "inv"
gamma: 0.0001
power: 0.75
# Display every 100 iterations
display: 100
# The maximum number of iterations
max_iter: 10000
# snapshot intermediate results
snapshot: 5000
snapshot_prefix: "/opt/caffe-master/examples/mnist/lenet"   //这是训练权值的保存路径
# solver mode: CPU or GPU
solver_mode: CPU   //选择CPU模式
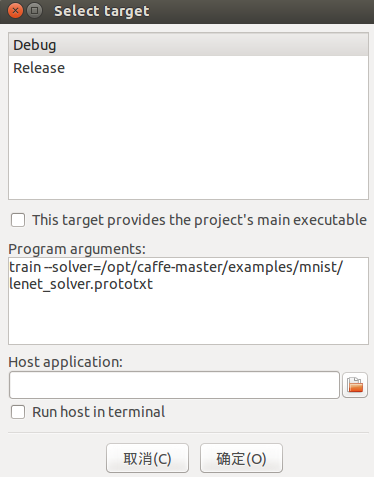
之后在codeblock中 Project->set program's argument 设置命令行参数,argv[0]不用填了,我的如下:
五、运行
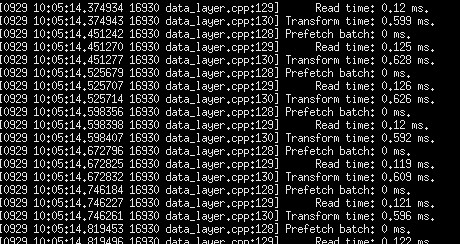
可以看到程序运行起来了,但是输出跟在终端的不一样,可能是软件本身的问题,这里直接把输出Read time、Prefetch time、Transform time去掉,即把data_layers里 load_batch函数的输出给注释。

由于修改了源码,需要按照开头的方法重新Make过。这样就不会有输出杂七杂八的time
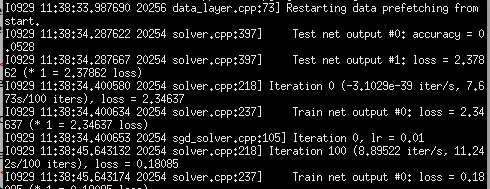
可以在codeblock打断点单步调试caffe训练过程了。


 3465
3465

 被折叠的 条评论
为什么被折叠?
被折叠的 条评论
为什么被折叠?
 到【灌水乐园】发言


