


《Android编程权威指南》第 20 章第二篇,补充完 BeatBox 应用的单元测试啦。
八、编写测试函数
测试函数将用到 @Test 注解。
 @Test
    fun exposesSoundNameAsTitle(){
        assertThat(subject.title,`is`(sound.name))
    }
assertThat(…) 选 org.junit 库里的 Assert.assertThat(…) 函数,is(…) 选 org.hamcrest 库里的 Is.is 函数。
上面代码意思是断定测试对象获取标题函数和 sound 的获取文件名函数返回相同的值。如果不同,单元测试失败。
接下来测试 SoundViewModel 和 BeatBox.play(Sound) 的交互。
 @Test
    fun callsBeatBoxPlayOnButtonClicked(){
        subject.onButtonClicked()
    }
为了测试 SoundViewModel 不让它跟 BeatBox 绑太死,不依赖 BeatBox 对象,就在此测试案例中模拟出 BeatBox 对象。
class SoundViewModelTest {
    ...
    private lateinit var beatBox: BeatBox
    @Before
    fun setUp() {
        beatBox = mock(BeatBox::class.java)
        ...
    }
    ...
}
Mockito 的 verify(Object) 可以确认,要测试的函数是否都按预期被调用了。
 @Test
    fun callsBeatBoxPlayOnButtonClicked(){
        ...
        verify(beatBox).play(sound)
    }
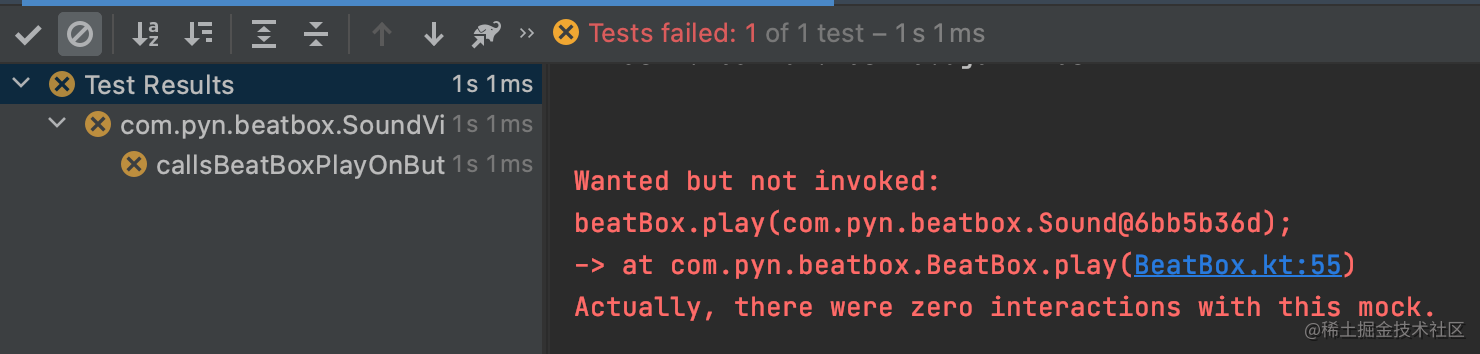
然后按照书中过程补充修正一下,把 BeatBox 传给 SoundViewModel,修正 SoundHolder 中的错误,在测试类里提供模拟板 BeatBox,实现 onButtonClicked() 函数。具体代码略了,见 Demo。

九、数据绑定回调
在布局文件里,添加数据绑定 lambda 表达式,让按钮对象和 SoundViewModel.onButtonClicked() 函数关联起来。
 <Button
        android:layout_width="match_parent"
        android:layout_height="120dp"
        android:onClick="@
最低0.47元/天 解锁文章


 821
821


 被折叠的 条评论
为什么被折叠?
被折叠的 条评论
为什么被折叠?
 到【灌水乐园】发言


