


一、MyBatis简介与配置
MyBatis 是一款优秀的持久层框架,它支持自定义 SQL、存储过程以及高级映射。MyBatis 免除了几乎所有的 JDBC 代码以及设置参数和获取结果集的工作。MyBatis 可以通过简单的 XML 或注解来配置和映射原始类型、接口和 Java POJO(Plain Old Java Objects,普通老式 Java 对象)为数据库中的记录。
1)maven自动管理jar文件
2)maven自动下载jar和他的文档和源代码
3)maven管理jar直接的依赖, a.jar需要b.jar , maven会自动下载b.jar
4)maven管理你需要的jar版本
5)maven帮你编译程序,把java编译为class
6)maven帮你测试你的代码是否正确。
7)maven帮你打包文件,形成jar文件,或者war文件
8)maven帮你部署项目
1.1、使用前先配置下maven
1)下载解压maven,配置maven的环境变量,需要配置环境变量有两个
右键“计算机-属性-高级系统设置”,单击“环境变量”。在“系统变量”栏下单击“新建”,创建新的系统环境变量。如下图所示,我是win11系统 跟win10一样的 无需担心


(1)新建->变量名"MAVEN_HOME",变量值"D:\apache-maven-3.3.9-bin\apache-maven-3.3.9"(即MAVEN的安装路径)

(2)编辑->变量名"Path"(是下面的path,不是上面的path),新建, “D:\apache-maven-3.3.9-bin\apache-maven-3.3.9\bin”,就是打开bin文件夹后的安装路径,复制粘贴即可

这两个环境变量添加完 win+R 输入cmd 回车,在输入mvn -v,如下图所示。
假如出现上面的那些数据,即表示maven的环境变量添加成功。
1.2 还是配置maven 打开你刚刚解压maven的文件夹,依次打开conf--settings.xml,我是用EditPlus打开的 打开后配置下另外所需的东西。
(1)解开掉<localRepository></localRepository>这个注释,我建议跟我一样,在里面填上 <localRepository>D:\repositorys\maven</localRepository>,意思是在D盘创建repository文件夹,在repository的文件夹再次创建maven文件夹,这个是maven文件夹是需要下载的jar包啥的 乱七八糟 都往这个文件夹里放,方便日后使用,更是为了idea找到这些资源,
(2)找到<mirrors></mirrors> 这些都是注释的 不要理会它,在他们中加上一段代码,
<mirror>
		<id>nexus-aliyun</id>
		<mirrorOf>*</mirrorOf>
		<name>Nexus aliyun</name>
		<url>http://maven.aliyun.com/nexus/content/groups/public</url>
	</mirror>
加完如下图所示:

千万注意 注意把 <mirrors></mirrors>注释给解掉,这样做的原因是 添加一个下载地址,因为maven是外国的 用他给的地址下载速度极慢,这串代码是国内 maven所需的资源的下载地址镜像,下载速度快
二、可以用idea愉快的玩耍了
2.1、在正式使用idea前 也要对idea设置一下,打开idea,点左上的File---->settings---->,如下图所示

打开这个页面 倒数一二行,一个User settings file,一个 Local repository
第一行的意思是添加自己的maven 添加地址 一直点开到刚刚修改的那个settings.xml这个文件,把路径弄进去
第二行,是配置maven所需的资源到本地仓库,就是刚刚添加的D:\repositorys\maven,配置好后就可以正式玩了
2.2、用maven创建一个项目,

就是快速建一个

GroupId 和 ArtifactId 取名字 和包名 自己设置吧,想去任何名都可以,接下来我说重点
2.3、配置pom.xml
话不多说直接上代码
    <!--    mybatis的jar-->
    <dependency>
      <groupId>org.mybatis</groupId>
      <artifactId>mybatis</artifactId>
      <version>3.5.1</version>
    </dependency>

    <!--    jdbc-->
    <dependency>
      <groupId>mysql</groupId>
      <artifactId>mysql-connector-java</artifactId>
      <version>5.1.9</version>
    </dependency>
配置好如下图所示

一个是mybatis的jar包,一个是mysql的驱动jar包,emmm为什么要上MySQL的jar包呢,因为我是主攻大数据的 不是大数据可以不用上,我重点是说mybatis
然后在放入资源插件的代码
<build>
    <resources>
      <resource>
        <directory>src/main/java</directory>
        <includes>
          <include>**/*.properties</include>
          <include>**/*.xml</include>
        </includes>
        <filtering>false</filtering>
      </resource>
    </resources>
    <plugins>
      <plugin>
        <artifactId>maven-compiler-plugin</artifactId>
        <version>3.1</version>
        <configuration>
          <source>1.8</source>
          <target>1.8</target>
        </configuration>
      </plugin>
    </plugins>
  </build>
都配置好后 就如下图所示

三、正式开始写java代码
先在数据库建一张表,再添加一些数据
CREATE TABLE `student` (
  `id` int(11) NOT NULL AUTO_INCREMENT,
  `name` varchar(255) CHARACTER SET utf8 DEFAULT NULL,
  `age` int(11) DEFAULT NULL,
  `gender` varchar(255) CHARACTER SET utf8 DEFAULT NULL,
  PRIMARY KEY (`id`)
) ENGINE=InnoDB AUTO_INCREMENT=5 DEFAULT CHARSET=utf8mb4;


INSERT INTO `student` VALUES ('1', '张三', '18', '男');
INSERT INTO `student` VALUES ('2', '李四', '20', '男');
INSERT INTO `student` VALUES ('3', '小红', '30', '女');
INSERT INTO `student` VALUES ('4', '李红', '28', '女');
用我的提供的即可
3.1、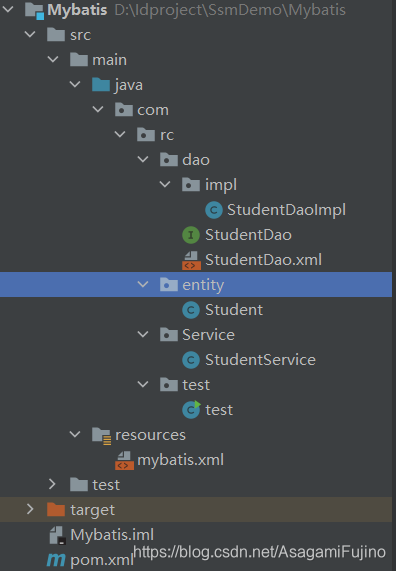
创建实体类,啥的我就不教了应该都会,我就直接到接口,
3.2、接口一个方法
我查询student表里的所有学生的数据,创建一个StudentDao接口 ,写一个查询学生的方法
List<Student> selectStudents() ;3.3、创建StudentDao.xml 我建议.xml前面的名字跟Dao接口的类名一致,编写StudentDao.xml
<!DOCTYPE mapper
        PUBLIC "-//mybatis.org//DTD Mapper 3.0//EN"
        "http://mybatis.org/dtd/mybatis-3-mapper.dtd">

<!--唯一字符串-->
<mapper namespace="com.rc.dao.StudentDao">

<!--    resultType 返回值类型-->
    <select id="selectStudents" resultType="com.rc.entity.Student">
        select  * from student
    </select>
</mapper>
3.4\在resources资源目录下新建mybatis.xml 并编写
<?xml version="1.0" encoding="UTF-8" ?>
<!DOCTYPE configuration
        PUBLIC "-//mybatis.org//DTD Config 3.0//EN"
        "http://mybatis.org/dtd/mybatis-3-config.dtd">
<configuration>
    <environments default="development">
        <environment id="development">
            <transactionManager type="JDBC"/>
            <dataSource type="POOLED">
                <property name="driver" value="com.mysql.jdbc.Driver"/>
                <property name="url" value="jdbc:mysql://localhost:3306/db_ssm"/>
                <property name="username" value="root"/>
                <property name="password" value="123456"/>
            </dataSource>
        </environment>
    </environments>
    <mappers>
        <mapper resource="com/rc/dao/StudentDao.xml"/>
    </mappers>
</configuration>
里面的数据库名因人而异,并不是都一样的
以上都弄好后,就可以写实现类(IMPL了)
创建StudentDaoImpl类,并编写
package com.rc.dao.impl;
import com.rc.dao.StudentDao;
import com.rc.entity.Student;
import org.apache.ibatis.io.Resources;
import org.apache.ibatis.session.SqlSession;
import org.apache.ibatis.session.SqlSessionFactory;
import org.apache.ibatis.session.SqlSessionFactoryBuilder;
import java.io.IOException;
import java.io.InputStream;
import java.util.List;

public class StudentDaoImpl implements StudentDao {
    SqlSession sqlSession = null;
    @Override
    public List<Student> selectStudents() {
        String resource = "mybatis.xml";
        InputStream inputStream = null;
        List<Student> list = null;
        try {
            inputStream = Resources.getResourceAsStream(resource);
            SqlSessionFactory sqlSessionFactory = new SqlSessionFactoryBuilder().build(inputStream);
            sqlSession = sqlSessionFactory.openSession();
            String statement = "com.rc.dao.StudentDao.selectStudents";
            list = sqlSession.selectList(statement);
            for (Student stu:list) {
                System.out.println(stu);
            }
        } catch (IOException e) {
            e.printStackTrace();
        }finally {
            sqlSession.close();
        }
        return list;
    }
}
再写Service
package com.rc.Service;

import com.rc.dao.StudentDao;
import com.rc.dao.impl.StudentDaoImpl;
import com.rc.entity.Student;

import java.util.List;

public class StudentService {

    private StudentDao studentDao = new StudentDaoImpl();

    public List<Student> selectStudents(){
        return studentDao.selectStudents();
    }
}
3.5、最后的controller层
package com.rc.test;

import com.rc.Service.StudentService;
import com.rc.entity.Student;

import java.util.List;

public class test {
    static StudentService studentService = new StudentService();
    public static void main(String[] args) {
        List<Student> list = studentService.selectStudents();
        System.out.println("---------------------------------------------");
        System.out.println(list);

     }
}
最后运行即可,我这个运行结果如下图所示

注意事项:
1:在 编写StudentDao.xml时 id=“”;双引号里的代码是 Dao接口的方法,这个必须要写一致。
2:编写的mybatis.xml 里
<mappers>
<mapper resource="com/rc/dao/StudentDao.xml"/>
</mappers>
地址是用“/” 不是“.”


 8317
8317

 被折叠的 条评论
为什么被折叠?
被折叠的 条评论
为什么被折叠?
 到【灌水乐园】发言


