


基于AndroidStudio构建ARM32-v7a以及ARM64-v8a环境
环境准备
安装SDK工具
- 安装
Android Studio - 在
SDK Manager中选择NDK、Android Emulator、Android SDK Platform-Tools等进行安装
![![[Pasted image 20230808011554.png]]](https://i-blog.csdnimg.cn/blog_migrate/5e7386646dc4ea548dcecf05b46c44d9.png)
- SDK文件目录结构
PS C:\Apps\Android\sdk> dir


    目录: C:\Apps\Android\sdk


Mode                 LastWriteTime         Length Name
----                 -------------         ------ ----
d-----          2023/8/8      0:46                .downloadIntermediates
d-----          2023/8/8      0:50                .temp
d-----          2023/8/8      0:50                build-tools
d-----          2023/8/8      0:50                cmake
d-----          2023/8/8      0:50                emulator # 模拟器
d-----          2021/9/3     23:37                extras
d-----          2021/9/4      1:11                fonts
d-----          2021/9/4      0:37                licenses
d-----          2023/8/8      1:28                ndk  # 交叉编译工具链
d-----          2021/9/3     23:36                patcher
d-----          2023/8/8      0:50                platform-tools # adb等
d-----         2023/1/19     20:01                platforms
d-----          2023/8/8      1:43                skins
d-----          2021/9/4      1:09                sources
d-----        2022/12/30     20:32                system-images
d-----          2021/9/3     23:37                tools
-a----          2023/8/8      1:41             16 .knownPackages
配置系统环境变量
配置
ANDROID_USER_HOME控制 .android目录所在位置
默认情况下,模拟器会将配置文件存储在$HOME/.android/下,将 AVD 数据存储在$HOME/.android/avd/下。您可以通过设置以下环境变量来替换默认设置。
emulator -avd <avd_name>命令会依次按照$ANDROID_AVD_HOME、$ANDROID_USER_HOME/avd/和$HOME/.android/avd/中的值来搜索avd目录。
下表介绍了 Android SDK 工具的常用环境变量。
| Android SDK 环境变量 | |
|---|---|
ANDROID_HOME |
设置 SDK 安装目录的路径。设置后,该值通常不会更改,并且可以由同一台计算机上的多个用户共享。ANDROID_SDK_ROOT 也指向 SDK 安装目录,但已废弃。如果您继续使用它,Android Studio 和 Android Gradle 插件将检查旧变量和新变量是否一致。 |
ANDROID_USER_HOME |
为 Android SDK 中包含的工具设置用户偏好设置目录的路径。 默认为 $HOME/.android/。某些较旧的工具(例如 Android Studio 4.3 及更低版本)不会读取 ANDROID_USER_HOME。如需替换这些旧工具的用户偏好设置位置,请将 ANDROID_SDK_HOME 设置为要在其下创建 .android 目录的父目录。 |
- ANDROID_HOME环境变量
ANDROID_HOME
C:\Apps\Android\sdk

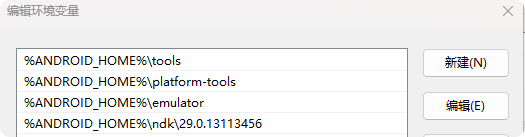
- Path环境变量
%ANDROID_HOME%\tools
%ANDROID_HOME%\platform-tools
%ANDROID_HOME%\emulator
%ANDROID_HOME%\ndk\25.2.9519653  # 这里根据自己的ndk版本自行调整
测试
- adb命令
PS C:\Users\xxx> adb
Android Debug Bridge version 1.0.41
Version 34.0.4-10411341
Installed as C:\Apps\Android\sdk\platform-tools\adb.exe
Running on Windows 10.0.22621

global options:
 -a                       listen on all network interfaces, not just localhost
 -d                       use USB device (error if multiple devices connected)
 -e                       use TCP/IP device (error if multiple TCP/IP devices available)
 -s SERIAL                use device with given serial
最低0.47元/天 解锁文章


 3199
3199

 被折叠的 条评论
为什么被折叠?
被折叠的 条评论
为什么被折叠?
 到【灌水乐园】发言


