


Google - 如何管理Fragment并通信 的示例学习
今天在Google Training 上看了第一章的第四节,标题是 Building a Dynamic UI with Fragments 。看过以后学到了很多东西,以前关于Fragment之间的很多疑问也被解决,关于Fragment的创建,如何适配不同屏幕,Fragment之间如何进行通信等内容都进行了十分详细地讲解。因为只是Training,关于Fragment生命周期的讲解,Google爸爸放在API Guides里面,我还是和上次一样,嘿嘿。手痒了,下载了一下示例,看了看Google爸爸的代码,一看。。
内心独白:我去,一样的方法,完全不一样的写法。。而且人家的精炼好多,考虑的也好粥道(嘿嘿,我饿啦)。以前自己在Activity复用Fragment的时候,都是照搬网站的代码,心里祈祷着,千万不要出岔子啊,前往不要出岔子啊。现在看了Google爸爸的代码,是时候来一个小小小小的档次变化了,嘿嘿,下面就开始记录我学到东西。
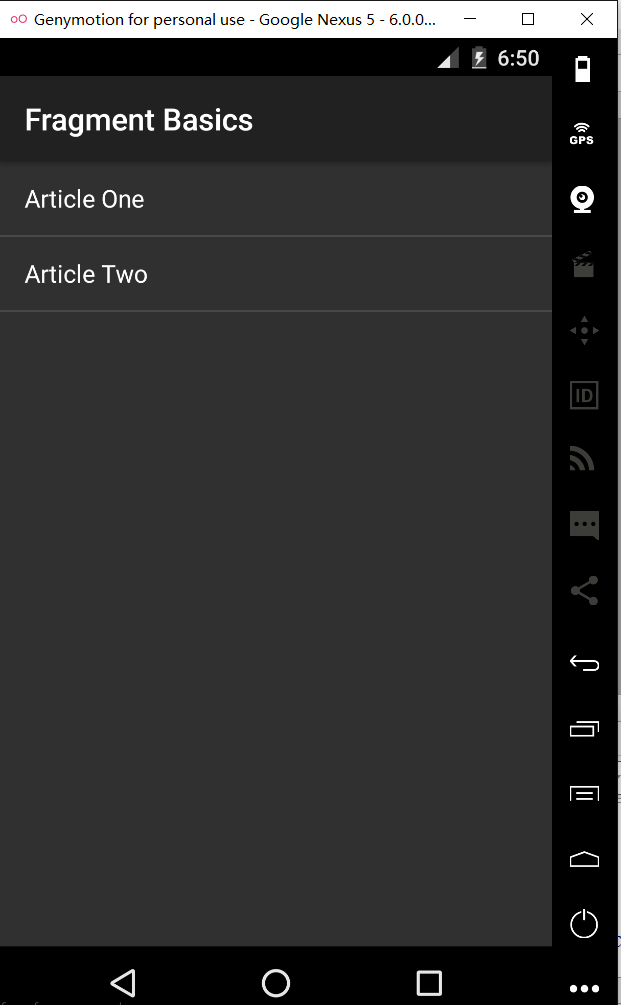
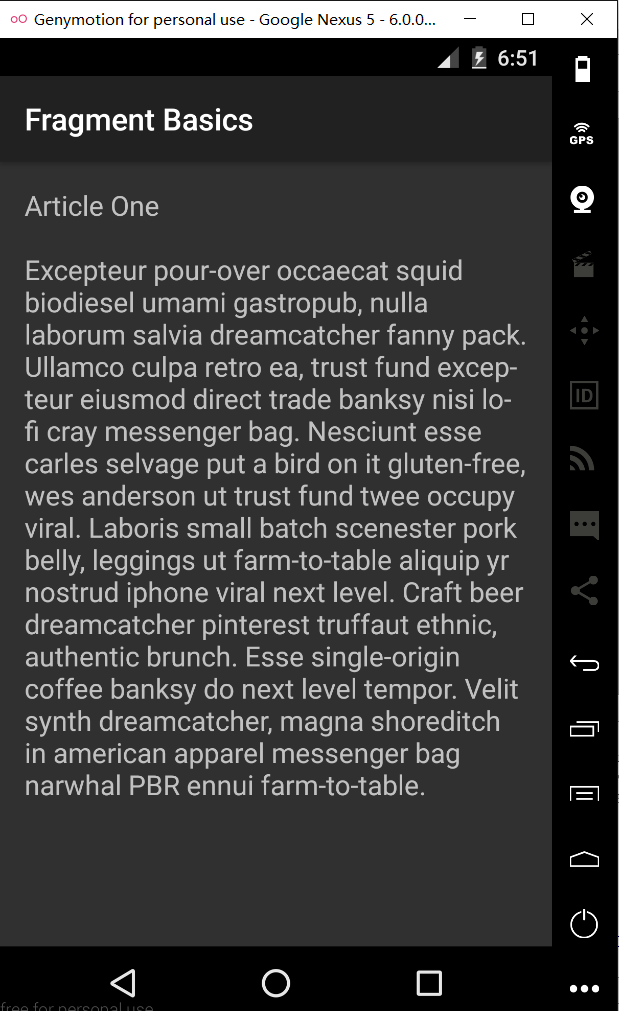
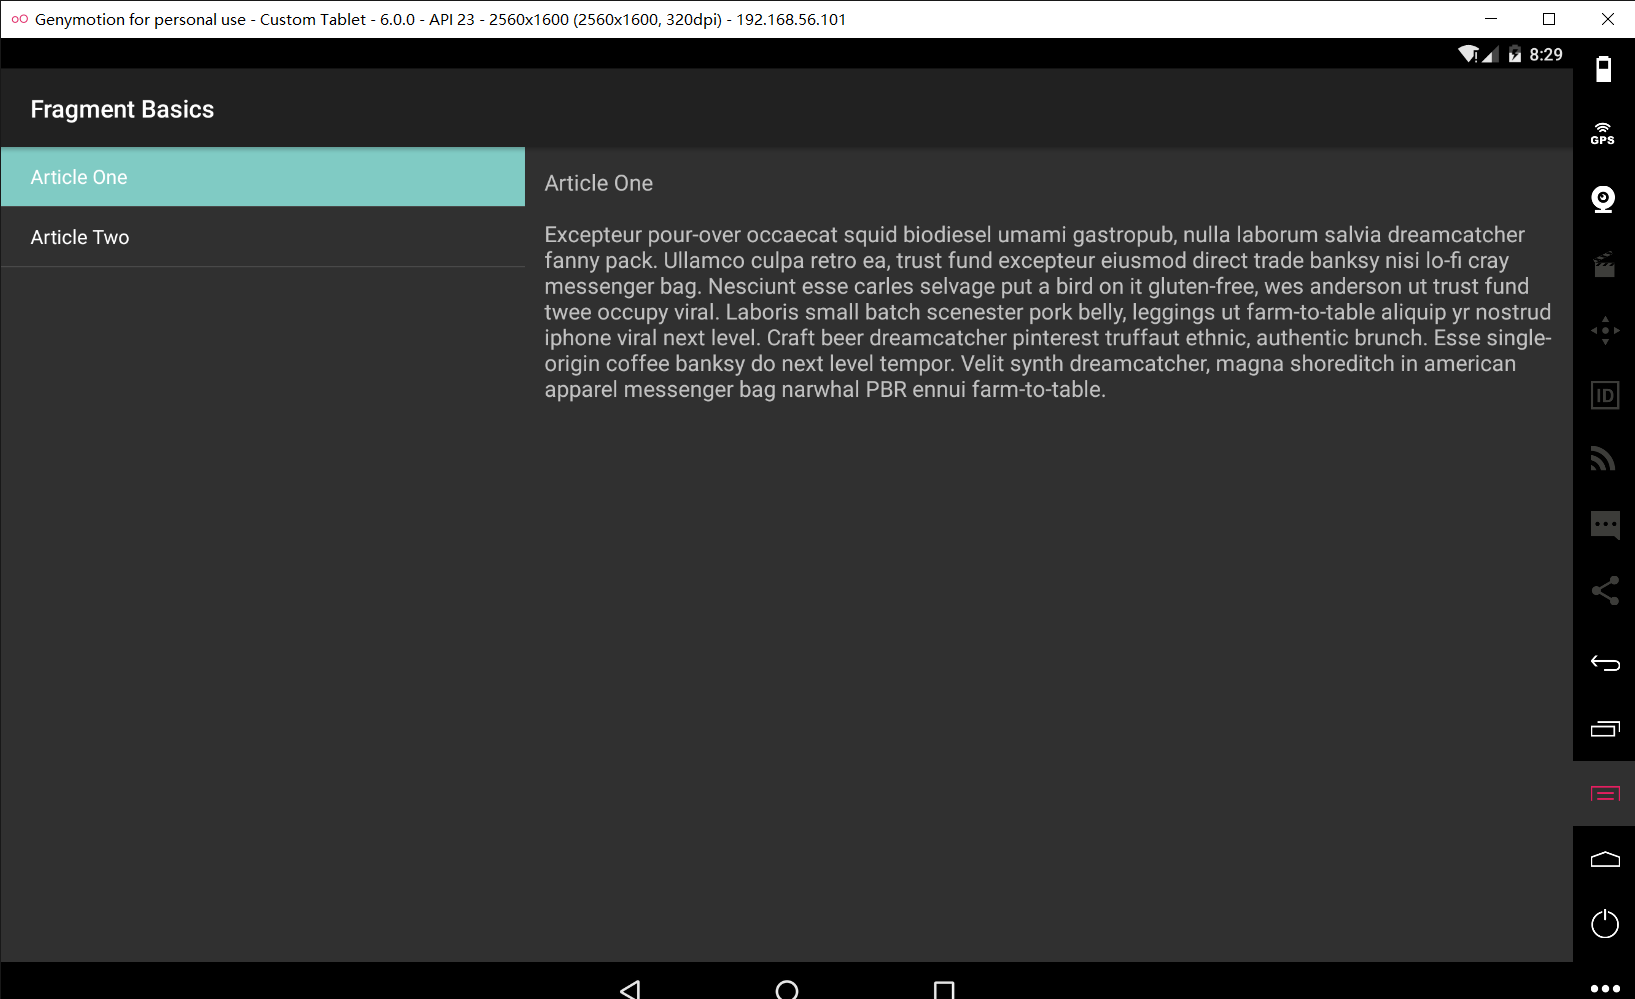
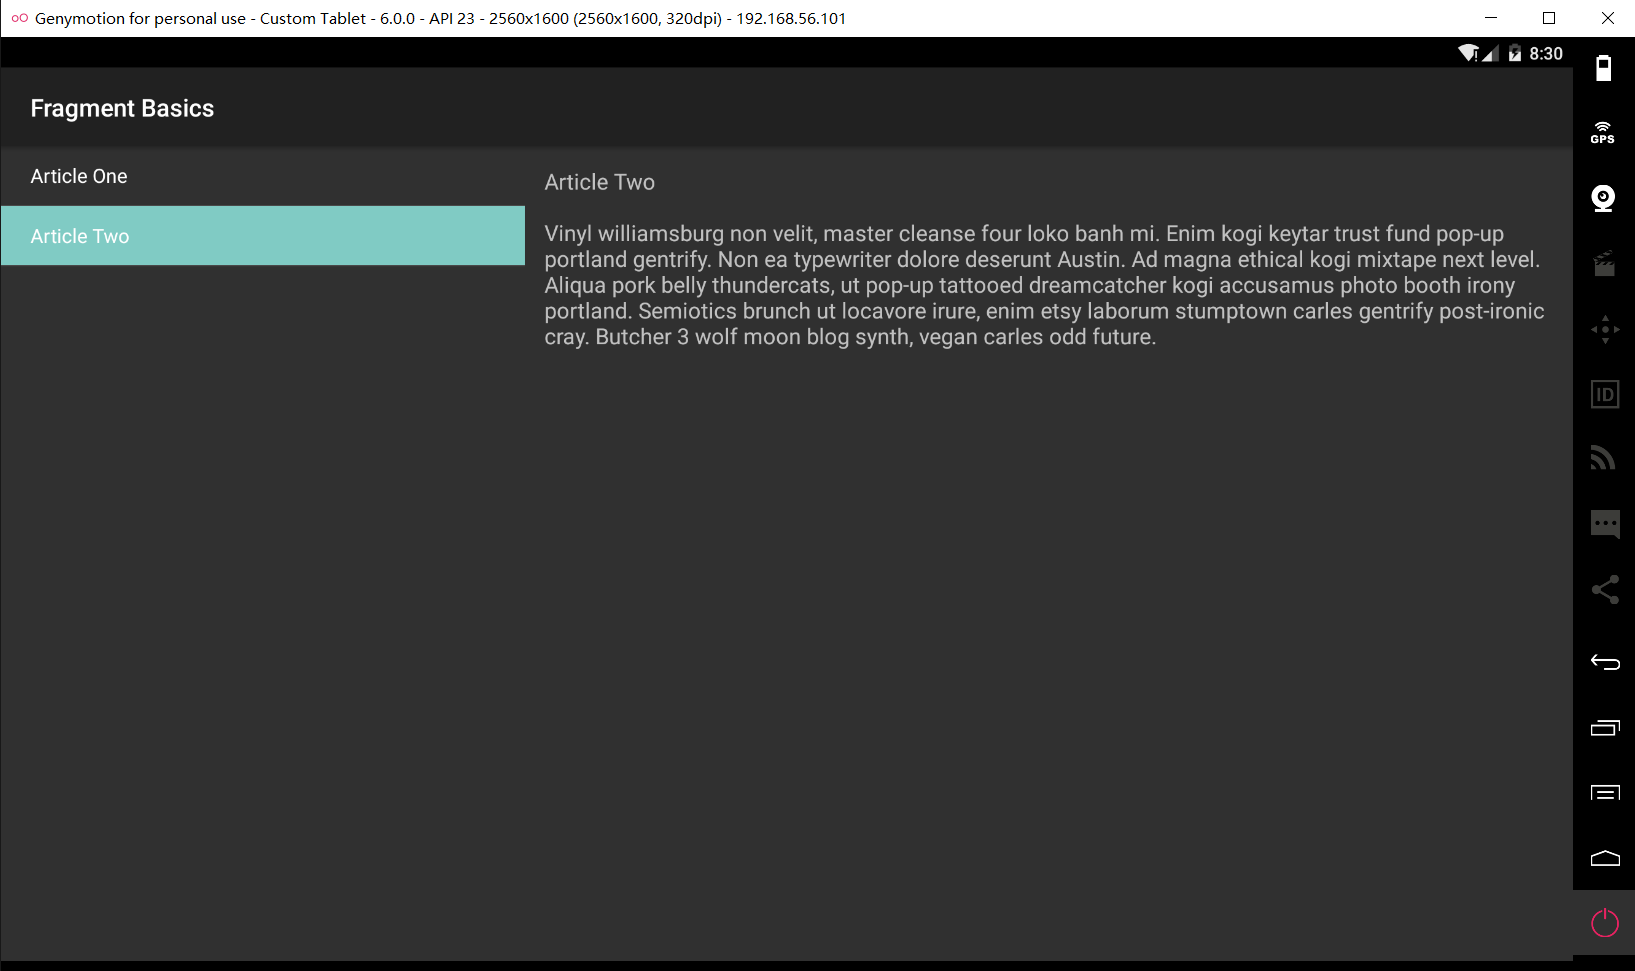
这个示例APP的主要内容是,有两个Fragment,我们在Fragment A里面放文章的标题列表,在Fragment B里面相对应的文章内容。在屏幕较小的设备上,比如正常的手机,我们点击Fragment A 中列表的一项文章标题,Fragment B就会出现该文章的内容,但是如果在平板,这样屏幕比较大的设备上,我们点击Fragment A,右侧的Fragment B就会显示对应的内容。
恩,看完一大段话,好像和一般关于Fragment的讲解,没什么不同哦,哈哈,看着吧。就像上次讲Activity生命周期的APP示例一样,虽然内容一样,但看完之后却能在Google中学到很多,差距自在不言中。
我先把在两个不同设备上的APP运行图给大家看看:
- 首先是在手机模拟器上运行的效果图:
- 接下来是在平板上模拟器上运行的效果图,为了这个效果,本boy还千辛万苦地下载了平板的模拟器:
如果大家对这个示例感兴趣,可以点击这里下载,恩,效果很酷炫,下面我们开始代码的分析!
首先先让我们看看这个诡异的整体布局吧!
看Java代码部分还是还是很正常的,ArticleFragment 用来显示文章内容,HeadlinesFragment用于显示文章的标题列表, MainActivity把这两部分结合起来,Ipsum 用来存放一文章标题和内容的字符串资源。恩还可以哦。再往下看,我就惊了,这个APP连MainActivity的布局文件都不写么。。。。
我点开看了看artcle_vew.xml,里面是这样的:
<?xml version="1.0" encoding="utf-8"?>

<TextView xmlns:android="http://schemas.android.com/apk/res/android"
    android:id="@+id/article"
    android:layout_width="match_parent"
    android:layout_height="match_parent"
    android:padding="16dp"
    android:textSize="18sp" />
只有一个TextView, 然后我又点开news_articles.xml,看了看:
<?xml version="1.0" encoding="utf-8"?>

<FrameLayout xmlns:android="http://schemas.android.com/apk/res/android"
    android:id="@+id/fragment_container"
    android:layout_width="match_parent"
    android:layout_height="match_parent" />
很熟悉有没有,里面是一个用来替换Fragment的容器FrameLayout,那下面那个名字一样的后面有(large)的就应该是对于大屏幕设备的布局了。
<?xml version="1.0" encoding="utf-8"?>

<LinearLayout xmlns:android="http://schemas.android.com/apk/res/android"
    android:orientation="horizontal"
    android:layout_width="match_parent"
    android:layout_height="match_parent">

    <fragment android:name="com.example.android.fragments.HeadlinesFragment"
              android:id="@+id/headlines_fragment"
              android:layout_weight="1"
              android:layout_width="0dp"
              android:layout_height="match_parent" />

    <fragment android:name="com.example.android.fragments.ArticleFragment"
              android:id="@+id/article_fragment"
              android:layout_weight="2"
              android:layout_width="0dp"
              android:layout_height="match_parent" />

</LinearLayout>
果然没错,我们看到里面放着两个fragment,ViewGroup是横向的线性布局,分别对应大平板的左边和右边,左边明白weight用法的人应该看出来,大屏幕的左边1/3是用来放文章标题列表的地方,大屏幕右边2/3的空间用来放显示文章内容的地方。
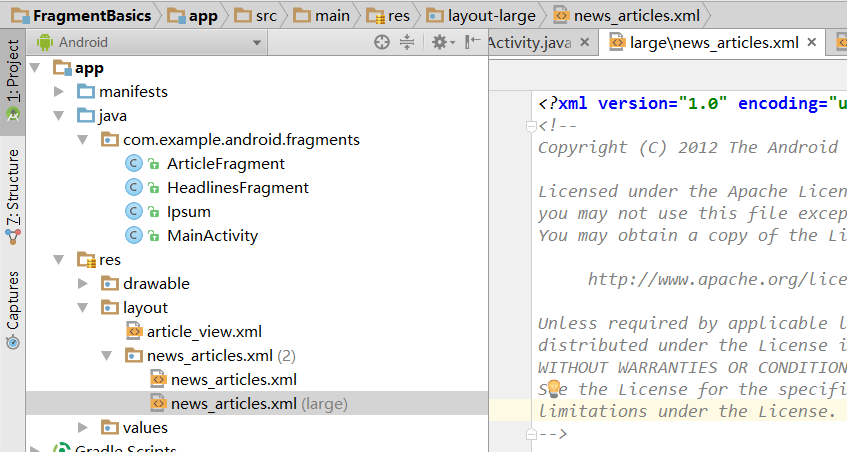
这个时候我有个疑问,在之前看Google教程的时候,我看到,对于屏幕尺寸为large的布局文件,我们应该要新建一个文件名为layout-large的文件夹,然后放一个名字相同但内容不同的布局文件,然后Android运行时根据设备屏幕大小自动加载啊,现在怎么没有啊,后面又(large)。好神奇,我搜了一下,了解原来Android Studio默认不显示带后缀是 -large 的文件夹,但是在我们点击相应的xml文件的时候上面的小横条也是会显示的,可以去上面的项目结构图看看,嘿嘿,小心机。
现在没有main.xml的疑问也烟消云散了,原来人家是直接用news_articles.xml,这样反而方便了很多呢。
好了,下面我们来看看Java代码的部分吧。首先看看 HeadlinesFragment 的代码(文章标题列表的Fragment):
public class HeadlinesFragment extends ListFragment {
    OnHeadlineSelectedListener mCallback;

    // The container Activity must implement this interface so the frag can deliver messages
    public interface OnHeadlineSelectedListener {
        /** Called by HeadlinesFragment when a list item is selected */
        public void onArticleSelected(int position);
    }

    @Override
    public void onCreate(Bundle savedInstanceState) {
        super.onCreate(savedInstanceState);

        // We need to use a different list item layout for devices older than Honeycomb
        int layout = Build.VERSION.SDK_INT >= Build.VERSION_CODES.HONEYCOMB ?
                android.R.layout.simple_list_item_activated_1 : android.R.layout.simple_list_item_1;

        // Create an array adapter for the list view, using the Ipsum headlines array
        setListAdapter(new ArrayAdapter<String>(getActivity(), layout, Ipsum.Headlines));
    }

    @Override
    public void onStart() {
        super.onStart();

        // When in two-pane layout, set the listview to highlight the selected list item
        // (We do this during onStart because at the point the listview is available.)
        if (getFragmentManager().findFragmentById(R.id.article_fragment) != null) {
            getListView().setChoiceMode(ListView.CHOICE_MODE_SINGLE);
        }
    }

    @Override
    public void onAttach(Activity activity) {
        super.onAttach(activity);

        // This makes sure that the container activity has implemented
        // the callback interface. If not, it throws an exception.
        try {
            mCallback = (OnHeadlineSelectedListener) activity;
        } catch (ClassCastException e) {
            throw new ClassCastException(activity.toString()
                    + " must implement OnHeadlineSelectedListener");
        }
    }

    @Override
    public void onListItemClick(ListView l, View v, int position, long id) {
        // Notify the parent activity of selected item
        mCallback.onArticleSelected(position);

        // Set the item as checked to be highlighted when in two-pane layout
        getListView().setItemChecked(position, true);
    }
}
首先定义了一个接口 OnHeadlineSelectedListener ,和 一个对应这个接口成员变量 mCallback,然后在 onAttach() 回调函数里面,完成接口的实现,和对应Activity进行绑定,恩,这样 HeadlinesFragment 就能通过 mCallback 向Activity发送消息了,如果不懂,可以看这篇(Google原装进口,绝对懂)。恩,我们继续往下看。
我看到 onCreate() 回调函数的时候惊了,Google爸爸就是厉害,在设置ListFragment的时候,人家不是先考虑用什么样式,而是先考虑设备的Android系统版本,就是这行代码:
        int layout = Build.VERSION.SDK_INT >= Build.VERSION_CODES.HONEYCOMB ?
                android.R.layout.simple_list_item_activated_1 : android.R.layout.simple_list_item_1;
确保系统版本高于HONEYCOMB的设备能用更加酷炫的酷炫的东西,而低于该版本的设备,人家也给予了充分的考虑,好感人。咕~~(╯﹏╰)b,停!
然后因为这个HeadlinesFragment 继承ListFragment所以,要setListAdapter,Ipsum是专门放资源的文件,我简单贴一下:
public class Ipsum {

    static String[] Headlines = {
        "Article One",
        "Article Two"
    };

    static String[] Articles = {
        "Article One\n\nExcepteur pour-over occaecat squid biodiesel umami gastropub, nulla laborum salvia dreamcatcher fanny pack. Ullamco culpa retro ea, trust fund excepteur eiusmod direct trade banksy nisi lo-fi cray messenger bag. Nesciunt esse carles selvage put a bird on it gluten-free, wes anderson ut trust fund twee occupy viral. Laboris small batch scenester pork belly, leggings ut farm-to-table aliquip yr nostrud iphone viral next level. Craft beer dreamcatcher pinterest truffaut ethnic, authentic brunch. Esse single-origin coffee banksy do next level tempor. Velit synth dreamcatcher, magna shoreditch in american apparel messenger bag narwhal PBR ennui farm-to-table.",
        "Article Two\n\nVinyl williamsburg non velit, master cleanse four loko banh mi. Enim kogi keytar trust fund pop-up portland gentrify. Non ea typewriter dolore deserunt Austin. Ad magna ethical kogi mixtape next level. Aliqua pork belly thundercats, ut pop-up tattooed dreamcatcher kogi accusamus photo booth irony portland. Semiotics brunch ut locavore irure, enim etsy laborum stumptown carles gentrify post-ironic cray. Butcher 3 wolf moon blog synth, vegan carles odd future."
    };
}
。。。比较多,原谅原谅
我们接着看发现,在onStart()的回调函数里面,Google考虑到大屏幕的UI优化,我解读这个函数的意思是,如果能找到article_fragment ,说明是大屏幕,我们就高亮显示左侧Fragment选中的部分。如果不是,就不用设置了,因为设置了也要被替换,又看不到。而且人家把这个设置放在了 onStart() 这个函数里,是因为这个Fragment的生命周期回调函数在onCreate()方法之后被执行,而这个时候布局肯定已经加载好了,所以我们可以安全的在这个方法里面进行设置!
再往下看就是这个 onListItemClick() 函数了,这个函数是List item被点击后的回调函数,方法内通过 mCallback 发送消息给Activity,为什么不是显示文章的Fragment,而是Activity,因为Google爸爸说任何两个Fragment都不能直接联系!不懂还是请看这篇。
好了,让我们再看看显示文章内容的 ArticleFragment,先展示它的代码:
public class ArticleFragment extends Fragment {
    final static String ARG_POSITION = "position";
    int mCurrentPosition = -1;

    @Override
    public View onCreateView(LayoutInflater inflater, ViewGroup container,
        Bundle savedInstanceState) {

        // If activity recreated (such as from screen rotate), restore
        // the previous article selection set by onSaveInstanceState().
        // This is primarily necessary when in the two-pane layout.
        if (savedInstanceState != null) {
            mCurrentPosition = savedInstanceState.getInt(ARG_POSITION);
        }

        // Inflate the layout for this fragment
        return inflater.inflate(R.layout.article_view, container, false);
    }

    @Override
    public void onStart() {
        super.onStart();

        // During startup, check if there are arguments passed to the fragment.
        // onStart is a good place to do this because the layout has already been
        // applied to the fragment at this point so we can safely call the method
        // below that sets the article text.
        Bundle args = getArguments();
        if (args != null) {
            // Set article based on argument passed in
            updateArticleView(args.getInt(ARG_POSITION));
        } else if (mCurrentPosition != -1) {
            // Set article based on saved instance state defined during onCreateView
            updateArticleView(mCurrentPosition);
        }
    }

    public void updateArticleView(int position) {
        TextView article = (TextView) getActivity().findViewById(R.id.article);
        article.setText(Ipsum.Articles[position]);
        mCurrentPosition = position;
    }

    @Override
    public void onSaveInstanceState(Bundle outState) {
        super.onSaveInstanceState(outState);

        // Save the current article selection in case we need to recreate the fragment
        outState.putInt(ARG_POSITION, mCurrentPosition);
    }
}
先看成员变量,一个常量静态字符串,一个指示点击位置的变量,没啥好说的。
但是 onCreate() 又开始惊艳了,它比我多了 if (savedInstanceState != null) 这个判断,几天前看过Google 的教程之后越来越发现这个的重要性,savedInstanceState 是在Activity销毁的时候恢复之前视图层次管理和一些View的内容的,比如你上次在平板上点的是C文章,下次回来继续看,人家会继续给你显示C文章。而且,不只是你主动销毁,可能是偶然销毁,比方说,你旋转了一下屏幕,这也算销毁,因为如果有分别对应横向和纵向的两种layout文件,为了要去重新加载不同的布局文件,Activity也会被销毁,这个时候我们必须要恢复啊!不过这点很遗忘,学习。
然后是 onStart() 回调函数,不得不说Google爸爸考虑就是周到好多,我们看这个代码:
    @Override
    public void onStart() {
        super.onStart();

        // During startup, check if there are arguments passed to the fragment.
        // onStart is a good place to do this because the layout has already been
        // applied to the fragment at this point so we can safely call the method
        // below that sets the article text.
        Bundle args = getArguments();
        if (args != null) {
            // Set article based on argument passed in
            updateArticleView(args.getInt(ARG_POSITION));
        } else if (mCurrentPosition != -1) {
            // Set article based on saved instance state defined during onCreateView
            updateArticleView(mCurrentPosition);
        }
    }
它的意思是,如果Fragment启动的时候传了参数进来,我们就显示对应的内容,这个比较简单,第二个else if 什么意思呢?
其实它的意思是,虽然我没有参数传递进来,但是我是双平板模式启动的(我们可以想象,如果启动,要么是一开始就是两个fragment一起显示了,要么是传个参数,然后启动,因为没有参数,所以只能是大屏幕的情况了,因为我的表述很差劲,所以不懂还是自己想想吧,一般想想也就懂了),所以我之前可能保存了 运行实例,如果保存了,在 onCreate() 回调函数里面,会更新 mCurrentPosition 变量,让他代表上次离开的文章标号,所以我直接显示就好,如果这种情况也不是,那就空白就好啦!
然后 updateArticleView() 函数是更新Activity中的内容,然后 onSaveInstanceState() 方法是在Activity要销毁的时候保存 mCurrentPosition 变量的值,用于下次使用。
最后,让我们再来看看MainActivity的内容吧。
先说明一点,一般良好的代码风格是不会像我贴出来的示例这样写一大推注释的,因为这样不方便我们快速浏览代码的整体结构,但是这是教程啊,呵呵哒~
老规矩:
public class MainActivity extends FragmentActivity
        implements HeadlinesFragment.OnHeadlineSelectedListener {

    /** Called when the activity is first created. */
    @Override
    public void onCreate(Bundle savedInstanceState) {
        super.onCreate(savedInstanceState);
        setContentView(R.layout.news_articles);

        // Check whether the activity is using the layout version with
        // the fragment_container FrameLayout. If so, we must add the first fragment
        if (findViewById(R.id.fragment_container) != null) {

            // However, if we're being restored from a previous state,
            // then we don't need to do anything and should return or else
            // we could end up with overlapping fragments.
            if (savedInstanceState != null) {
                return;
            }

            // Create an instance of ExampleFragment
            HeadlinesFragment firstFragment = new HeadlinesFragment();

            // In case this activity was started with special instructions from an Intent,
            // pass the Intent's extras to the fragment as arguments
            firstFragment.setArguments(getIntent().getExtras());

            // Add the fragment to the 'fragment_container' FrameLayout
            getSupportFragmentManager().beginTransaction()
                    .add(R.id.fragment_container, firstFragment).commit();
        }
    }

    public void onArticleSelected(int position) {
        // The user selected the headline of an article from the HeadlinesFragment

        // Capture the article fragment from the activity layout
        ArticleFragment articleFrag = (ArticleFragment)
                getSupportFragmentManager().findFragmentById(R.id.article_fragment);

        if (articleFrag != null) {
            // If article frag is available, we're in two-pane layout...

            // Call a method in the ArticleFragment to update its content
            articleFrag.updateArticleView(position);

        } else {
            // If the frag is not available, we're in the one-pane layout and must swap frags...

            // Create fragment and give it an argument for the selected article
            ArticleFragment newFragment = new ArticleFragment();
            Bundle args = new Bundle();
            args.putInt(ArticleFragment.ARG_POSITION, position);
            newFragment.setArguments(args);
            FragmentTransaction transaction = getSupportFragmentManager().beginTransaction();

            // Replace whatever is in the fragment_container view with this fragment,
            // and add the transaction to the back stack so the user can navigate back
            transaction.replace(R.id.fragment_container, newFragment);
            transaction.addToBackStack(null);

            // Commit the transaction
            transaction.commit();
        }
    }
}
好了,我们按惯例看看Google爸爸一直惊艳我的 onCreate() 函数,它先检查是不是正常只显示一个Fragment的设备,如果不是,直接加载 -large 的布局文件显示 Fragment 就完事了,但是如果是,要先有这么一句话 if (savedInstanceState != null) ,它的注释说明了一下,它说:如果我们之间已经由一个运行示例,我么你不需要做什么应该,可以直接返回(因为Android会自动帮我们恢复),负责的话,会造成 Fragment 的重叠,没错,就是这个万恶的Fragment重叠,原来这个原因。以前我苦苦百度,哭出一口老血也无济于事。
然后就是加载标题 HeadlinesFragment,然后那个 setArguments() 是为了什么,我看不懂,然后显示出来就可以了。
接下来就是实现 HeadlinesFragment 接口 方法 onArticleSelected,来处理 HeadlinesFragment 传来的事件,这里是用户点击的标题位置 ,还是,先看是不是平板之类的大屏幕设备,如果是,ArticleFragment 示例已经存在了,如果不是那就要我们手动创建,然后把显示的文章标号作为参数穿进去,替换,加载显示。对了,别忘了把Fragment添加返回堆栈,就是调用这个方法 addToBackStack(),这样可以保证用户点击返回键以后,之前的Fragment会被重新加载,而不会被销毁。也是解决了之前的一个小疑问,嘿嘿。
好了,手都打酸了,本boy休息去了


 363
363

 被折叠的 条评论
为什么被折叠?
被折叠的 条评论
为什么被折叠?
 到【灌水乐园】发言


